
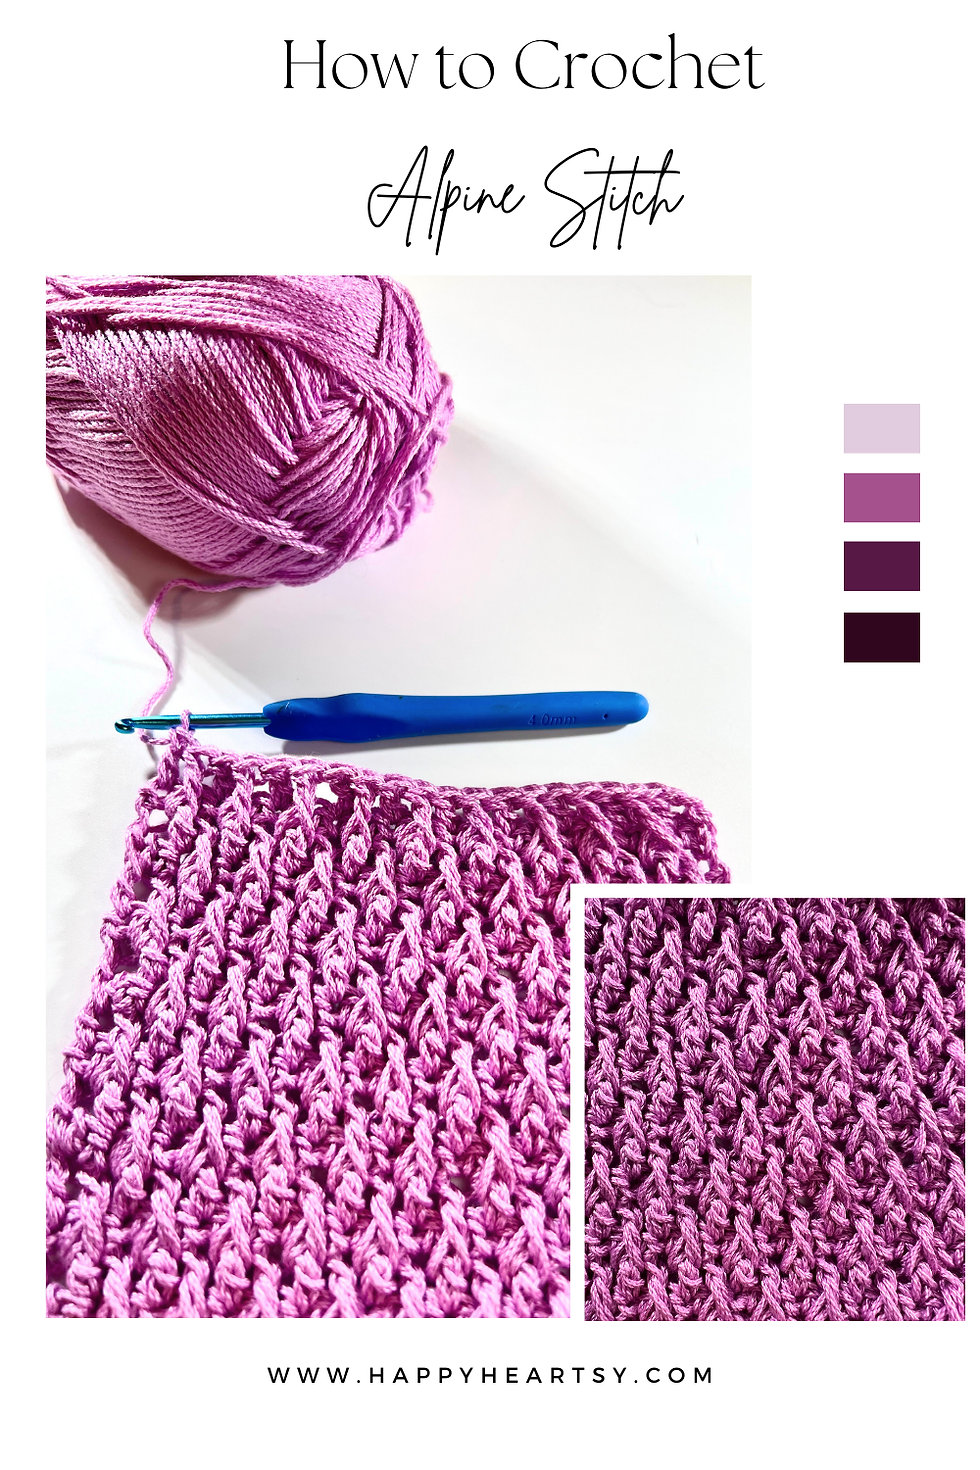
How to Crochet the Star Stitch – Step-by-Step Tutorial for Beginners
- Jul 25, 2025
- 4 min read
Updated: Jan 13
There’s something about the Star Stitch that just feels a little magical, doesn’t it? ✨ It gives me soft summer or baby project vibes with its pretty, textured look. At first glance, it might seem a bit intimidating with all those little loops and spikes—but don’t worry! It’s actually much easier than it looks. Once you get the hang of the first row, it’s just a simple 2-row repeat that flows beautifully. Let’s dive in and break it down step by step.

If you wish to support my work you can do so with Buy Me a Coffee (my version is Buy Me Yarn, you know why:) ).
It's a symbolic amount that supports me in maintaining my blog and producing more free content for you. Find out more by clicking the link or button.
BIG THANKS for everyone who supports me by purchases, likes, shares, comments, tags or/and feedbacks! It means a lot to me.
This post contains affiliate links for the yarns I used and truly love. It also displays ads. I may earn a small commission if you choose to make a purchase through these links or interact with the ads—at no extra cost to you. The revenue I earn through ads and affiliate links helps support my small business and allows me to continue sharing free crochet patterns and content with you. Thank you so much for your support—it truly means the world to me.
All patterns and images in this post are for personal use only. They may not be sold, copied, or claimed as your own. You’re more than welcome to comment, like, or share this post with others!
Before we get into the actual pattern, I also created the Ultimate Crochet Hack Sheet! It's 2 pages with basic crochet abbreviations and symbols, hook sizes in US and UK versions, all the yarn types (with recommended hooks and projects), etc. Feel free to click on the pic or a link to my shop where you can find more details.
Video Tutorial
Check out my YouTube video tutorial where I cover everything. It's a fantastic complement to any written pattern. You're welcome to leave feedback in the video comments.

Recommended Materials
In this tutorial, I use LionBrand Cotton24/7 cotton yarn. I find that the texture stands out more with cotton yarn, and its bright colours are beneficial during tutorials. For this yarn I use a 4mm/G-6 crochet hook.
However, if you're new to crocheting and just practicing, I highly recommend using any solid color acrylic yarn that works with a 5mm/H-8 hook size.


Below is the crochet chart for the Star Stitch. It's an excellent method for learning to read crochet charts, and understanding written instructions can sometimes be beneficial.


Directions for Star Stitch
Start with any even number of the Foundation Chain (FCH).
ROW 1 - Into the 2nd ch from the hook make your SC and then SC all across the row. (Visit this link for the How to Crochet Single Crochet Tutorial). Then ch 3 and turn.

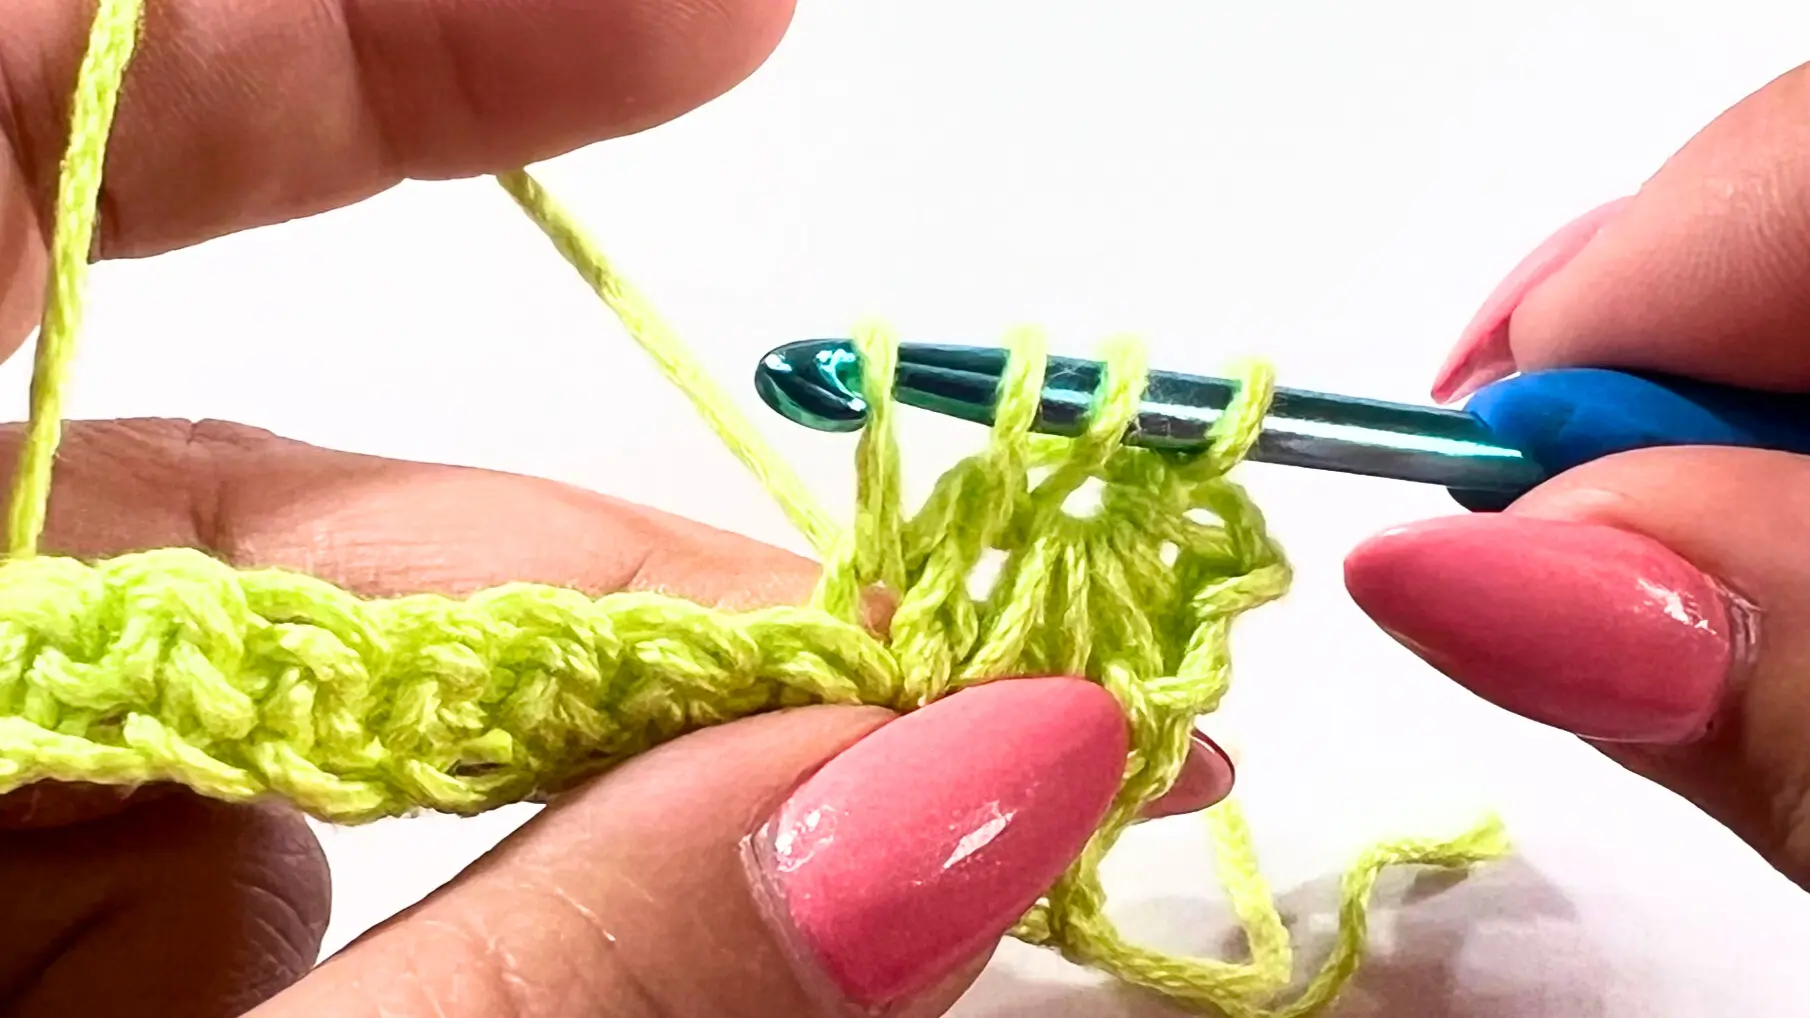
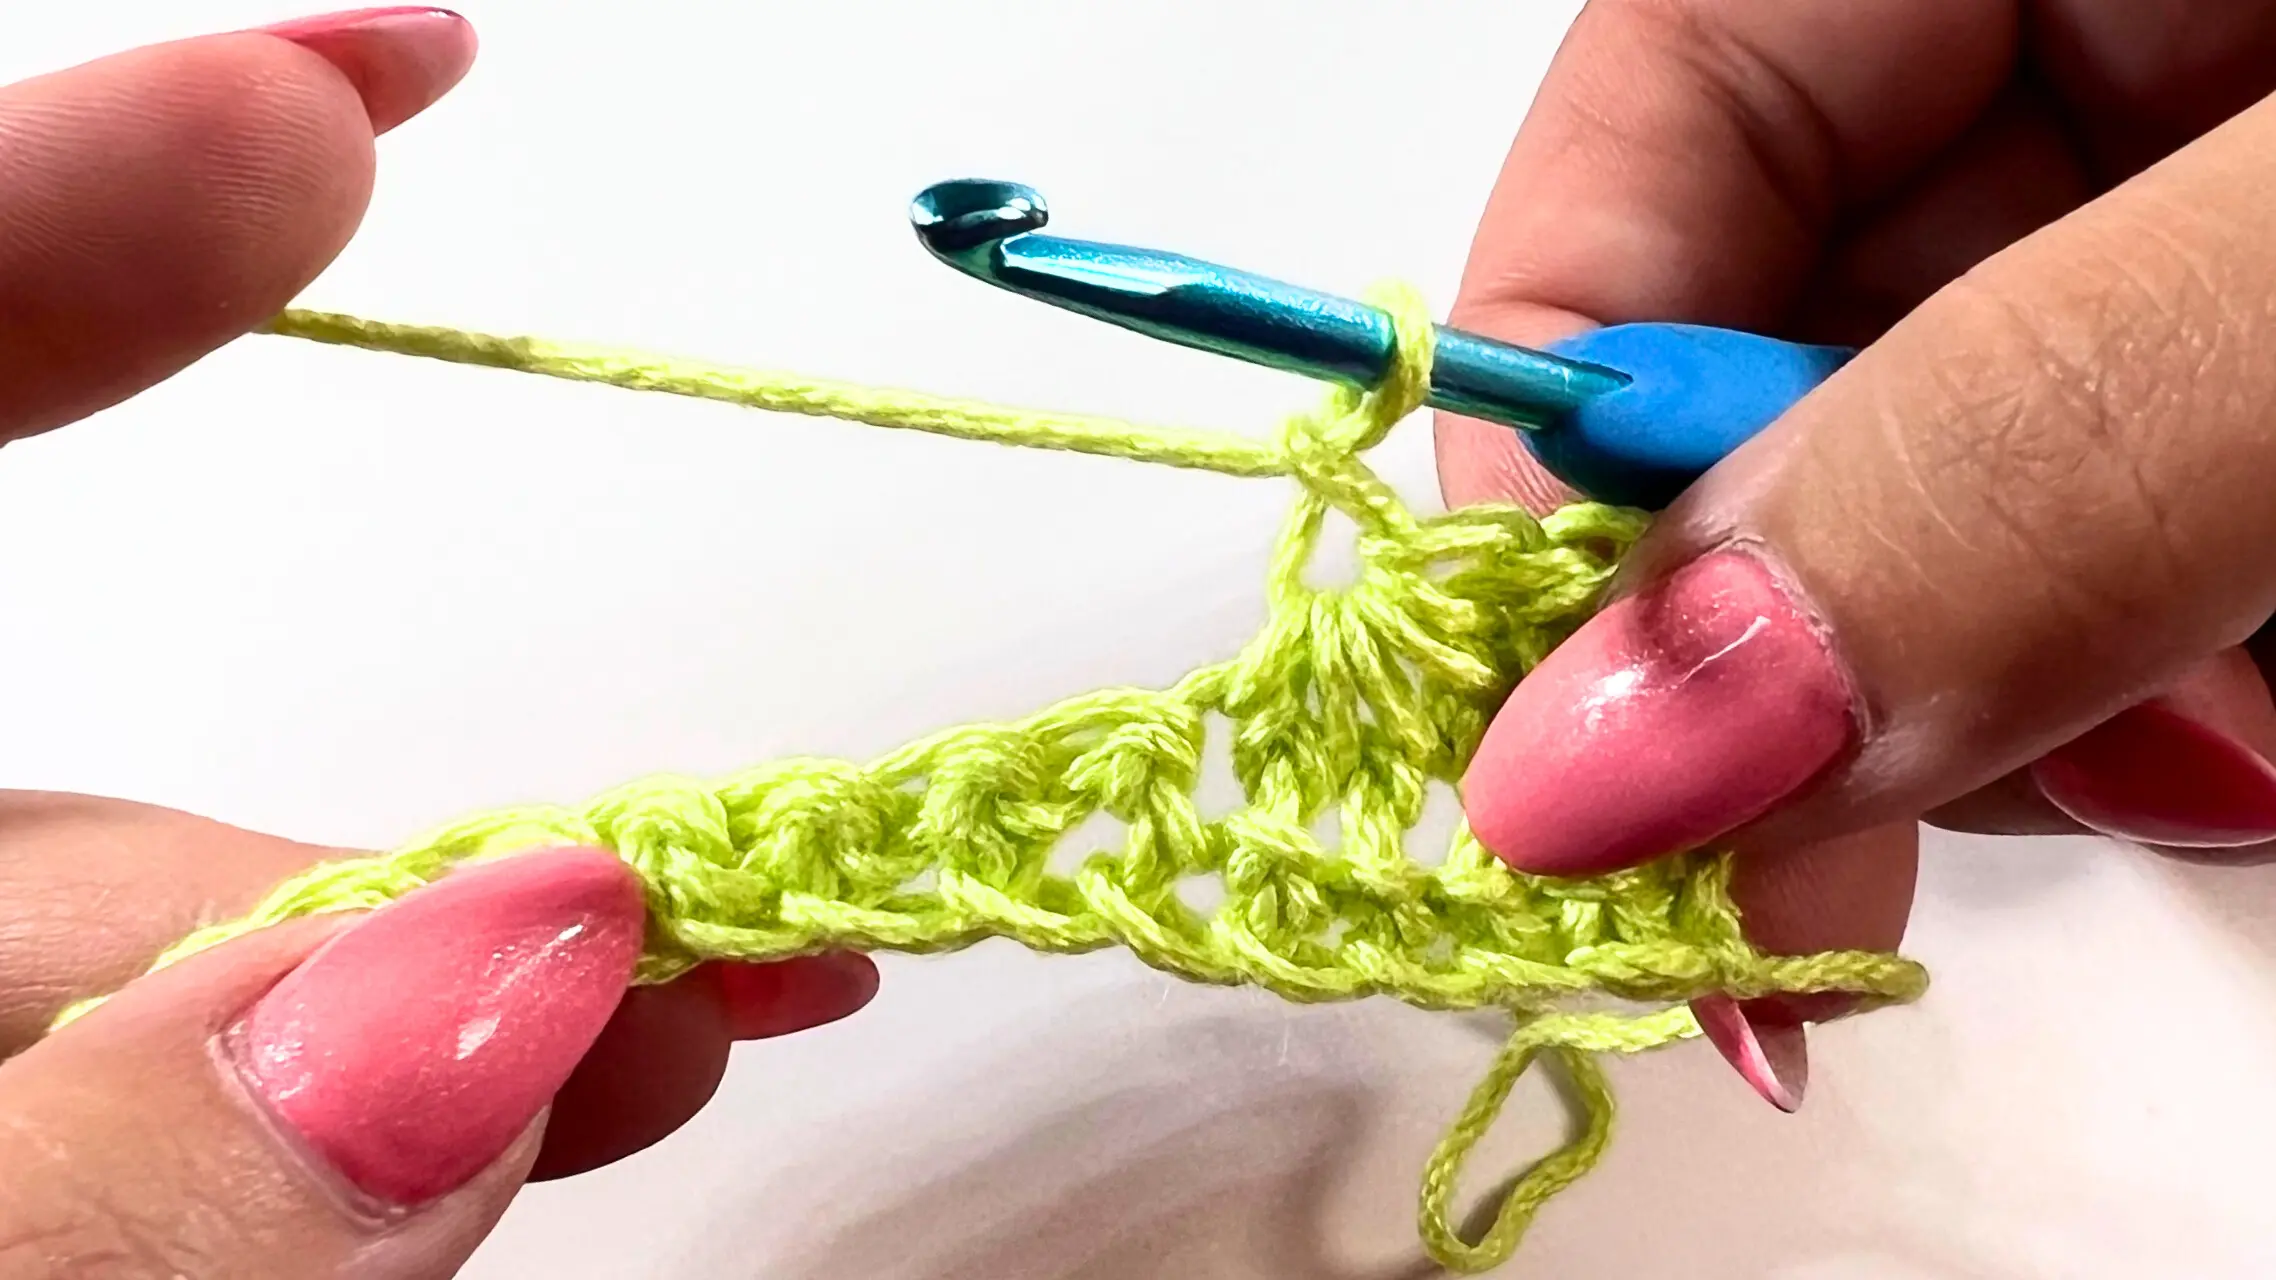
ROW 2 – This is where the Star Stitch begins!
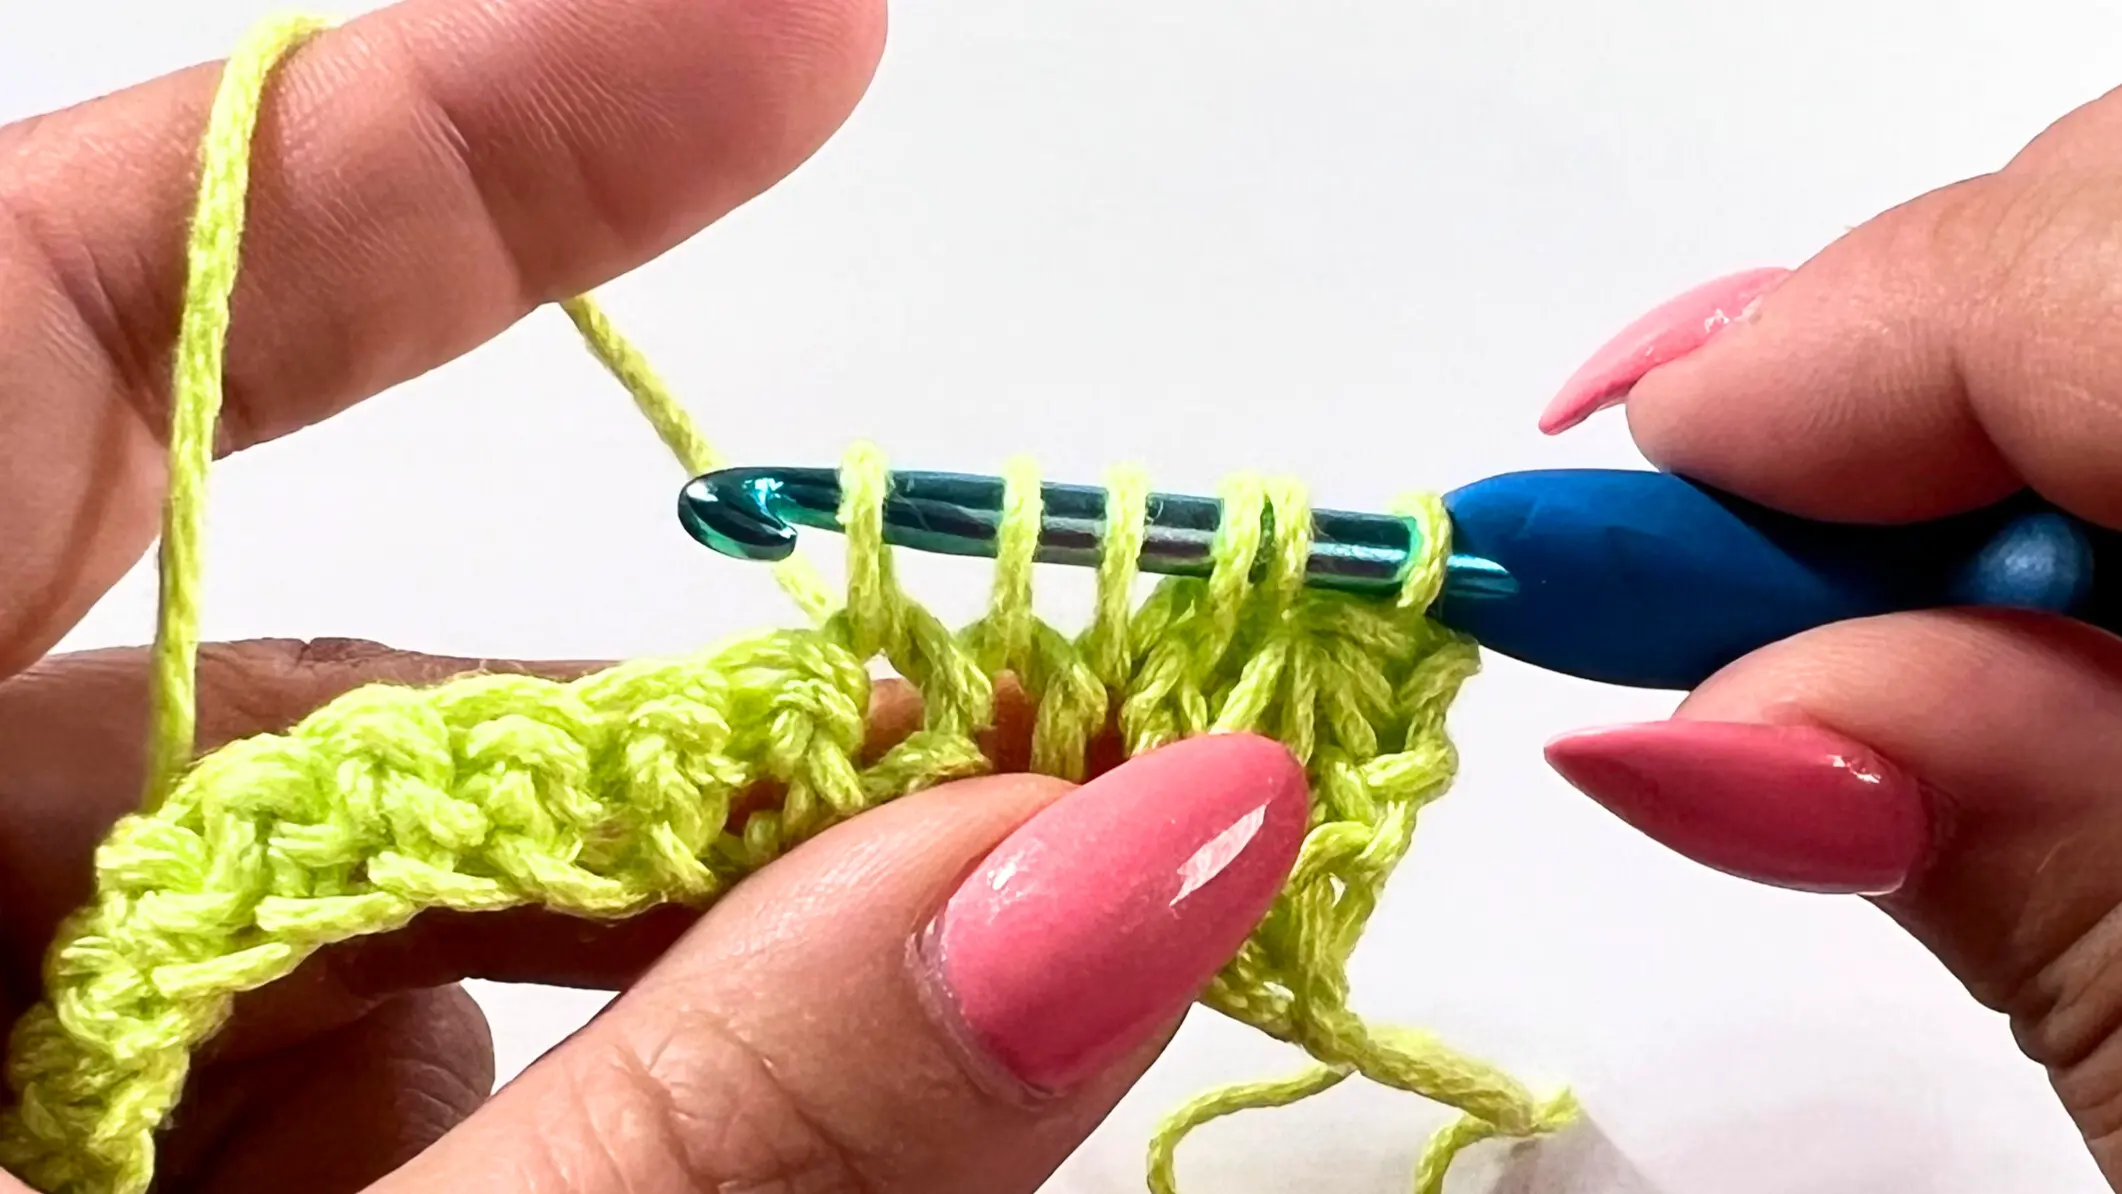
Insert your hook into the second chain from the hook and pull up a loop — keep that loop on your hook (you now have 2 loops). Insert your hook into the next chain and pull up a loop (3 loops on your hook, all loops stay on). Now insert your hook and pull up a loop from each of the next three stitches, one at a time. At the end, you should have 6 loops on your hook. Yarn over and pull through all 6 loops.
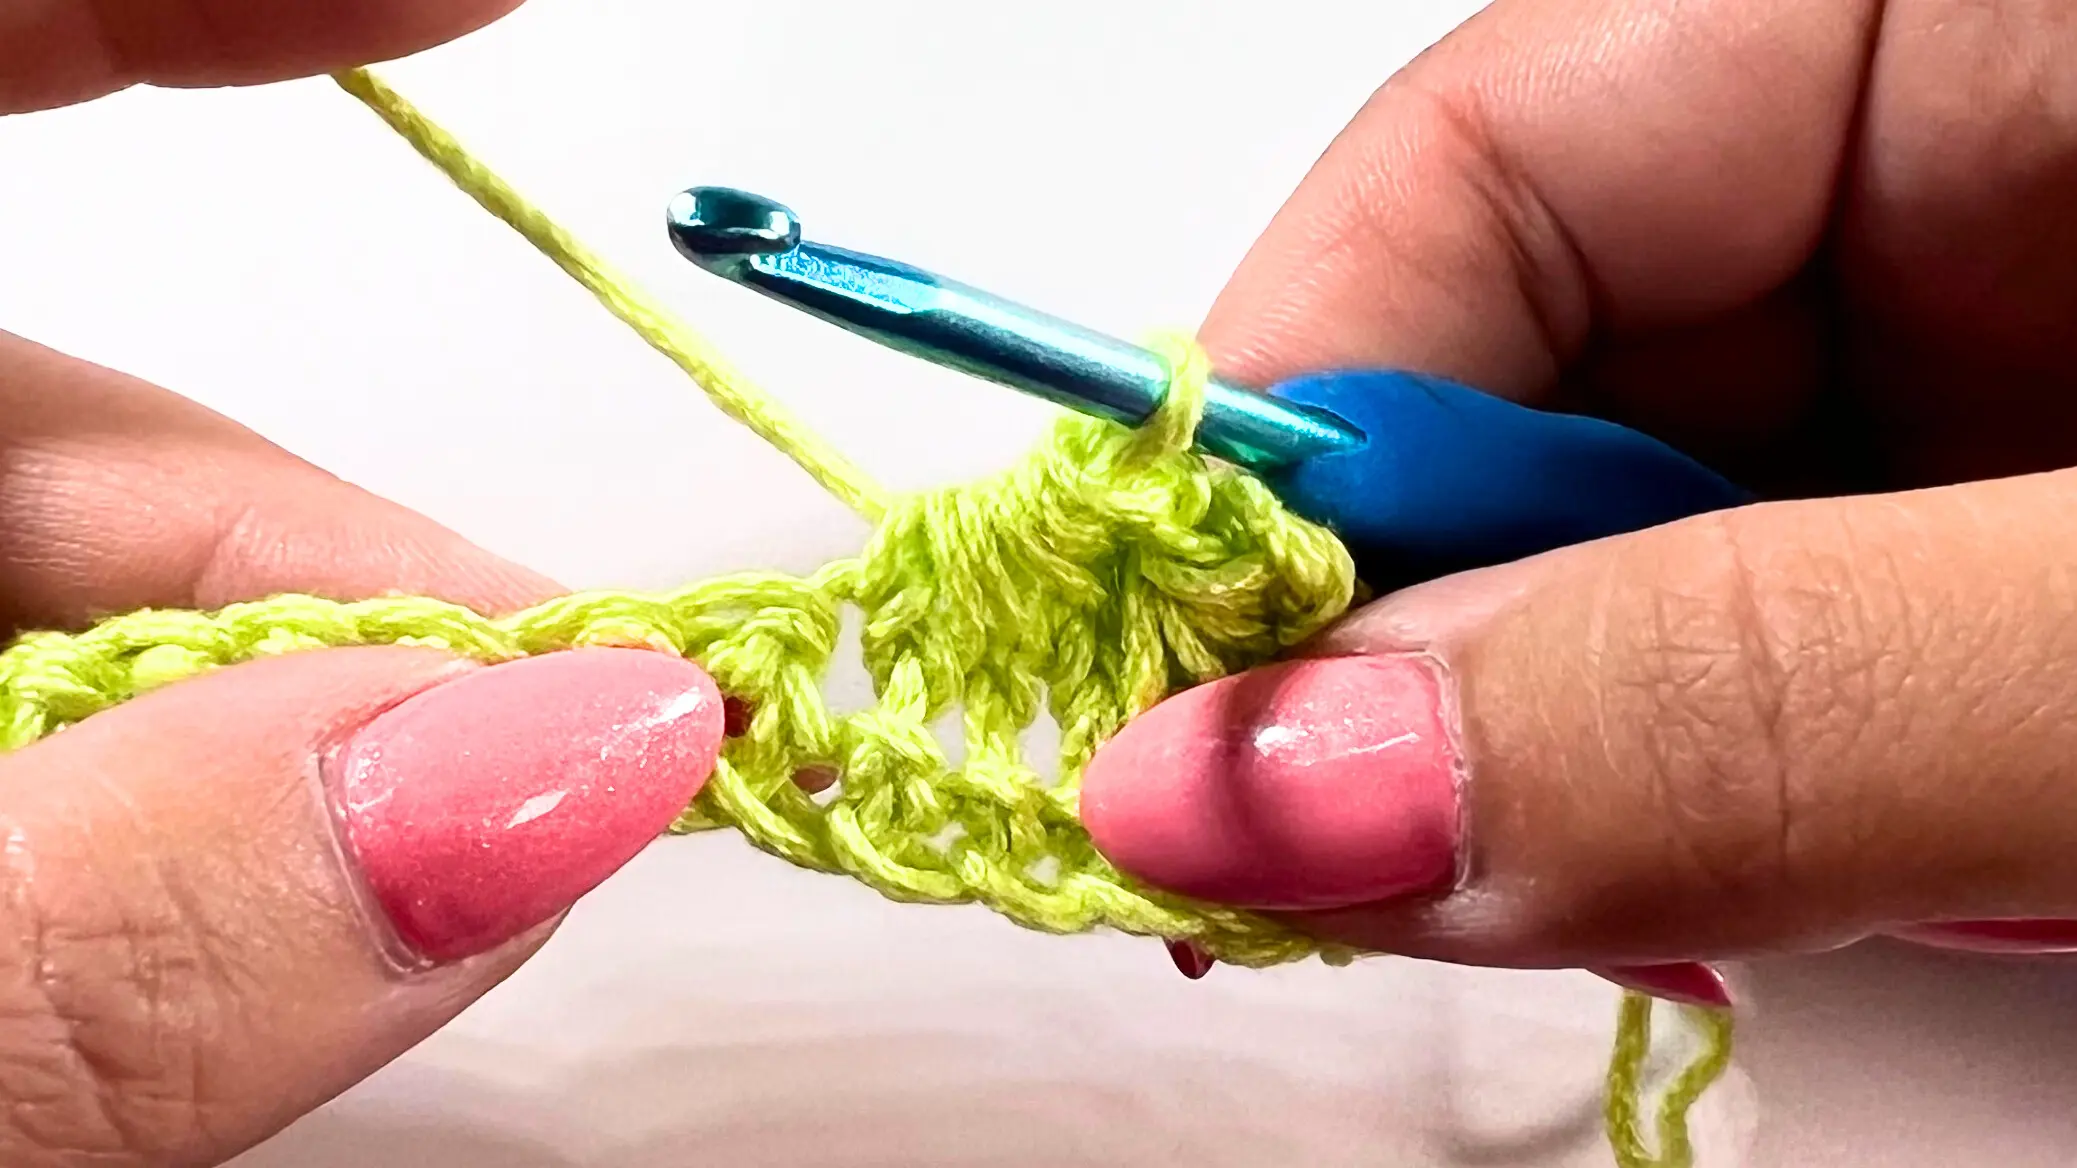
Then chain 1 — that creates the little “eye” of your star ✨


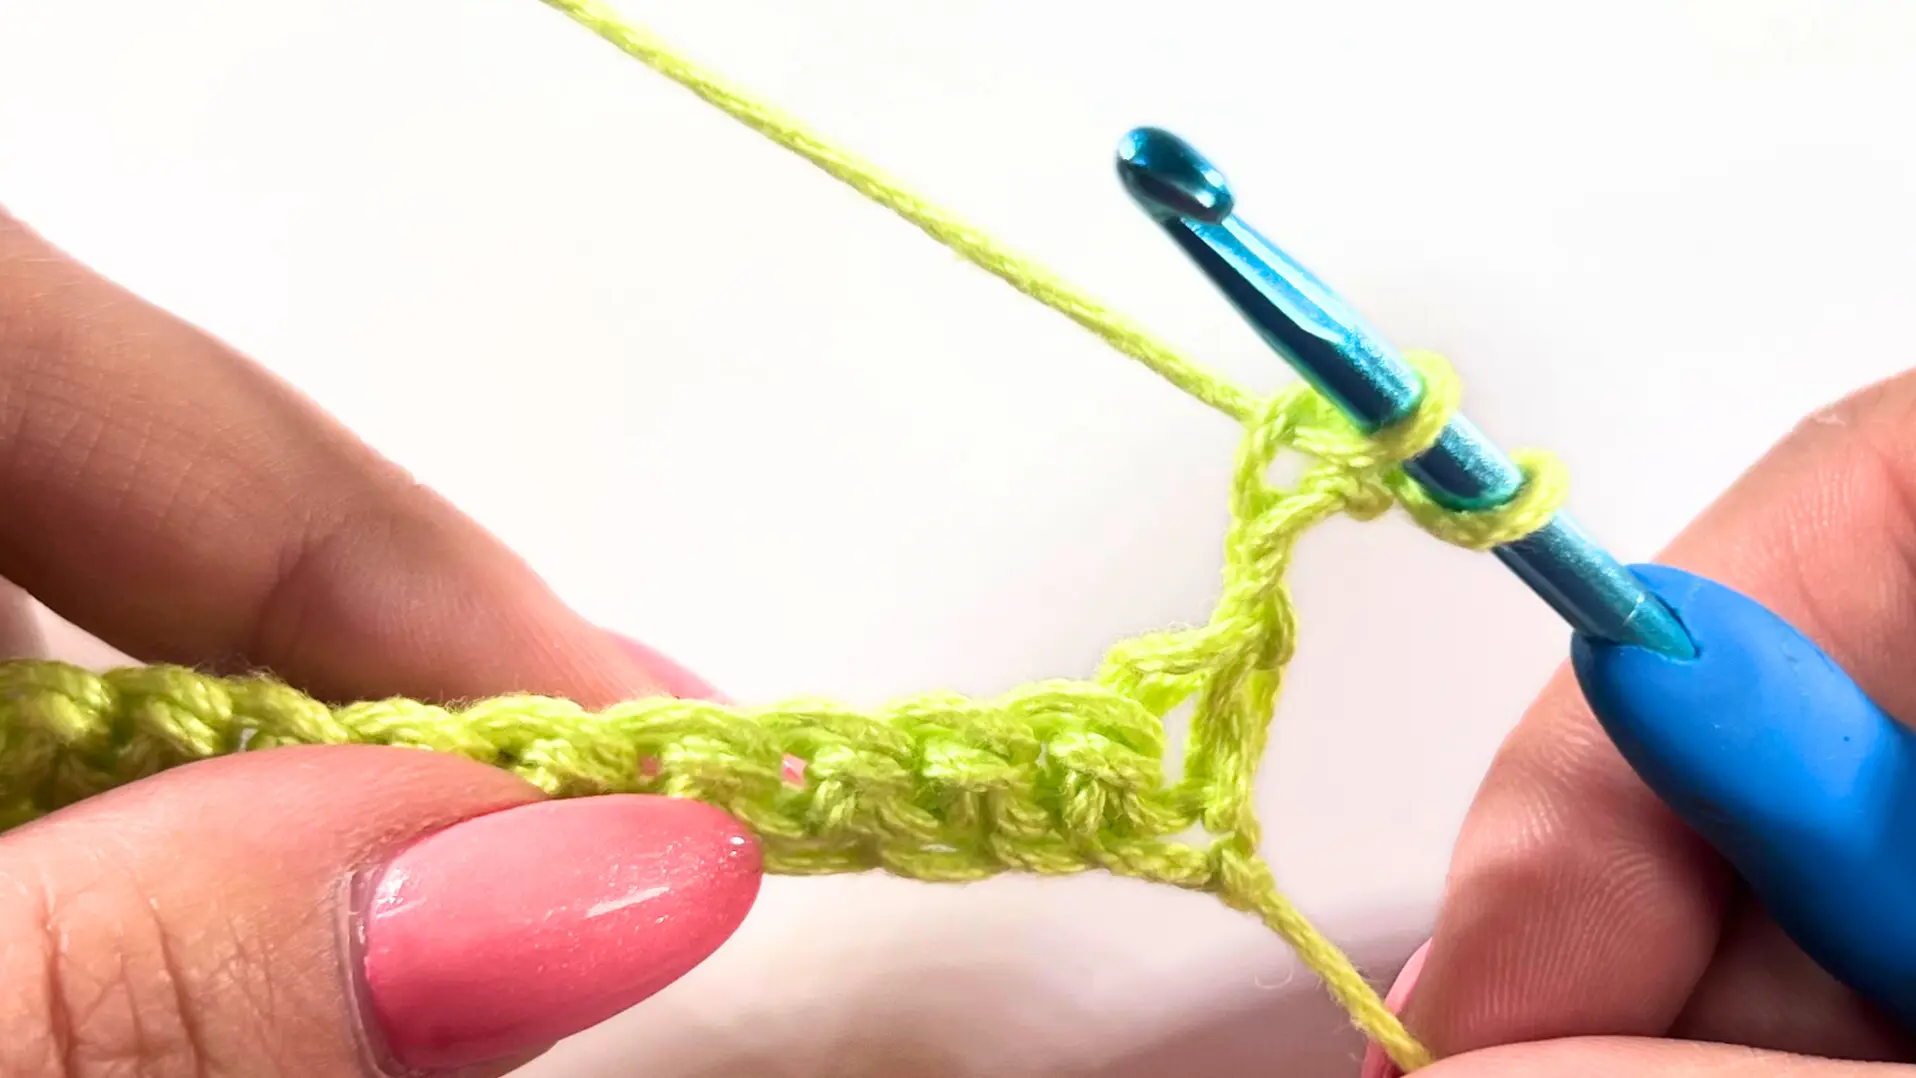


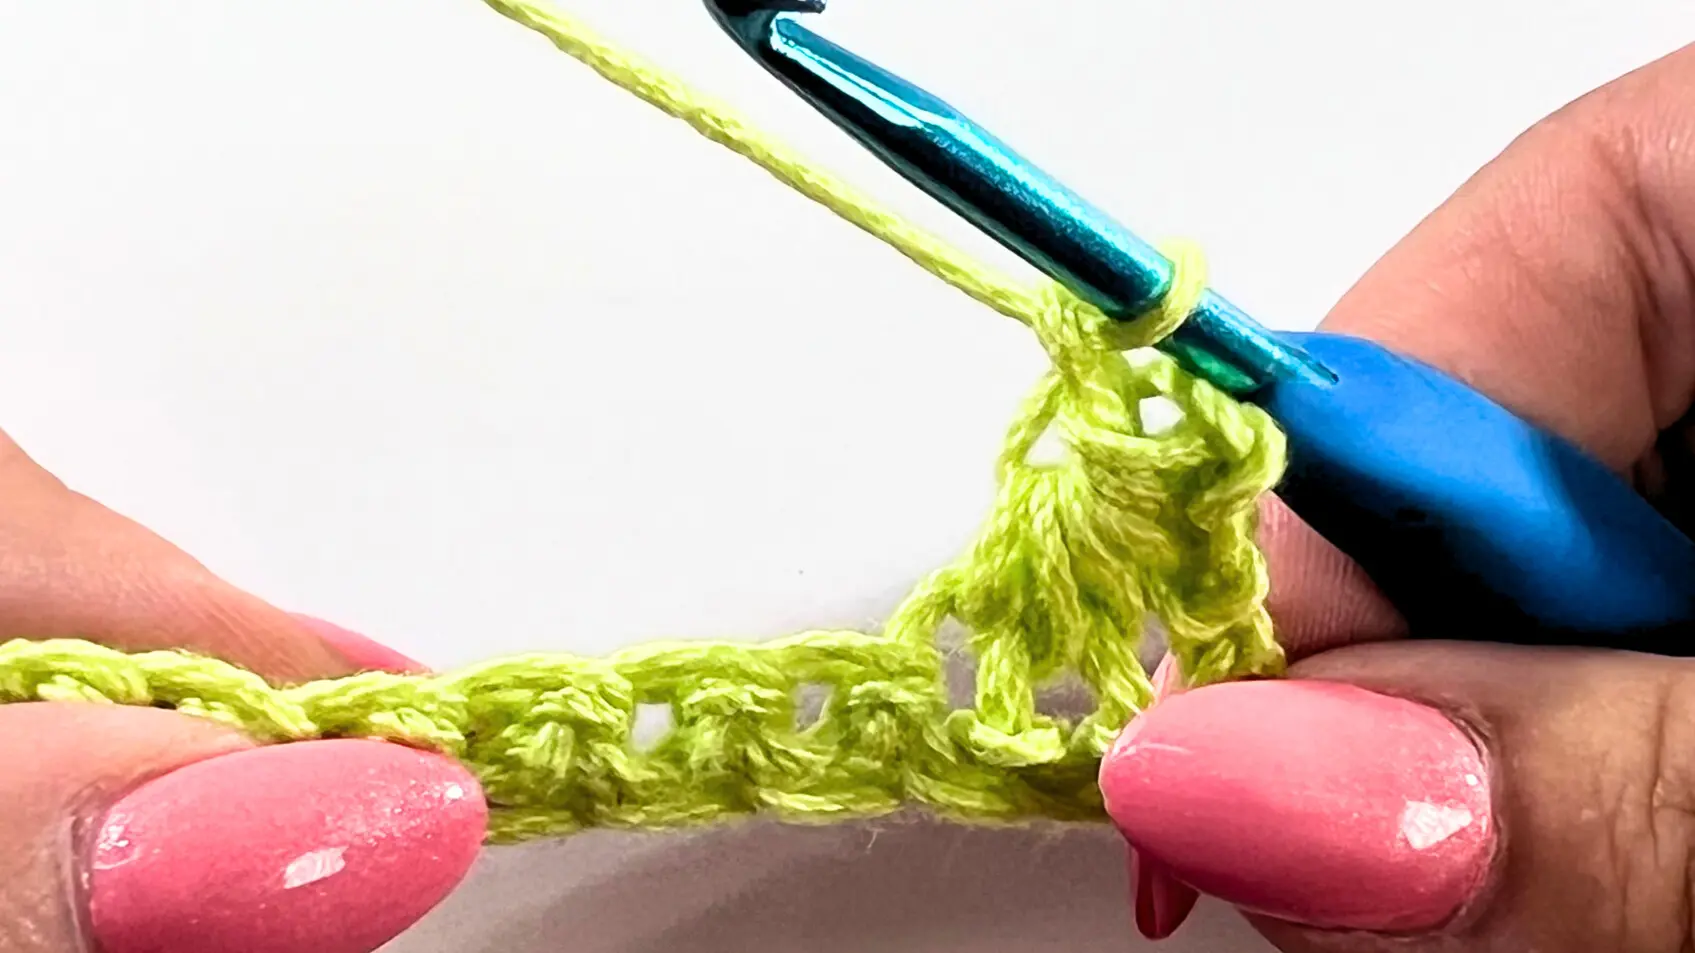
You just completed your first Star Stitch — yay! 🌟
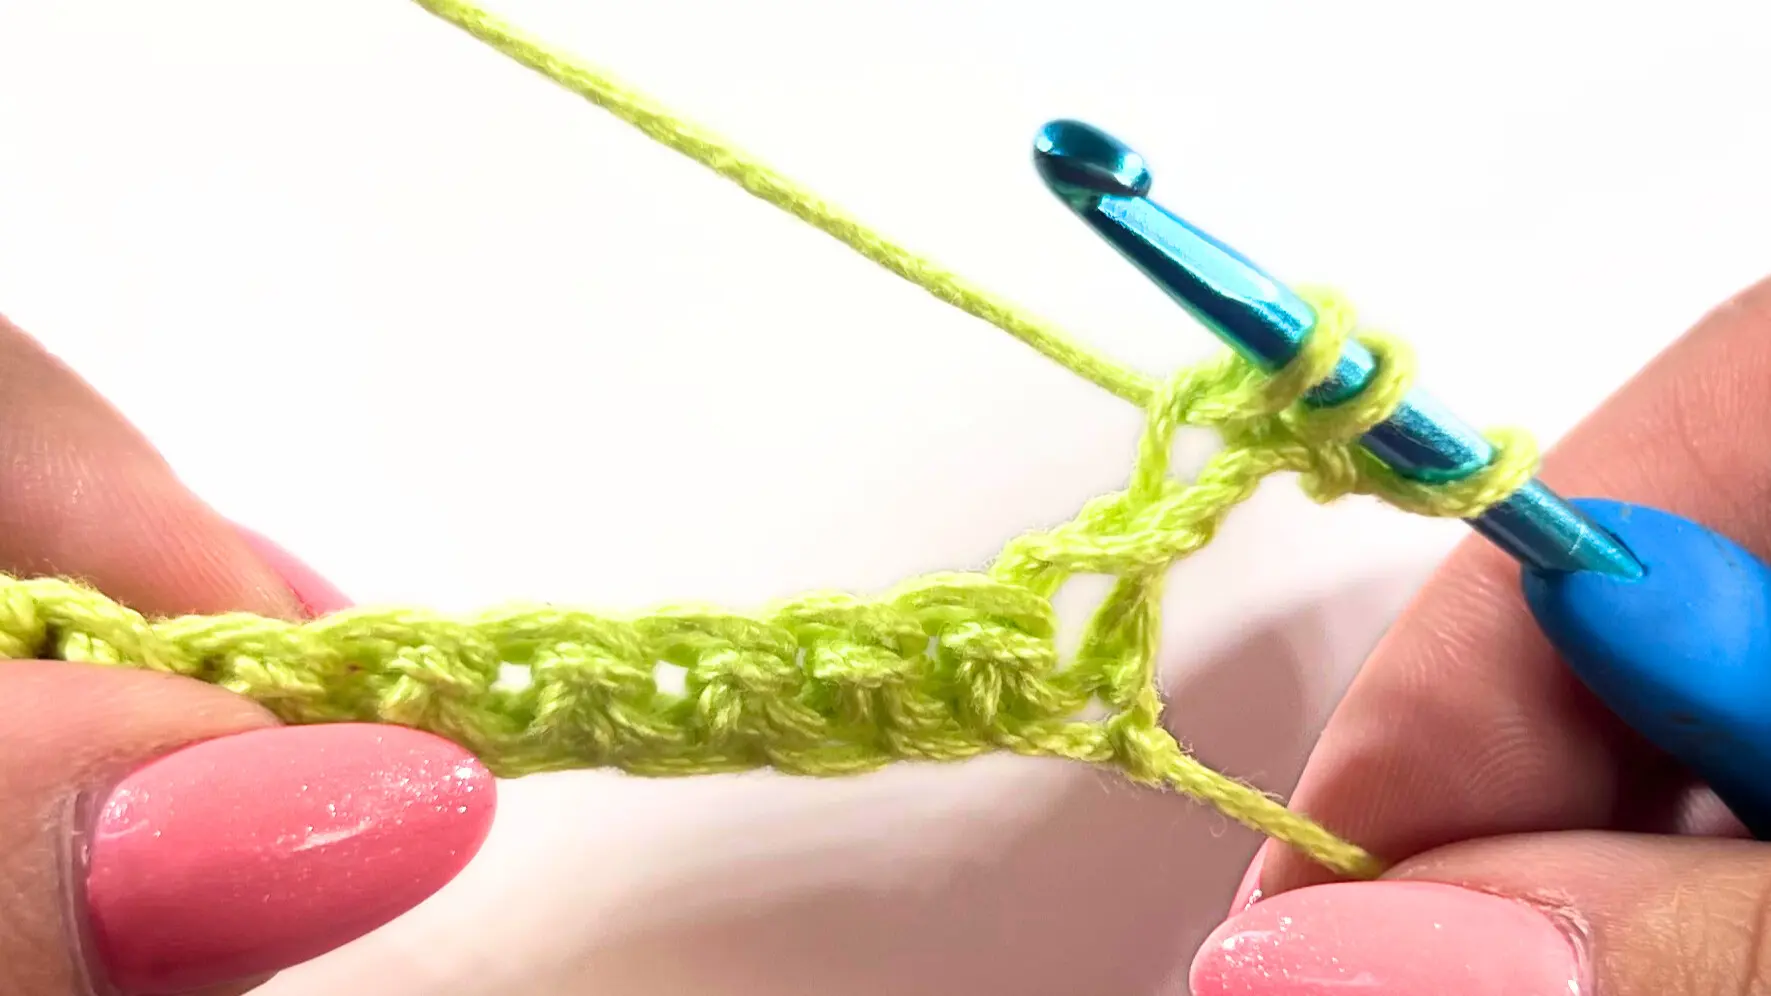
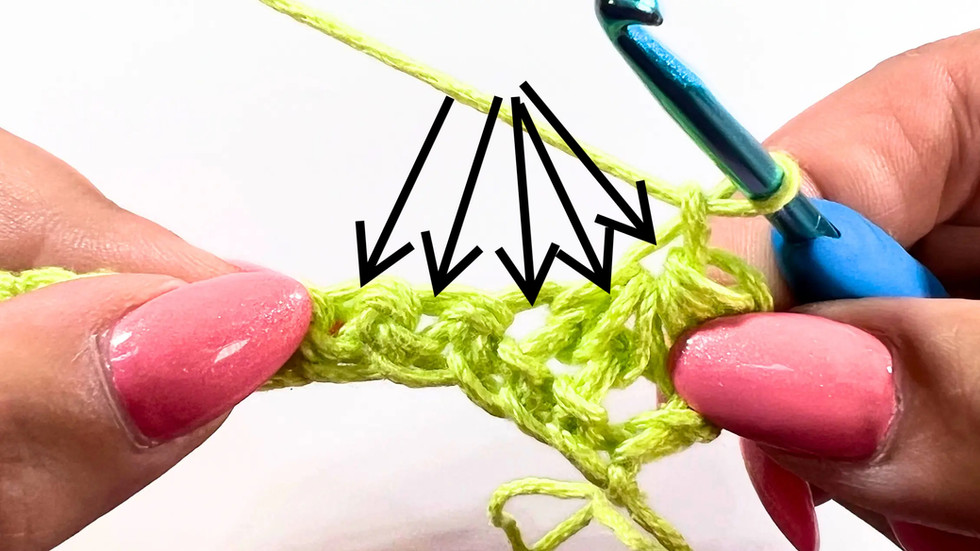
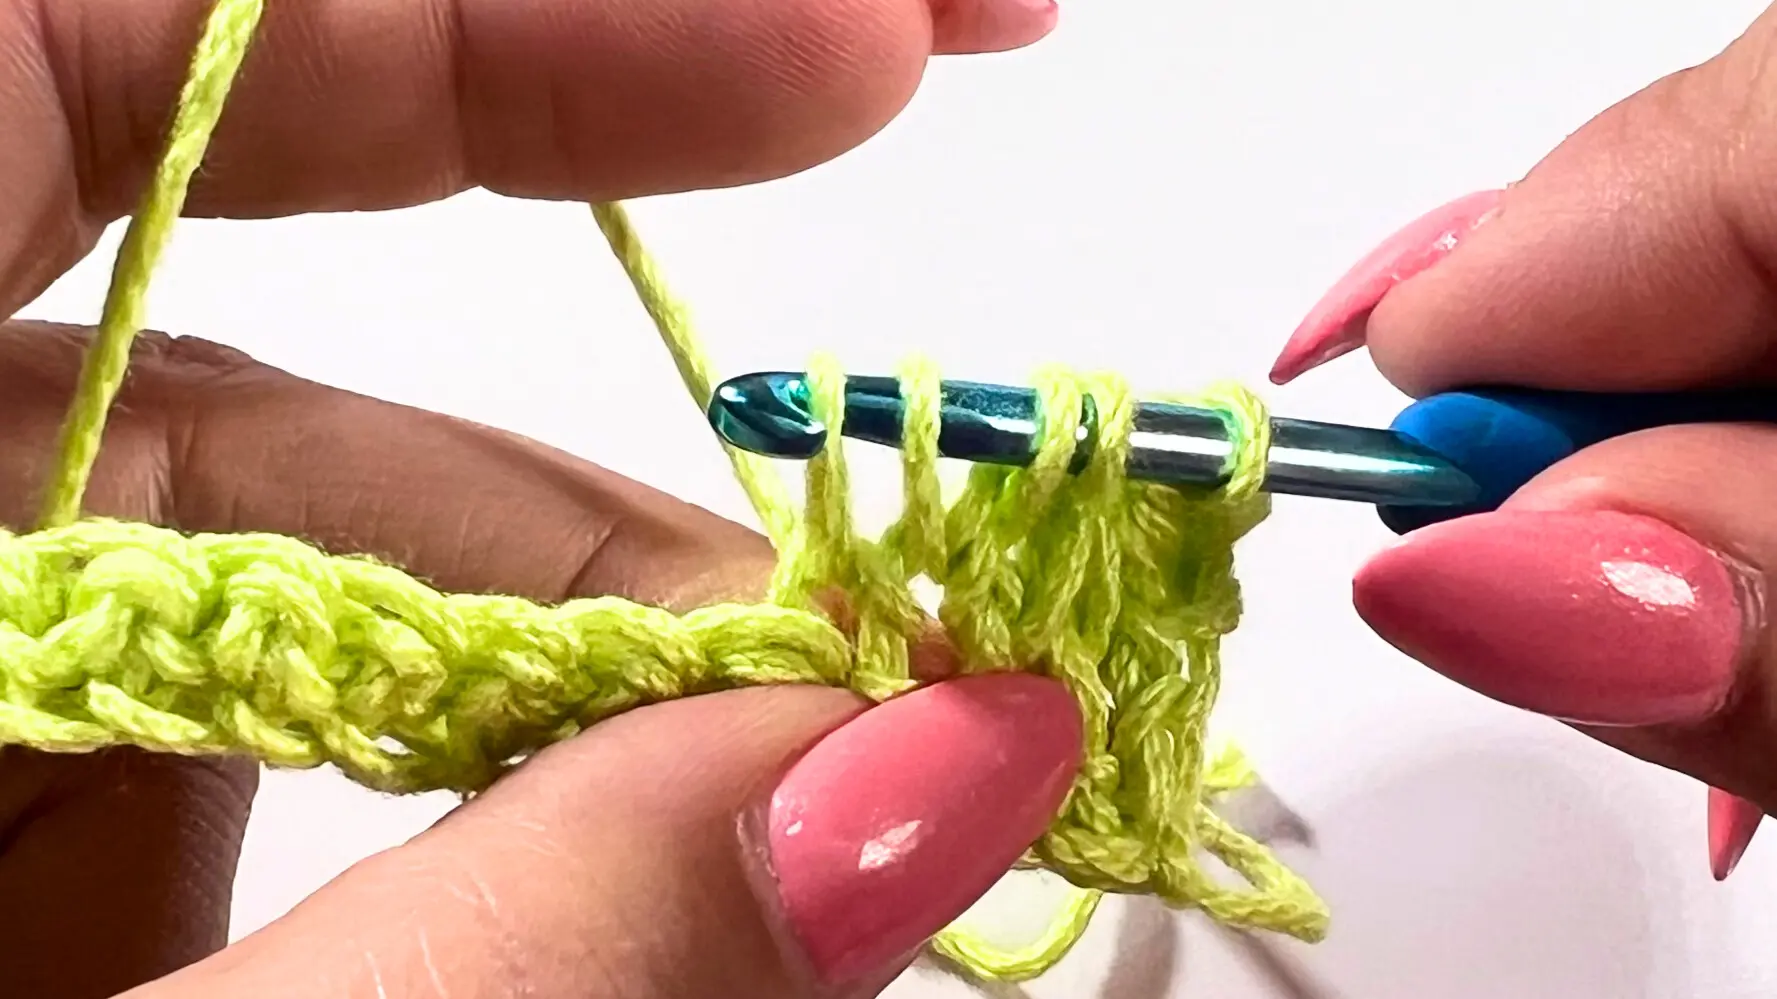
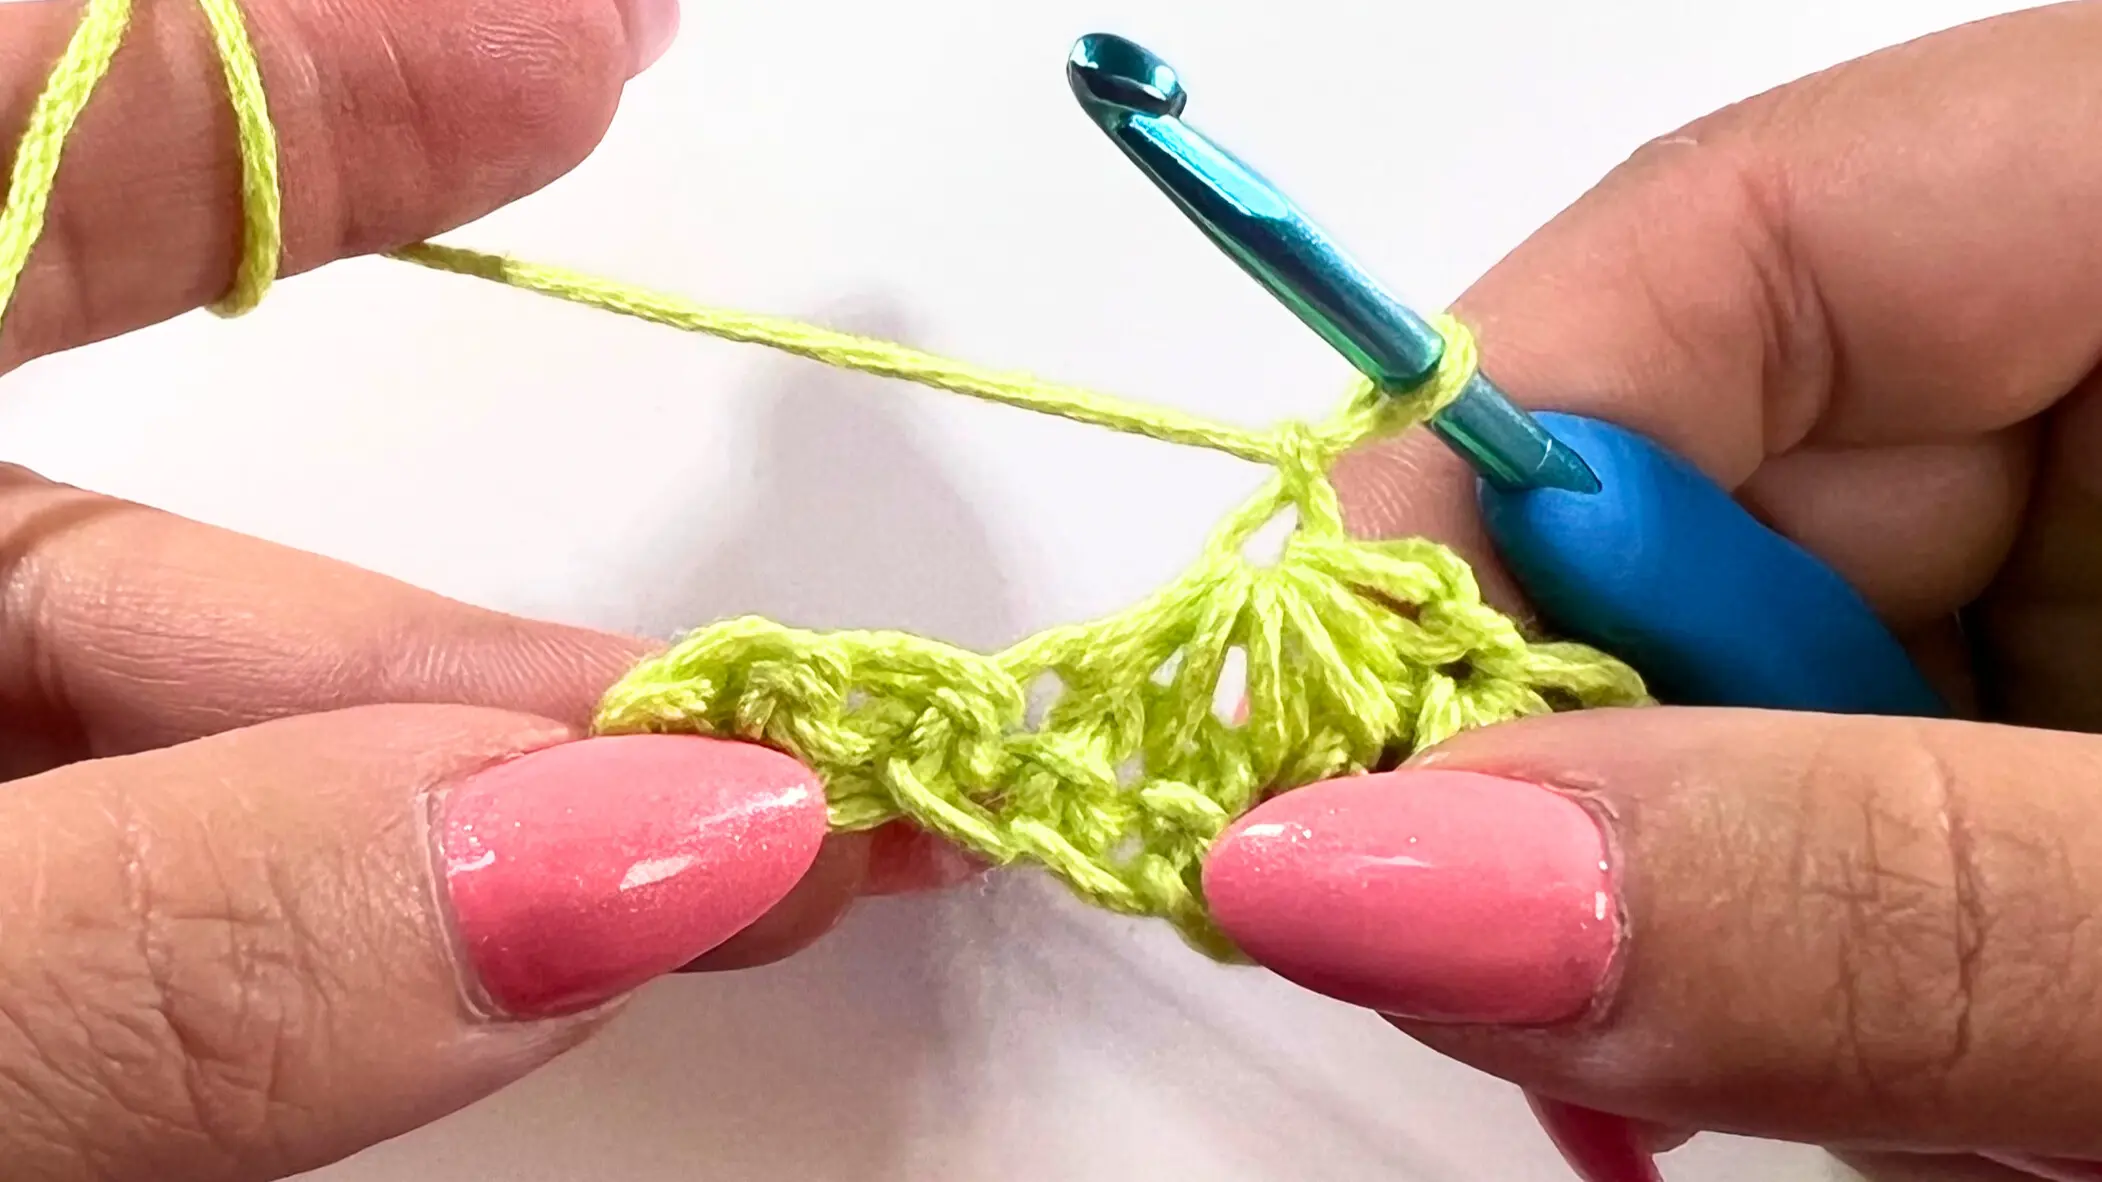
For the next Star Stitches, here’s what you do: Insert your hook into the “eye” of the previous star and pull up a loop (keep it on your hook). Then pull up a loop from between the two posts (spikes). Next, insert your hook into the same stitch where your last loop was made in the previous star and pull up another loop. Finally, pull up a loop from each of the next two stitches.
You should now have 6 loops on your hook. Yarn over and pull through all 6 loops, then chain 1 — and your next star is done!

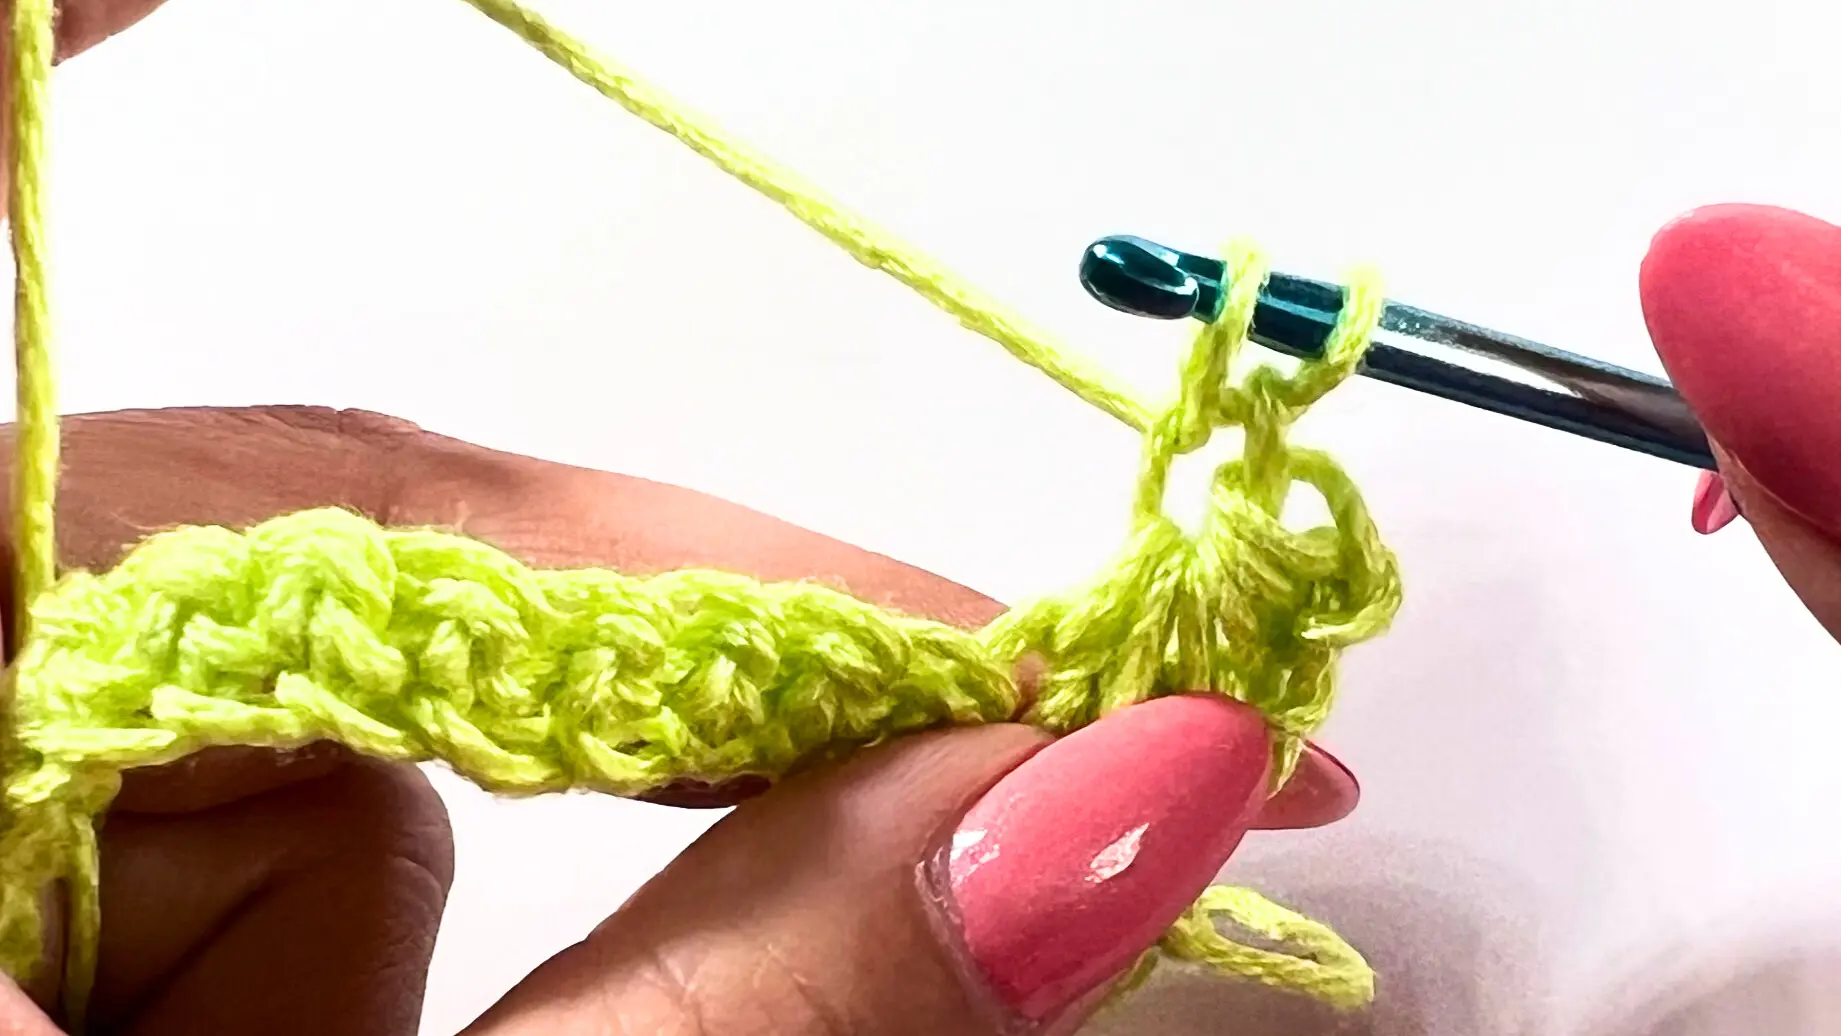
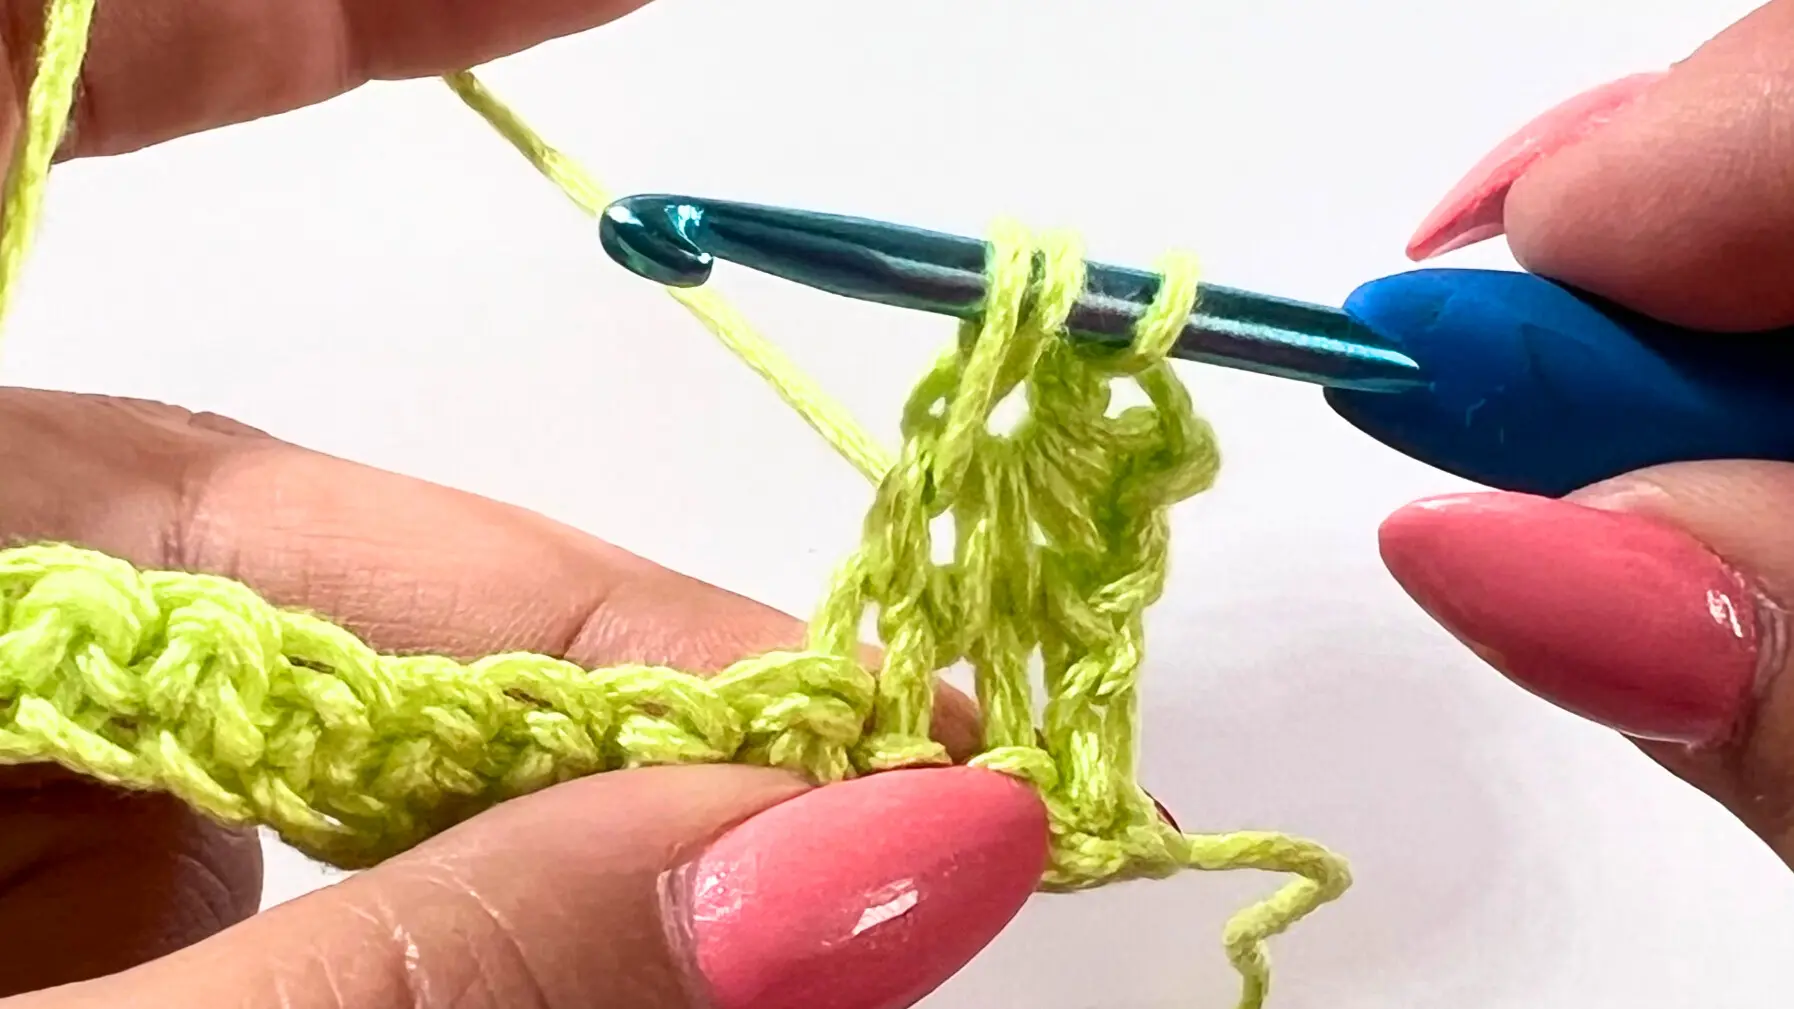
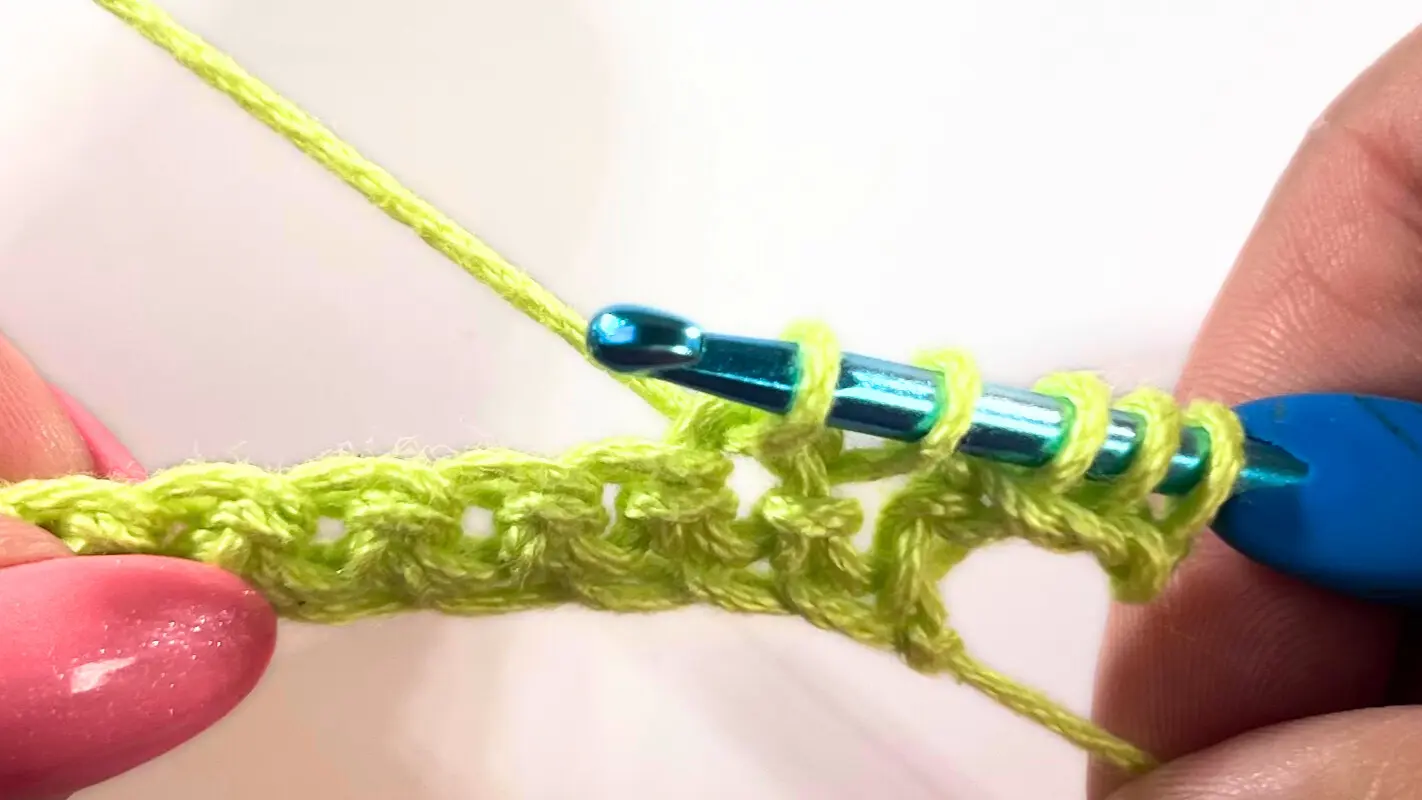
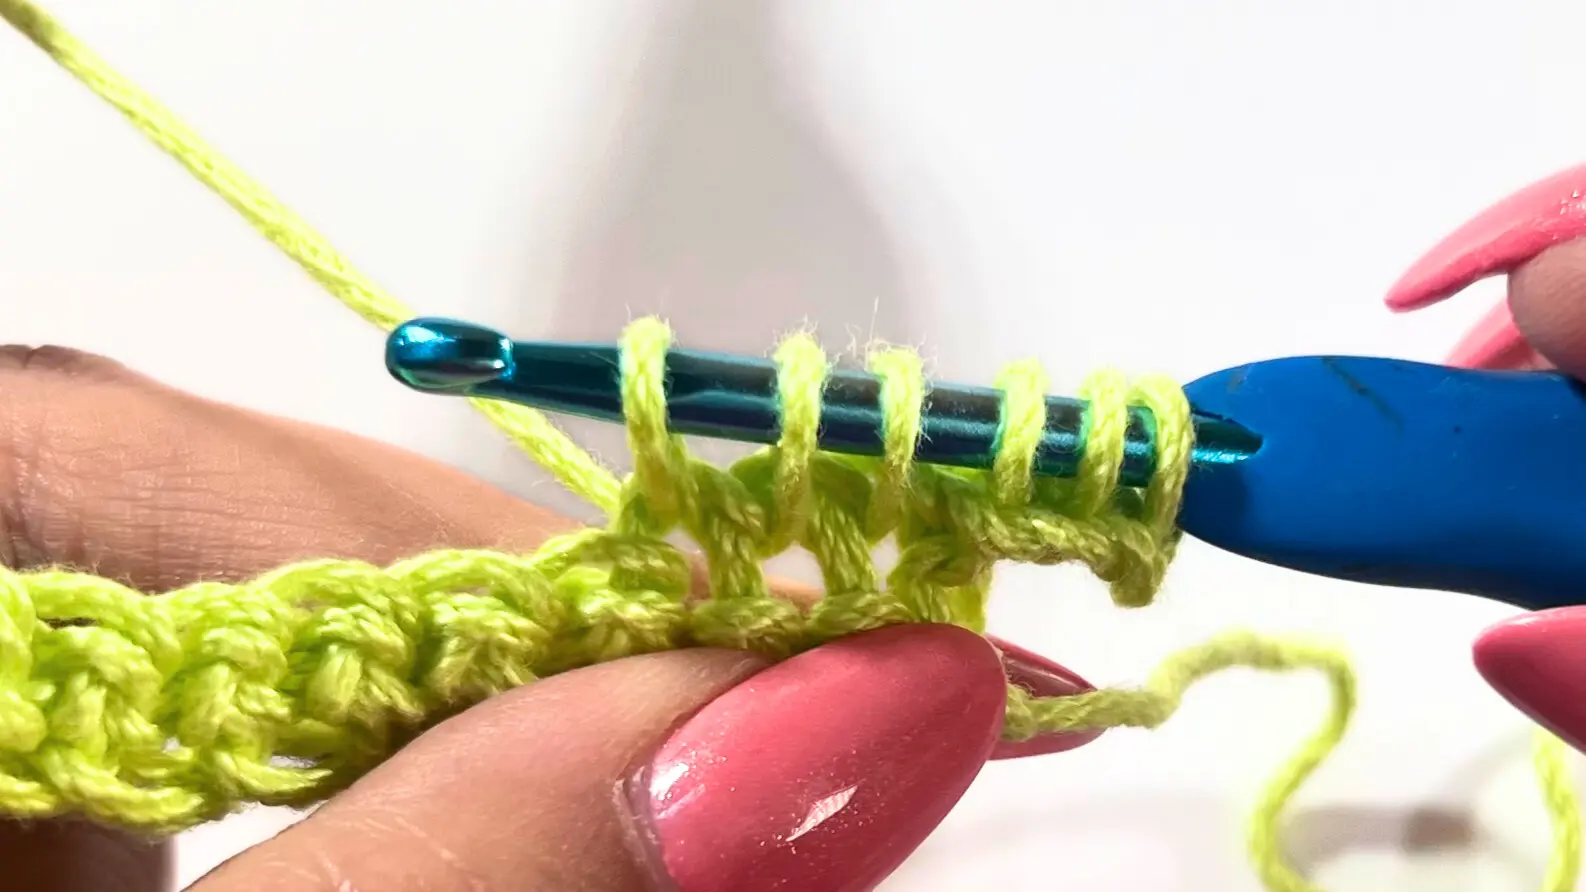
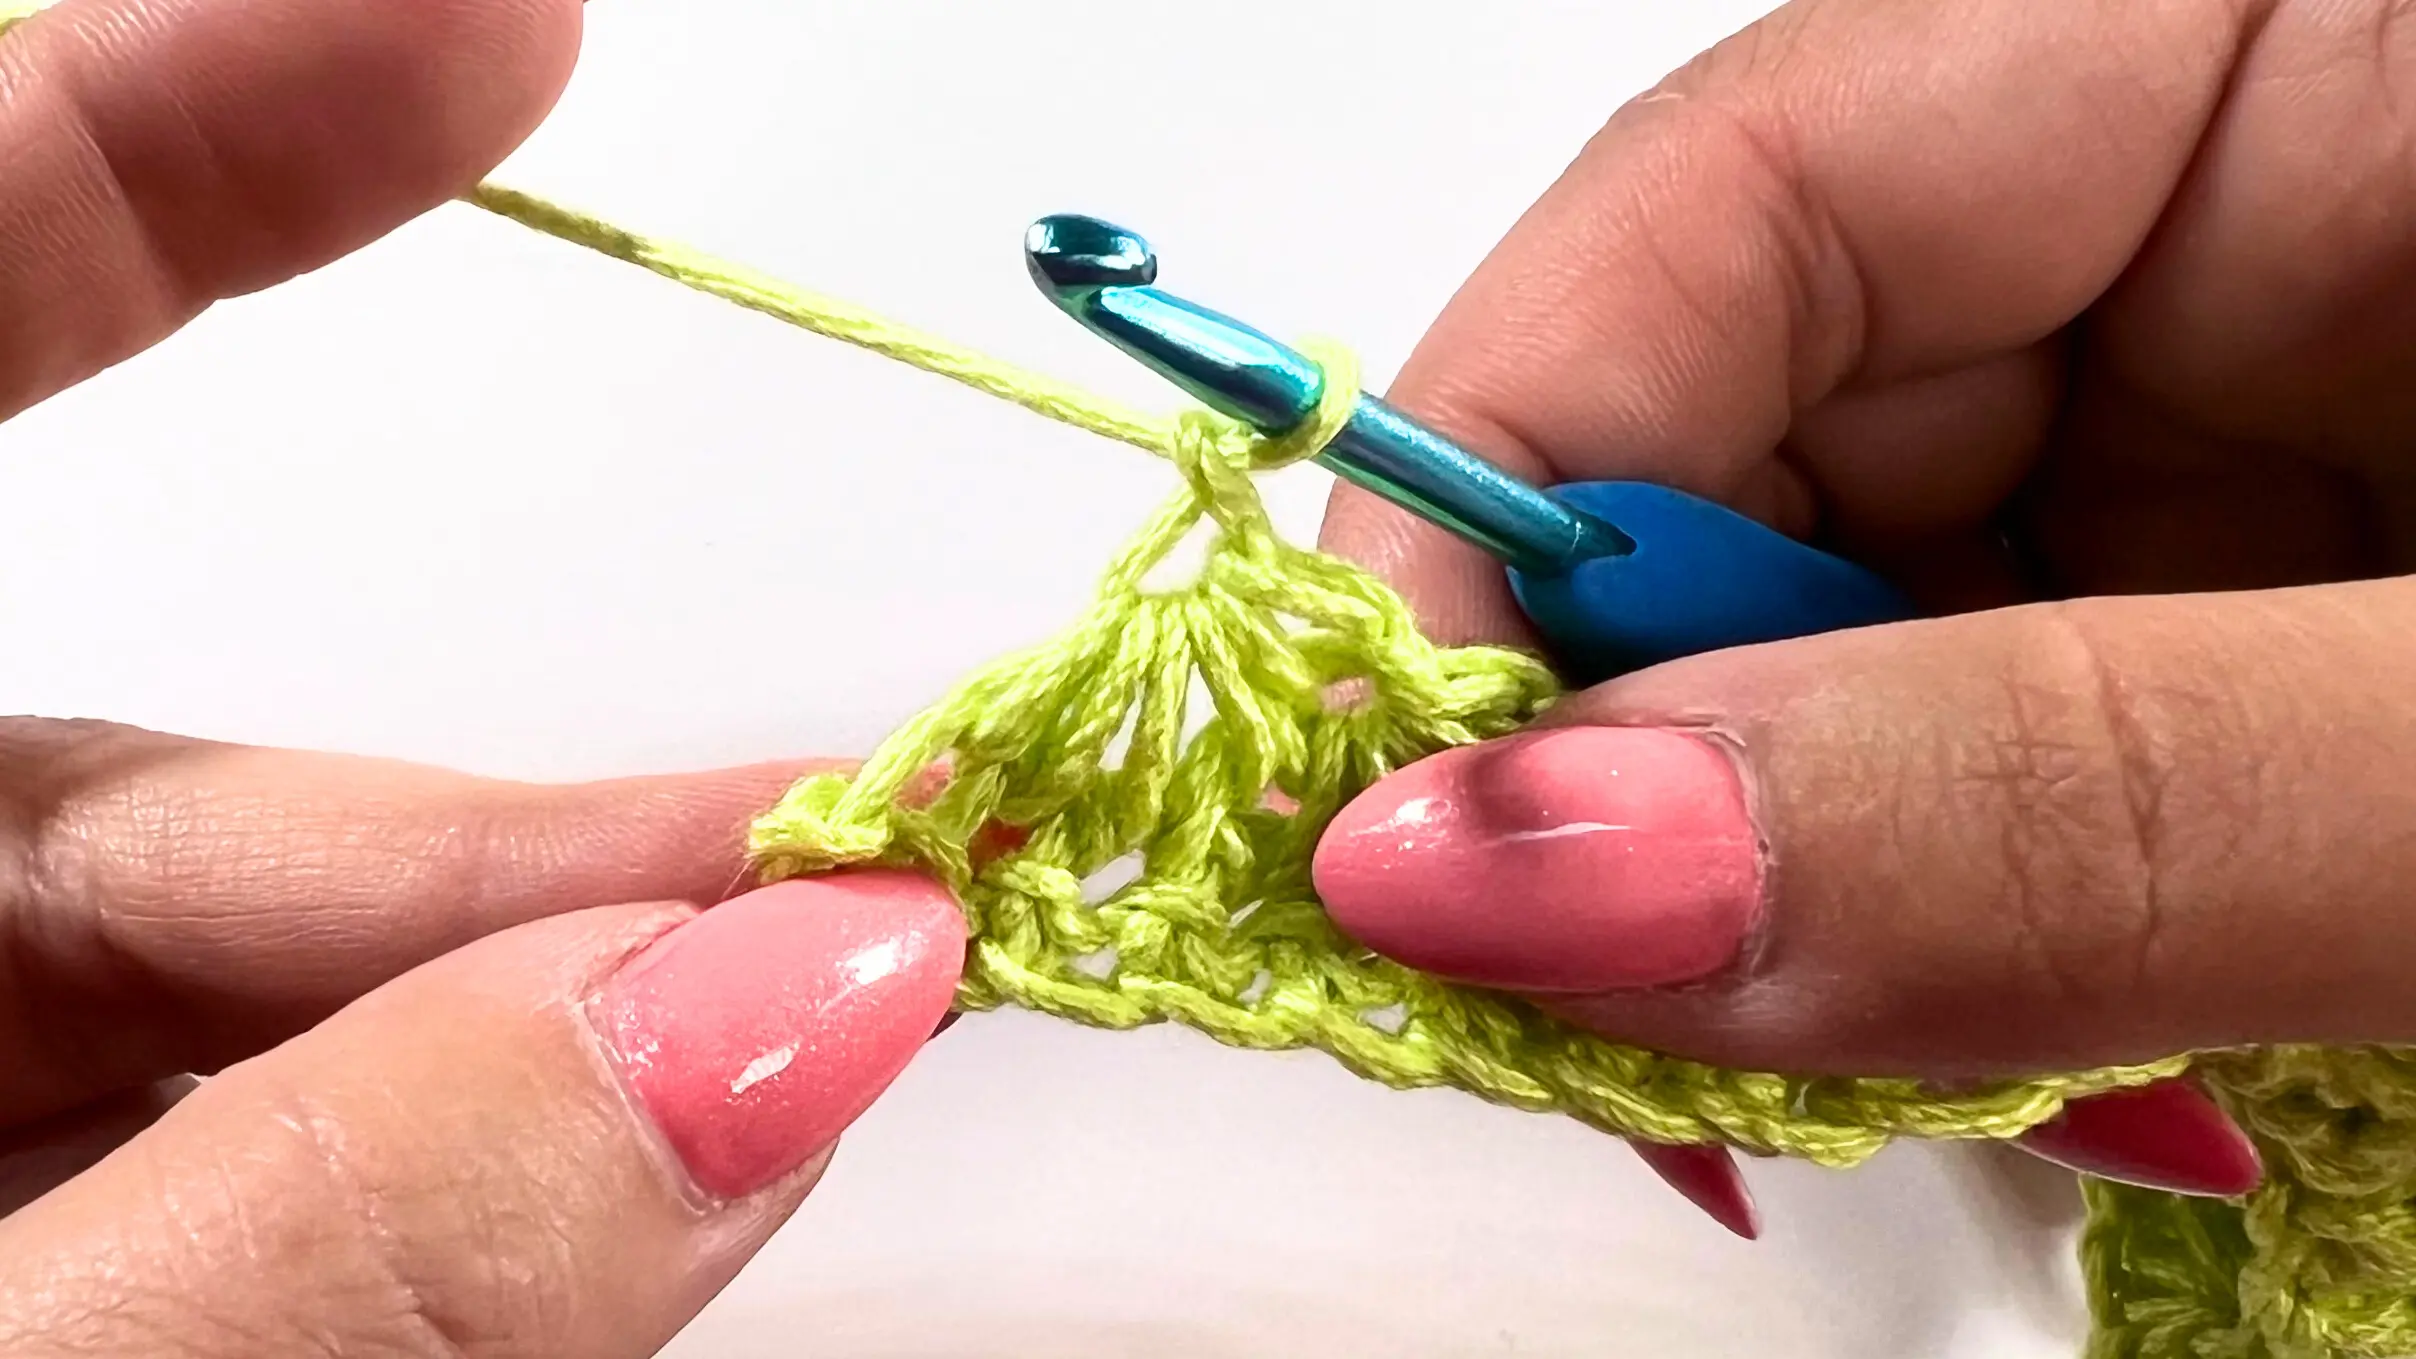
Now just keep repeating the Star Stitch until you have 2 stitches left at the end of the row.
You’ll still make your final Star Stitch, closing the cluster with a ch 1 — your last loop will be pulled up from the very last stitch in the row.
Then, into that same last stitch, make 1 half double crochet (HDC) to finish the row. Then ch 1 and turn.
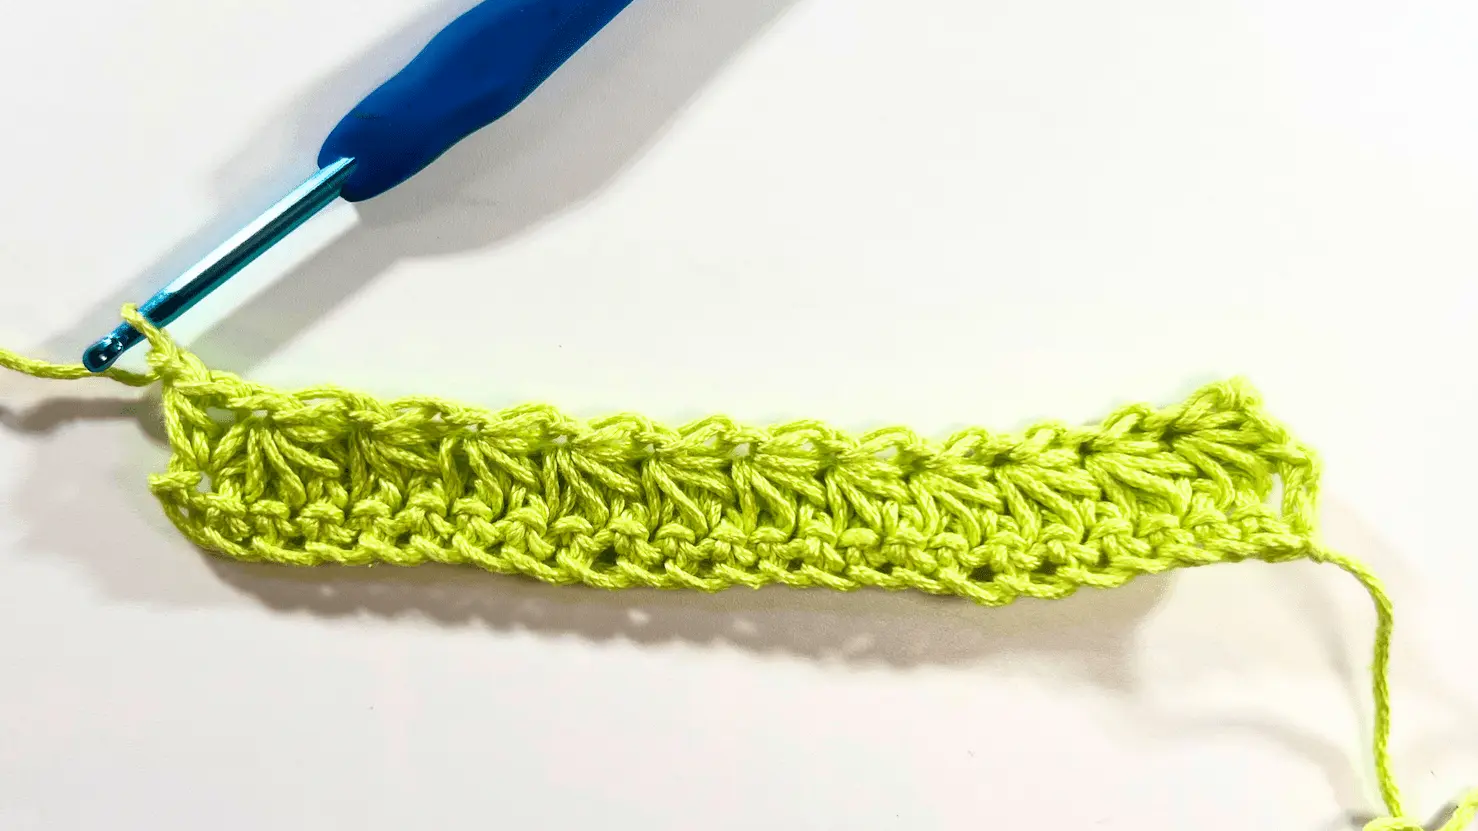
ROW 3 - SC into the first stitch (ch 1 is just a turning chain and doesn’t count as a stitch). Make 1 SC into the first “eye” of the previous row. Then make 2 SC into each of the next eyes across the row. Finish with 1 SC into the last stitch. Then ch 3 and turn.


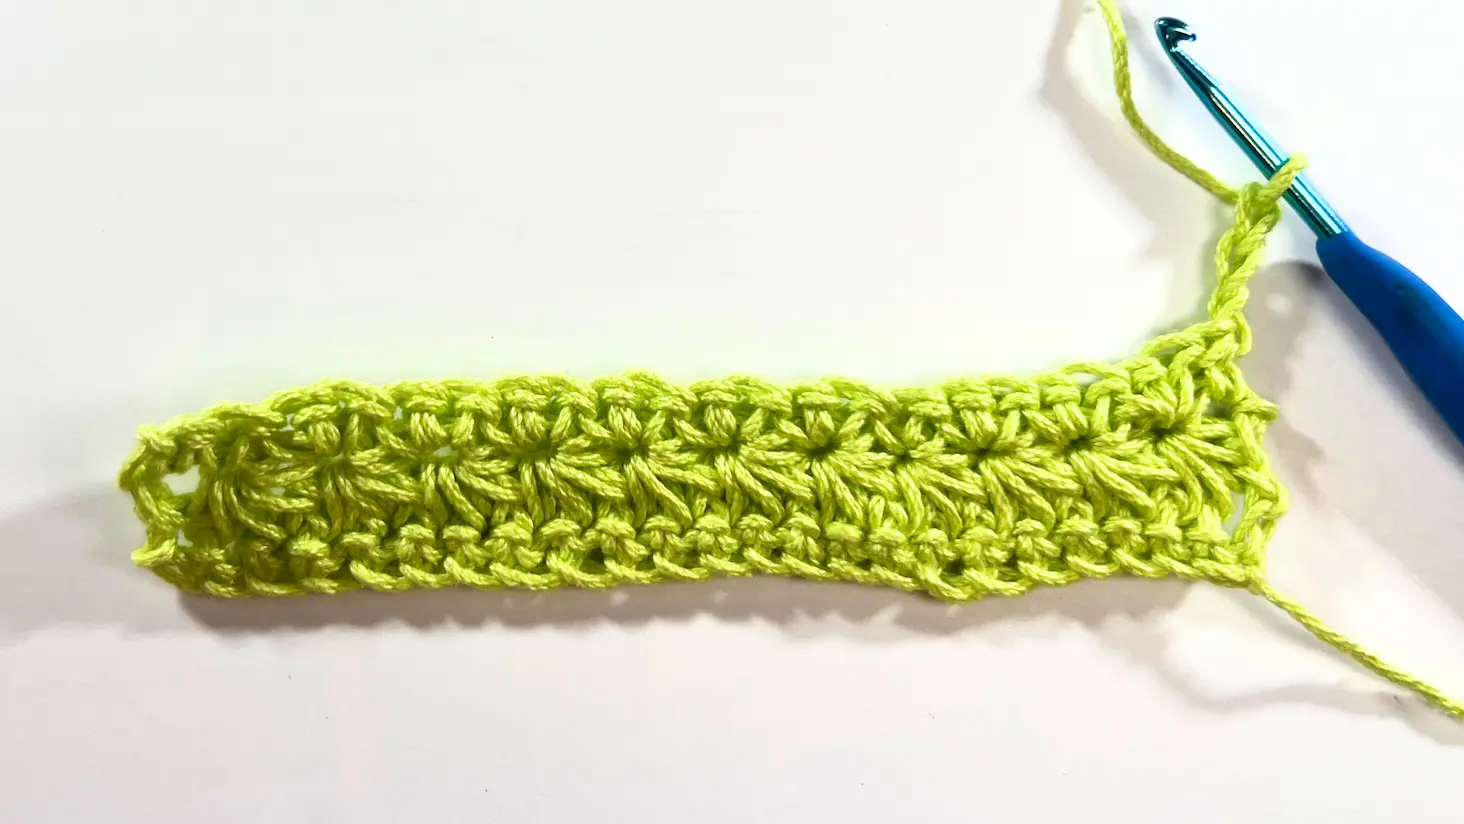
ROW 4 - ROW of your desired length - repeat row 2 and 3.
And that's a wrap on the Star Stitch! 🌟Isn't it such a fun texture to work with? Let me know in the comments what kind of project you'd love to make using this stitch — maybe a cozy blanket, a textured pouch, or even a baby sweater?
If you found this helpful, don’t forget to share it with your crochet friends 💛You can also tag me on Instagram @happyheartsy — I’d love to see your creations!
Happy stitching,
Lenka


Comments