
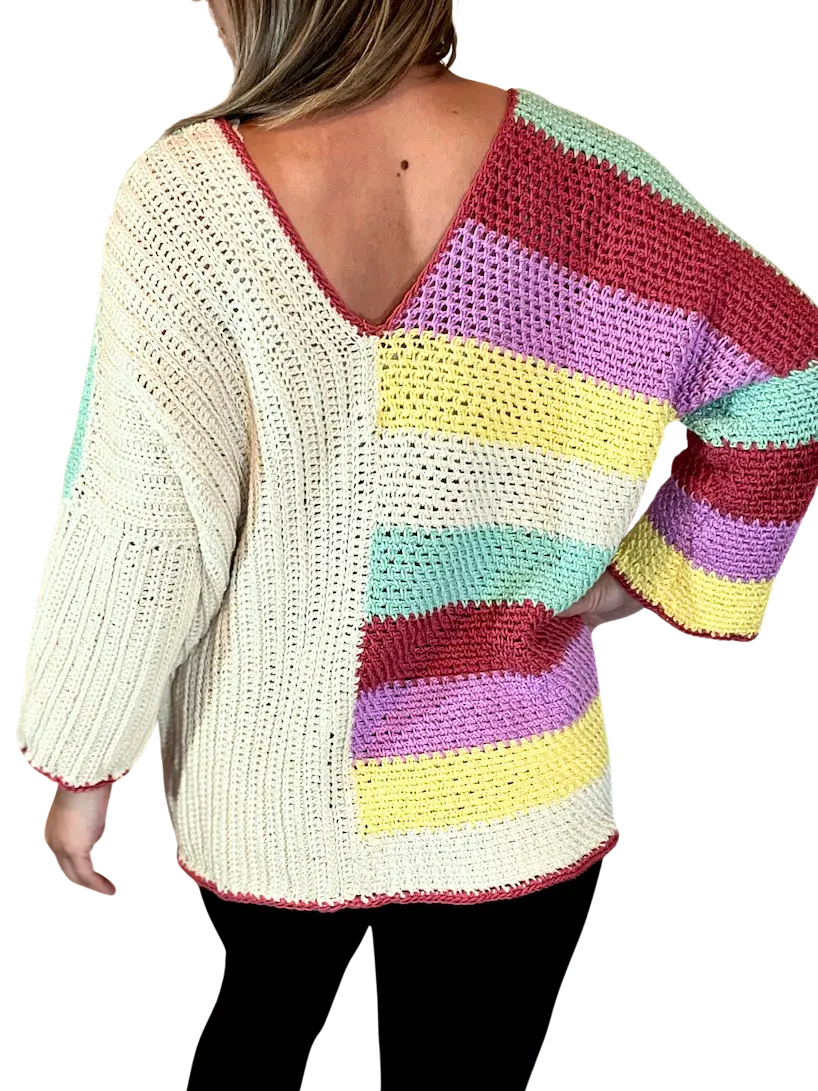
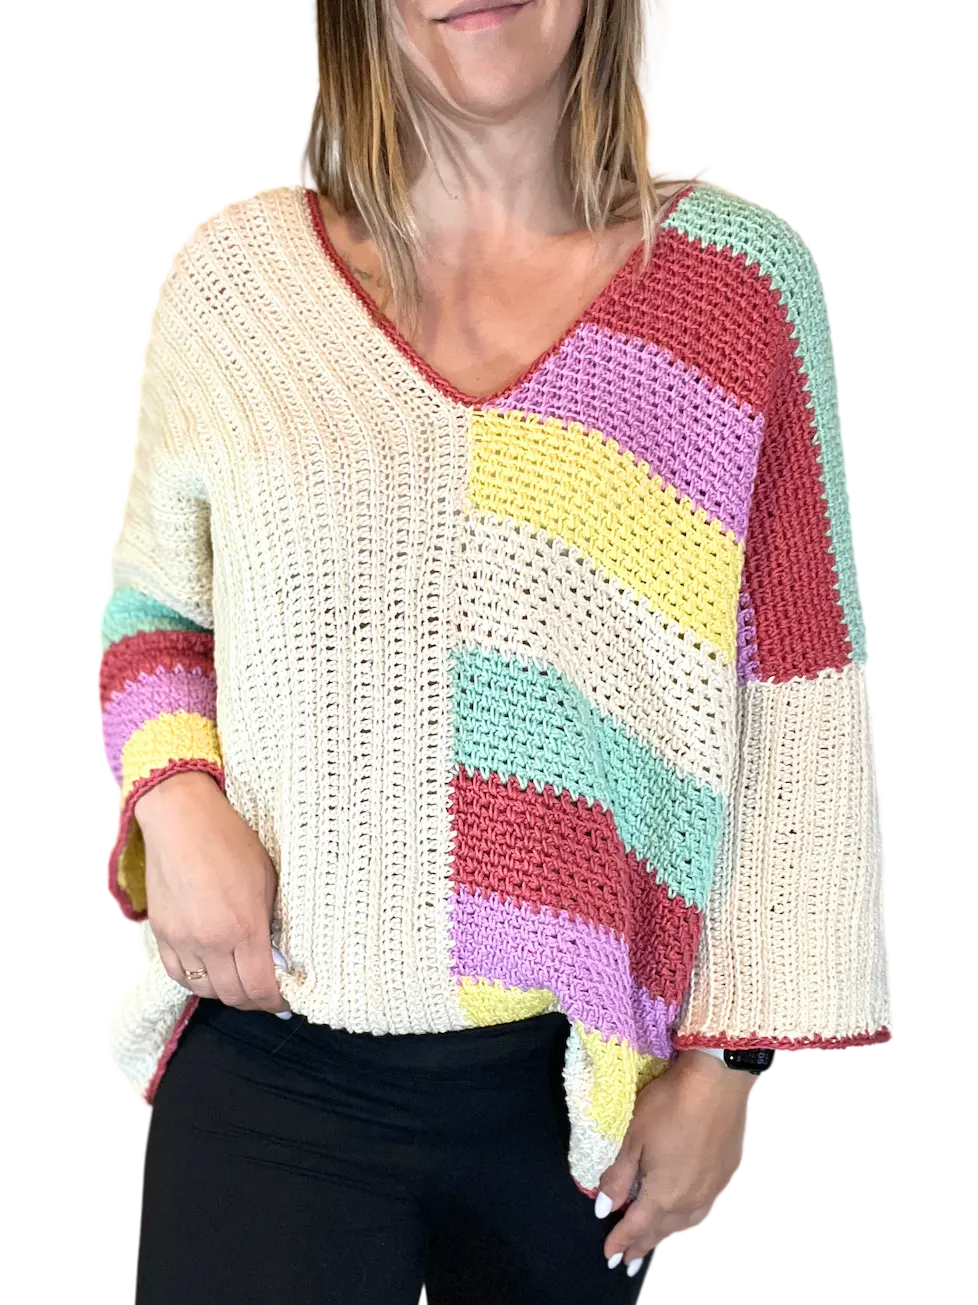
Happy Stripes Sweater – Free Crochet Pattern for a Joyful and Cozy Make
- Jun 20, 2025
- 11 min read
Updated: Jan 13
There’s something so magical about playing with colour—and the Happy Stripes Sweater is here to bring that joy right into your hands (and your wardrobe!). This cozy, feel-good make was designed to be as cheerful as it is comfy, with simple stitches and playful stripes that let your yarn shine. 💛
Whether you’re crocheting your first sweater or just looking for a relaxing project with a pop of personality, this one’s for you. Grab your favourite colours, settle in with your hook, and let’s make something happy together.
If you'd like to support my work and get a printable, ad-free version of this pattern, please visit my shop or Ravelry.
If you like my crochet content but aren't interested in buying my patterns, that's perfectly fine. :) I offer my patterns for free on my blog so everyone can access them!
Additionally, there's an alternative way to support my work through Buy Me a Coffee (in my case, it's Buy Me Yarn, and you know the reason:) ). It's even cheaper than my current patterns. For more information, you can click the link above or the button below.
HUGE THANKS to everyone who supports me through purchases, likes, shares, comments, tags, or feedback! It truly means a lot to me.

This post contains affiliate links for the yarns I used and love and it also displays ads. I make a small commission if you purchase through these links or through the Ads which in no way affects the cost to you. The revenue I receive from Ads, and affiliate links, help me to support my small business which allows me to share my free crochet patterns/content with you. Thank you for your understanding and your support! It means a lot to me.
This pattern and all images associated with this pattern cannot be sold or claimed as your own.
You are allowed to sell finished project. Feel free to mention me for creating this pattern, it would make my day and I can share your finished blanket on my social media if you allow.
Don’t forget to share your project on Instagram! If you have your account you can tag me under
@happyheartsy. I would love to see your finished Happy Stripes Sweater so I can share it with others.
Before we get into the actual pattern I also created the Ultimate Crochet Hack Sheet! It's 2 pages with basic
crochet abbreviations and symbols, hook sizes in US and UK version, all the yarn types (with recommended hooks and projects) etc. Feel free to click on the pic or a link to my shop where you can find more details.

What you need for this Happy Stripes Sweater:
Colour A - Ecru - used for size M - 467g in total = approx. for all sizes (skeins) - 2 (2, 3, 3, 4, 4, 5, 5, 6)
Colour B - Lemon - used for size M - approx. 85g = approx. for all sizes (skeins) - 1 (1, 1, 2, 2, 2, 3, 3, 3)
Colour C - Orchid - used for size M - approx. 85g = approx. for all sizes (skeins) - 1 (1, 1, 2, 2, 2, 3, 3, 3)
Colour D - Terracota - used for size M - approx. 90g (I used this colour for the border) = approx. for all sizes (skeins) - 1 (1, 1, 2, 2, 2, 3, 3, 3)
Colour E - Mint - used for size M - approx. 85g = approx. for all sizes (skeins) - 1 (1, 1, 2, 2, 2, 3, 3, 3)
Hooks - 4mm
Scissors, Yarn Needle, Stitch Markers
Gauge:
Moss Stitch Panel (Stripe Panel) - 20sts x 16rows = 4"x4"
Modified Camel Stitch (HDC in the 3rd loop) = 17sts x 10rows = 4"x4"
The sizing guide follows size XS, (S, M, L, XL, 2XL, 3XL, 4XL, 5XL). E.g. 52, (58, 62, 68, 72, 78, 82, 88, 92) means 52 for XS, 58 for S, 62 for M, 68 for L, 72 for XL, 78 for 2XL, 82 for 3XL, 88 for 4XL, 92 for 5XL)
Final measurements for this sweater for all sizes in inches:
Bust (This sweater is designed with a relaxed, oversized fit for cozy comfort.): 40 (44, 48, 52, 56, 60, 64, 68, 72)
Length: 25 for all sizes (you can easily adjust to make it shorter/longer)
Arm depth + Sleeve length: per your preferences:) = I’ll guide you how to calculate your own size

NOTES:
This sweater is crocheted from the bottom up.
One half is worked in Moss Stitch, and the other half is crocheted sideways using a modified Camel Stitch (HDC in 3rd loop and back loop).
The sleeve (depth and length) is customizable to fit your preferences, so no specific stitch or row counts are provided—you’ll calculate your own using the formulas included.
This design has a relaxed, oversized fit with positive ease. If you prefer a more fitted look, consider sizing down by 1 or 2 sizes.
You can also check out my YouTube video tutorial for this pattern, where I walk you through each step. Skip to the timestamped sections as needed—no need to watch the entire video.
Abbreviations:
Ch - Chain
YO - Yarn Over
St - Stitch
Ch Sp - Chain Space
SC - Single Crochet
HDC - Half Double Crochet
FLO - Front Loop Only
BLO - Back Loop Only

DIRECTIONS
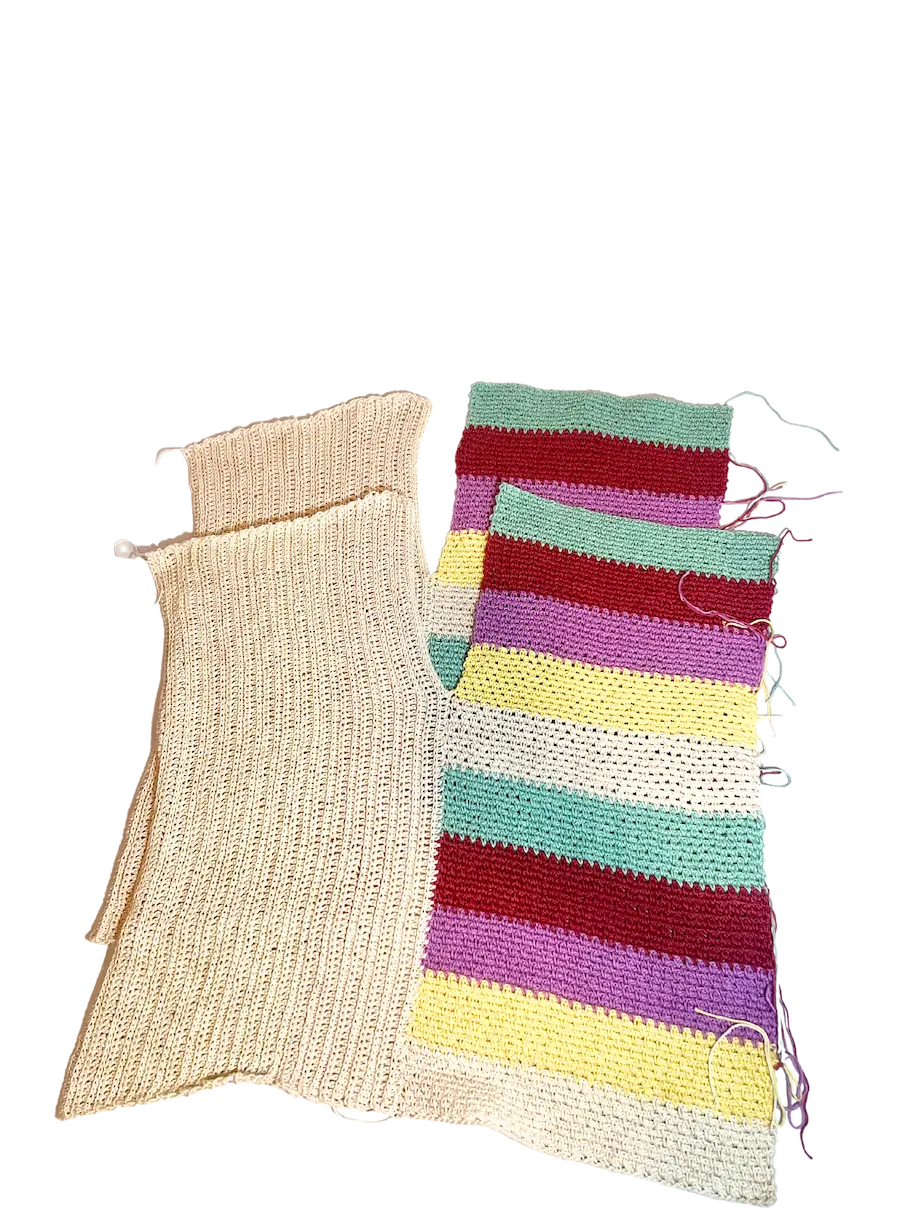
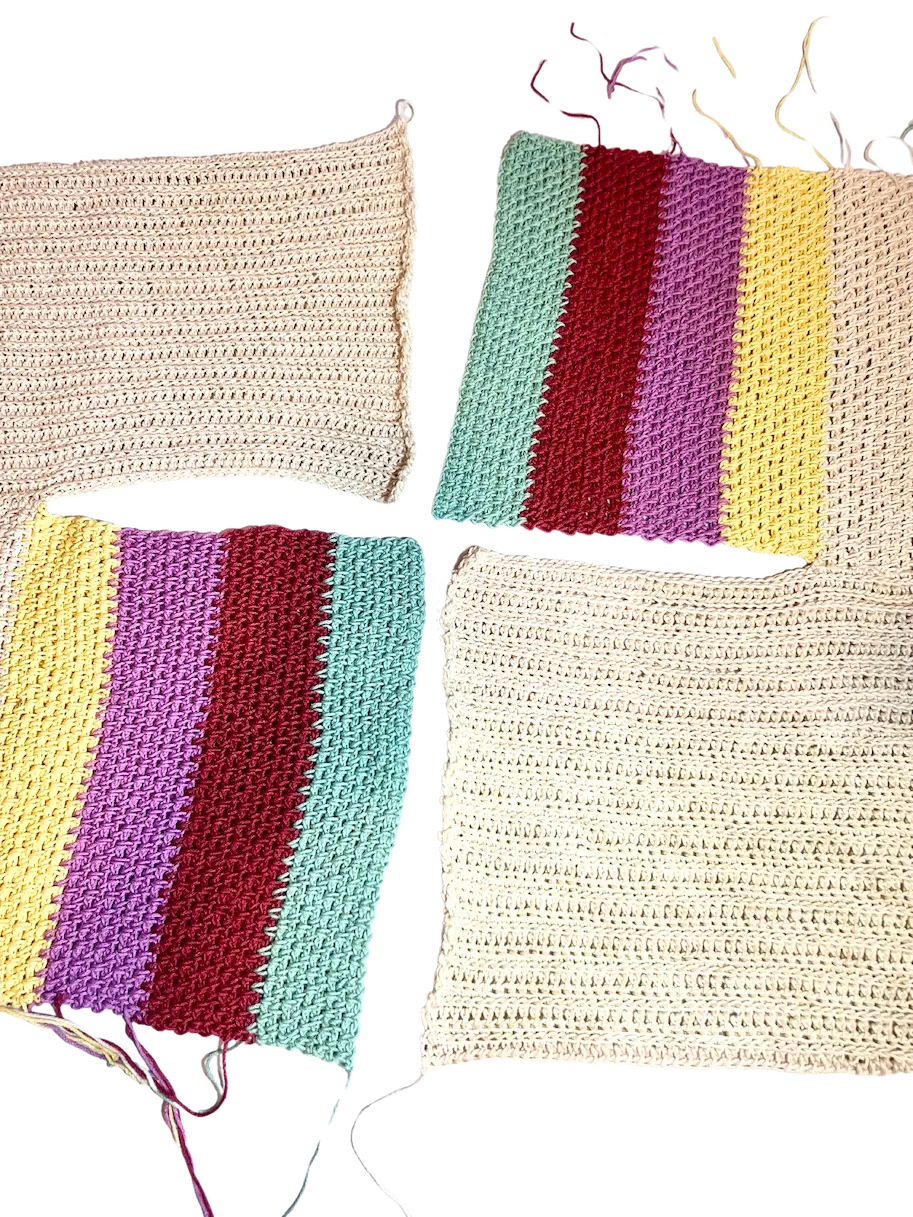
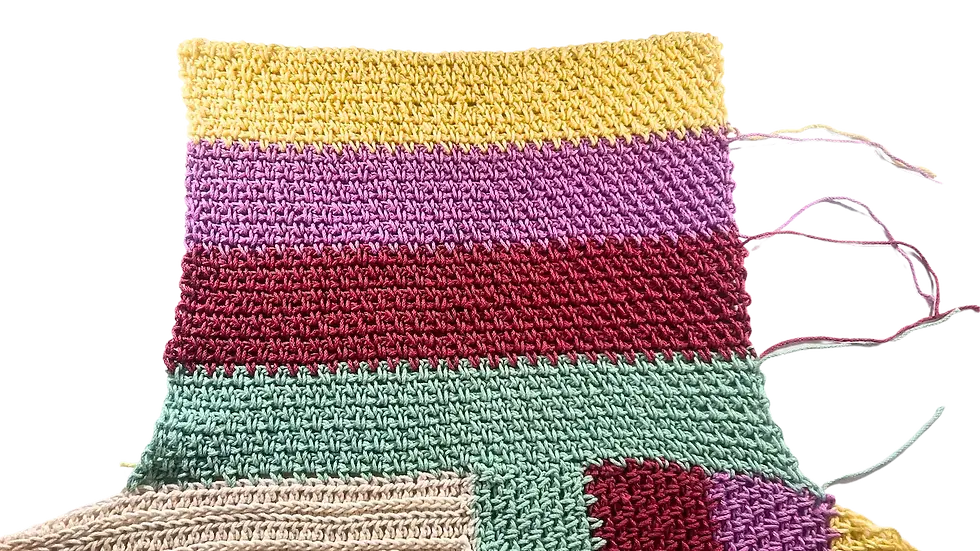
Front and Back Are the Same – Make Two Matching Panels
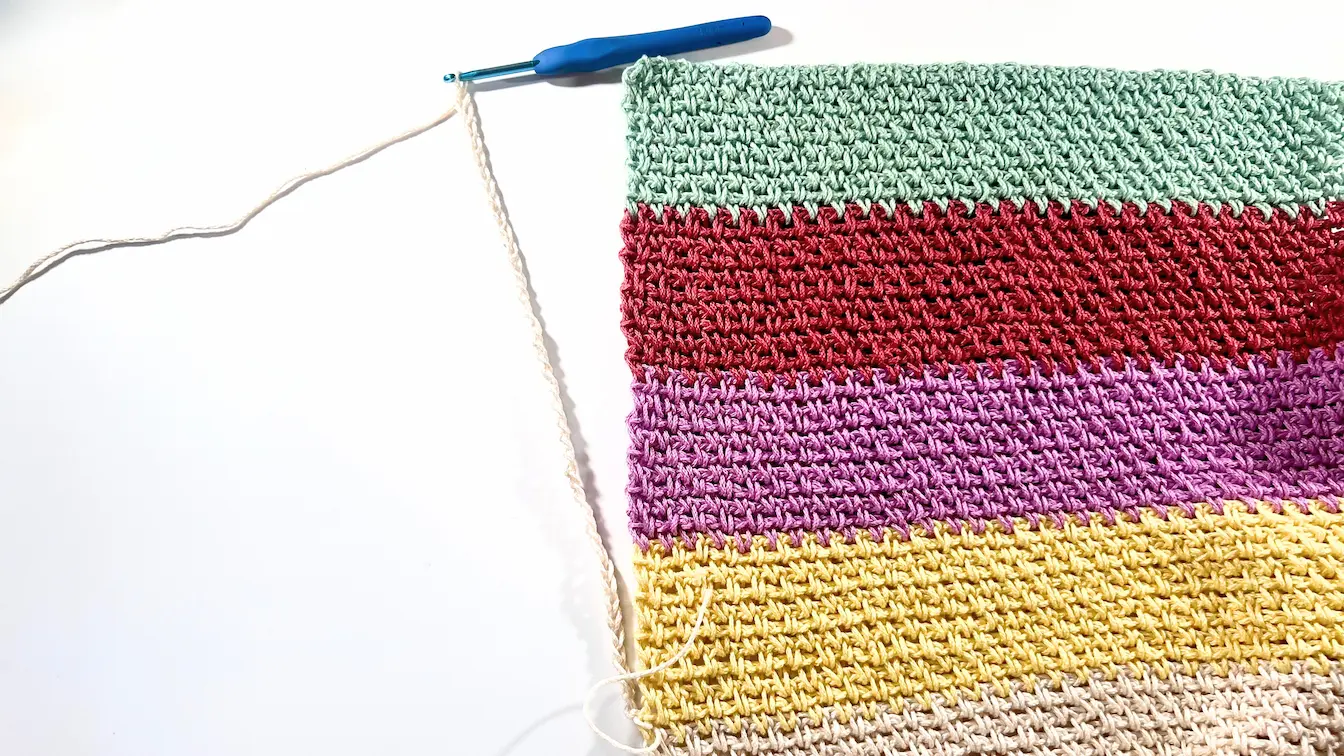
Starting with the Moss Stitch Stripes Panel
Ch 52, (58, 62, 68, 72, 78, 82, 88, 92) with colour A
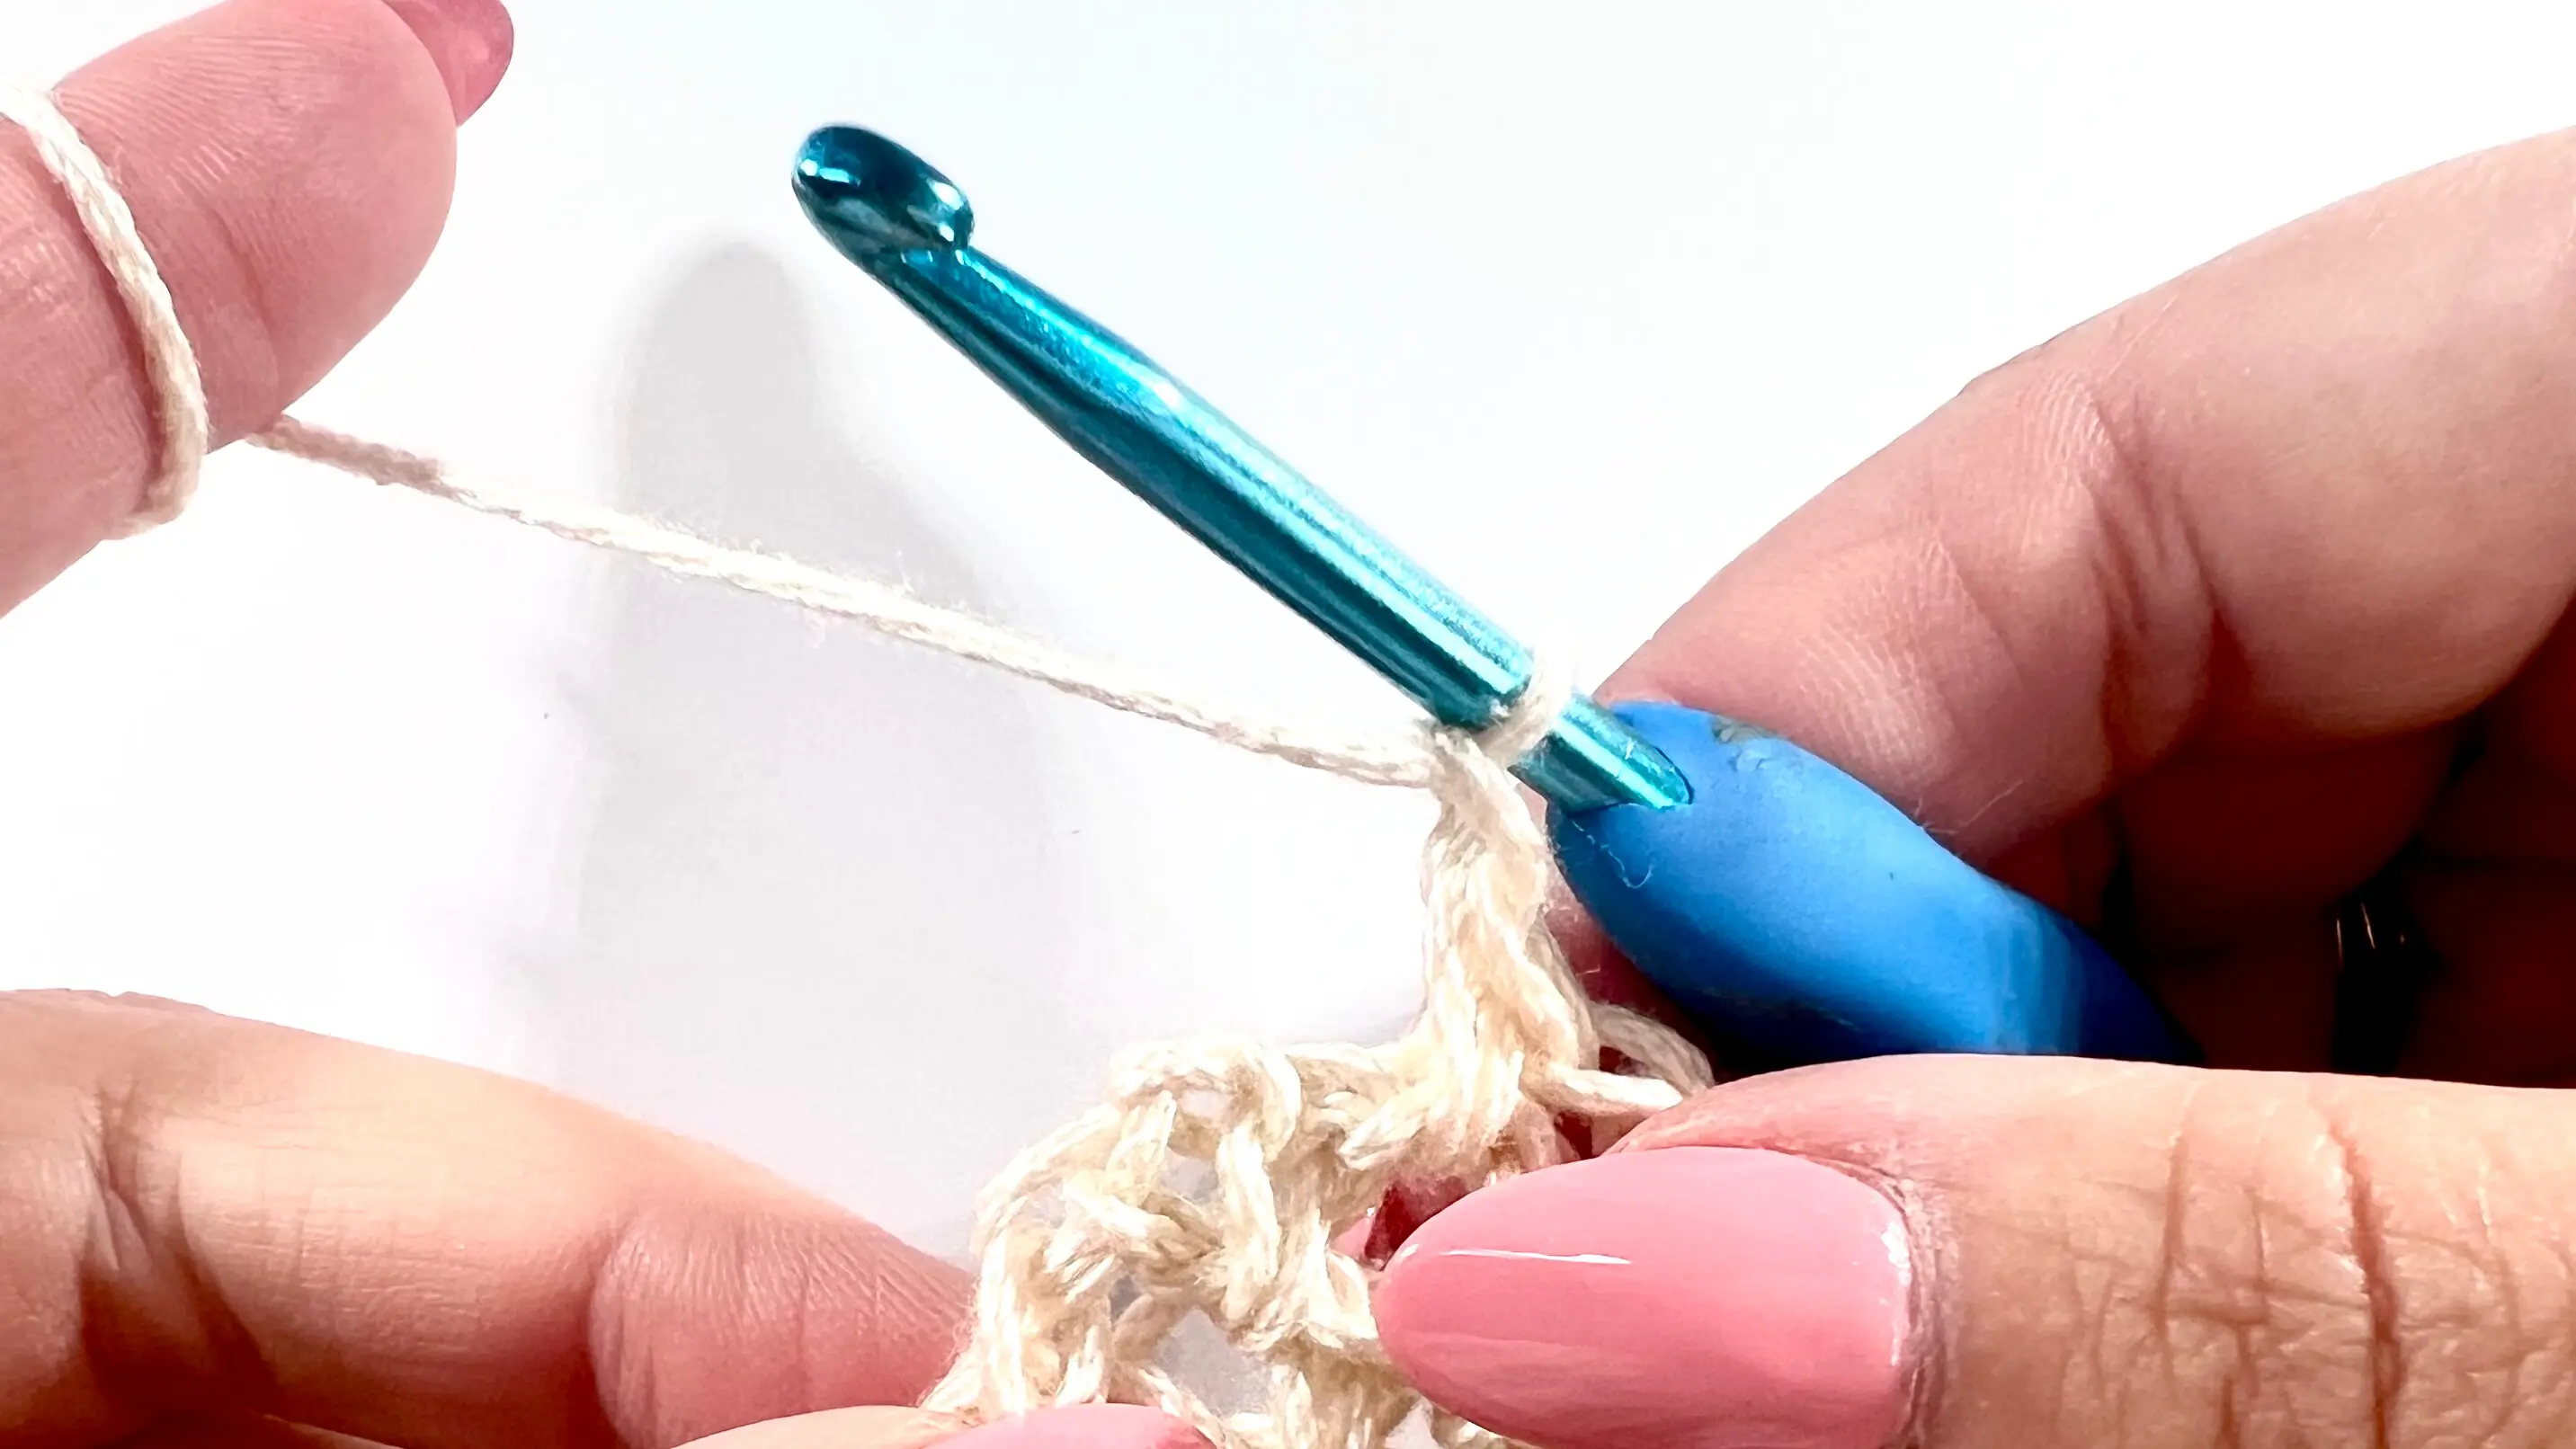
ROW 1 - SC into 4th ch, ch 1 (skip the ch), SC. Repeat from to until the end of the row. SC is your last st into the last ch. Ch 2 and turn. In total 51 (57, 61, 67, 71, 77, 81, 87, 91) sts.
ROW 2 - SC into the 1st ch sp, ch 1 (skip the st), SC into the ch sp. Repeat to until the end of the row. SC into the last ch sp. Ch 2 and turn. (You always have the same number of stitches)
ROW 3 - ROW 10 = repeat ROW 2 (see How to change the yarn colour before chaining 2)
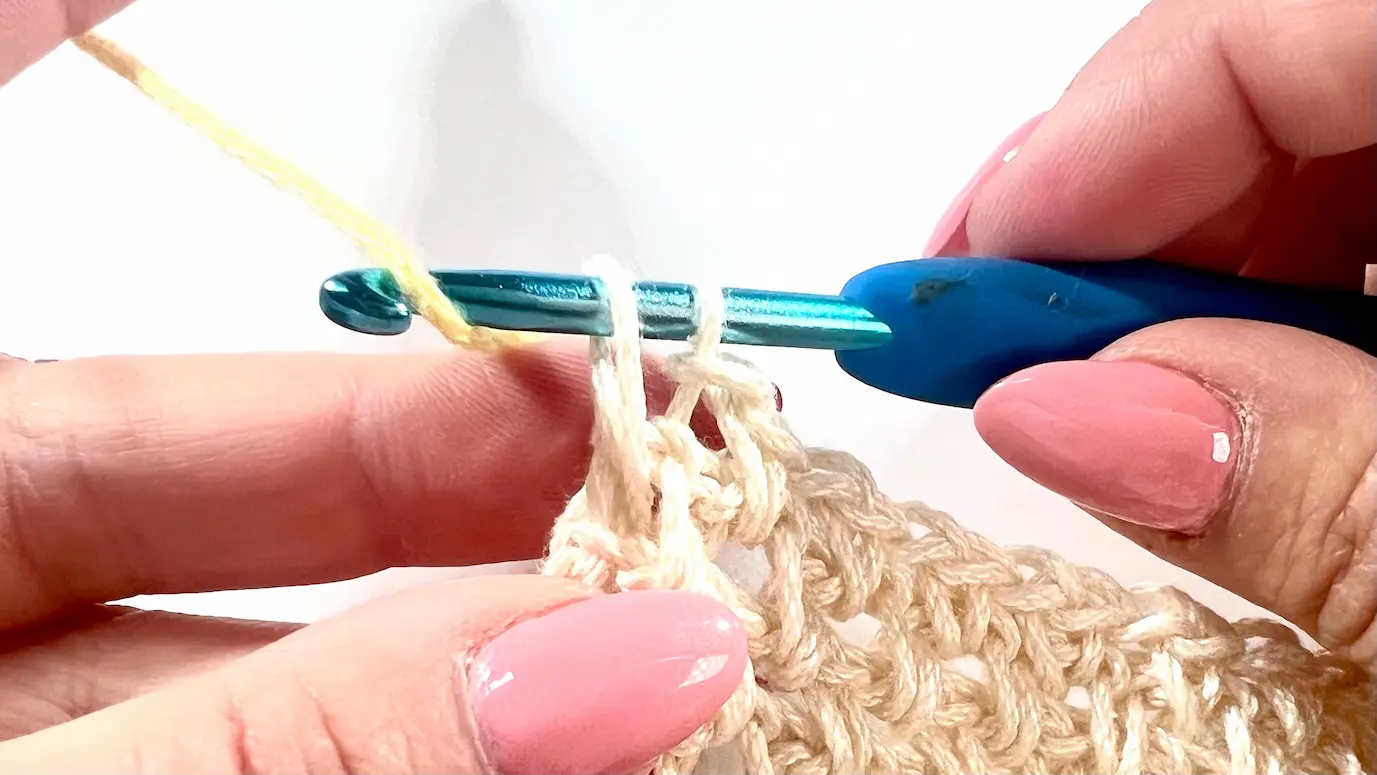
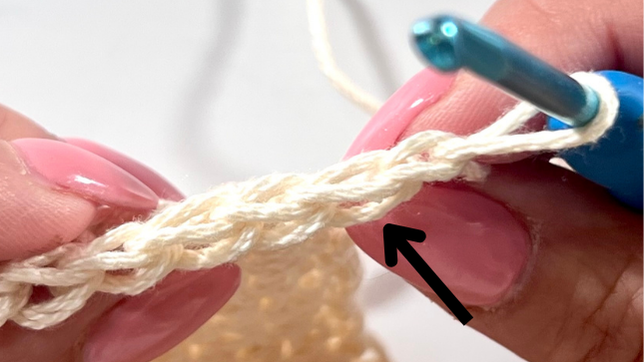
How to change the yarn colour:
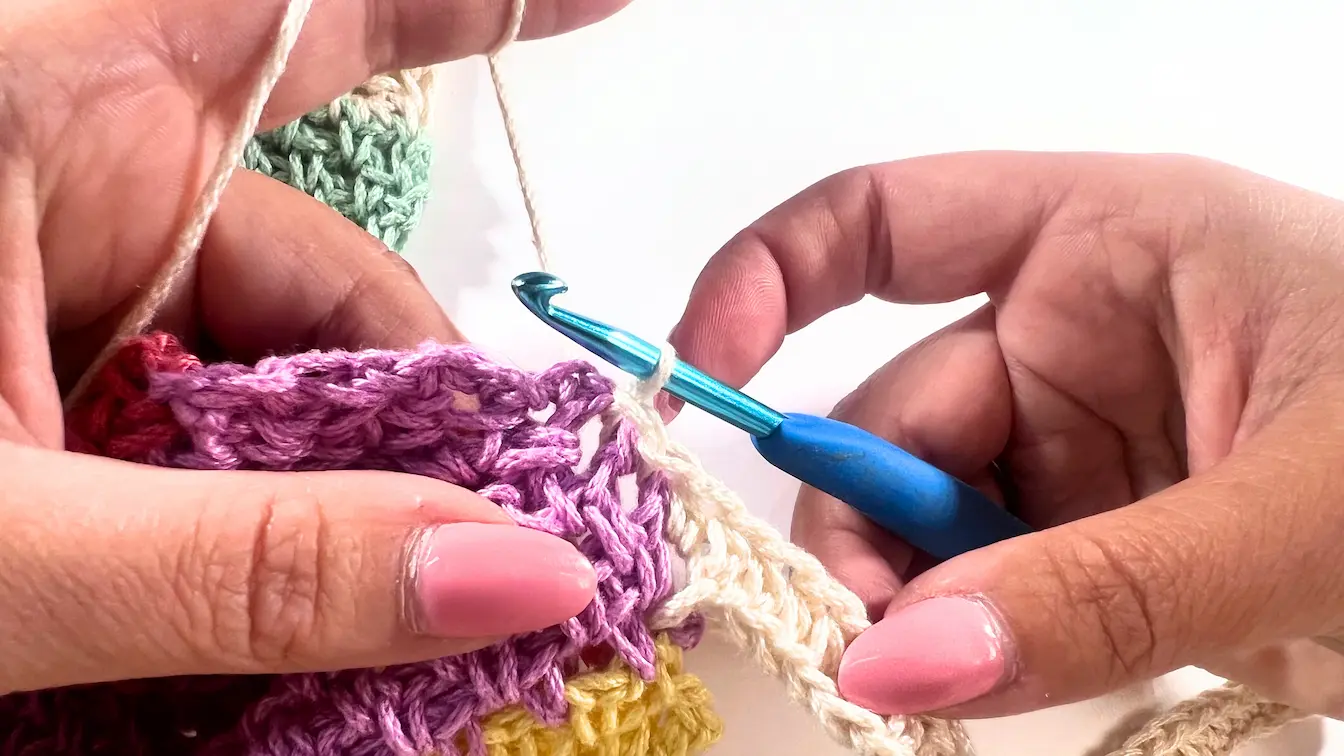
When you're about to make the last single crochet of the row, stop before finishing the stitch—leave the last two loops on your hook. Take your new colour, place it over the hook, and pull it through both loops to complete the stitch. This changes the colour seamlessly. Now, continue with the pattern by chaining 2 and turning your work for the first row in the new colour.

Colour B - ROW 11 - ROW 20 = repeat ROW 2
Colour C - ROW 21 - ROW 30 = repeat ROW 2
Colour D - ROW 31 - ROW 40 = repeat ROW 2
Colour E - ROW 41 - ROW 50 = repeat ROW 2
Colour A - ROW 51 - ROW 60 = repeat ROW 2
Colour B - ROW 61 - ROW 70 = repeat ROW 2
Colour C - ROW 71 - ROW 80 = repeat ROW 2
Colour D - ROW 81 - ROW 90 = repeat ROW 2
Colour E - ROW 91 - ROW 100 = repeat ROW 2
Then secure the panel and grab colour A to continue with the other half of the first panel.
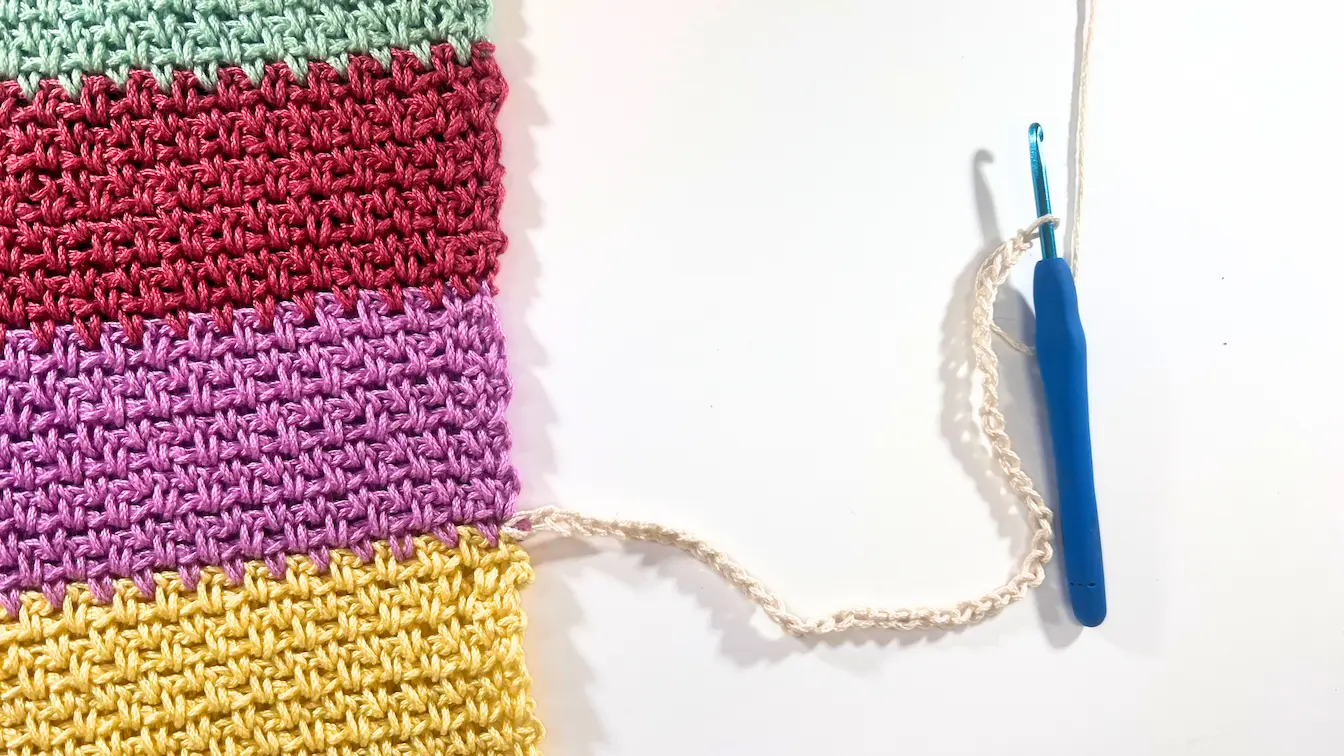
The second half of a panel made in modified Camel Stitch - crocheted sideways
ALL SIZES
Now it’s up to you how deep you'd like your neckline to be for both the front and back panels. You can keep them the same, or make one shallower or deeper than the other—it's totally customizable!
The sweater in the photos has the same neckline depth. If you’d like to follow that version, here’s how:
With Colour A, insert your hook into the 81st row.
Want a shallower neckline? Start around the 91st row. Prefer a deeper neckline? Try starting at the 71st row instead. Or any row you prefer.
Once you insert your hook into the chosen row, yarn over and pull through to join the yarn. Your first chain counts as the row you're joining into. From there, continue chaining one for each row up to row 100, and then add one extra chain for turning.
So for example:
Starting at row 81 → chain 21 in total
Starting at row 71 → chain 31 in total
Starting at row 61 → chain 41 in total
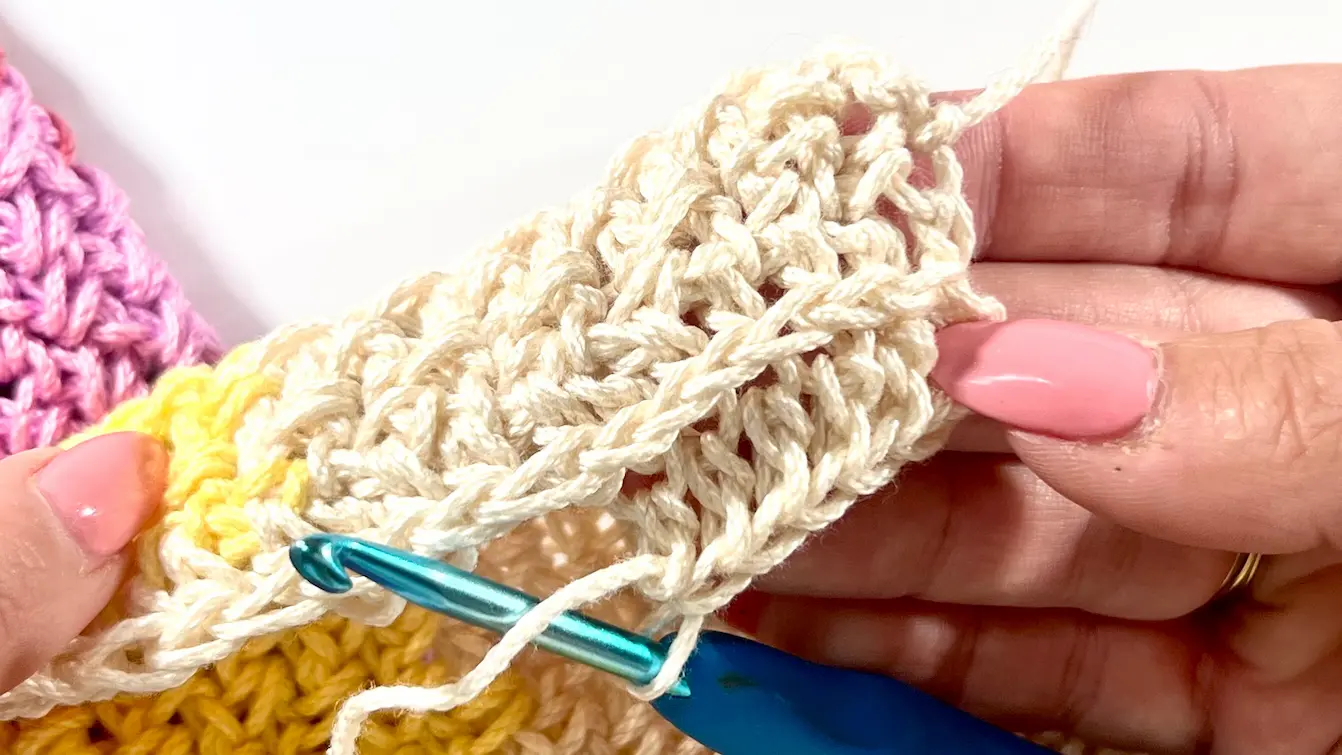
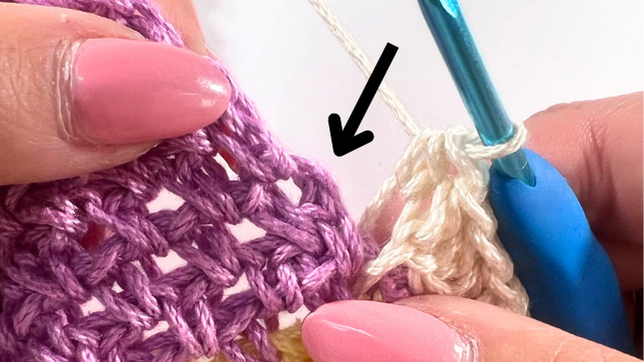
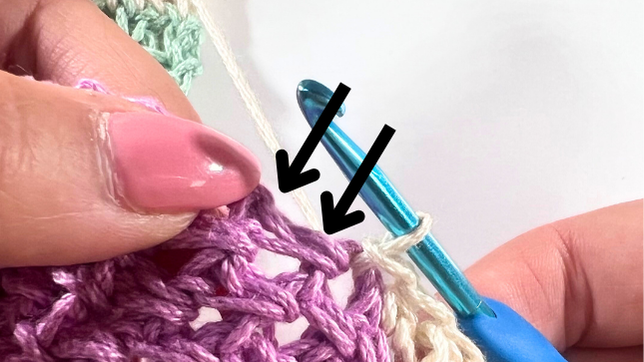
ROW 1 - Once you finish your chains, make a half double crochet (HDC) into the 2nd chain from the hook. From there, continue making 1 HDC into each chain all the way down.
When you reach the side of the first half of the panel, continue by working 1 HDC per row. Each colour stripe should give you 10 HDC, and you’ll keep going until you reach the bottom edge of the panel.
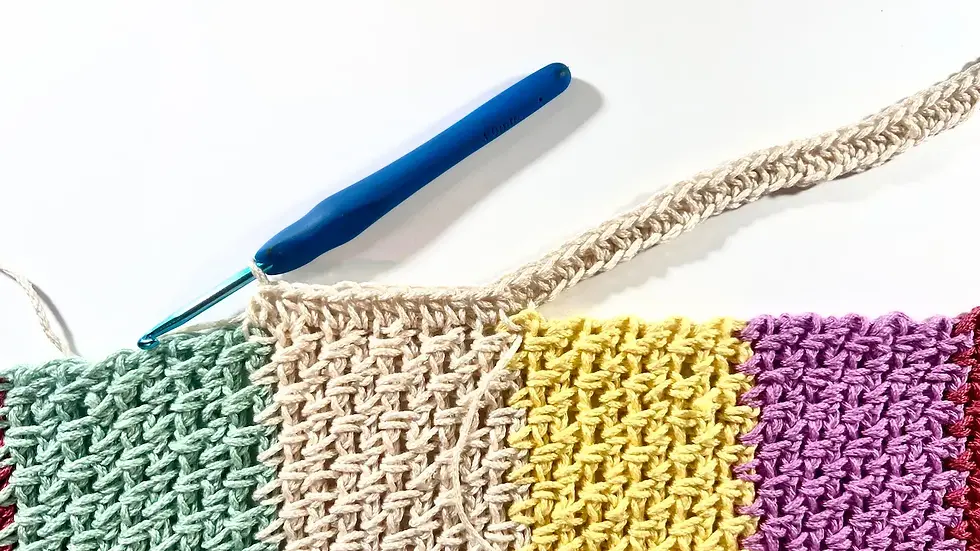
By the end, you should have 100 HDC in total across the full row. Ch 1 and turn.
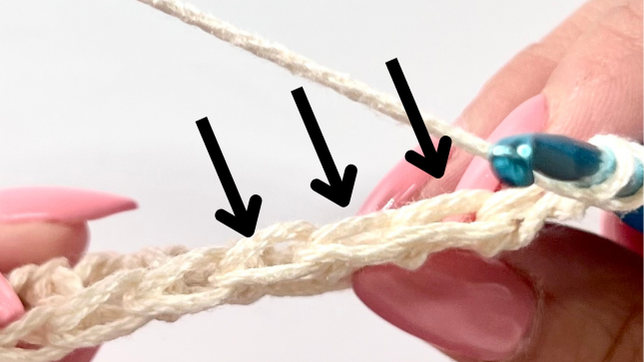
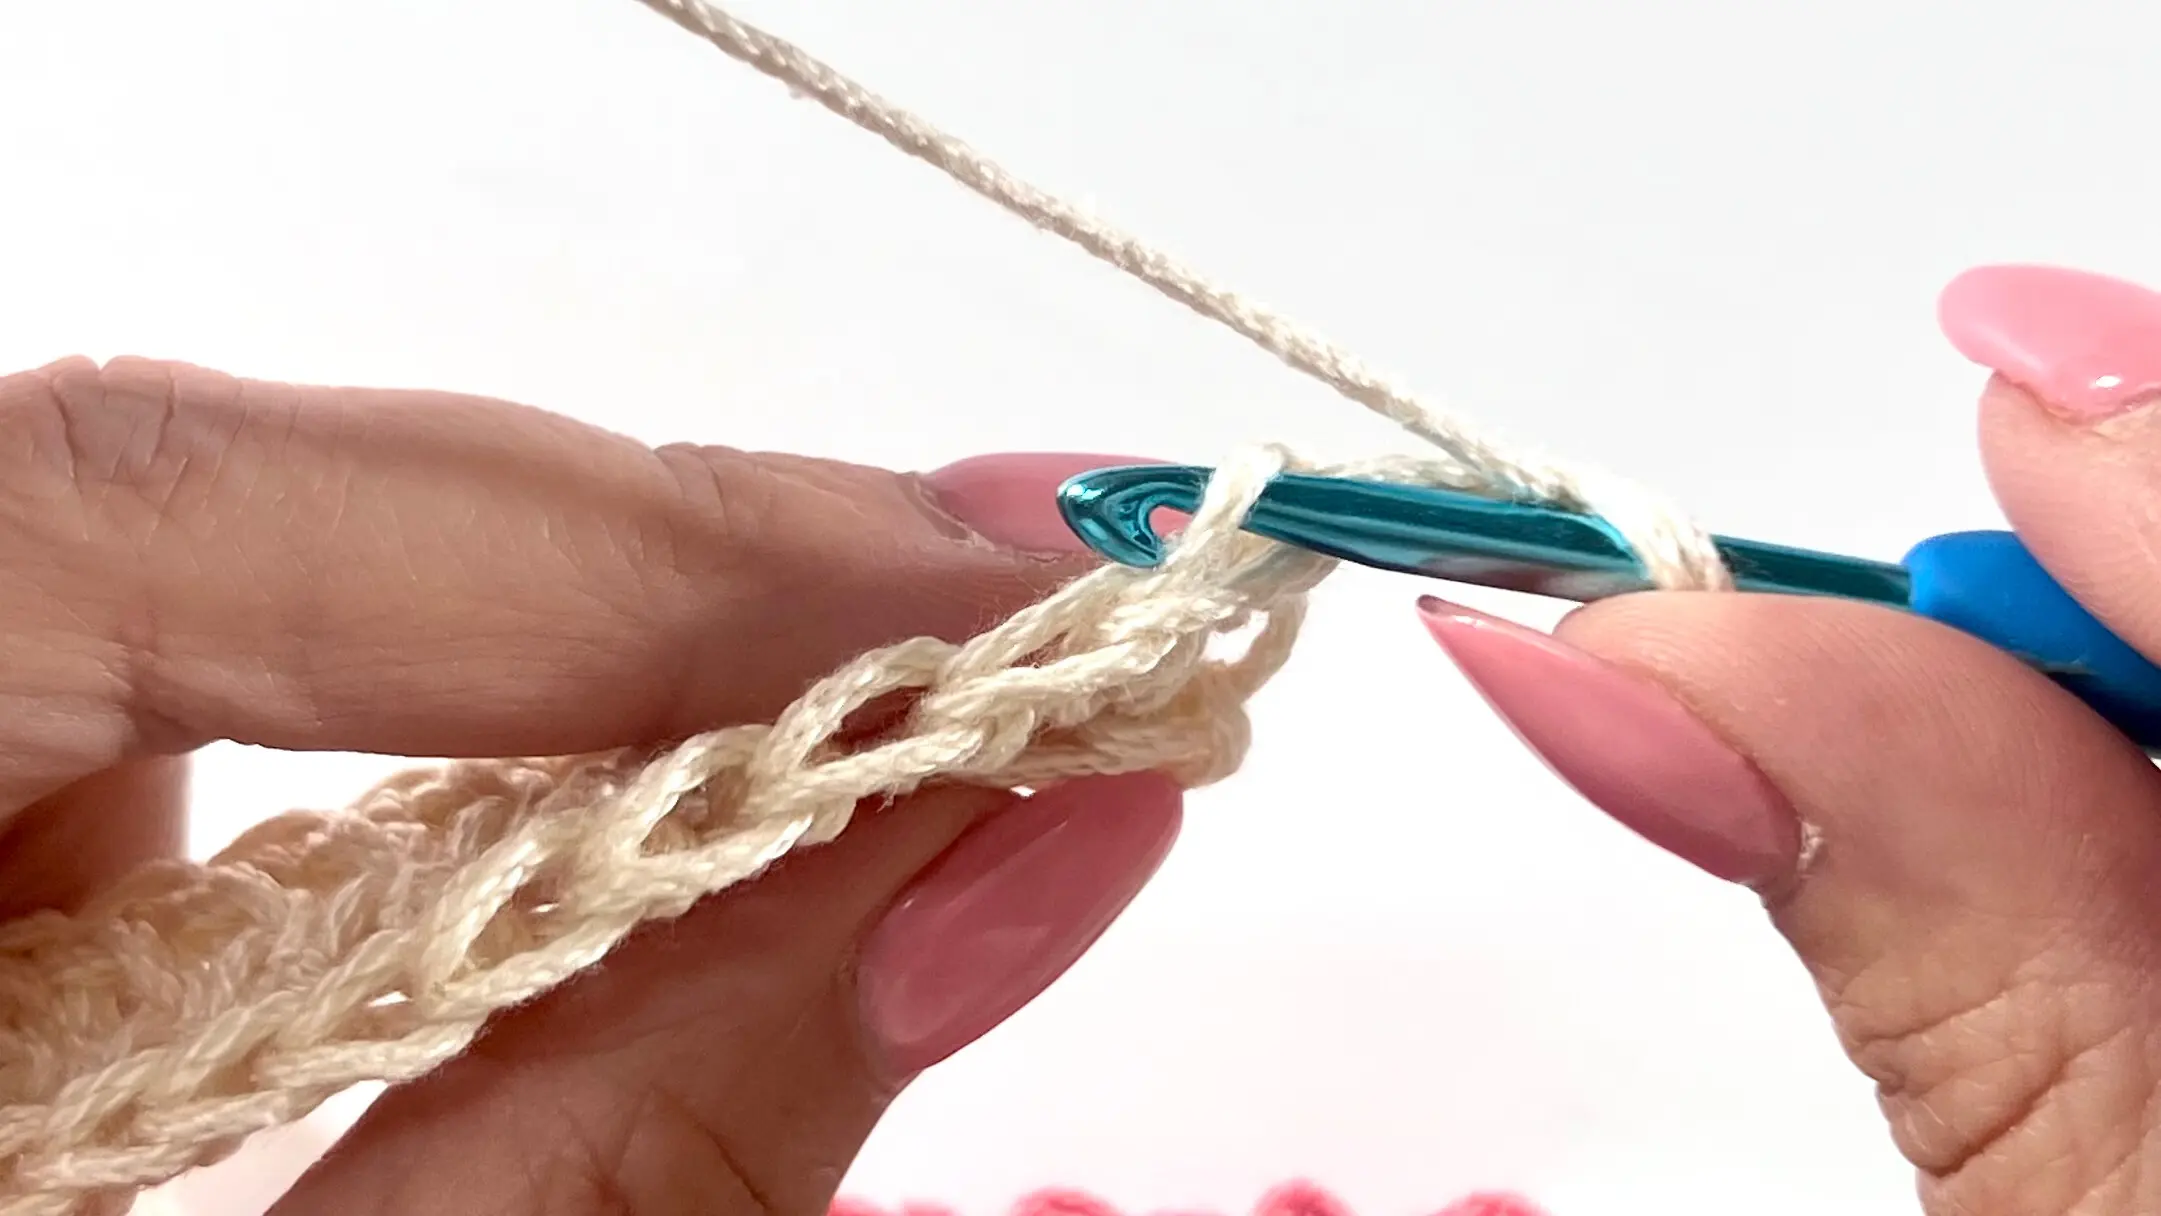
ROW 2 - In this row make HDC in very front loop only (FLO) in each stitch. Then ch 1 and turn.


ROW 3 - HDC in each stitch in back loop only (BLO). Then ch 1 and turn.

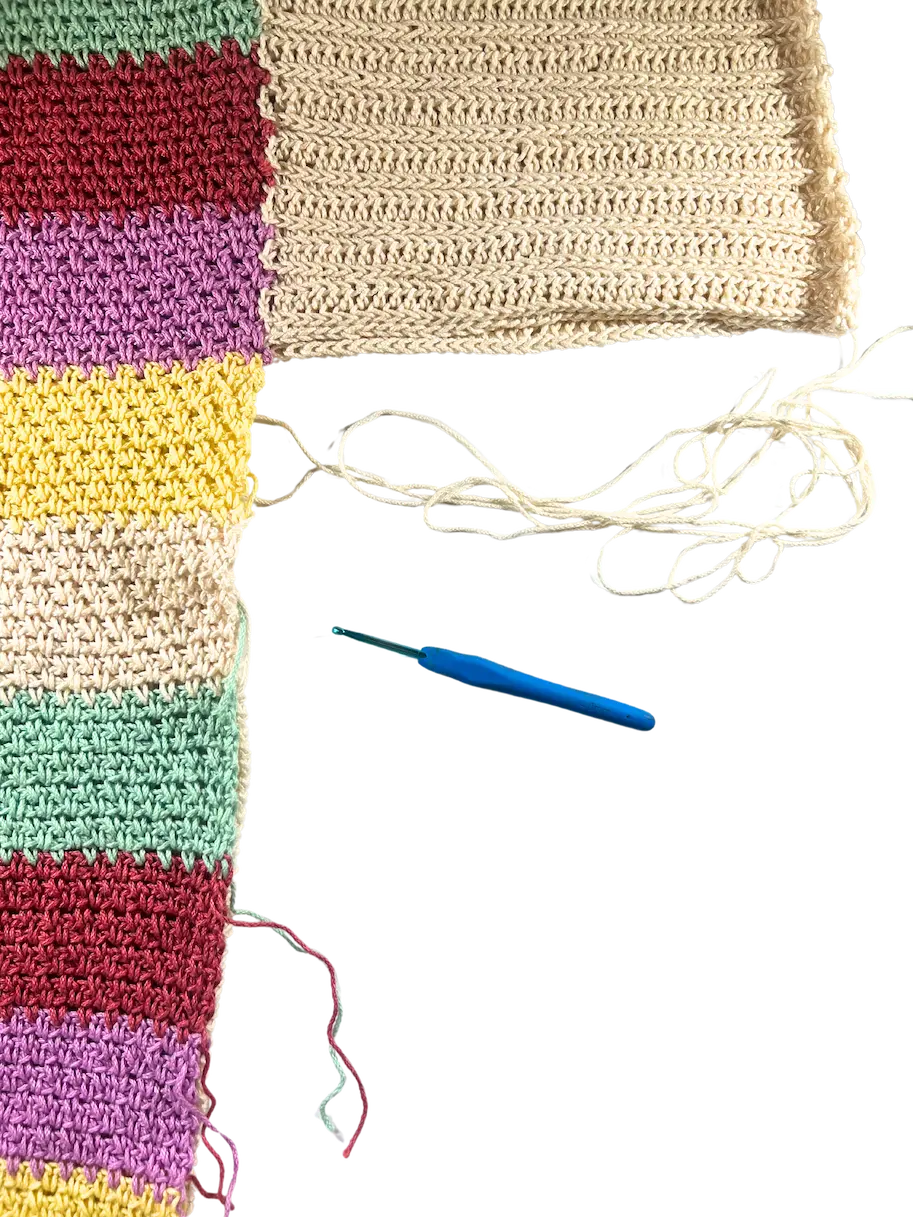
ROW 4 - ROW 26 (28, 30, 32, 34, 38, 40, 42, 44) - Repeat ROWS 2 and 3. Each size should have even number of rows so you end at the top of the panel. Leave a longer tail for seaming the panels together.
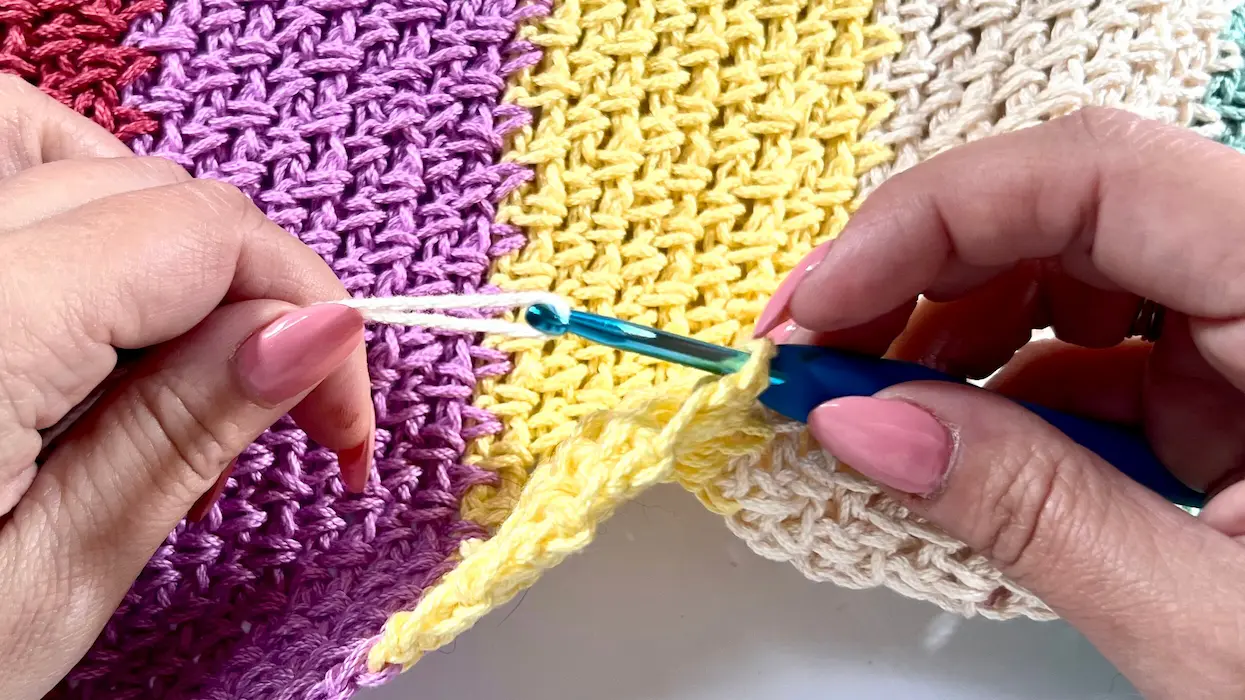
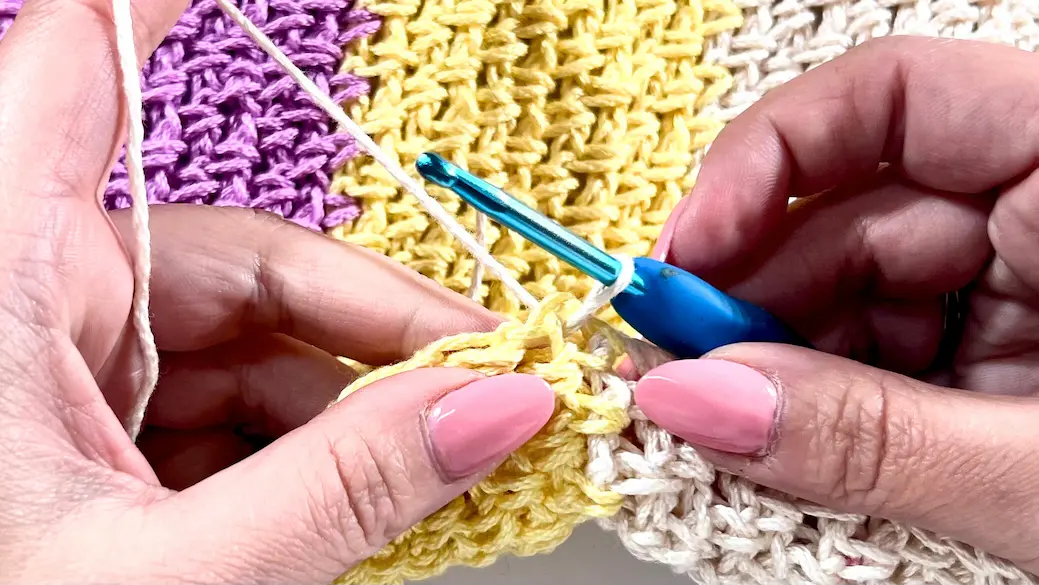
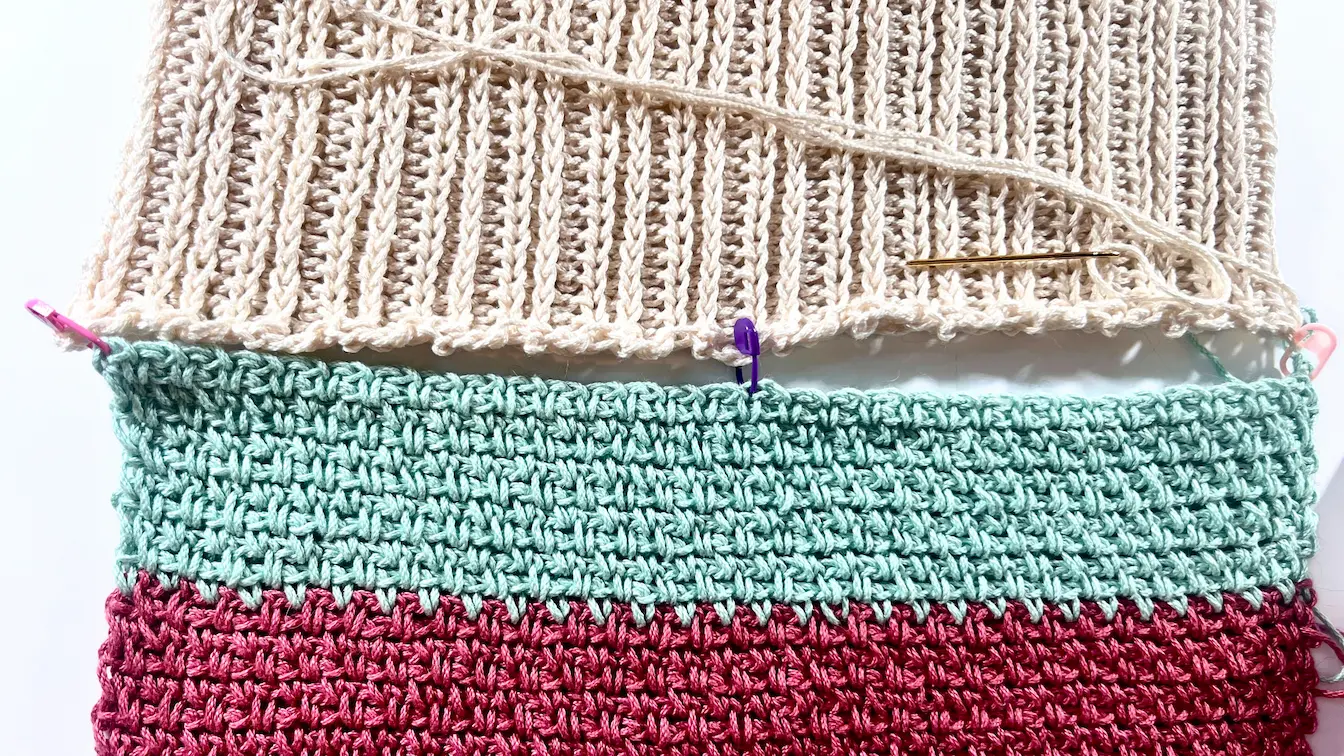
Seaming the Panels Together
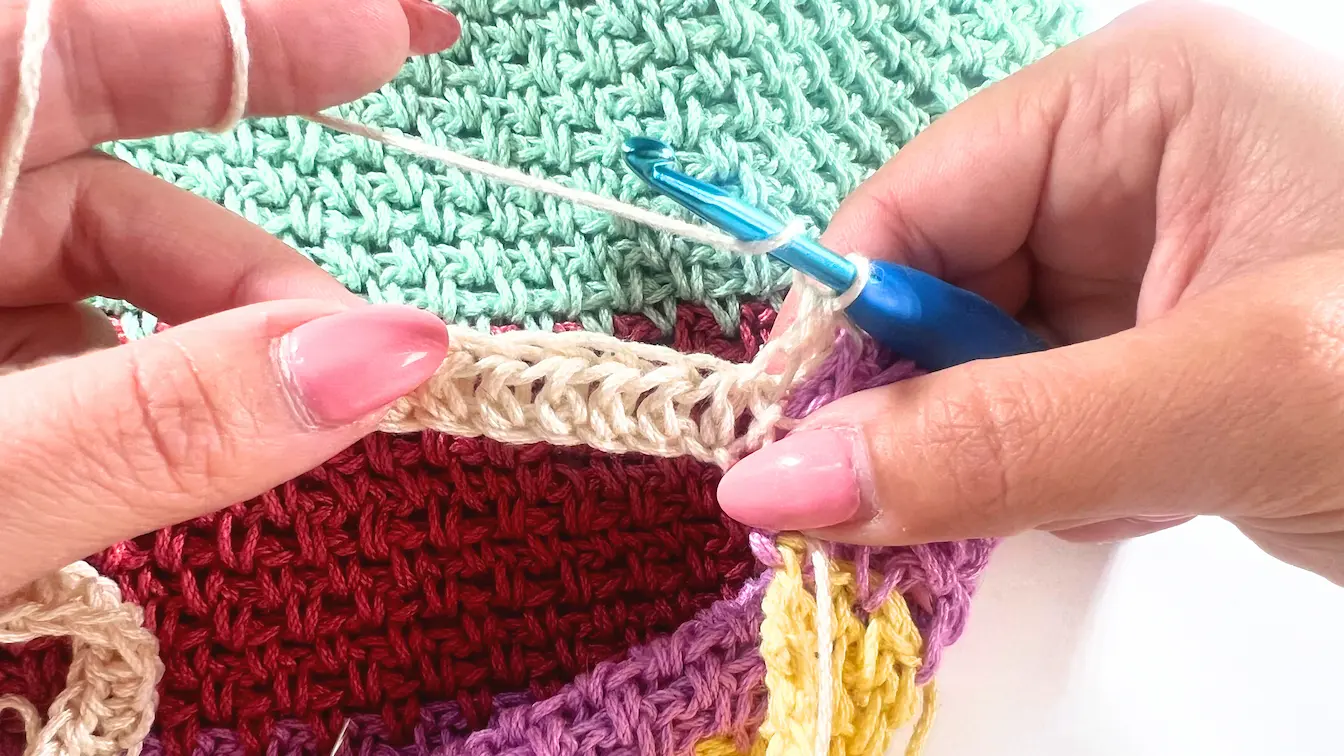
It's time to join the panels! Start by aligning them with the right sides facing each other (so the wrong side is out), ensuring that the striped half is positioned against the half double crochet side. Next, thread your needle with Colour A and whip stitch through the top part of the panels, carefully going through each stitch of the Moss Stitch.
Fitting Check
Once your panels are seamed together, I recommend conducting a fitting check. Evaluate whether the depth of the front and back necklines feels comfortable. If you find them too deep, you can easily adjust by seaming the sections until they meet your preference.
Next, turn your attention to the sleeves. Consider how deep and how long you want them to be. Use stitch markers to indicate the desired sleeve depth, and then take a measuring tape to determine the length you’d like for your sleeves. Make a note of the inches, and I’ll assist you in calculating the necessary stitches.


Left Sleeve in Moss Stitch
After completing your fitting check, ensure that you have at least one stitch marker placed at the desired width of the sleeve. Be certain to match this length on the opposite side by marking it with another stitch marker (match the length for the right sleeve as well!). Now, let's proceed with the counting based on the gauge to determine how many stitches and rows you’ll need for the sleeve. (see next page)
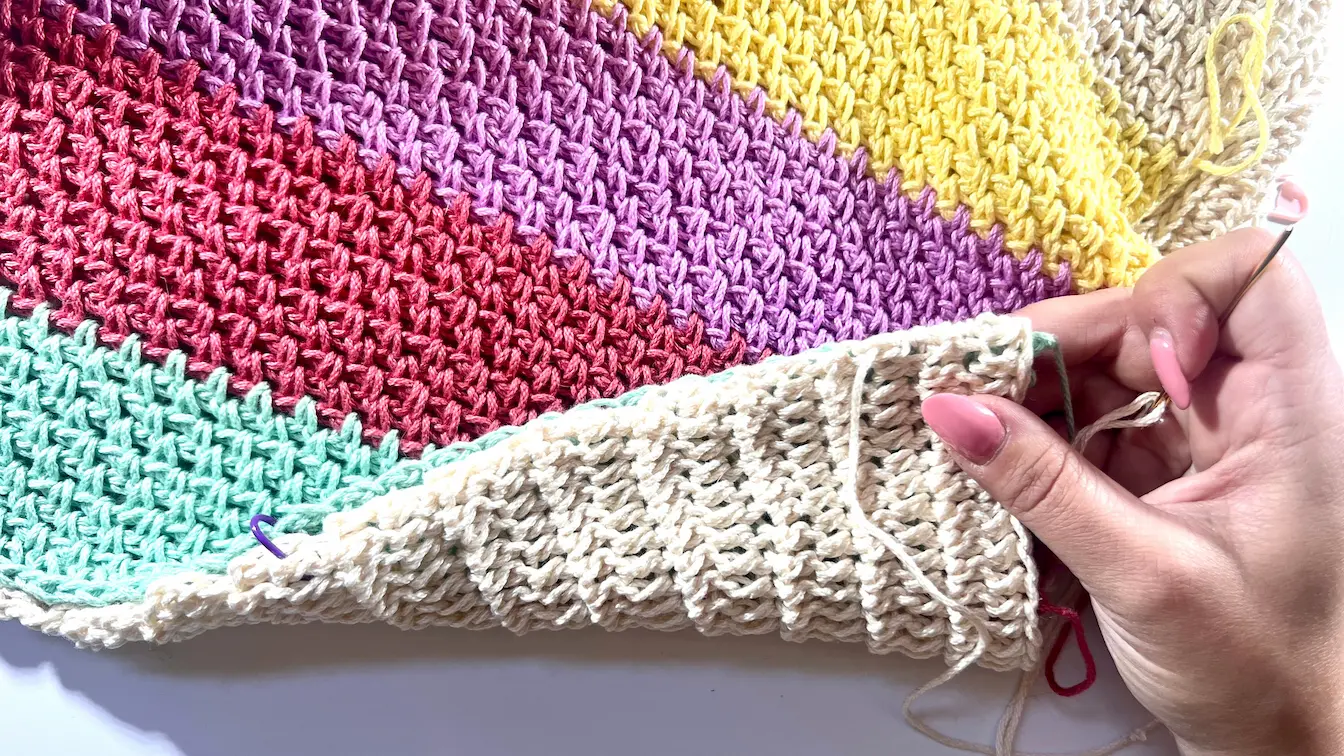
Make sure your front panel, featuring the Moss Stitch Stripes, is positioned on the right, while the back panel is on the left side with the right side facing out, as illustrated in the picture below. Insert your hook and begin crocheting your sleeve starting from the Moss Stitch Front Panel. Also, make sure to leave a slightly longer tail at the end of each stripe so you can seam the sleeve later using the same colour.

How to calculate the number of stitches for your sleeve in Moss Stitch you need based on gauge:
You measured that your sleeve needs to be for example 16" (or any different measurement for your needs) wide.
Your gauge is 20 stitches in 4" for the Moss Stitch.
✏️ Step-by-step:
Divide the number of stitches by the number of inches in the swatch to get stitches per inch:
20 ÷ 4 = 5 stitches per inch
Multiply by your desired width (in inches):
5 × 16 (or your desired width of the sleeve) = 80 stitches total
Moss Stitch needs an odd number of stitches, so round to the nearest odd number:
➤ Use 79 or 81 stitches.
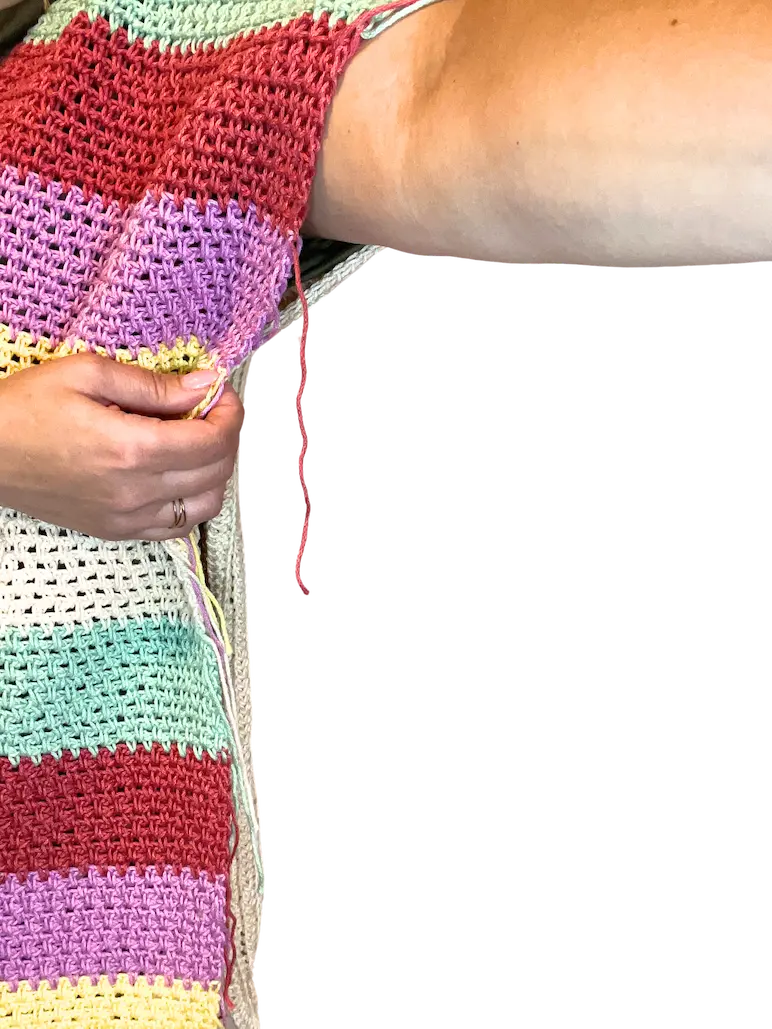
Please note: in this picture, the sleeve appears slightly shrunken. Don’t worry—your sleeve will have nice, straight sides. I made a mistake and didn’t calculate the gauge correctly. Use the photo as a reference only.
How to calculate the number of rows for a 10" long Moss Stitch sleeve:
Your desired sleeve length is 10" (or any different measurement for your needs).
Your Moss Stitch gauge is 16 rows in 4".
✏️ Step-by-step:
Divide the number of rows by the number of inches in the swatch to get rows per inch:
16 ÷ 4 = 4 rows per inch
Multiply by your desired length (in inches):
4 × 10 = 40 rows total (4 different colours)
Right Sleeve in Modified Camel Stitch
You should have the same markings as you did for the left sleeve. Since you’ll be crocheting the sleeve sideways, refer to the formula below to determine how many stitches you need for the sleeve length.
Once you know the stitch count, insert your hook at the marked spot and start chaining with Colour A.
How to calculate stitches for the length of your sleeve (working sideways):
You measured that your sleeve needs to be 10" long (or any different measurement for your needs).
Your gauge for Half Double Crochet (HDC, worked sideways) is 17 stitches in 4".
✏️ Step-by-step:
Divide the number of stitches by the number of inches in the swatch to get stitches per inch:
17 ÷ 4 = 4.25 stitches per inch
Multiply by your desired length (in inches):
4.25 × 10 = 42.5 stitches total
For HDC, it doesn’t matter if the stitch count is odd or even, so round to the nearest whole number:
➤ Use 42 or 43 stitches
ROW 1 – Work regular HDC stitches across, starting in the second chain from the hook. Once you reach the edge of the panel, slip stitch into the second row of the Moss Stitch above (this secures your first HDC row). Then make 2 more slip stitches into the rows above—these count as the turning chains for your next row.
ROW 2 – Turn your work and begin HDC stitches in the front loop only (FLO), just like you did when working the panels in HDC.


Continue until you reach the HDC panel.
On this side, the stitches are clearly visible. To join each row, make one slip stitch into the first stitch above, then make two more slip stitches—these will count as your turning chains for the next row. Basically, once you reach the edge, you’ll always make three slip stitches: one to join the row and two to start the next one.

Seaming the sides of the panels
Now it’s time to seam the sweater. Make sure the panels are wrong side out before you begin.
If you’re starting from the HDC sleeve, use the long tail you left to whipstitch the sides together with Colour A, all the way down to the bottom of the sweater.
For the Moss Stitch sleeve, first seam the sleeve itself using the matching colour for each stripe. Then, for the side seam, use only Colour A.

Border (neckline, sleeves, bottom of sweater)
To finish off your sweater, add a clean border using single crochet (SC) around the neckline, sleeve openings, and bottom edge.
For the sleeves, start at the seam.
For the neckline, start at the back panel where the two panels are joined.
For the bottom edge, start in the middle of the back panel.
Simply insert your hook into each stitch and work SC evenly all the way around.
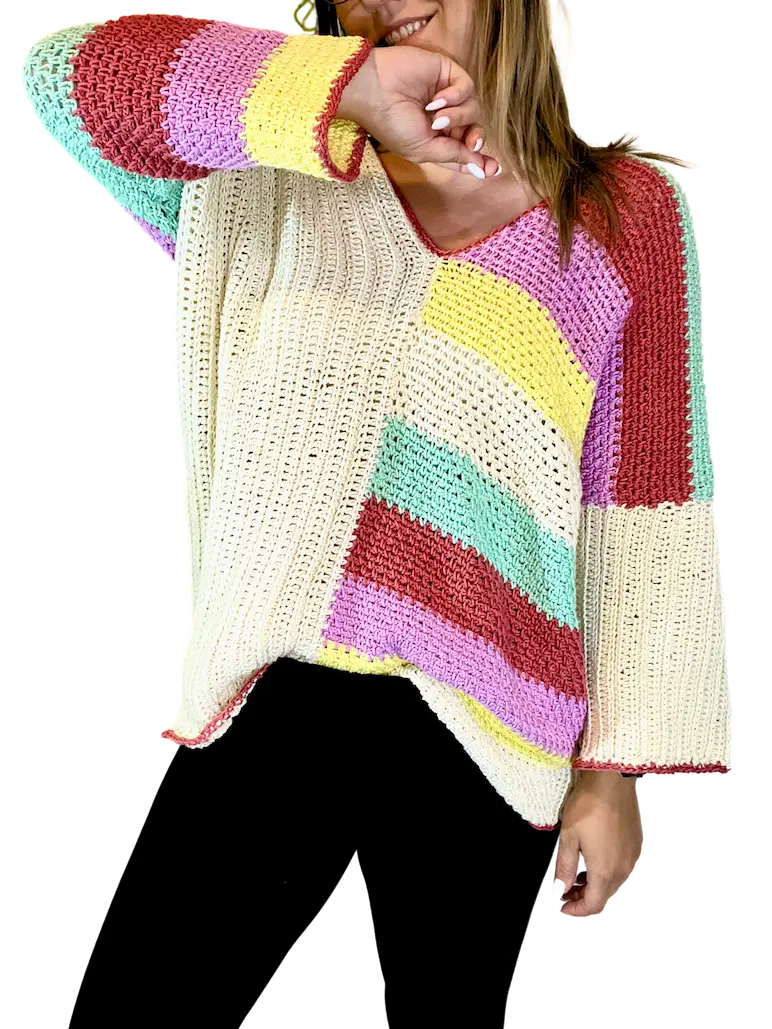
TA-DA! YOUR HAPPY STRIPES SWEATER IS NOW FINISHED AND READY TO WEAR!
I hope you enjoyed making your Happy Stripes Sweater! 💛If you loved this pattern, don’t forget to like, comment, or share this post to spread the joy.
📸 Finished your sweater? I’d LOVE to see it!Tag me on Instagram @happyheartsy so I can share your beautiful work with the community — or email me a photo at lenka@happyheartsy.com
Let’s inspire each other one colourful stitch at a time 💫


Comments