
Free Crochet Kindle Sleeve Pattern with Flower & Leaf Designs
- 2 hours ago
- 10 min read
I wish I knew how to read a book and crochet at the same time. Unfortunately, that's one skill I haven't mastered yet!
Even so, I always try to make time for reading whenever I can. Whether it's a few pages before bed or a quiet moment during the day, having a good book nearby is one of my favourite ways to relax.
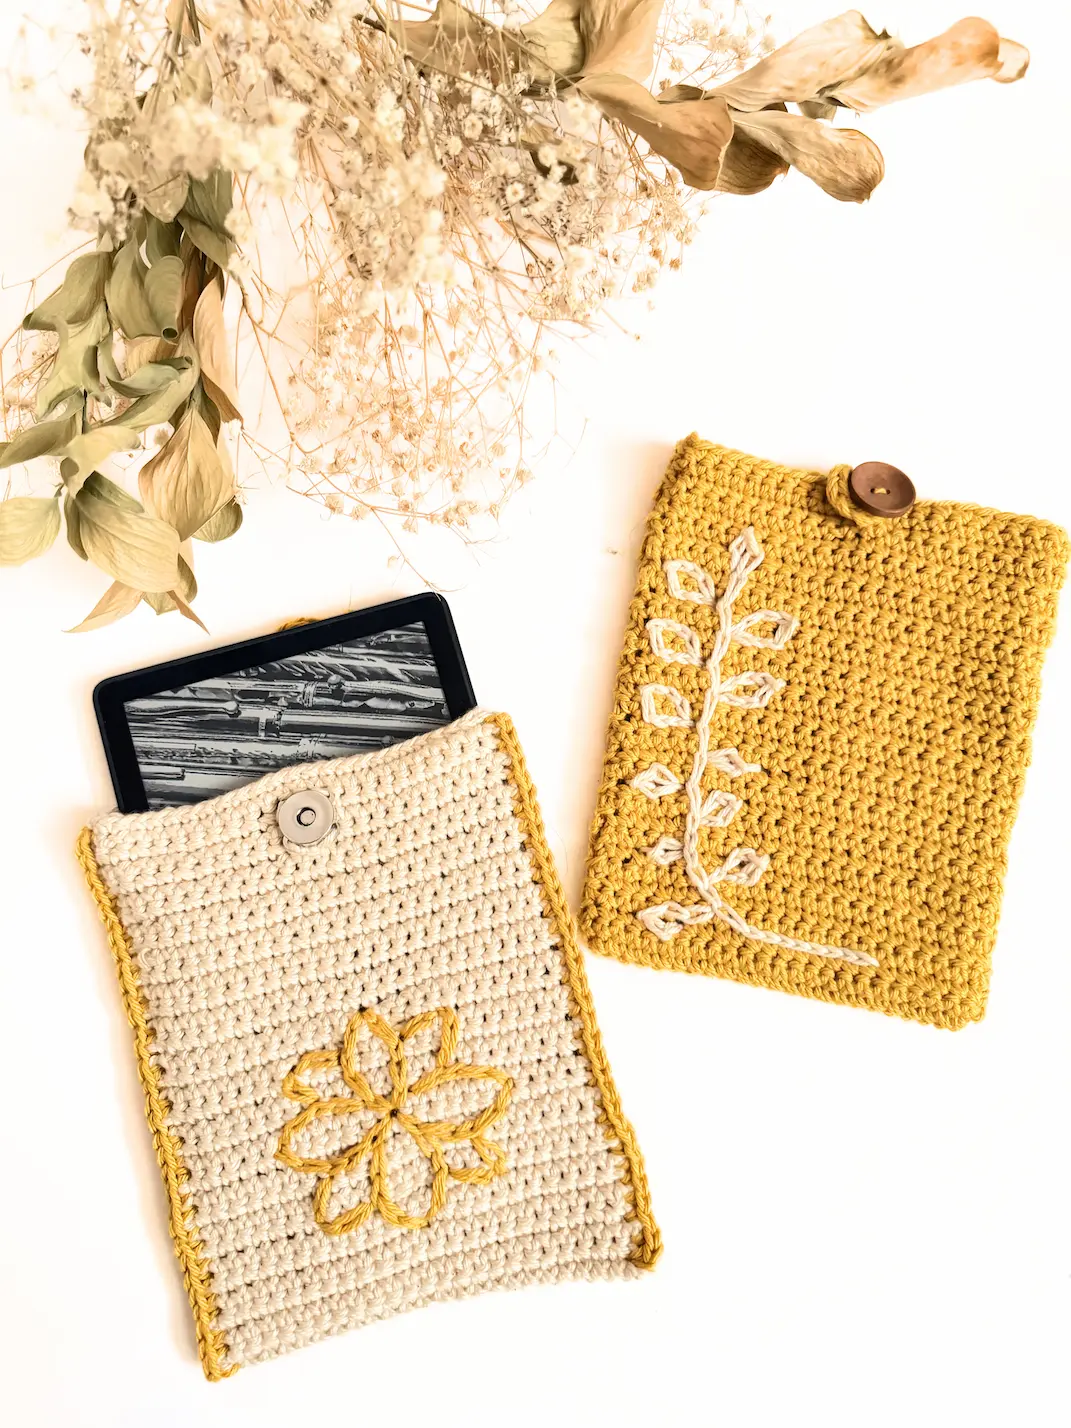
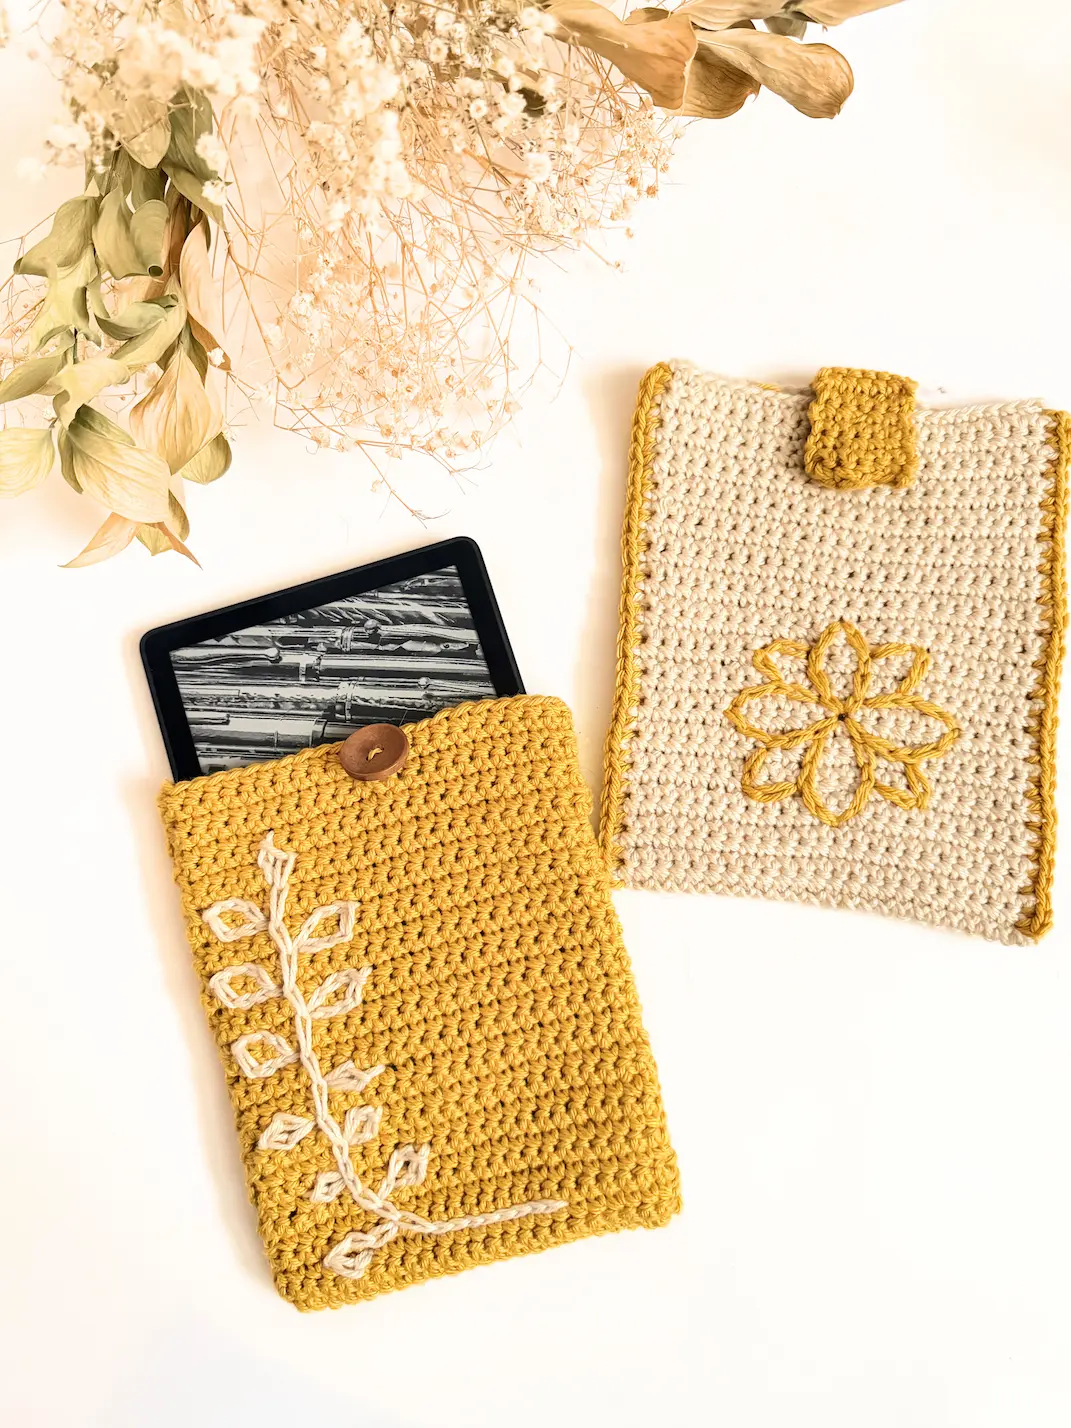
That's exactly what inspired me to create The Cozy Reader Sleeve. This crochet Kindle sleeve is worked using simple Single Crochet stitches and includes two surface crochet designs, a flower and a leaf version. You'll also find different assembly and closure options, along with instructions for customizing the sleeve to fit your device.
So if you're looking for a practical project to protect your Kindle or e-reader while adding a handmade touch, let's get started!
If you'd like to support my work and get a printable, ad-free version of this pattern, please visit my shop or Ravelry.
HUGE THANKS to everyone who supports me through purchases, likes, shares, comments, tags, or feedback! It truly means a lot to me.

This post contains affiliate links for the yarns I used and love and it also displays ads. I make a small commission if you purchase through these links or through the Ads which in no way affects the cost to you. The revenue I receive from Ads, and affiliate links, help me to support my small business which allows me to share my free crochet patterns/content with you. Thank you for your understanding and your support! It means a lot to me.
This pattern and all images associated with this pattern cannot be sold or claimed as your own. You are allowed to sell finished project. Feel free to mention me for creating this pattern, it would make my day and I can share your finished project on my social media if you allow.
Don’t forget to share your project on Instagram! If you have your account you can tag me under @happyheartsy. I would love to see your finished The Cozy Reader Sleeve so I can share it with others.
Before we get into the pattern, I also created The Ultimate Crochet Hack Sheet, a handy 2-page PDF designed to keep your crochet essentials in one place.
Inside, you'll find crochet abbreviations and symbols, hook size conversions (US and UK), yarn types with recommended hook sizes and project ideas, and other quick-reference guides that are useful to keep nearby while crocheting.
Feel free to click on the image below or visit my shop to learn more.
What you need for this Cozy Reader Sleeve:
Yarn Used for the sleeves
Main Colour for 1 - 87yd/80m, 1.41oz/40g
Contrast Colour - 5.5yd/5m, 0.1oz/2.5g
Hook - 4mm/US G-6
Button, Magnetic Button - depending on your preferred closure
Scissors, Yarn Needle, Stitch Markers
Measurements of sleeves: Fits a 5" × 7" Kindle or e-reader
Gauge: for 2"x2" = 10sts x 10rows
Sizing Note: Instructions for adjusting the sleeve to fit other e-reader and tablet sizes are included in the pattern.
NOTES:
This pattern is made using Single Crochet (SC) stitches only.
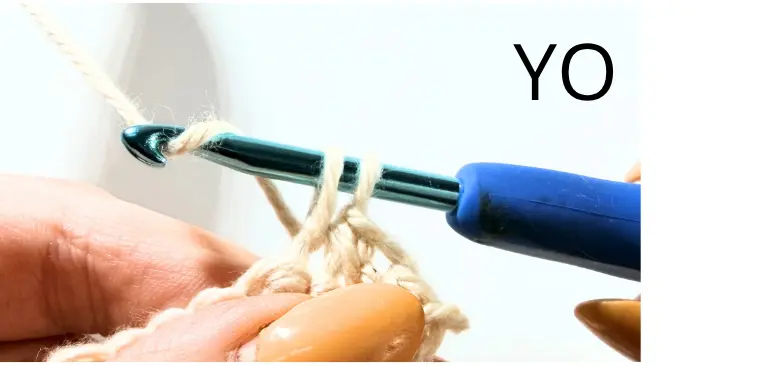
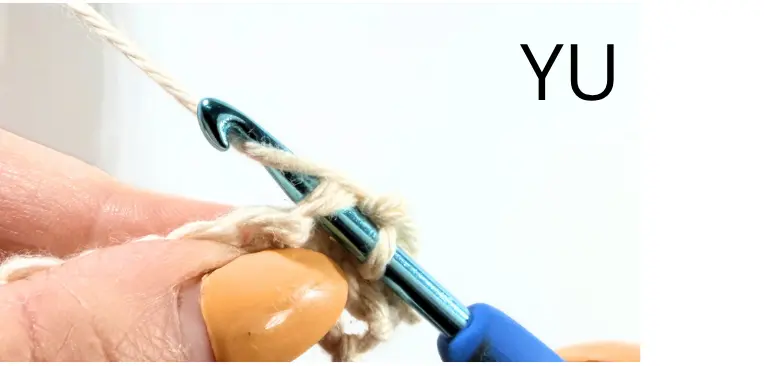
When inserting your hook into the stitch, use Yarn Under (YU) for a slightly different look and texture.
Ch 1 at the end of each row does NOT count as a stitch. It is only a turning chain.
The sleeve is worked as one rectangle and then folded in half.
This pattern includes two surface crochet designs: a flower and a leaf.
Detailed instructions on how to read the graphs and work surface crochet are included in the pattern.
Two assembly options and two closure options are included, allowing you to customize the final look of your sleeve.
This pattern is designed to fit a 5" × 7" Kindle or e-reader. If your device has different measurements, don't worry! In the Customizing the Measurements section, you'll find a simple formula to help you calculate your own stitch counts and adjust the sleeve size.
Abbreviations:
Ch - Chain
FCH - Foundation Chain
YU - Yarn Under
YO - Yarn Over
St - Stitch
SC - Single Crochet
Custom Measurements
This sleeve is designed to fit a 5" × 7" Kindle or e-reader, but it can easily be adjusted for other devices.
Please Note: The calculations below are based on my gauge of 10 stitches × 10 rows = 2" × 2". If your gauge is different, use your own gauge measurements when calculating the number of stitches and rows needed.
First, measure the width and height of your device.
Using my gauge:
5 stitches = 1"
5 rows = 1"
Use the following formulas:
Width (Starting Chain)
Device Width (inches) × 5 = Number of Stitches
Height
Device Height (inches) × 5 = Number of Rows
Since the sleeve is worked as one rectangle and folded in half, multiply the height rows by 2.
Example:
For a device measuring 5" wide and 7" tall:
Width: 5 × 5 = 25 stitches
Height: 7 × 5 = 35 rows
Since the sleeve is folded in half:
35 × 2 = 70 rows
Fitting Test
The calculations above are only a starting point. As you work the sleeve, place your device against the project to check the fit.
After a few rows, check that the width comfortably fits your device. For my sleeve, the calculation suggested 25 stitches, but I used 24 stitches instead. Since the surface crochet designs are centred, I preferred working with an even number of stitches to make it easier to find the centre line.
As the rectangle grows, continue checking the fit. Once it is long enough to fold around your device, test it before adding additional rows. For my sleeve, the calculation suggested 70 rows, but I stopped at 68 rows because I was happy with the fit.
The surface crochet graphs remain the same. Simply add additional stitches and rows around the design as needed.
Directions for both sleeves
Start with ch 25.
ROW 1 - Into the second Chain (Ch) from the hook make 1 SC (once inserting your hook into the chain or stitches, do Yarn Under (YU) first then pull up a loop (two loops on your hook) and then Yarn Over (YO) and pull through two loops). Ch 1. Turn. (24sts)
ROW 2 - Make SC into each stitch across the row (don’t forget to do YU). Ch 1. Turn. (24 sts)
ROW 3 - ROW 68 = Repeat Row 2
Now you should have a long rectangle.

How to Surface Crochet
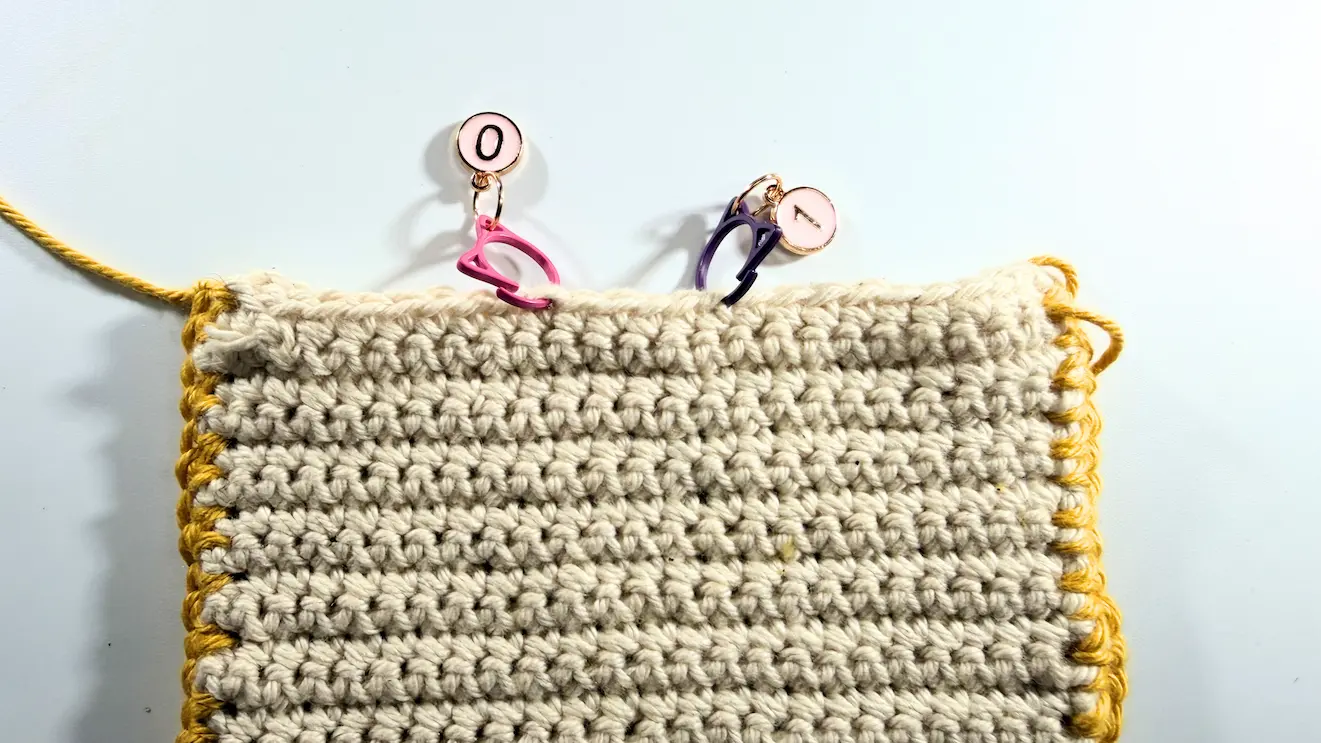
For surface crochet, you will work Slip Stitches over the existing stitches. For both versions, first find the starting point.
For the flower, start in the centre.
For the leaf, begin with the stem and work your way from right to left (+ from bottom to top)
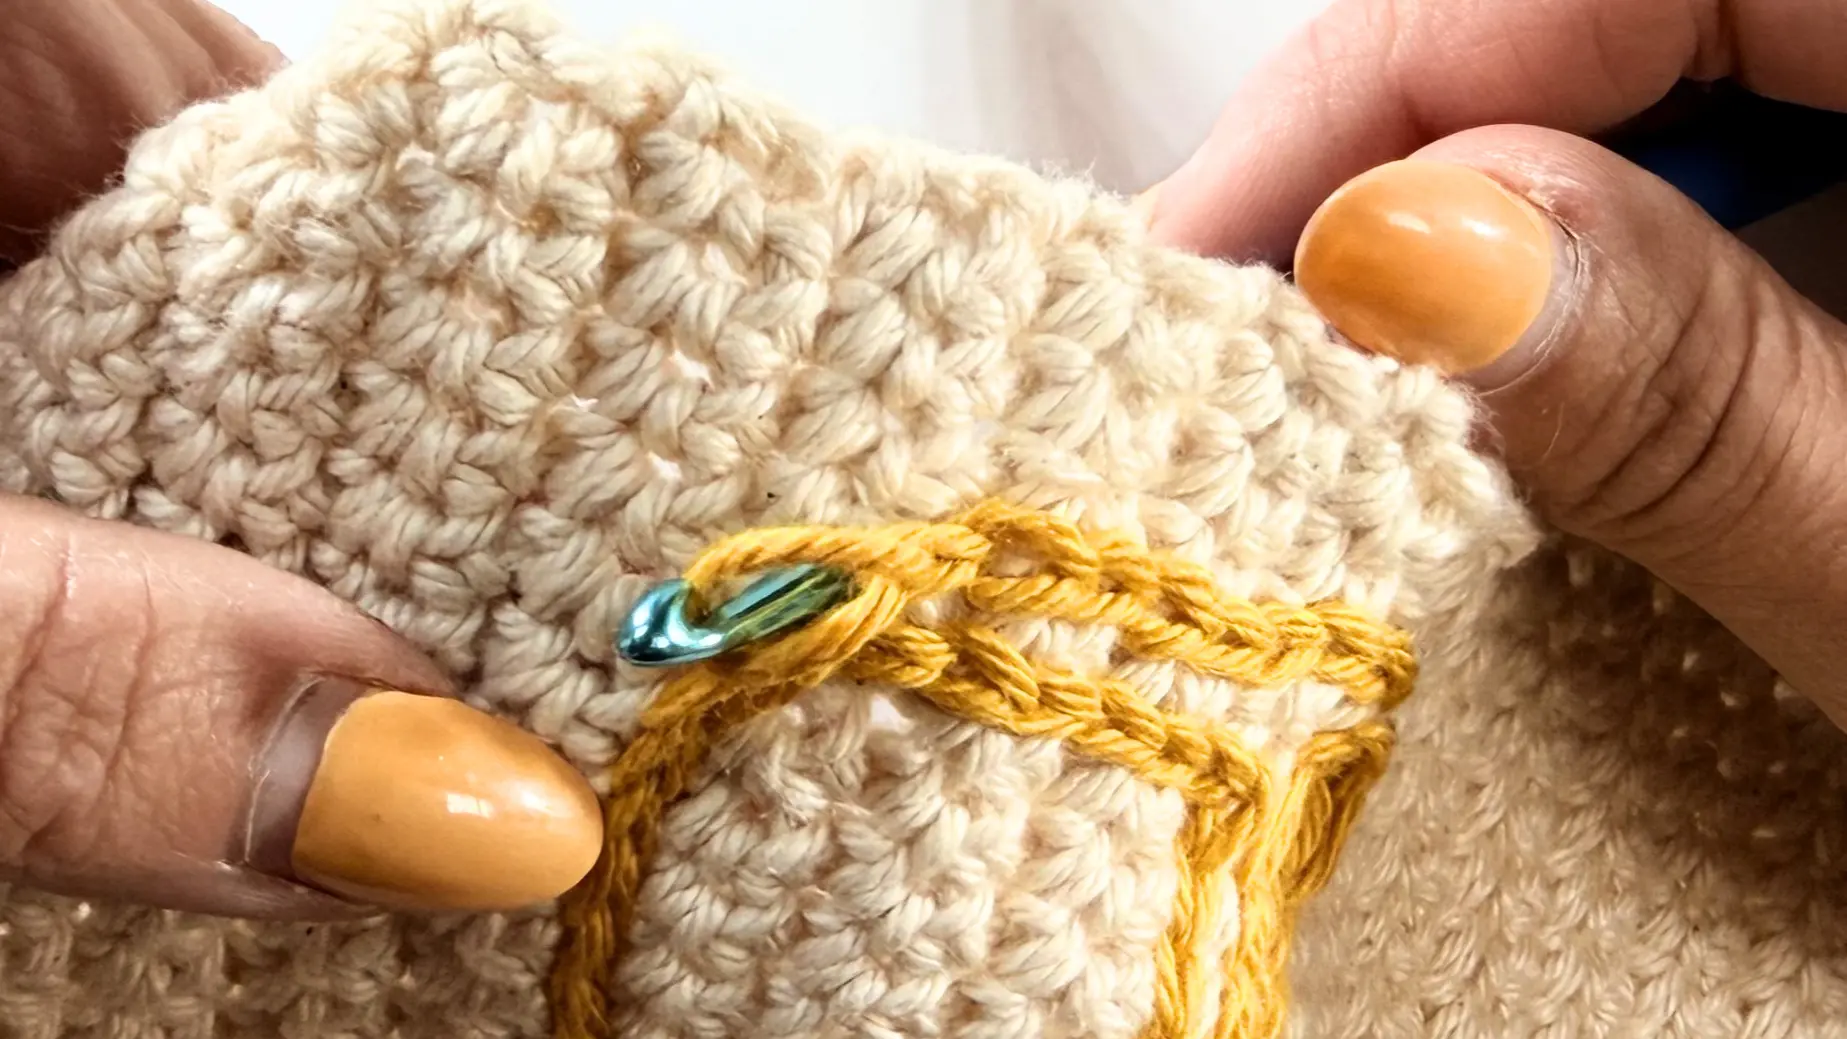
Stitch markers can be very helpful for marking the placement before you begin crocheting.
For different sleeve sizes, the graph itself stays the same. Simply add more stitches and rows to the sleeve as needed. (See the custom sizing section below for more details on adjusting the measurements.)
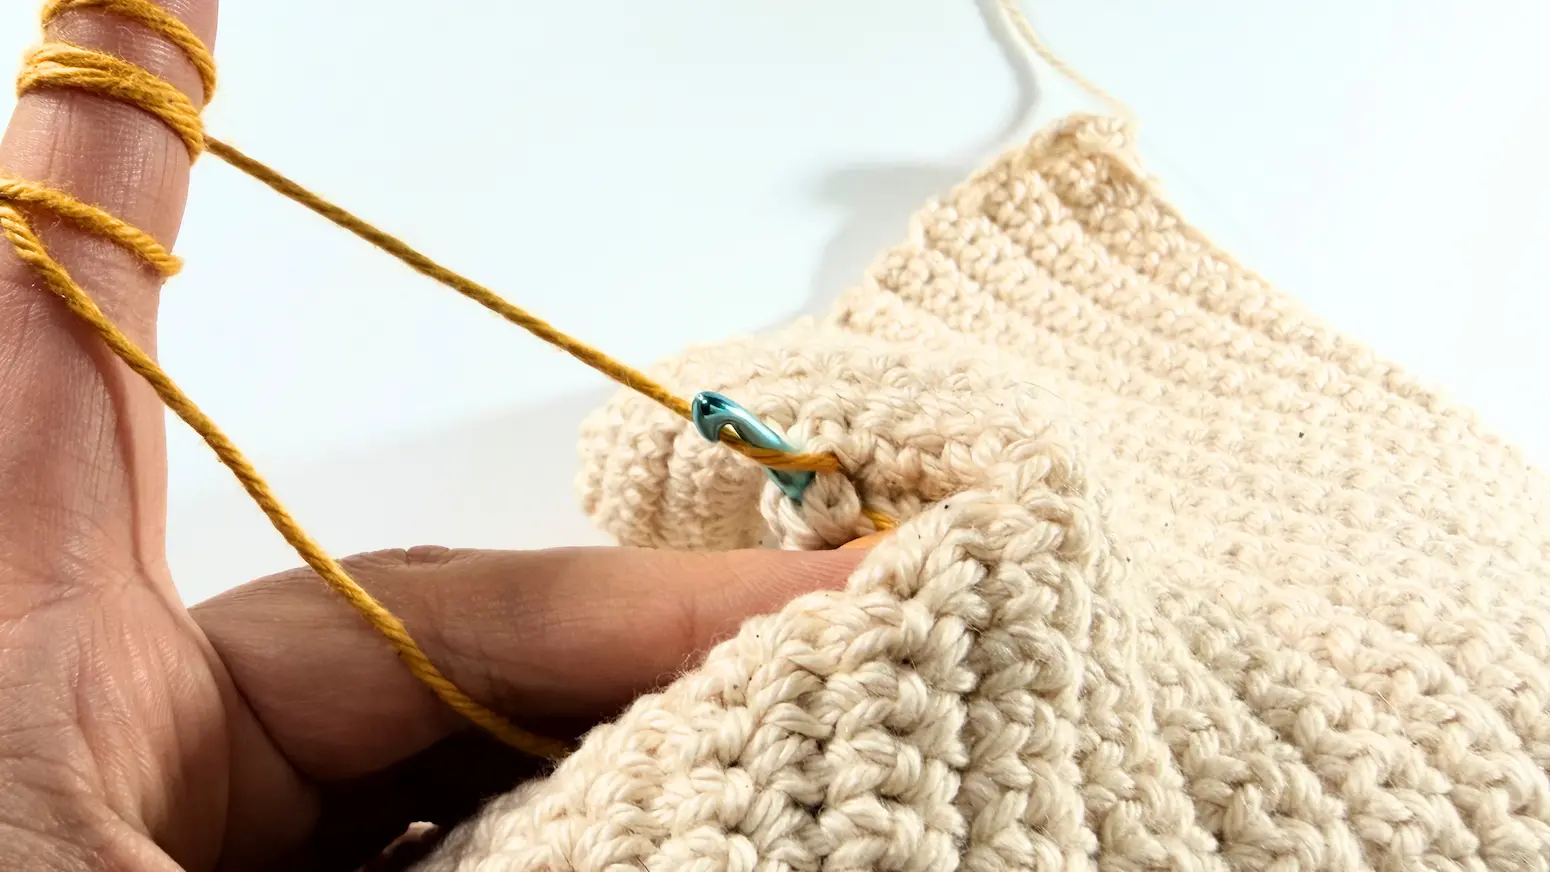
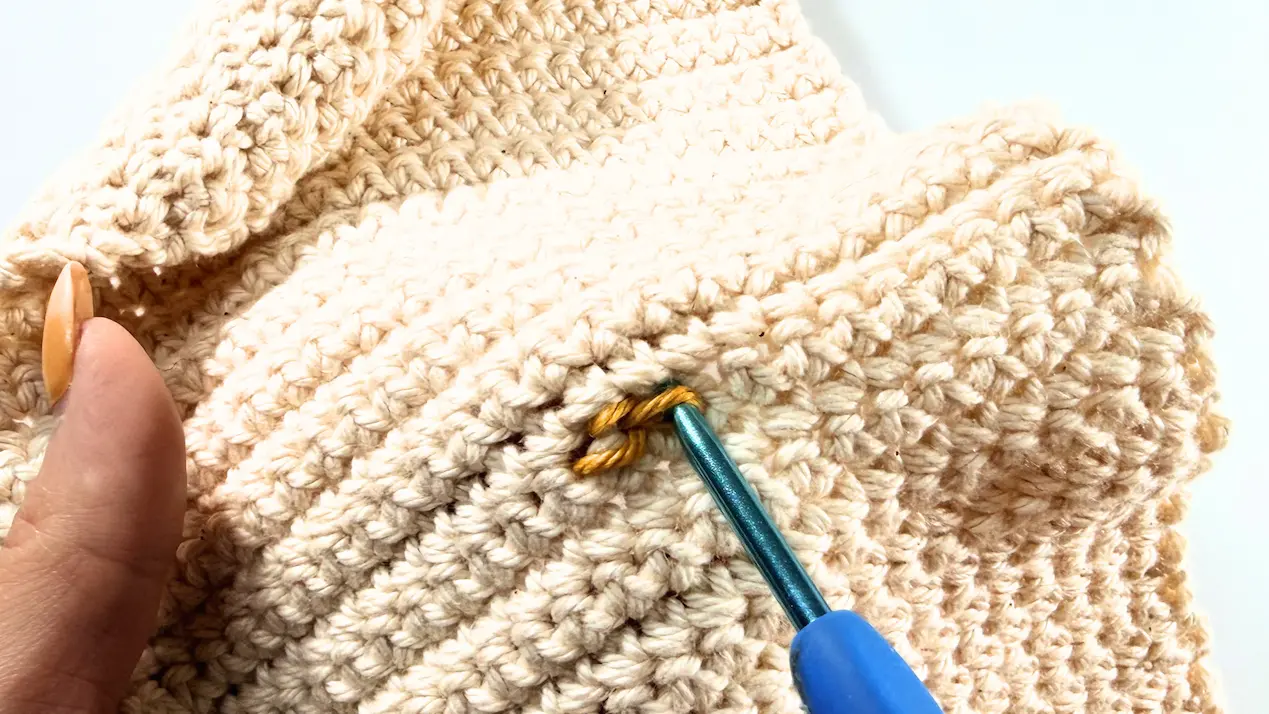
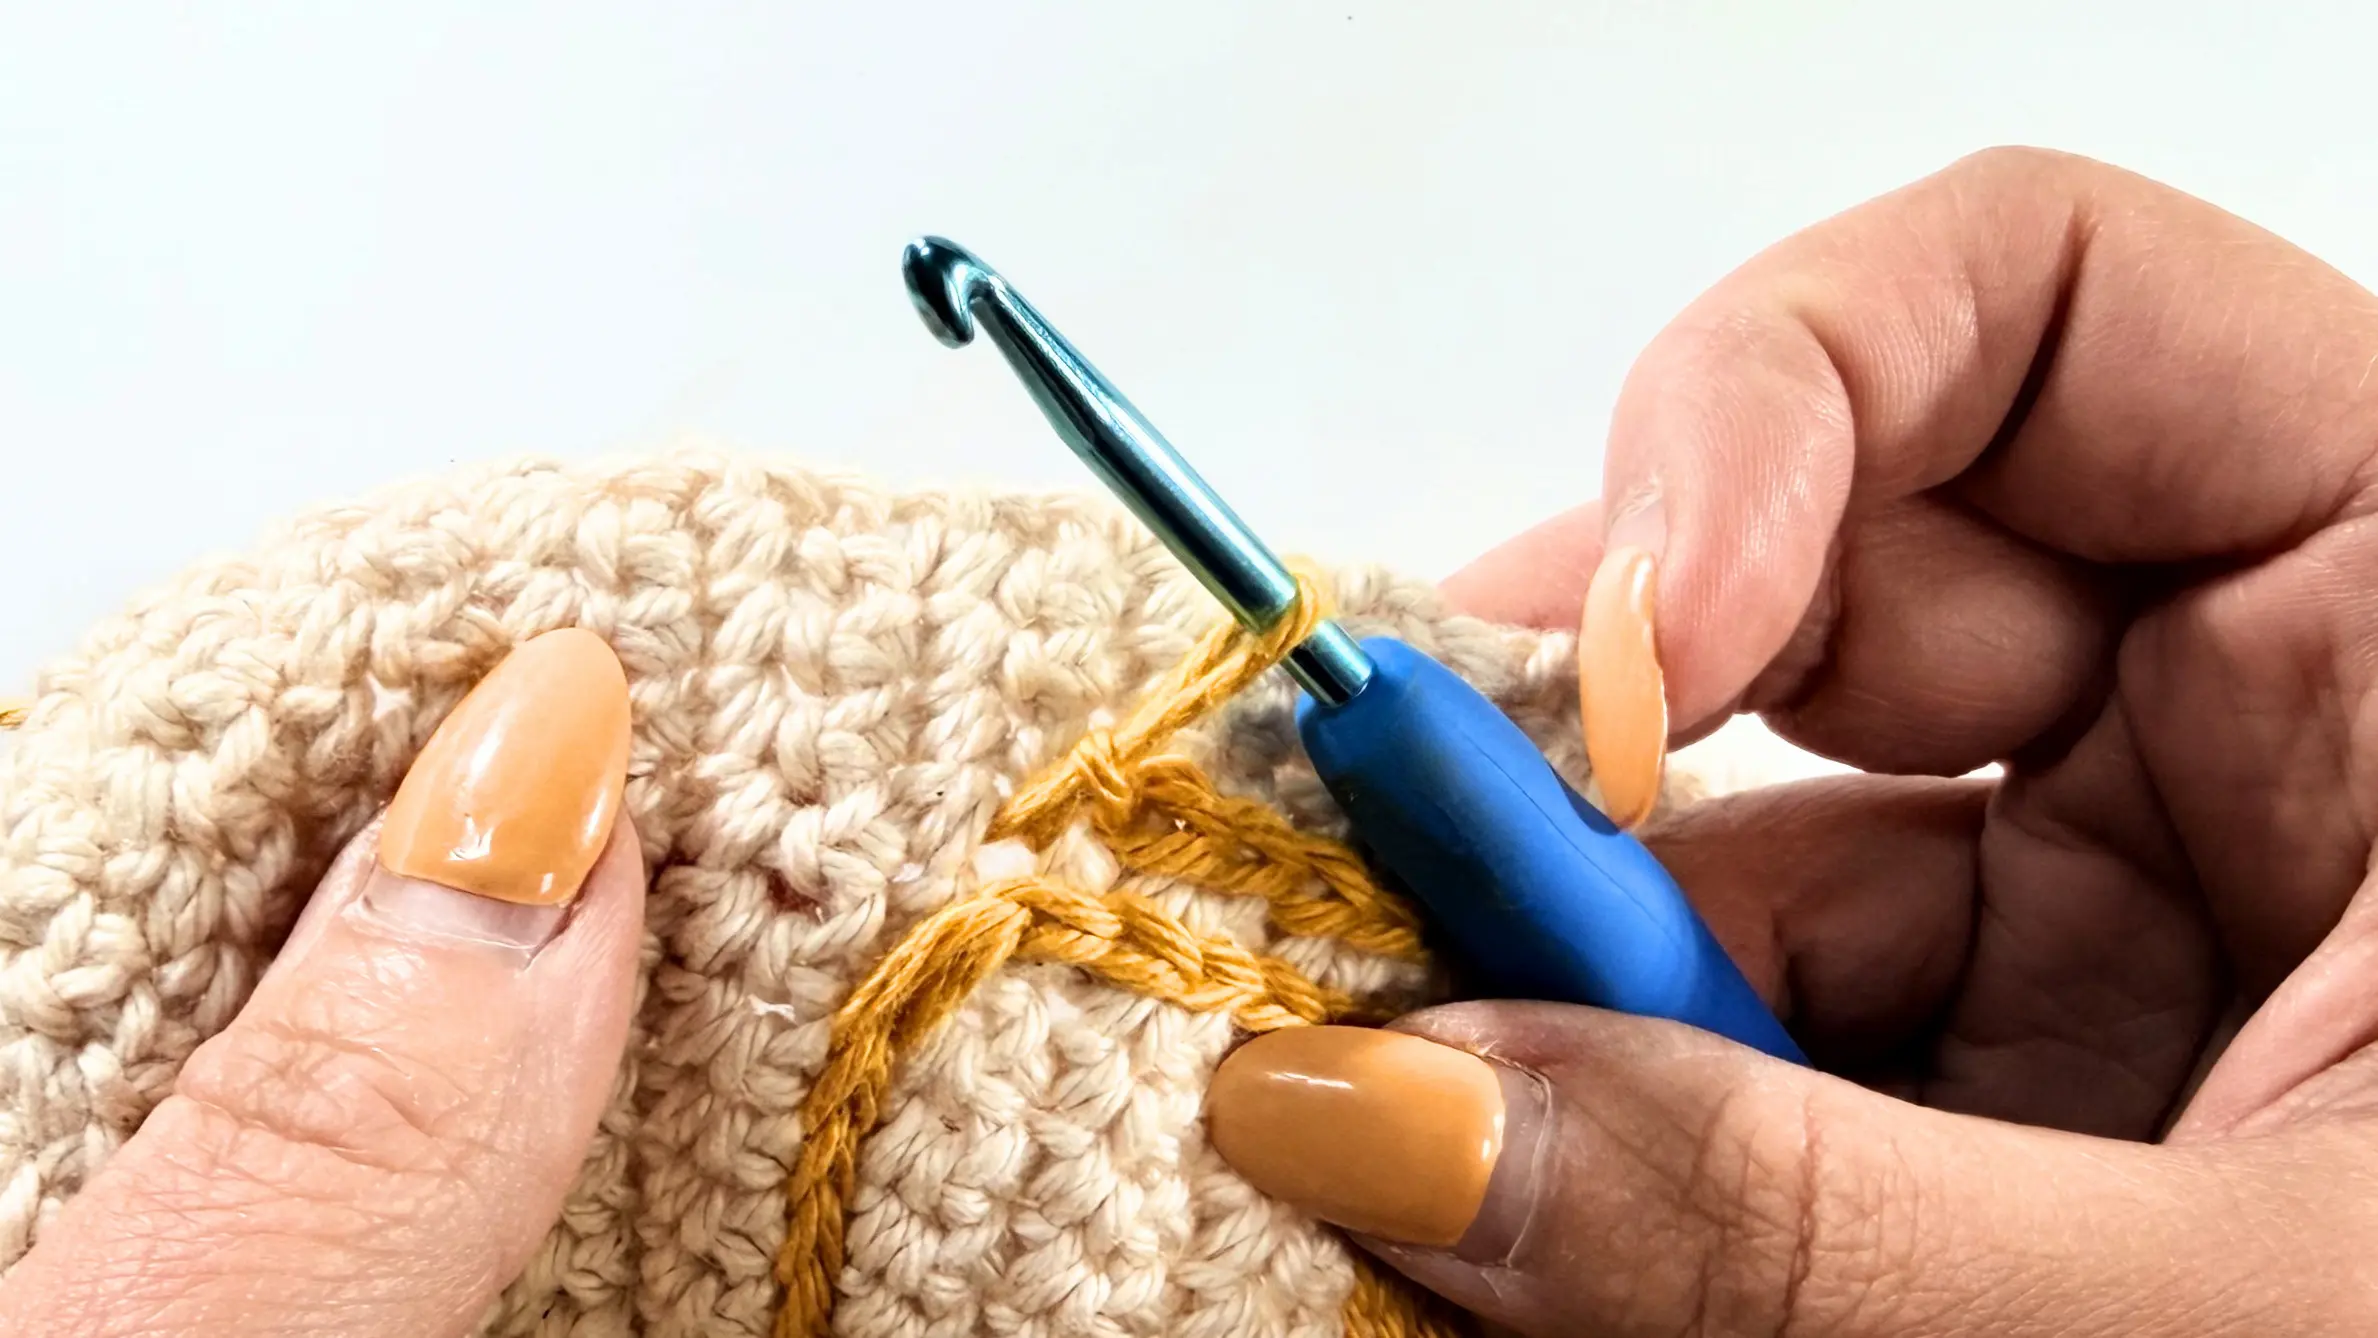
Once you find the spot, insert the hook from the right side to the back and yarn over. Then pull up a loop.
Then insert the hook into the next corner (wherever the pattern shows). Yarn over from the back and pull the loop through the project and through the loop on your hook.

How to Read the Graph
Follow the lines on the graph to place your surface Slip Stitches.
Think of each square as one Single Crochet stitch. Each stitch has four corners (or holes) where you can insert your hook.
For the first three examples, work one surface Slip Stitch per square, whether the line is horizontal, vertical, or diagonal.

For the last two examples, the line spans two squares within the same row or column. In these cases, work one longer surface Slip Stitch from the starting point to the ending point of the line.

Changing Direction and Moving to the Next Section
The arrows on the graph show the direction in which the surface Slip Stitches should be worked. Always work from right to left.
To avoid having multiple yarn tails, you can carry the yarn behind the project instead of cutting it after each section.
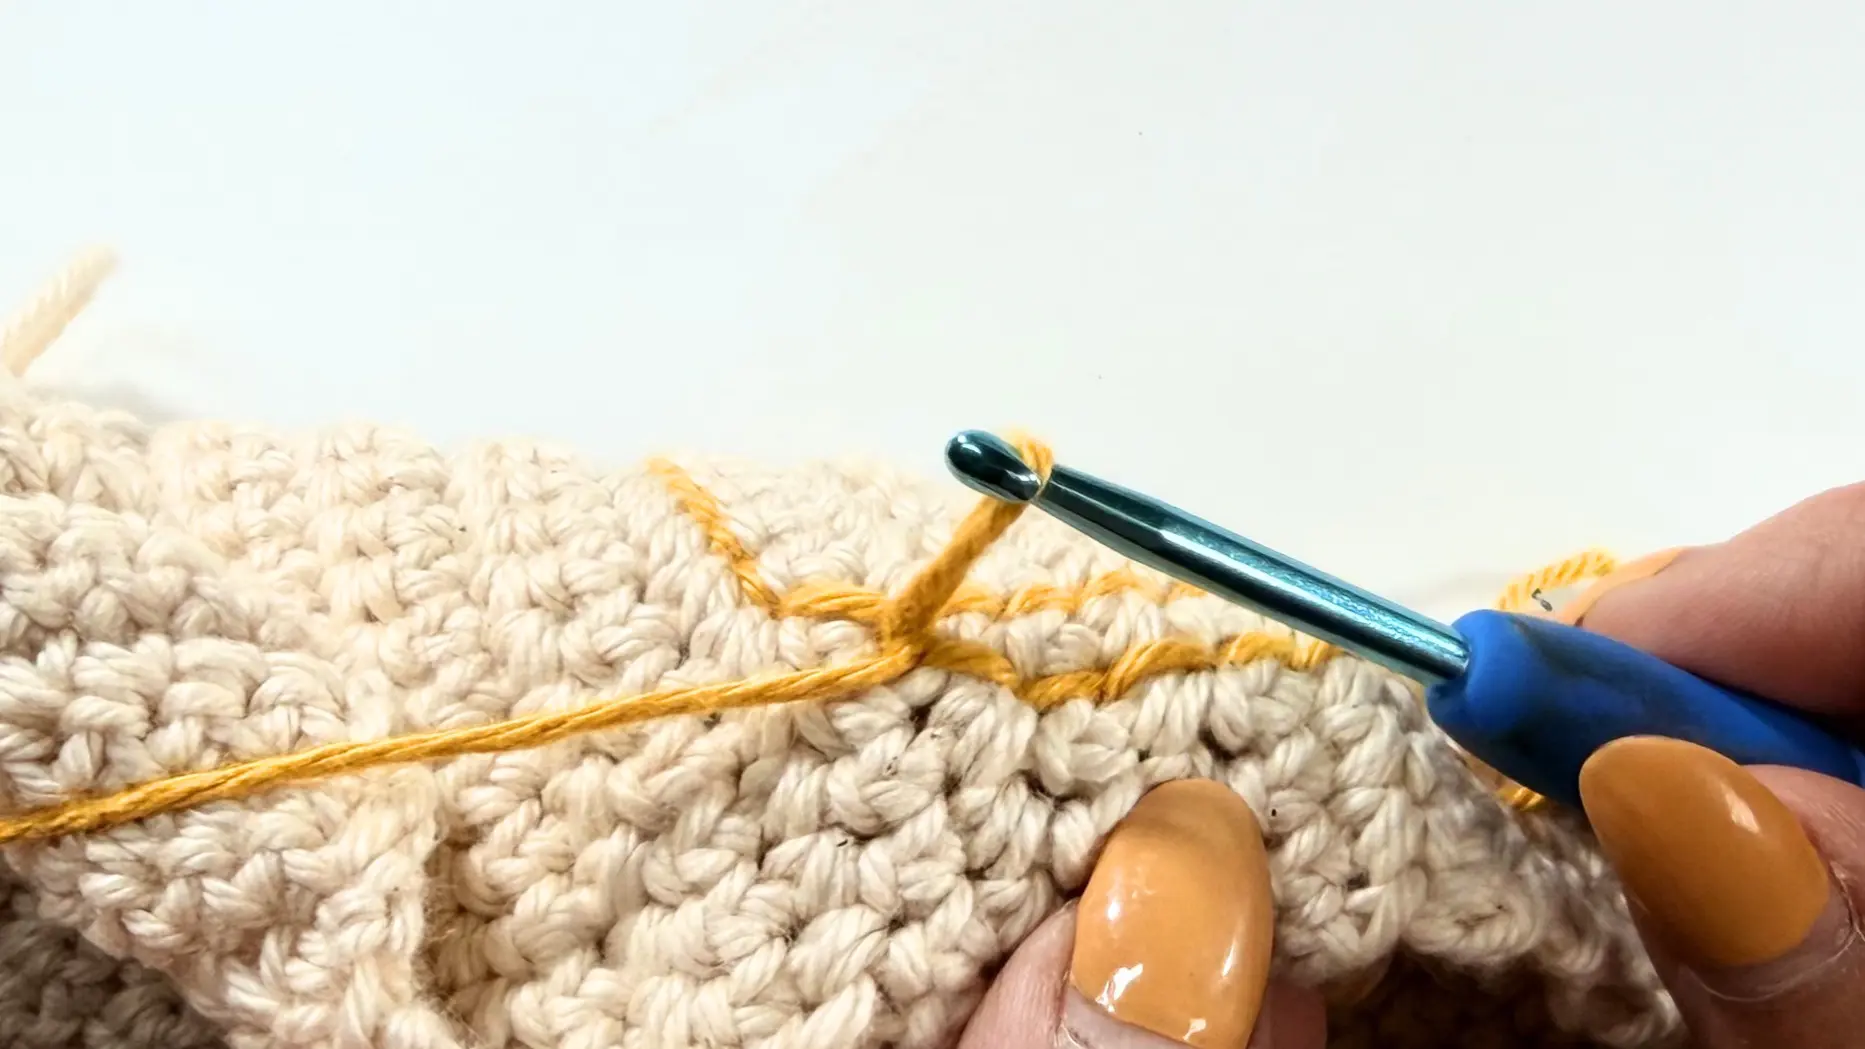
Once you have completed the last surface Slip Stitch, pull the loop up slightly longer on the front of the work and remove your hook. Insert the hook from the back into the same spot where the last surface Slip Stitch was made. Place the loop back on your hook and pull it through to the back of the project.
To begin the next section, insert your hook into the next starting point shown on the graph. From the back of the work, pull up the loop, making it long enough to reach the new starting point and leave enough yarn for the next surface Slip Stitch. Pull the loop through to the front and continue following the graph.
Fasten Off
Once your design is complete, pull the loop up slightly longer on the front of the work and remove your hook. Insert the hook from the back into the same spot where the last surface Slip Stitch was made. Place the loop back on your hook and pull it through to the back of the project.
Cut the yarn and pull the end completely through the loop. Tighten gently to secure.
Please Note
When pulling the loop to the back, insert your hook into the same spot where the last surface Slip Stitch was made. Do not insert the hook through the surface Slip Stitch itself. Instead, insert it through the opening behind the stitch.

Flower Graph Note
Start in the centre and complete the first petal.
For the next petal, start where the previous line finished instead of going back to the centre. Continue this way around the flower. This helps avoid overlapping the surface Slip Stitches in the centre and keeps the flower looking cleaner.
You may also choose to complete all of the larger petals first and then add the smaller petals afterwards.
This graph is for personal use only. Please do not reproduce, share, or distribute this chart without permission.


Leaves Graph Note
Start at the bottom of the stem and work your way to the top.
Once the stem is complete, work the leaves from top to bottom, following the arrows shown on the graph.
This graph is for personal use only. Please do not reproduce, share, or distribute this chart without permission.

Sleeve Assembly Options
Once you are done with your graph, it is time to seam the sides. There are two options to choose from!
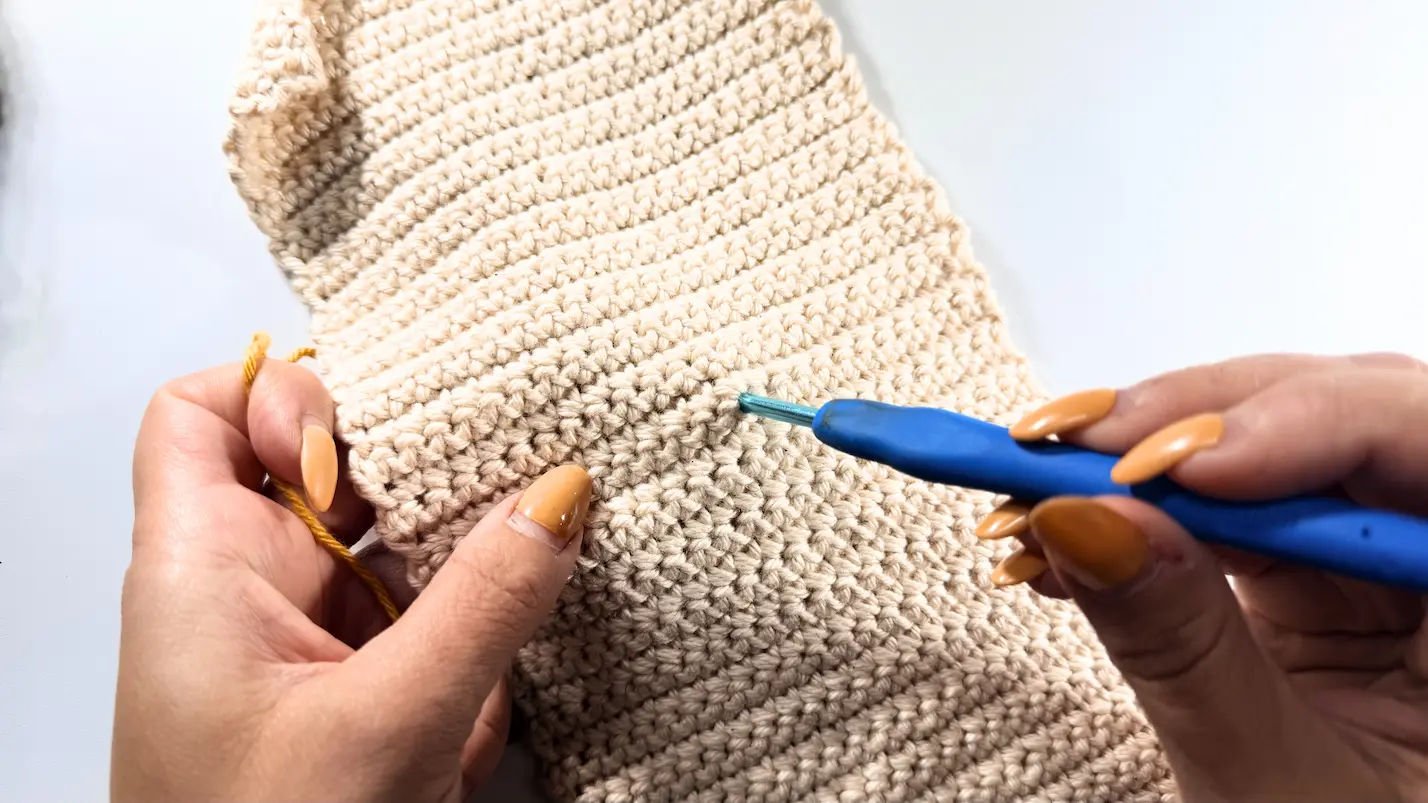
Option 1:
This version is worked with the right side of the sleeve facing out. As you can see in the picture, it is seamed with Single Crochet using a contrasting colour (the colour choice is optional).
Please Note: For this seaming method, seam the right side from the bottom up and the left side from the top down. Single Crochet has a right and wrong side, and we want both seams to look the same.
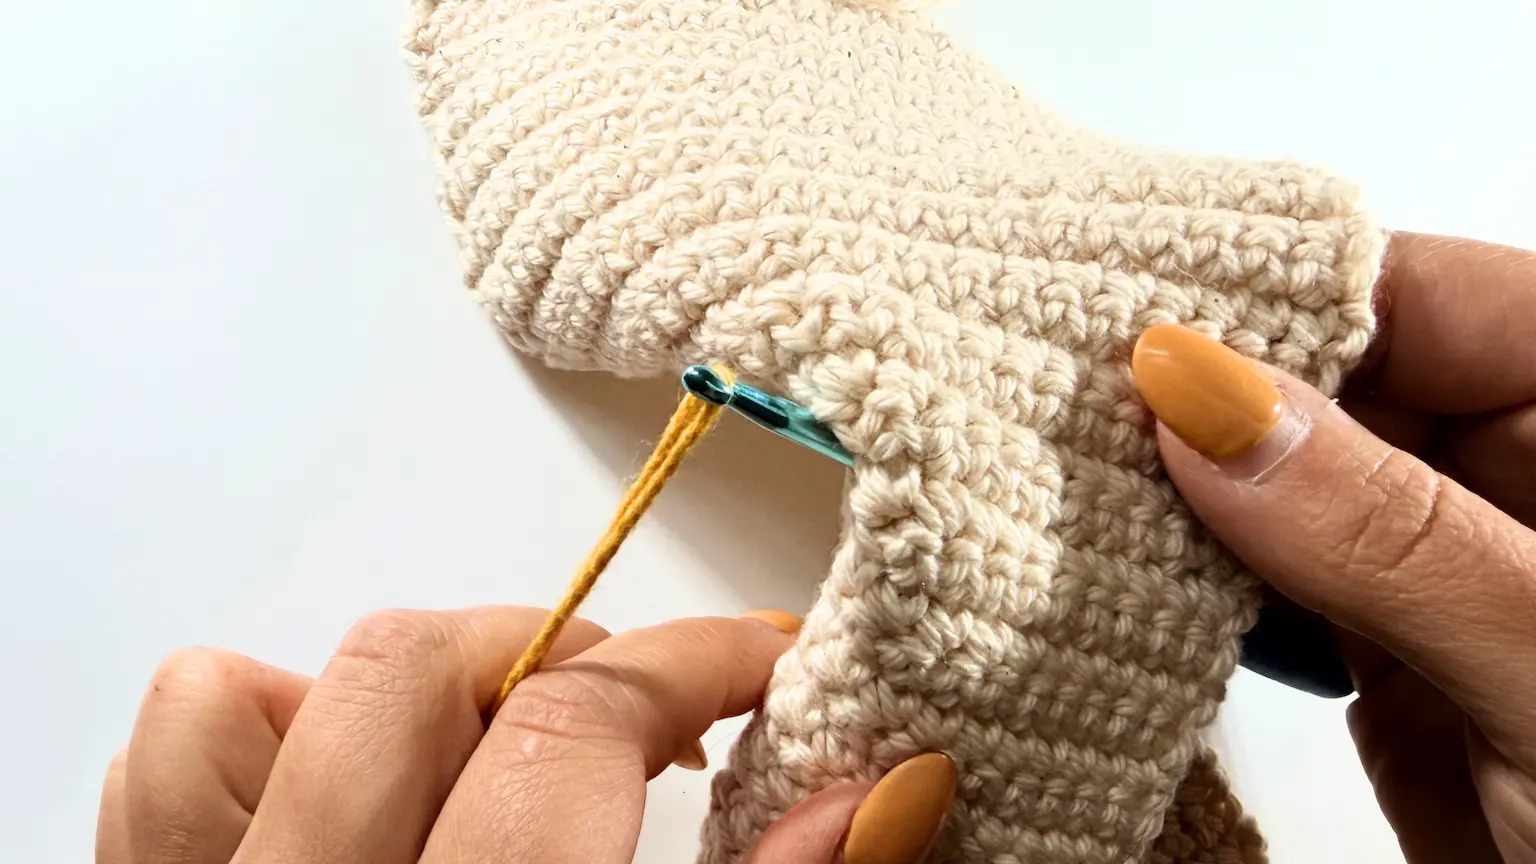
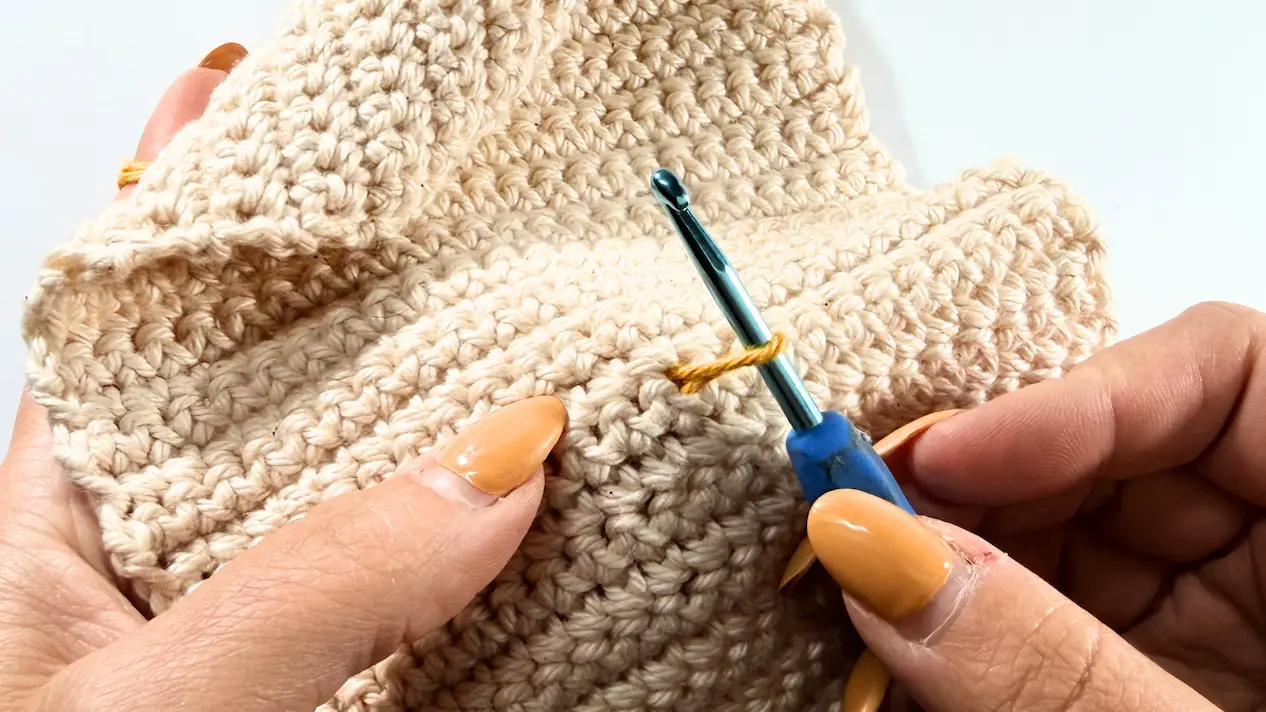
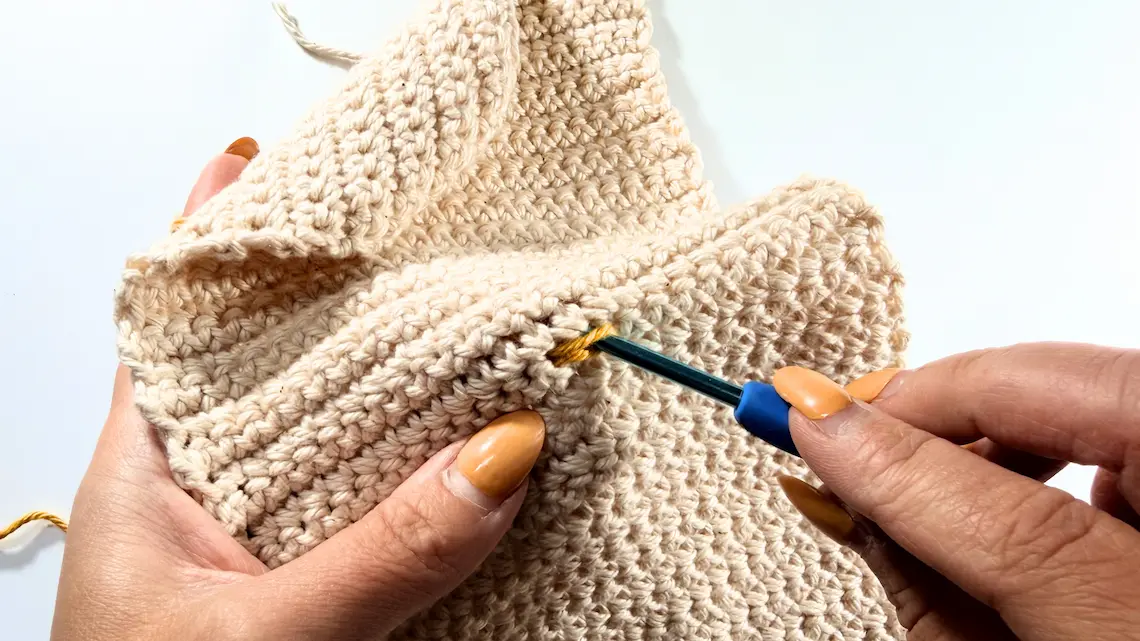
Once the sleeve is folded, start on either side (as mentioned above). Insert your hook into the first stitch on one side and the corresponding stitch on the other side. Yarn over and pull up a loop. Chain 1 to secure the yarn, then work a Single Crochet into the same stitches.
Continue working Single Crochet evenly across the entire side.

Option 2:
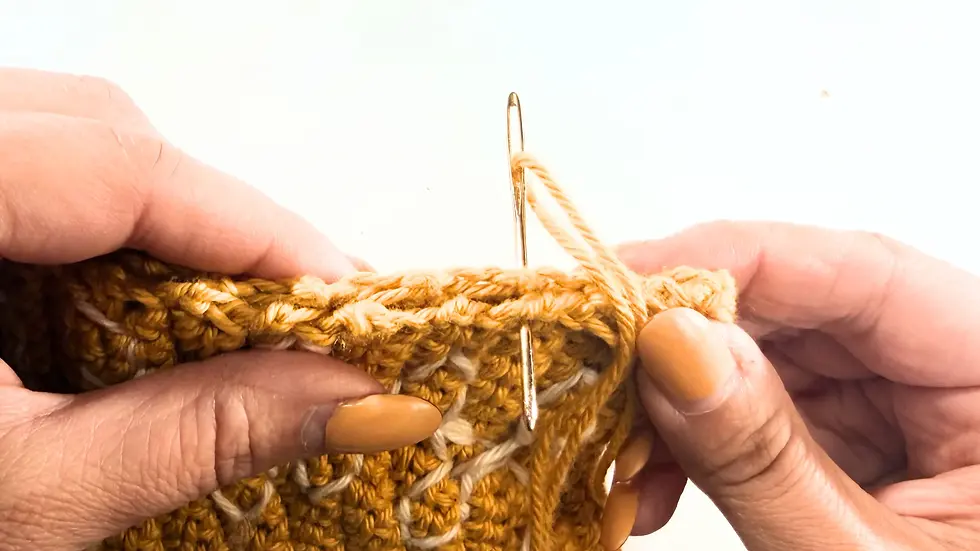
This option creates a simpler look and is worked using a yarn needle.
For this seaming method, turn the sleeve inside out (wrong side facing out). Once the sides are aligned, insert the yarn needle through both layers and seam the sides using a whip stitch.
To work a whip stitch, simply insert the yarn needle from one side to the other and pull the yarn through. Continue in this manner along the entire side.
Once both sides are seamed, turn the project right side out.
Closure Options
There are many ways to close your sleeve. Let me show you two options that I had available at home, and you can decide which one you prefer.
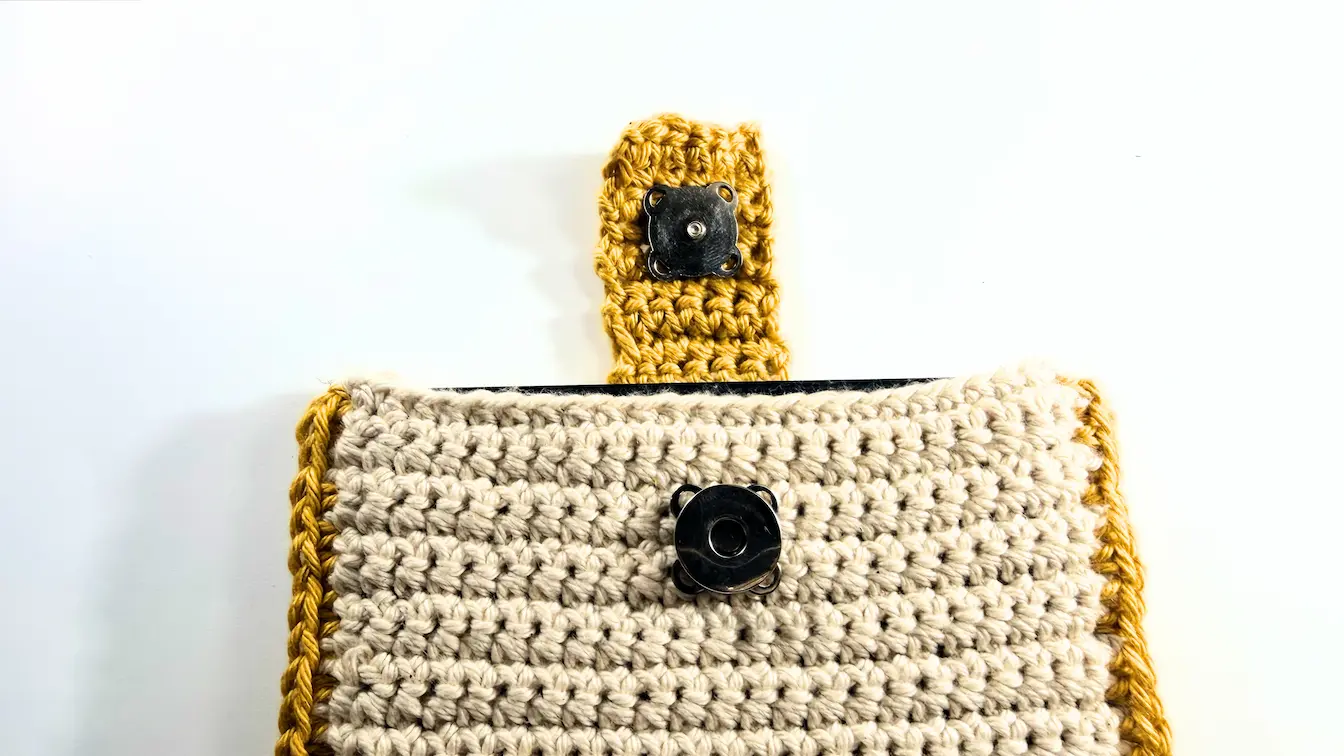
Option 1: Magnetic Button Closure
I purchased these magnetic buttons on Amazon. They have holes in each corner, making them easy to sew onto the project.
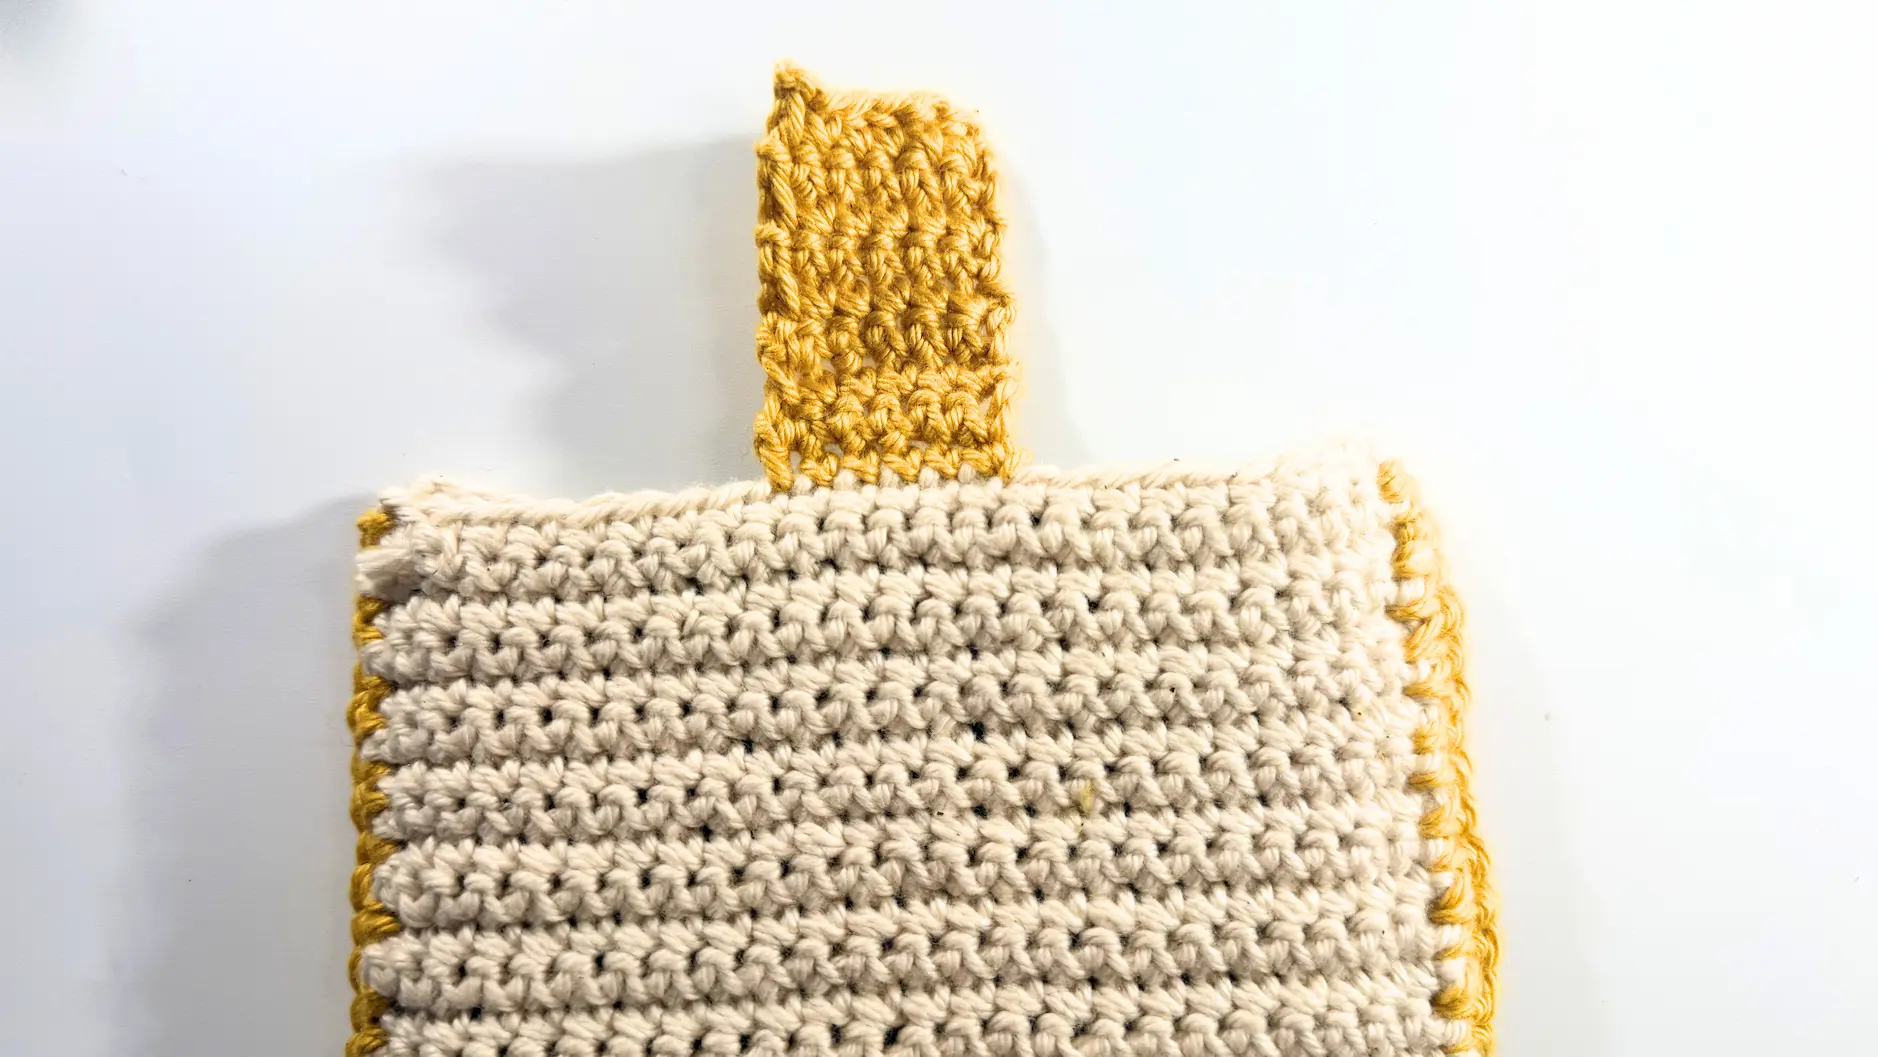
Start with the bottom part of the magnetic button that will be attached to the sleeve. Align it in the centre and sew it in place.
Next, create a strap that extends from the back of the sleeve. My strap was 6 stitches wide. Use stitch markers to help find the centre of the sleeve and work an even number of stitches. Since the sleeve has an even stitch count, I worked 3 stitches to the left of the centre and 3 stitches to the right.
Make the strap as long as needed so that it comfortably reaches over the magnetic button.
Once the strap is complete, sew the top part of the magnetic button onto the strap, making sure it aligns with the bottom part attached to the sleeve.
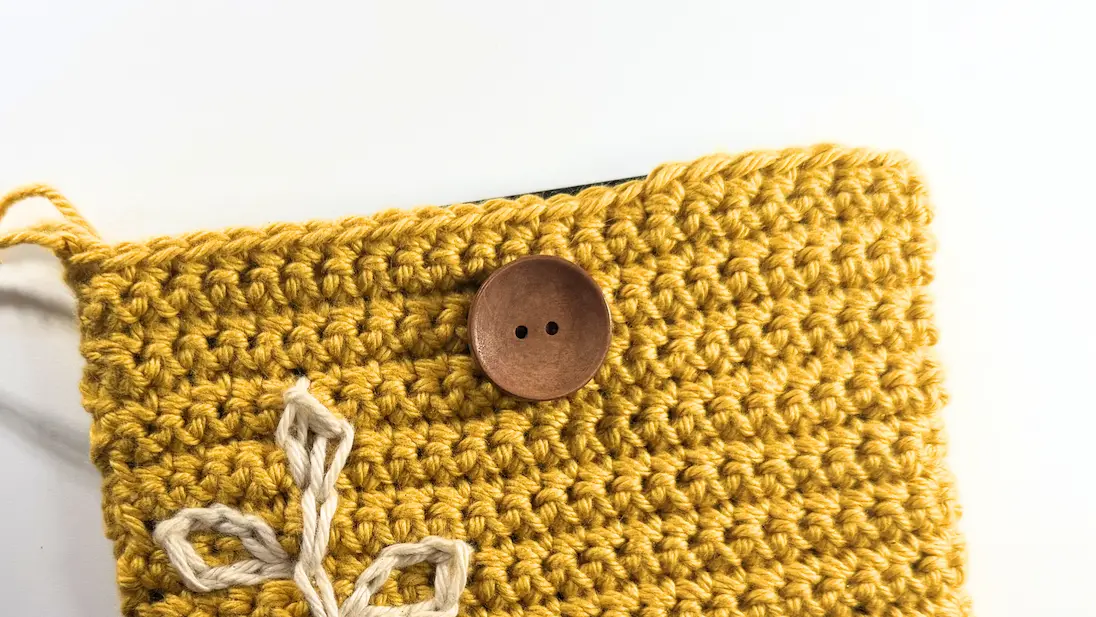
Option 2: Button Closure
This option creates a simpler look.
Choose your button and sew it to the centre of the front of the sleeve.
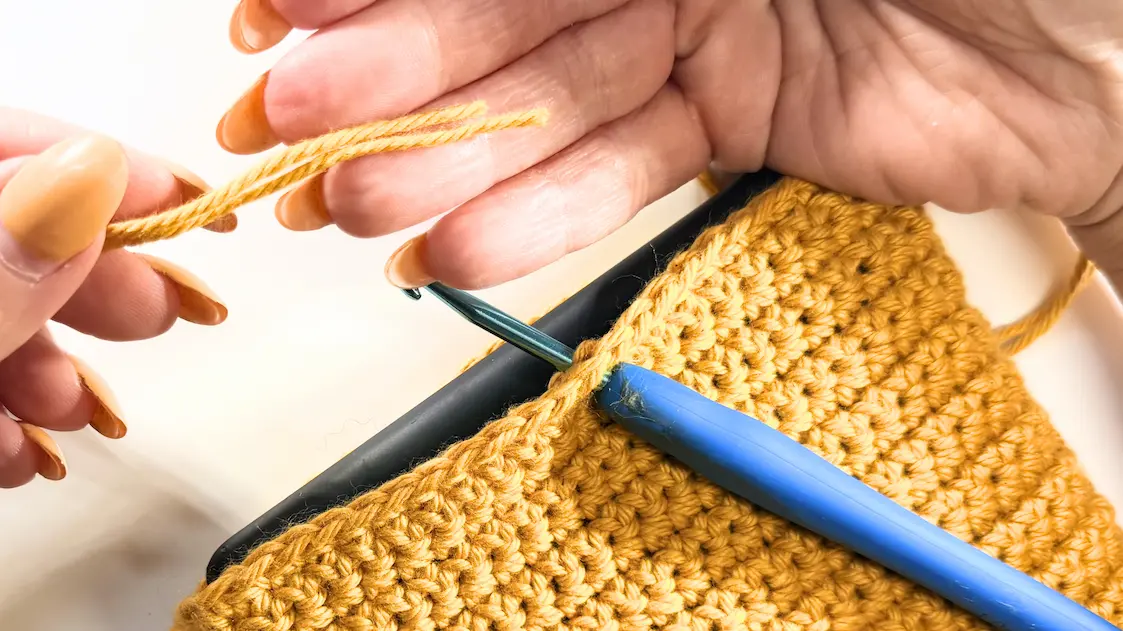
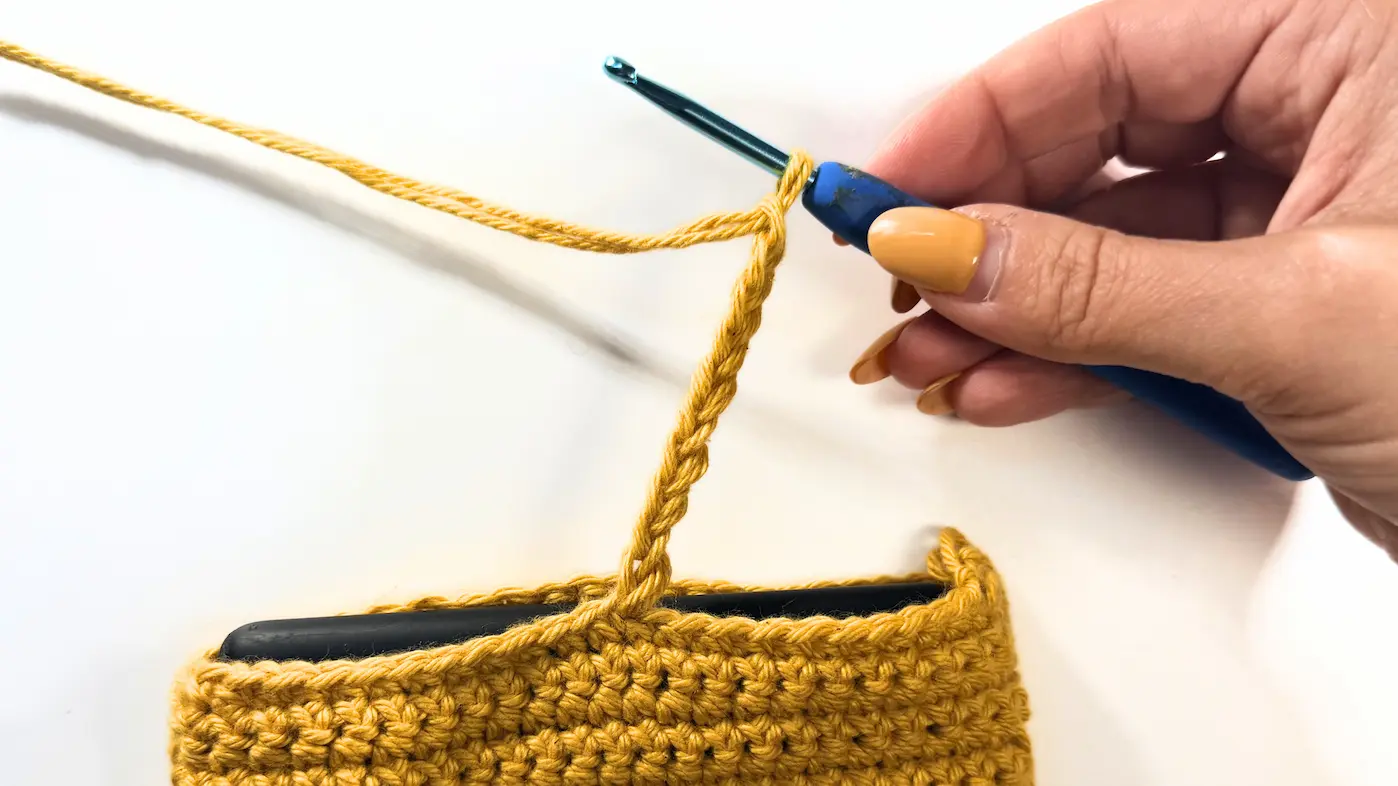
Next, find the centre on the back of the sleeve. Insert your hook into the centre stitch and, using a double strand of yarn, work a chain long enough to fit around the button.
Once the desired length is reached, insert your hook back into the same stitch where the chain started. Make a Slip Stitch to form a loop and secure the yarn.
Try the loop around the button before fastening off and adjust the length if needed.
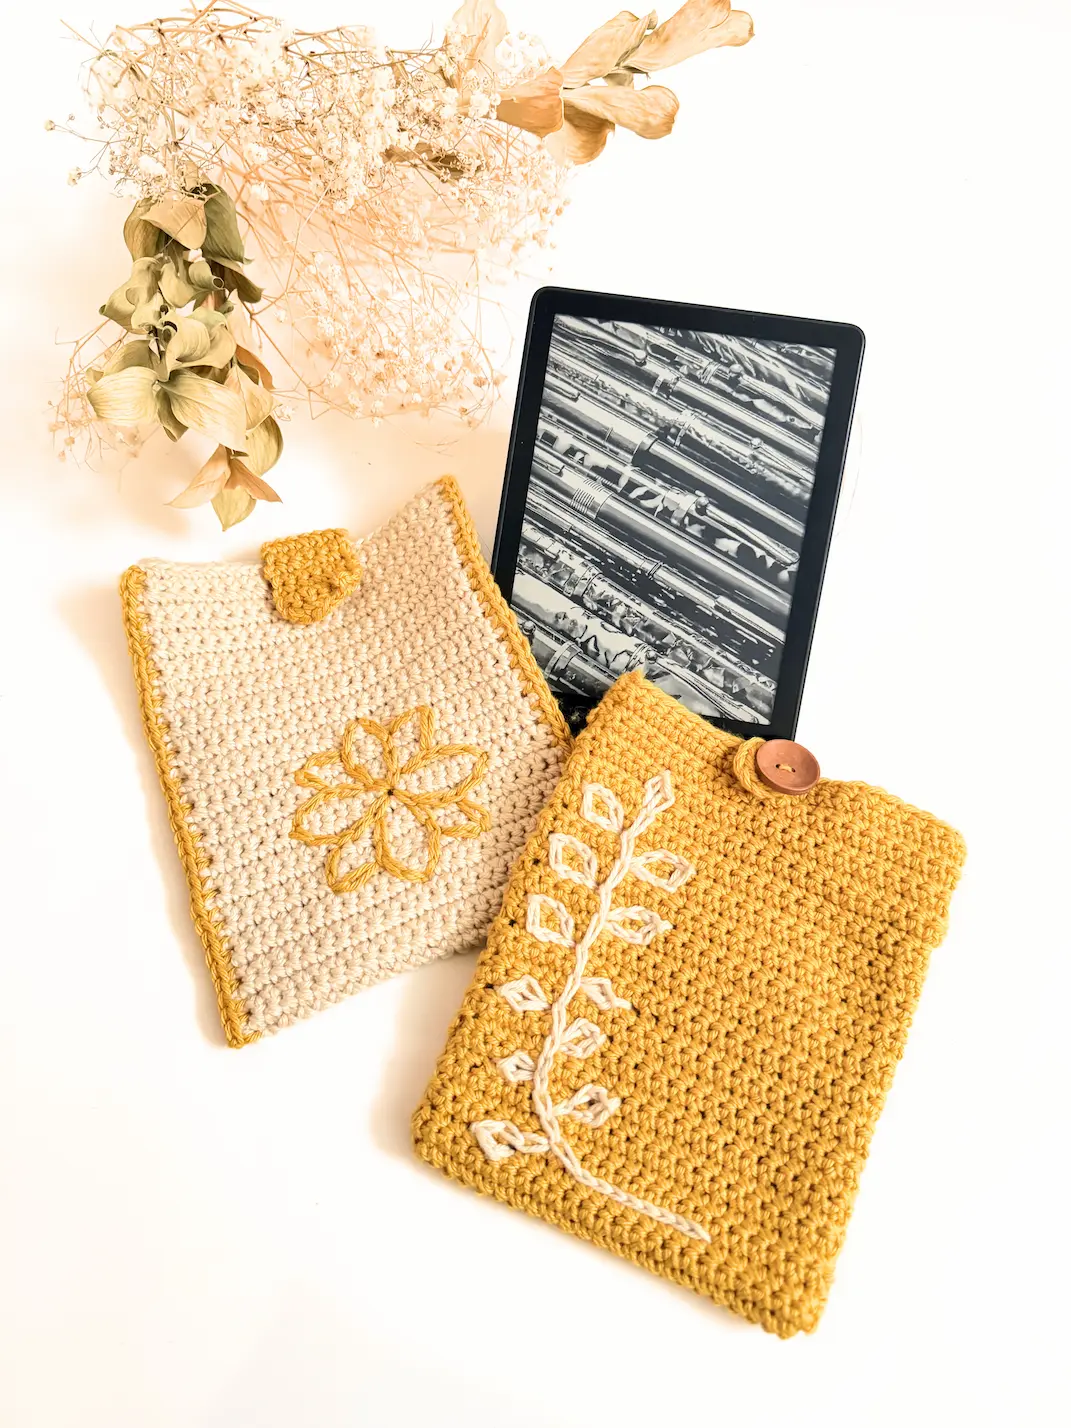
Ta-daa! Your Cozy Reader Sleeves are done!
Whether you chose the flower design, the leaf design, or both, I hope you enjoyed adding a little handmade touch to your reading time.
I'd love to know, which design is your favourite: Flower or Leaf?
Feel free to leave a comment below, share a photo of your finished sleeve, and don't forget to tag me on social media so I can see your beautiful creations. Seeing your projects is always the best part of sharing my patterns with you!
Happy crocheting and reading!
Lenka
Where happy heart meets crochet art


Comments