
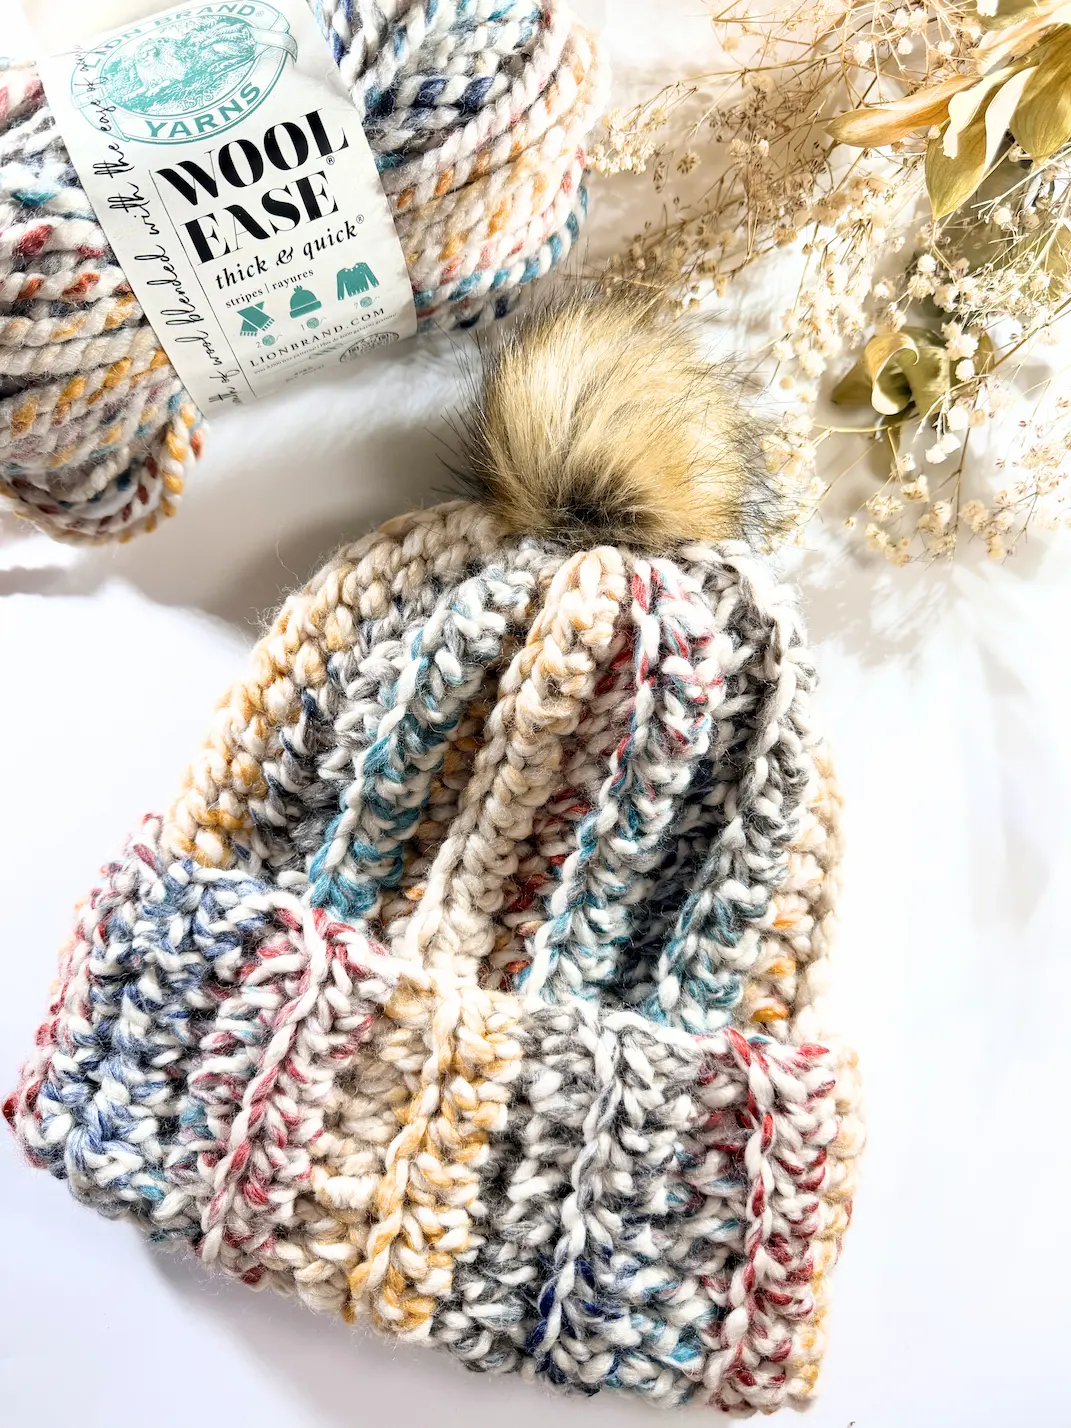
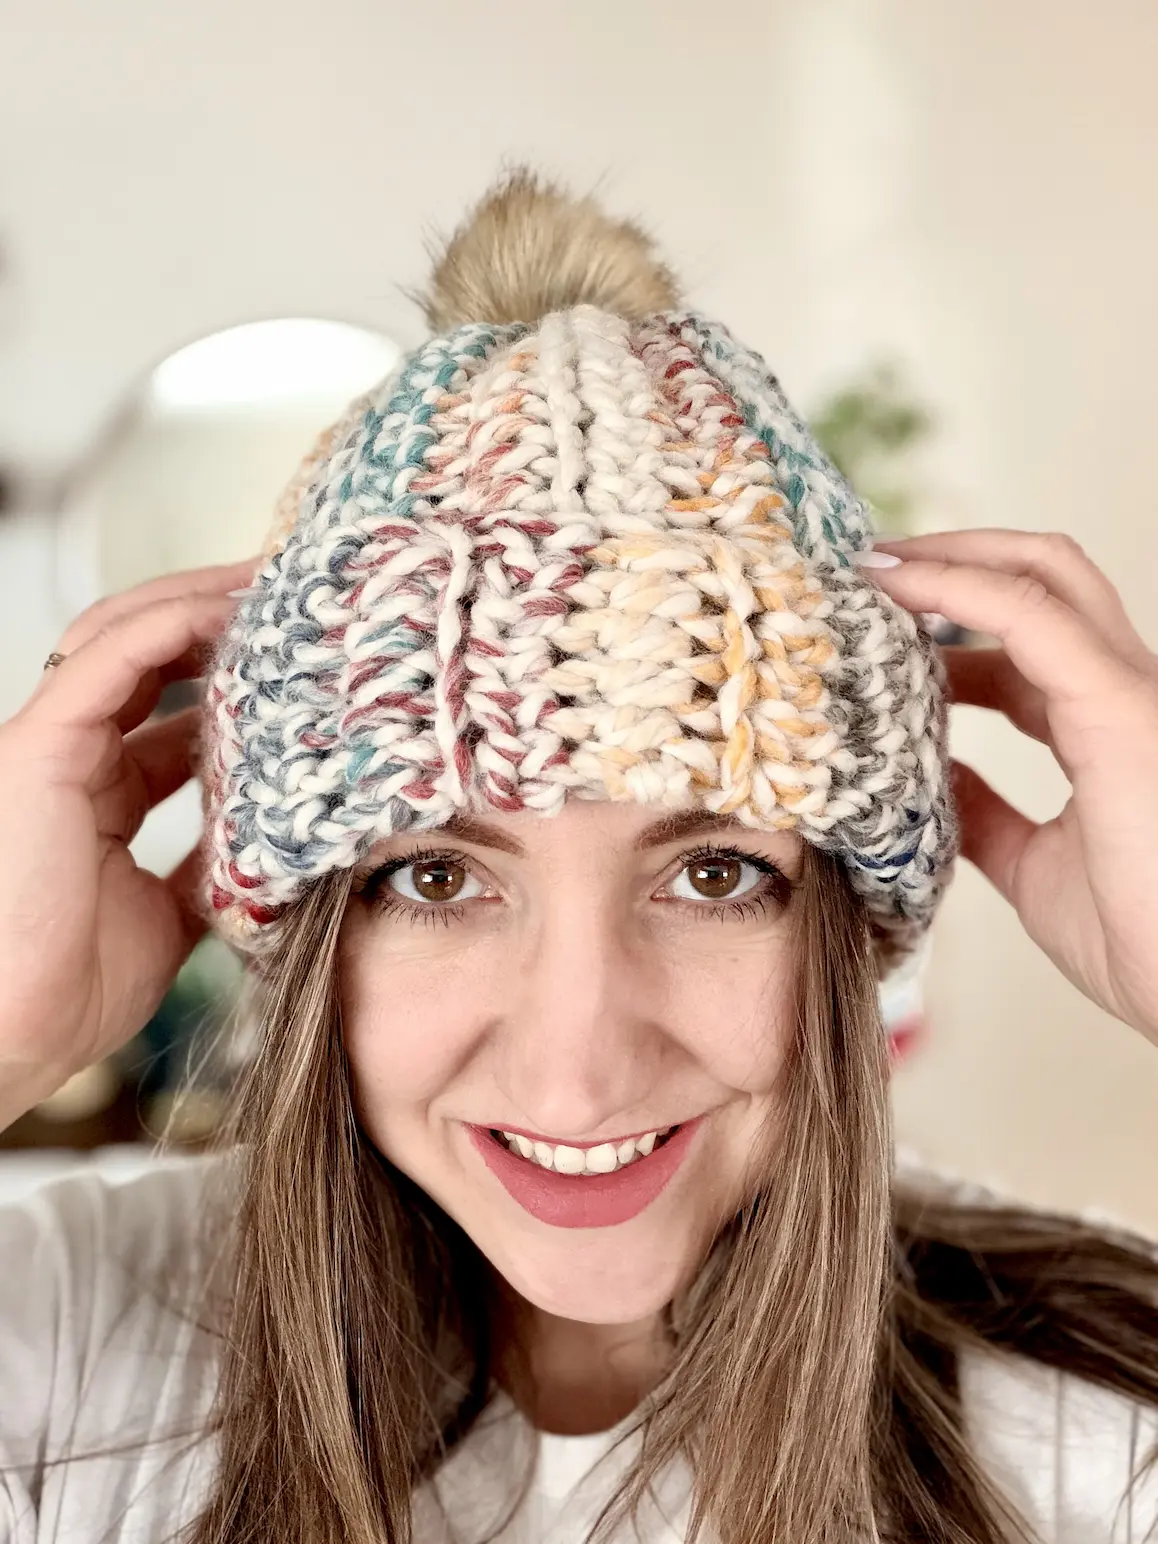
2 Easy Chunky Crochet Hats (Super Bulky Beanie Patterns for Beginners)
- Mar 4
- 7 min read
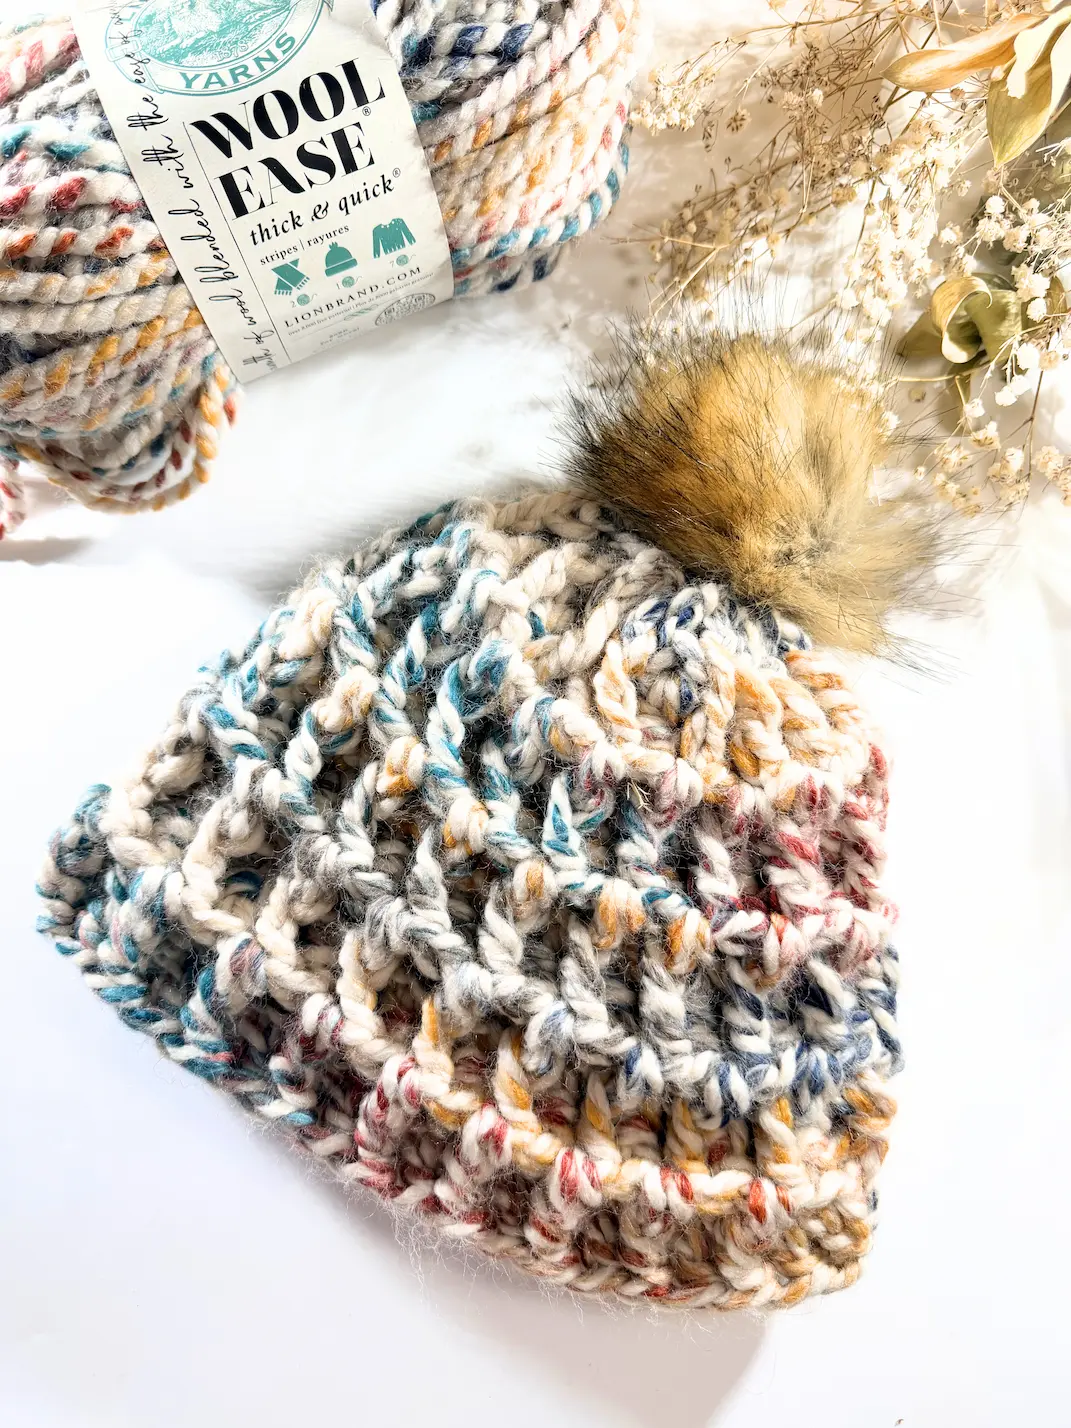
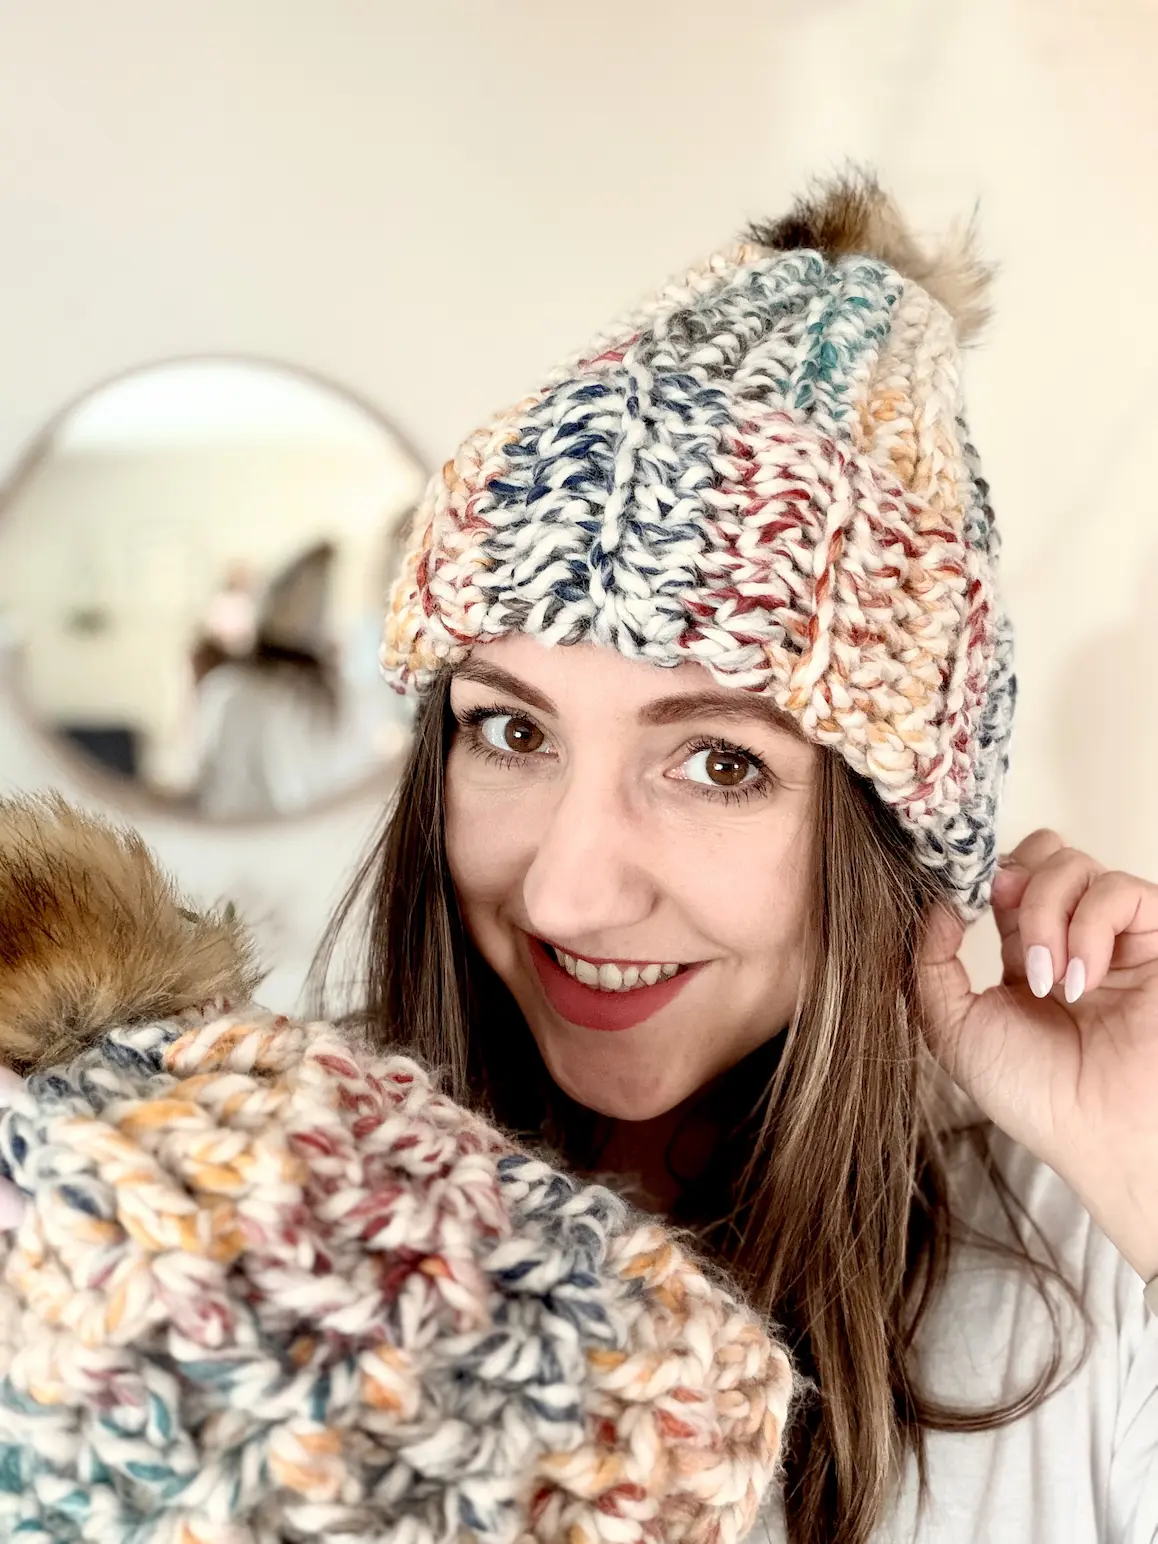
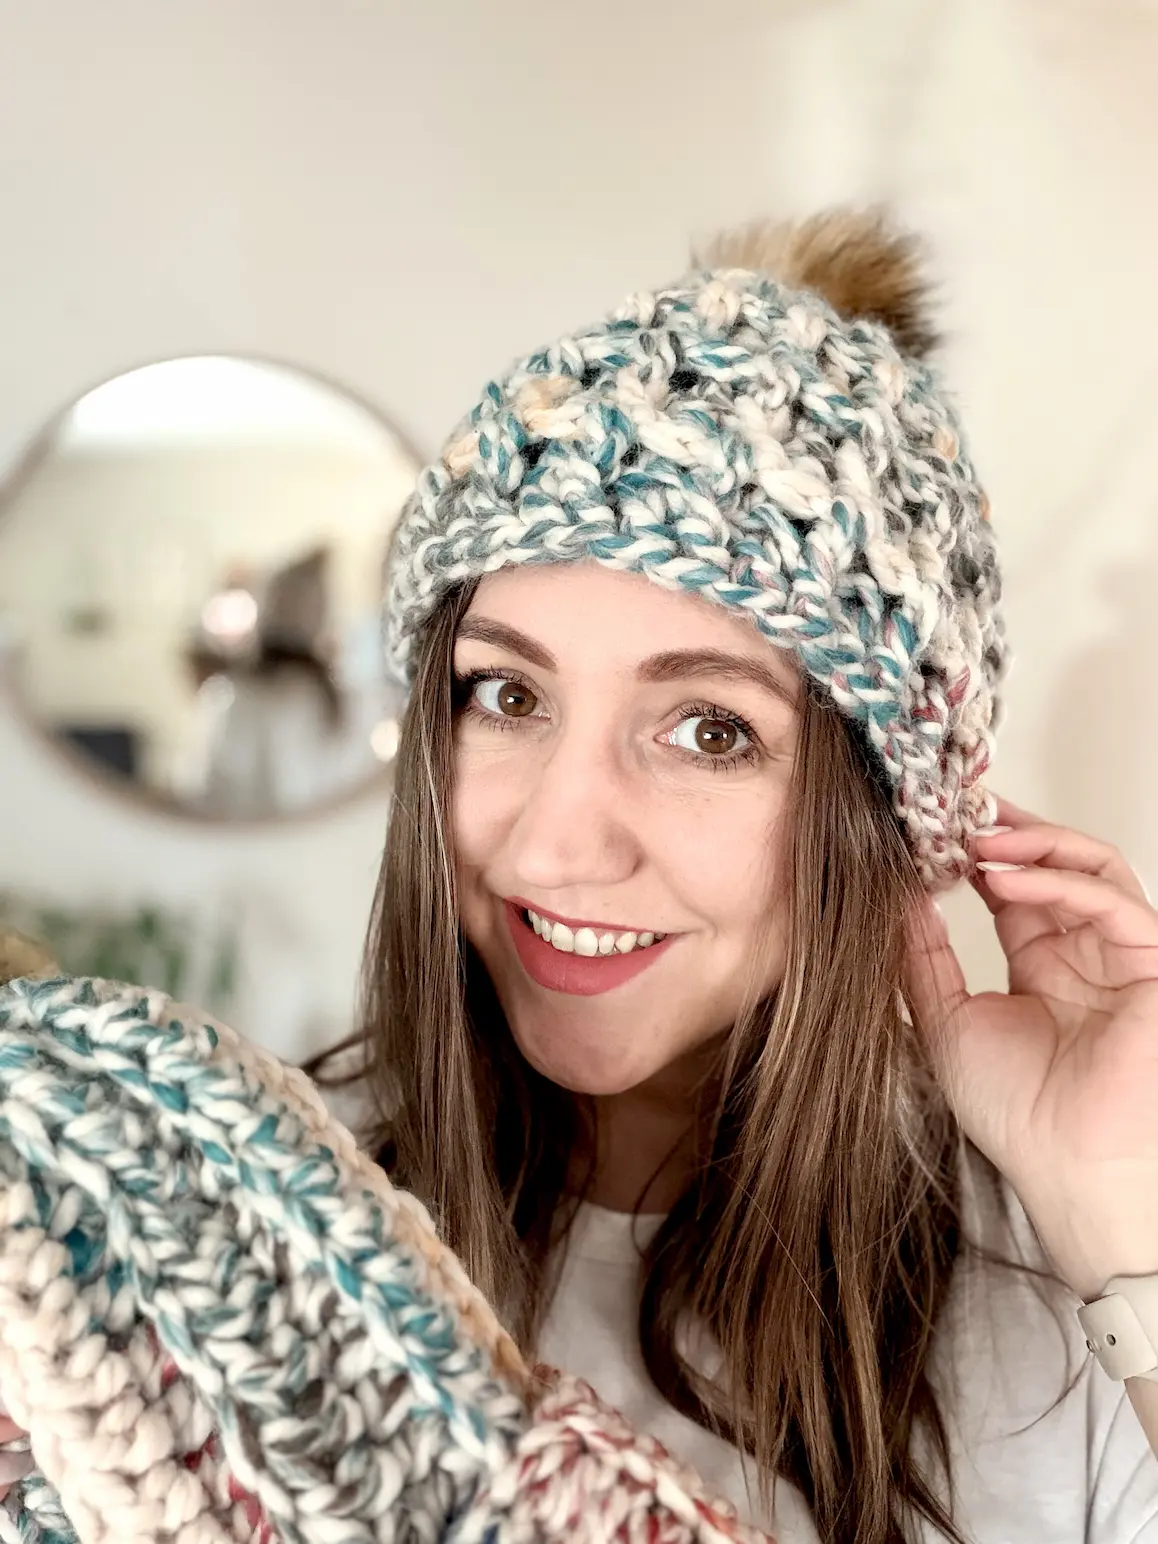
Welcome to this 2-in-1 chunky crochet beanie pattern!
In this tutorial, I’ll show you how to make two easy and beginner-friendly chunky hats using super bulky yarn. Both beanies use the same yarn and hook size, but each one creates a slightly different texture — making this a fun and versatile project whether you’re crocheting for yourself, gifting, or preparing for markets.
If you’re new to crochet or need a refresher on the basics, you can visit my guide to basic crochet stitches here.
That said, don’t worry — the full video tutorial included in this post walks you step-by-step through everything you need to complete both hats.
Grab your yarn, pick your favourite colour, and let’s get started!
If you'd like to support my work and get a printable, ad-free version of this pattern, please visit my shop or Ravelry.
HUGE THANKS to everyone who supports me through purchases, likes, shares, comments, tags, or feedback! It truly means a lot to me.

This post contains affiliate links for the yarns I used and love and it also displays ads. I make a small commission if you purchase through these links or through the Ads which in no way affects the cost to you. The revenue I receive from Ads, and affiliate links, help me to support my small business which allows me to share my free crochet patterns/content with you. Thank you for your understanding and your support! It means a lot to me.
This pattern and all images associated with this pattern cannot be sold or claimed as your own. You are allowed to sell finished project. Feel free to mention me for creating this pattern, it would make my day and I can share your finished blanket on my social media if you allow.
Don’t forget to share your project on Instagram! If you have your account you can tag me under @happyheartsy. I would love to see your finished Chunky Hats so I can share it with others.
Before we get into the actual pattern I also created the Ultimate Crochet Hack Sheet! It's 2 pages with basic
crochet abbreviations and symbols, hook sizes in US and UK version, all the yarn types (with recommended hooks and projects) etc. Feel free to click on the pic or a link to my shop where you can find more details.

What you need for these Chunky Hats:
Materials:
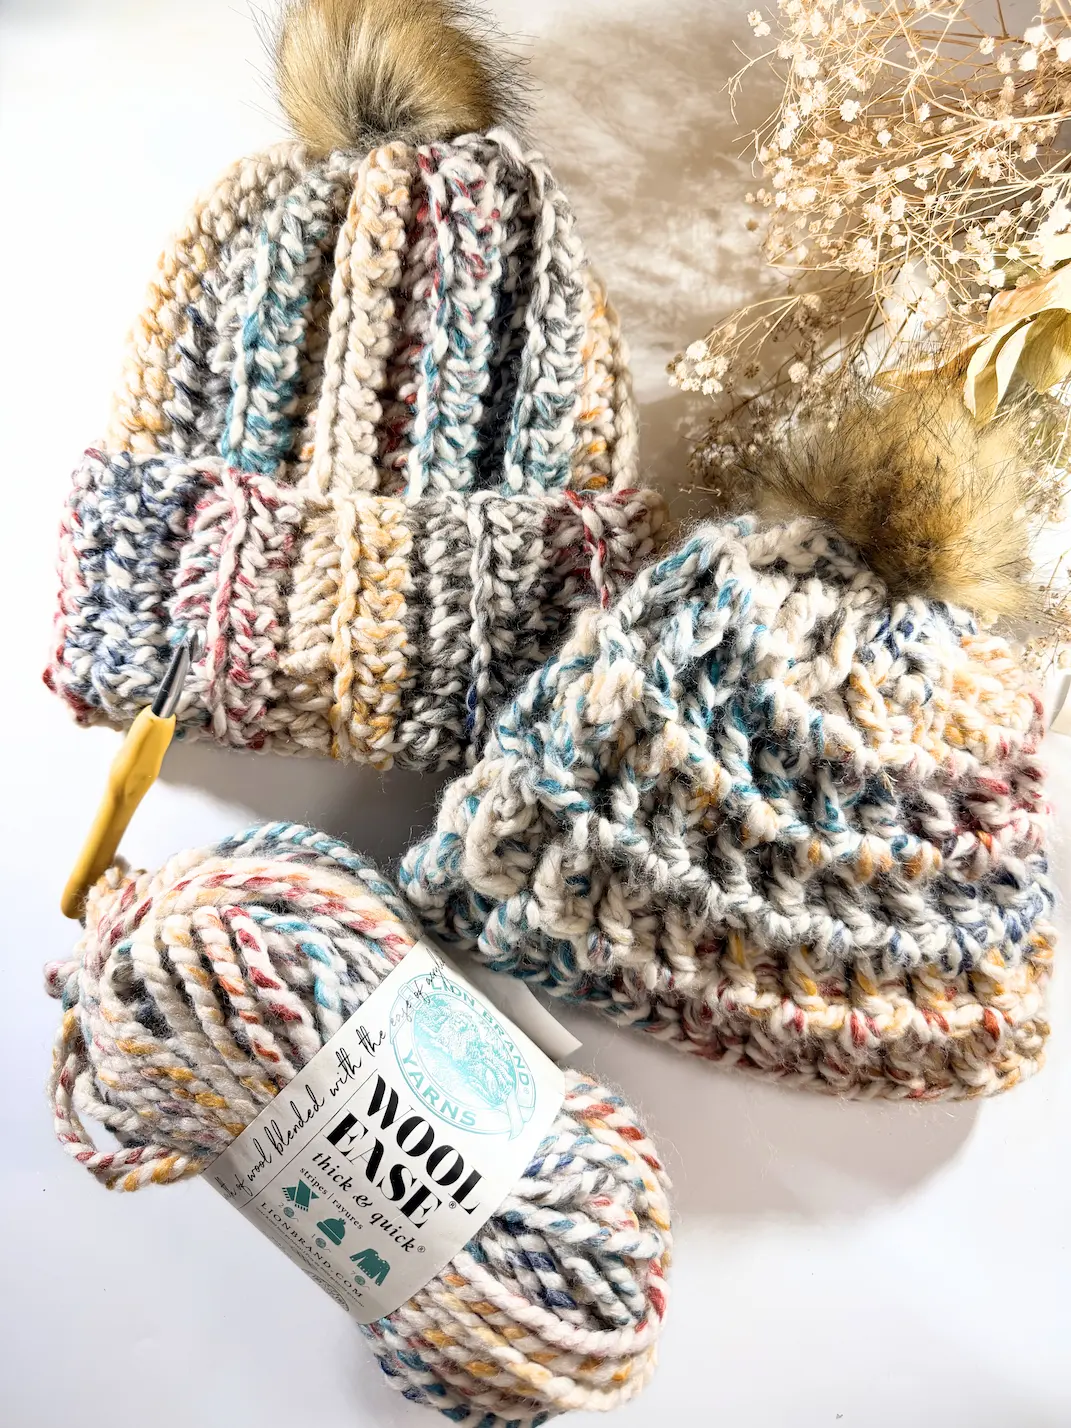
Yarn
Yarn Used:
2 skeins needed for an adult hat
Hooks - 10mm/N/P-15
Scissors, Yarn Needle, Stitch Marker (optional), PomPom (optional)
Gauge - Gauge is not required for this pattern. Follow the instructions provided for your specific size to achieve the correct fit.
Measurements - Instructions are written to fit all sizes, with sizing adjustments included throughout the pattern.
NOTES:
This pattern does not include specific stitch or row counts. Instead, you’ll be guided step by step to customize the hat for your desired size and fit.
The hat is crocheted flat and then seamed together.
Pompom is optional.
Instructions for seaming the hat and attaching the pompom are the same for both versions and can be found at the end of the pattern.
Abbreviations:
Ch - chain
FCH - foundation chain
FDC - foundation double crochet row
FHDC - foundation half double crochet row
St - stitch
DC - double crochet
HDC - half double crochet
FPDC - front post double crochet
BLO - back loop only


DIRECTIONS for Chunky Hat #1
Option 1 – Foundation Chain (odd number) (YouTube - 2:13 - Foundation Chain & Row 1)
Row 1: DC in the 3rd ch from the hook and in each ch across. You should have even number of stitches. Ch 2, turn. (Continue with Row 2)
OR
Option 2 – Foundation Double Crochet Row of even number of stitches. (YouTube - 5:49 - Foundation Half Double Crochet) This counts as Row 1. Ch 2, turn..

ROW 2 - your desired length (please see the size chart below) - (YouTube - 9:01- ROW 2 Repeat)
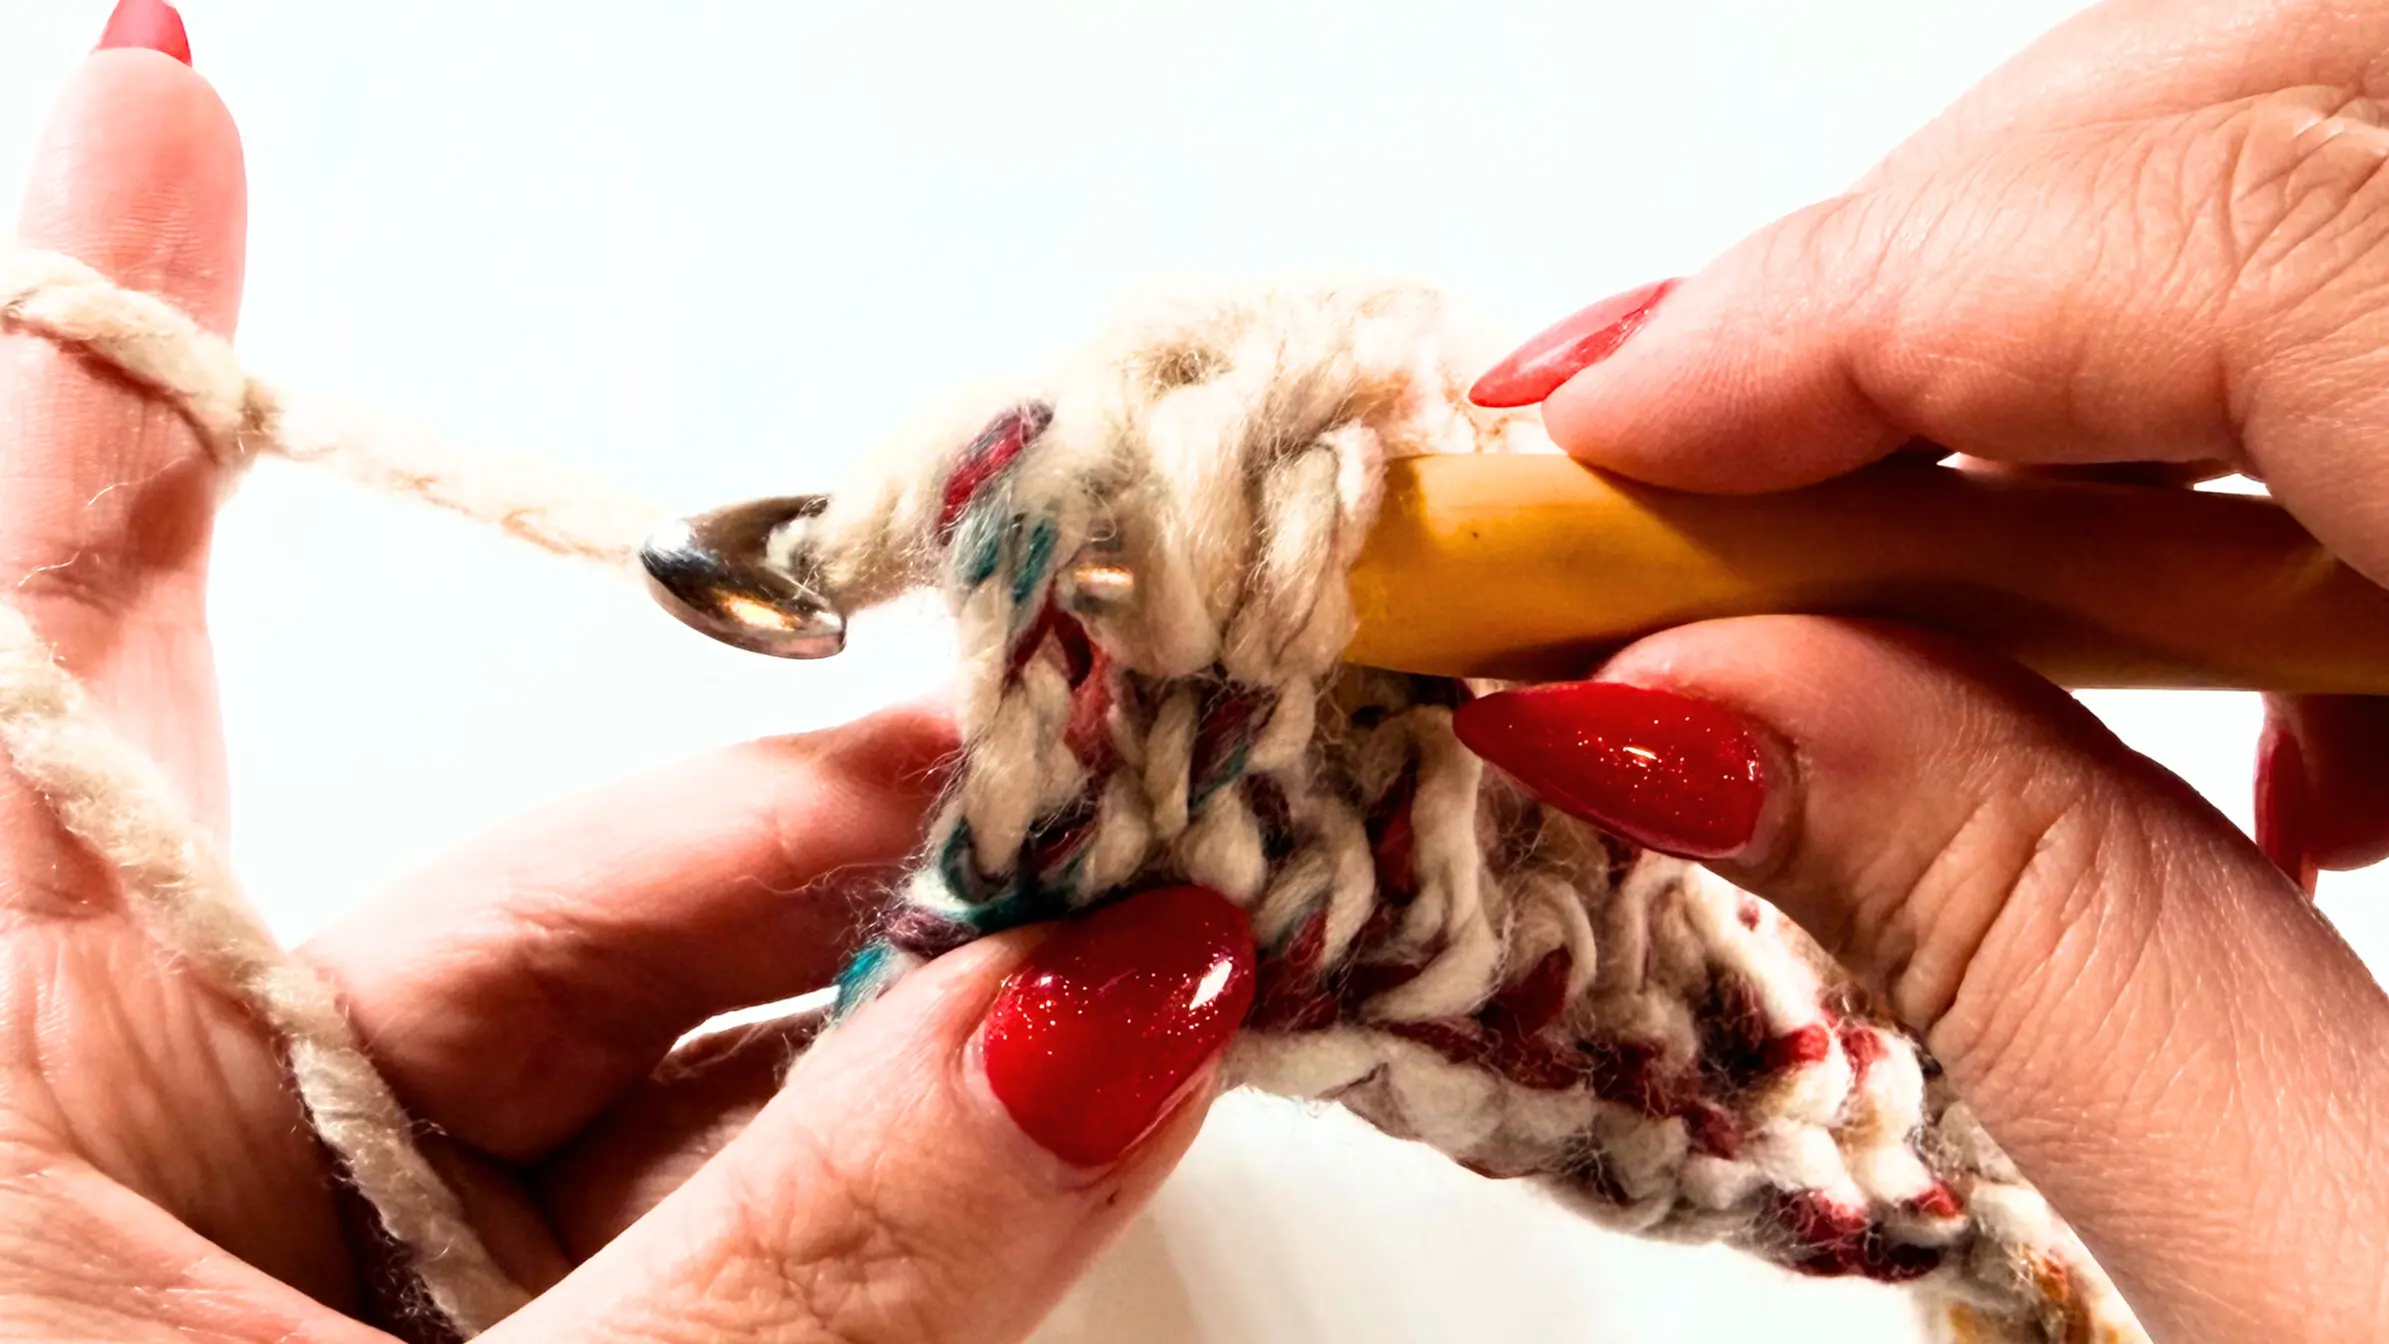
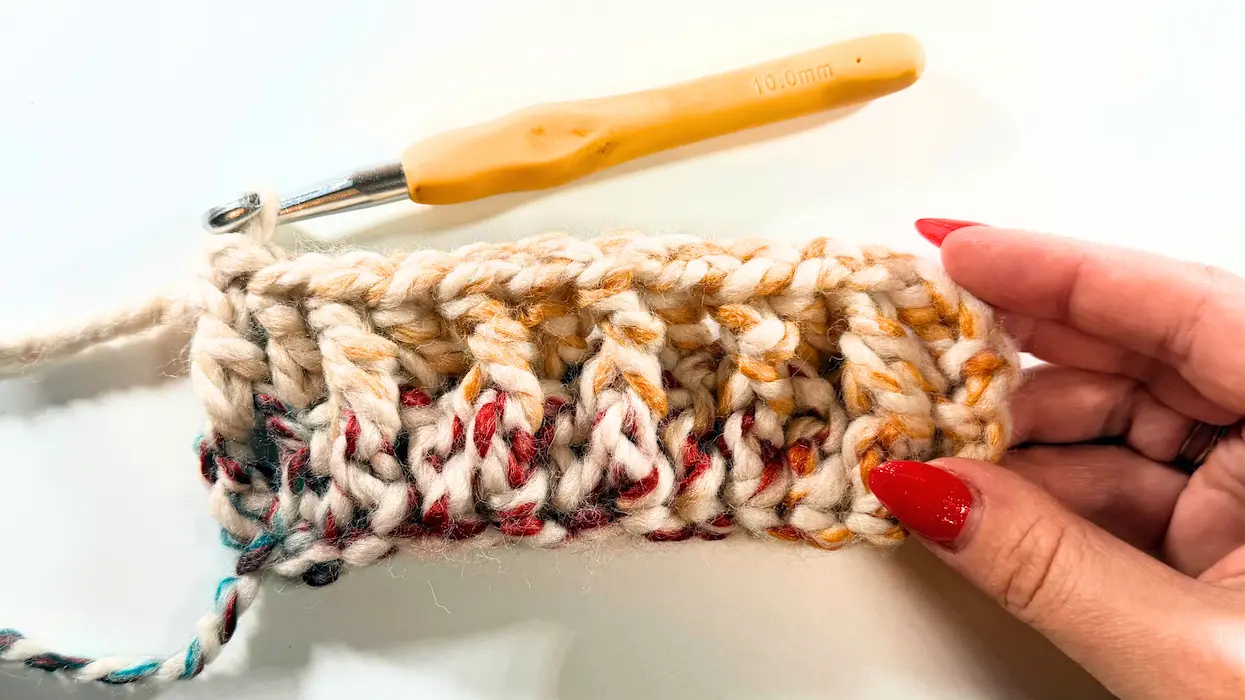
Start with a Front Post Double Crochet (FPDC) around the next stitch, DC in the next stitch, FPDC. Repeat from to across. Your last stitch should be an FPDC. Ch 2, turn.
Repeat Row 2 until the crown reaches your desired width (see chart below).
Little tip: Crochet the hat until it measures about 10% shorter than the head circumference. For example, for a 22” head, crochet the hat approximately 19.5–20”.
The hat should feel snug but comfortable and stretch slightly when wrapped around the head.
How to Crochet Front Post Double Crochet
Once you turn your work, the ch 2 counts as your first stitch of the row. Yarn over (YO), then insert your hook from front to back and back to front around the post of the next stitch from the previous row, so the post sits in front of your hook.
Yarn over and pull up a loop slightly taller than usual (3 loops on your hook). Yarn over and pull through the first two loops, then yarn over and pull through the remaining two loops—just like finishing a double crochet.


After completing the FPDC, crochet a regular DC into the next stitch as usual.
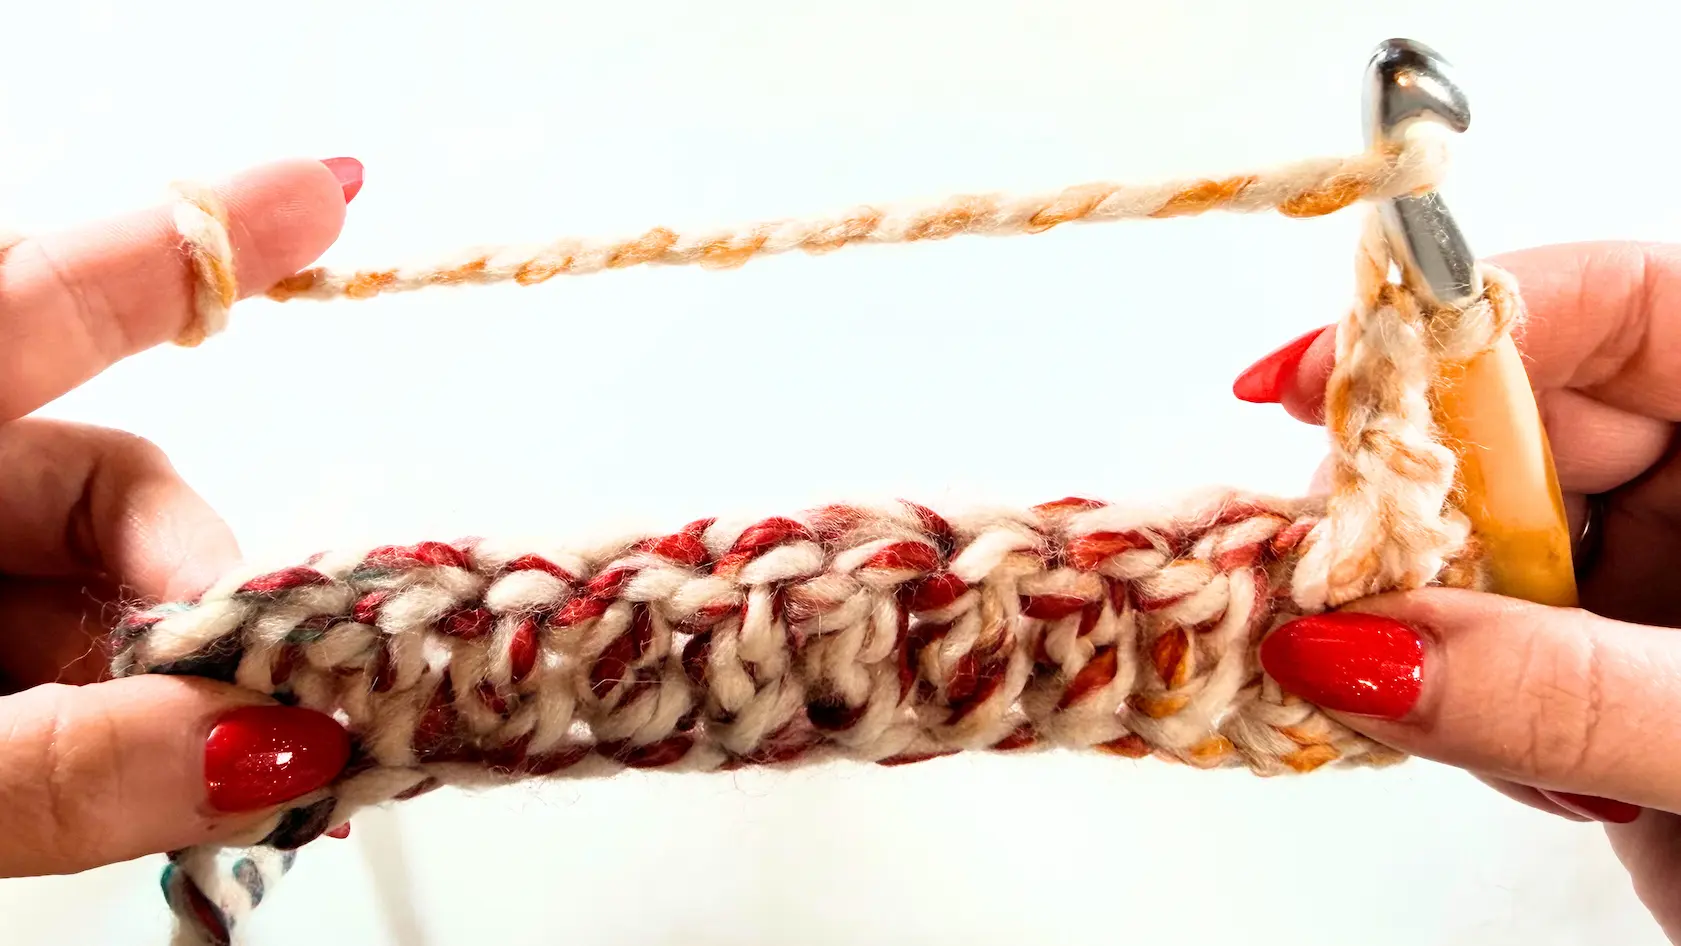
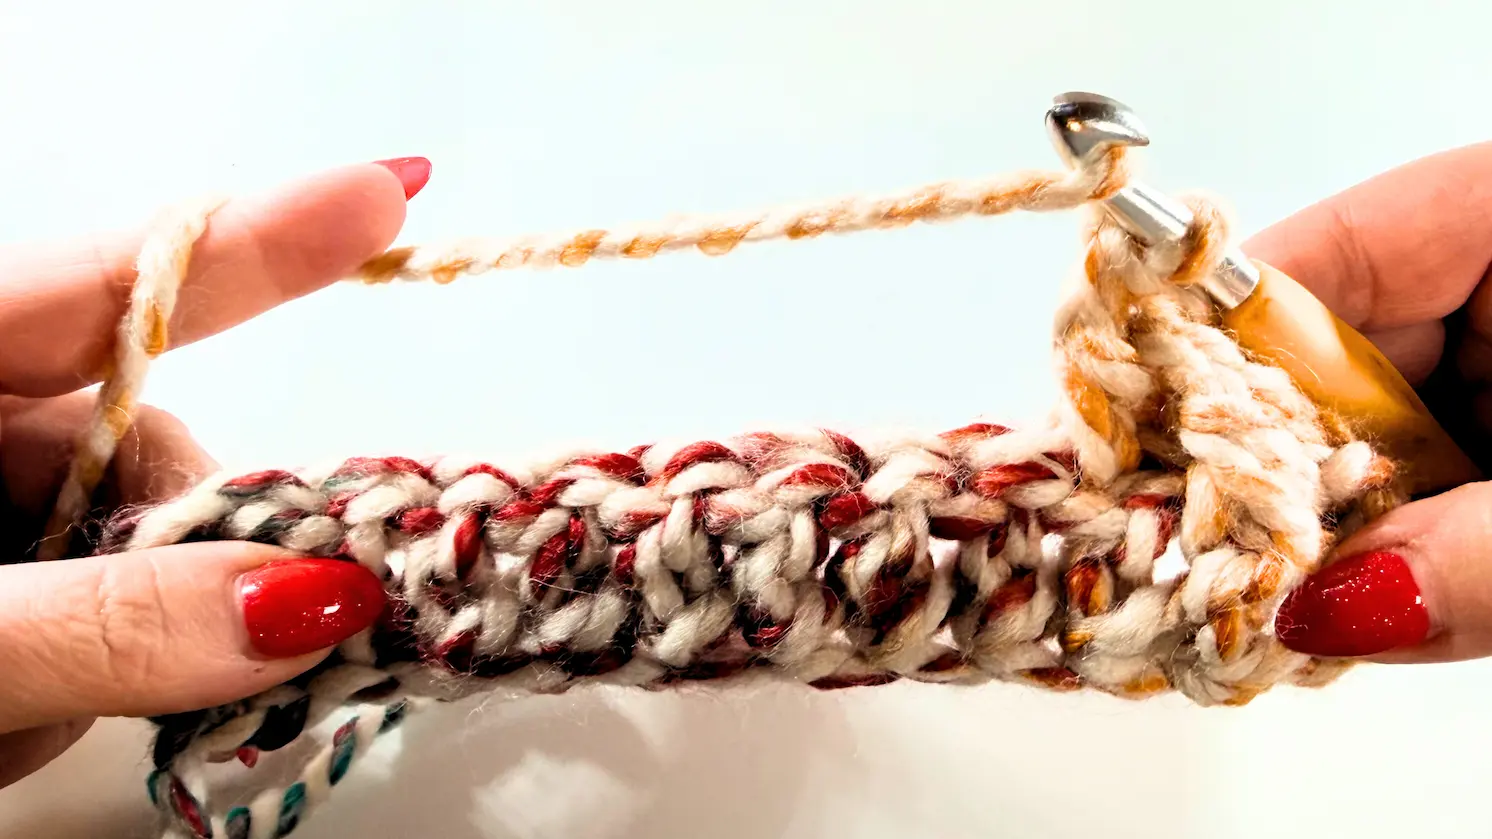
Continue alternating FPDC and DC across the row, ending with an FPDC. Ch 2, turn.

Continue alternating FPDC and DC across the row, ending with an FPDC. Ch 2, turn.
Repeat until you reach the desired height. Fasten off, leaving a long tail for seaming the sides together (see finishing instructions at the end of the pattern).

Video steps for this beanie:
DIRECTIONS for Chunky Hat #2
Option 1 – Foundation Chain (even/odd number) (YouTube - 21:26 - Foundation Chain & Row 1)
Row 1: HDC in the 2nd ch from the hook and in each ch across. Ch 1, turn. (Continue with Row 2)
OR
Option 2 – Foundation Half Double Crochet Row (YouTube - 24:39 - Foundation Half Double Crochet (Alternative Start))
This counts as Row 1. Ch 1, turn..
ROW 2 - your desired length (please see the size chart below) - Half Double Crochet (HDC) in Back Loop Only (BLO) into the each stitch across the row. Ch 1. Turn.

Repeat Row 2 until the crown reaches your desired width (see chart below). (YouTube - 30:04 - ROW 2 Repeat)
Little tip: Crochet the hat until it measures about 10% shorter than the head circumference. For example, for a 22” head, crochet the hat approximately 19.5–20”.
The hat should feel snug but comfortable and stretch slightly when wrapped around the head.
Video steps for this beanie:


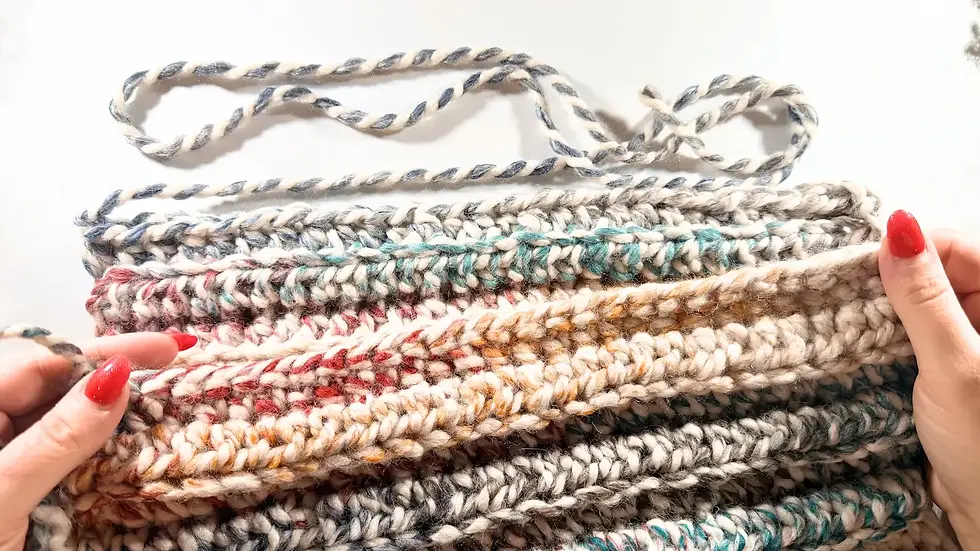
How to Seam the Hats and Closing the Crown
Once you have finished either hat, fasten off leaving a long tail (approximately 4 times the length of the short side).
Thread the yarn tail onto a yarn needle. With the hat folded in half and the short sides aligned, seam the short edges together by sewing through each stitch from bottom to top.
When you reach the end, secure with a double knot — but do not cut the yarn. Keep the yarn threaded on the needle.
Next, weave the needle in and out through the stitches all the way around the top opening (working through the edge stitches around the crown).
When you return to the starting point, gently pull the yarn tight to close the top opening completely. Secure with another double knot to prevent it from loosening. (If you would like to attach a pompom, continue with the instructions below.)
Weave in the remaining end securely.
Turn the hat right side out.
How to Attach the PomPom with Elastic (optional)
After closing the crown, keep the hat wrong side out. Place the pompom inside the hat so it rests against the right side at the top center of the crown.
Using the yarn tail and a yarn needle:
Insert the needle from the wrong side (outside of the hat) through the crown to the right side (inside).
Pass the needle through the elastic loop.
Insert the needle back through the crown to the wrong side again.
Repeat this process two more times to secure the elastic firmly. Tie a double knot on the wrong side of the hat and weave in the remaining tail.
Turn the hat right side out.
Ta-da! Your chunky beanies are done and ready to wear 🧶✨
I hope you enjoyed crocheting these easy chunky hats as much as I enjoyed designing them. Whether you made one or both, they’re such satisfying projects that work up beautifully and quickly.
If you found this pattern helpful, I’d truly appreciate it if you left a comment, shared it with a fellow crocheter, or pinned it for later — it really helps support my work and keeps Happy Heartsy growing 💛
And if you share your finished beanies on Instagram, don’t forget to tag me @happyheartsy so I can see and celebrate your cozy makes!
Happy crocheting,
Lenka
Where happy heart meets crochet art


Comments