
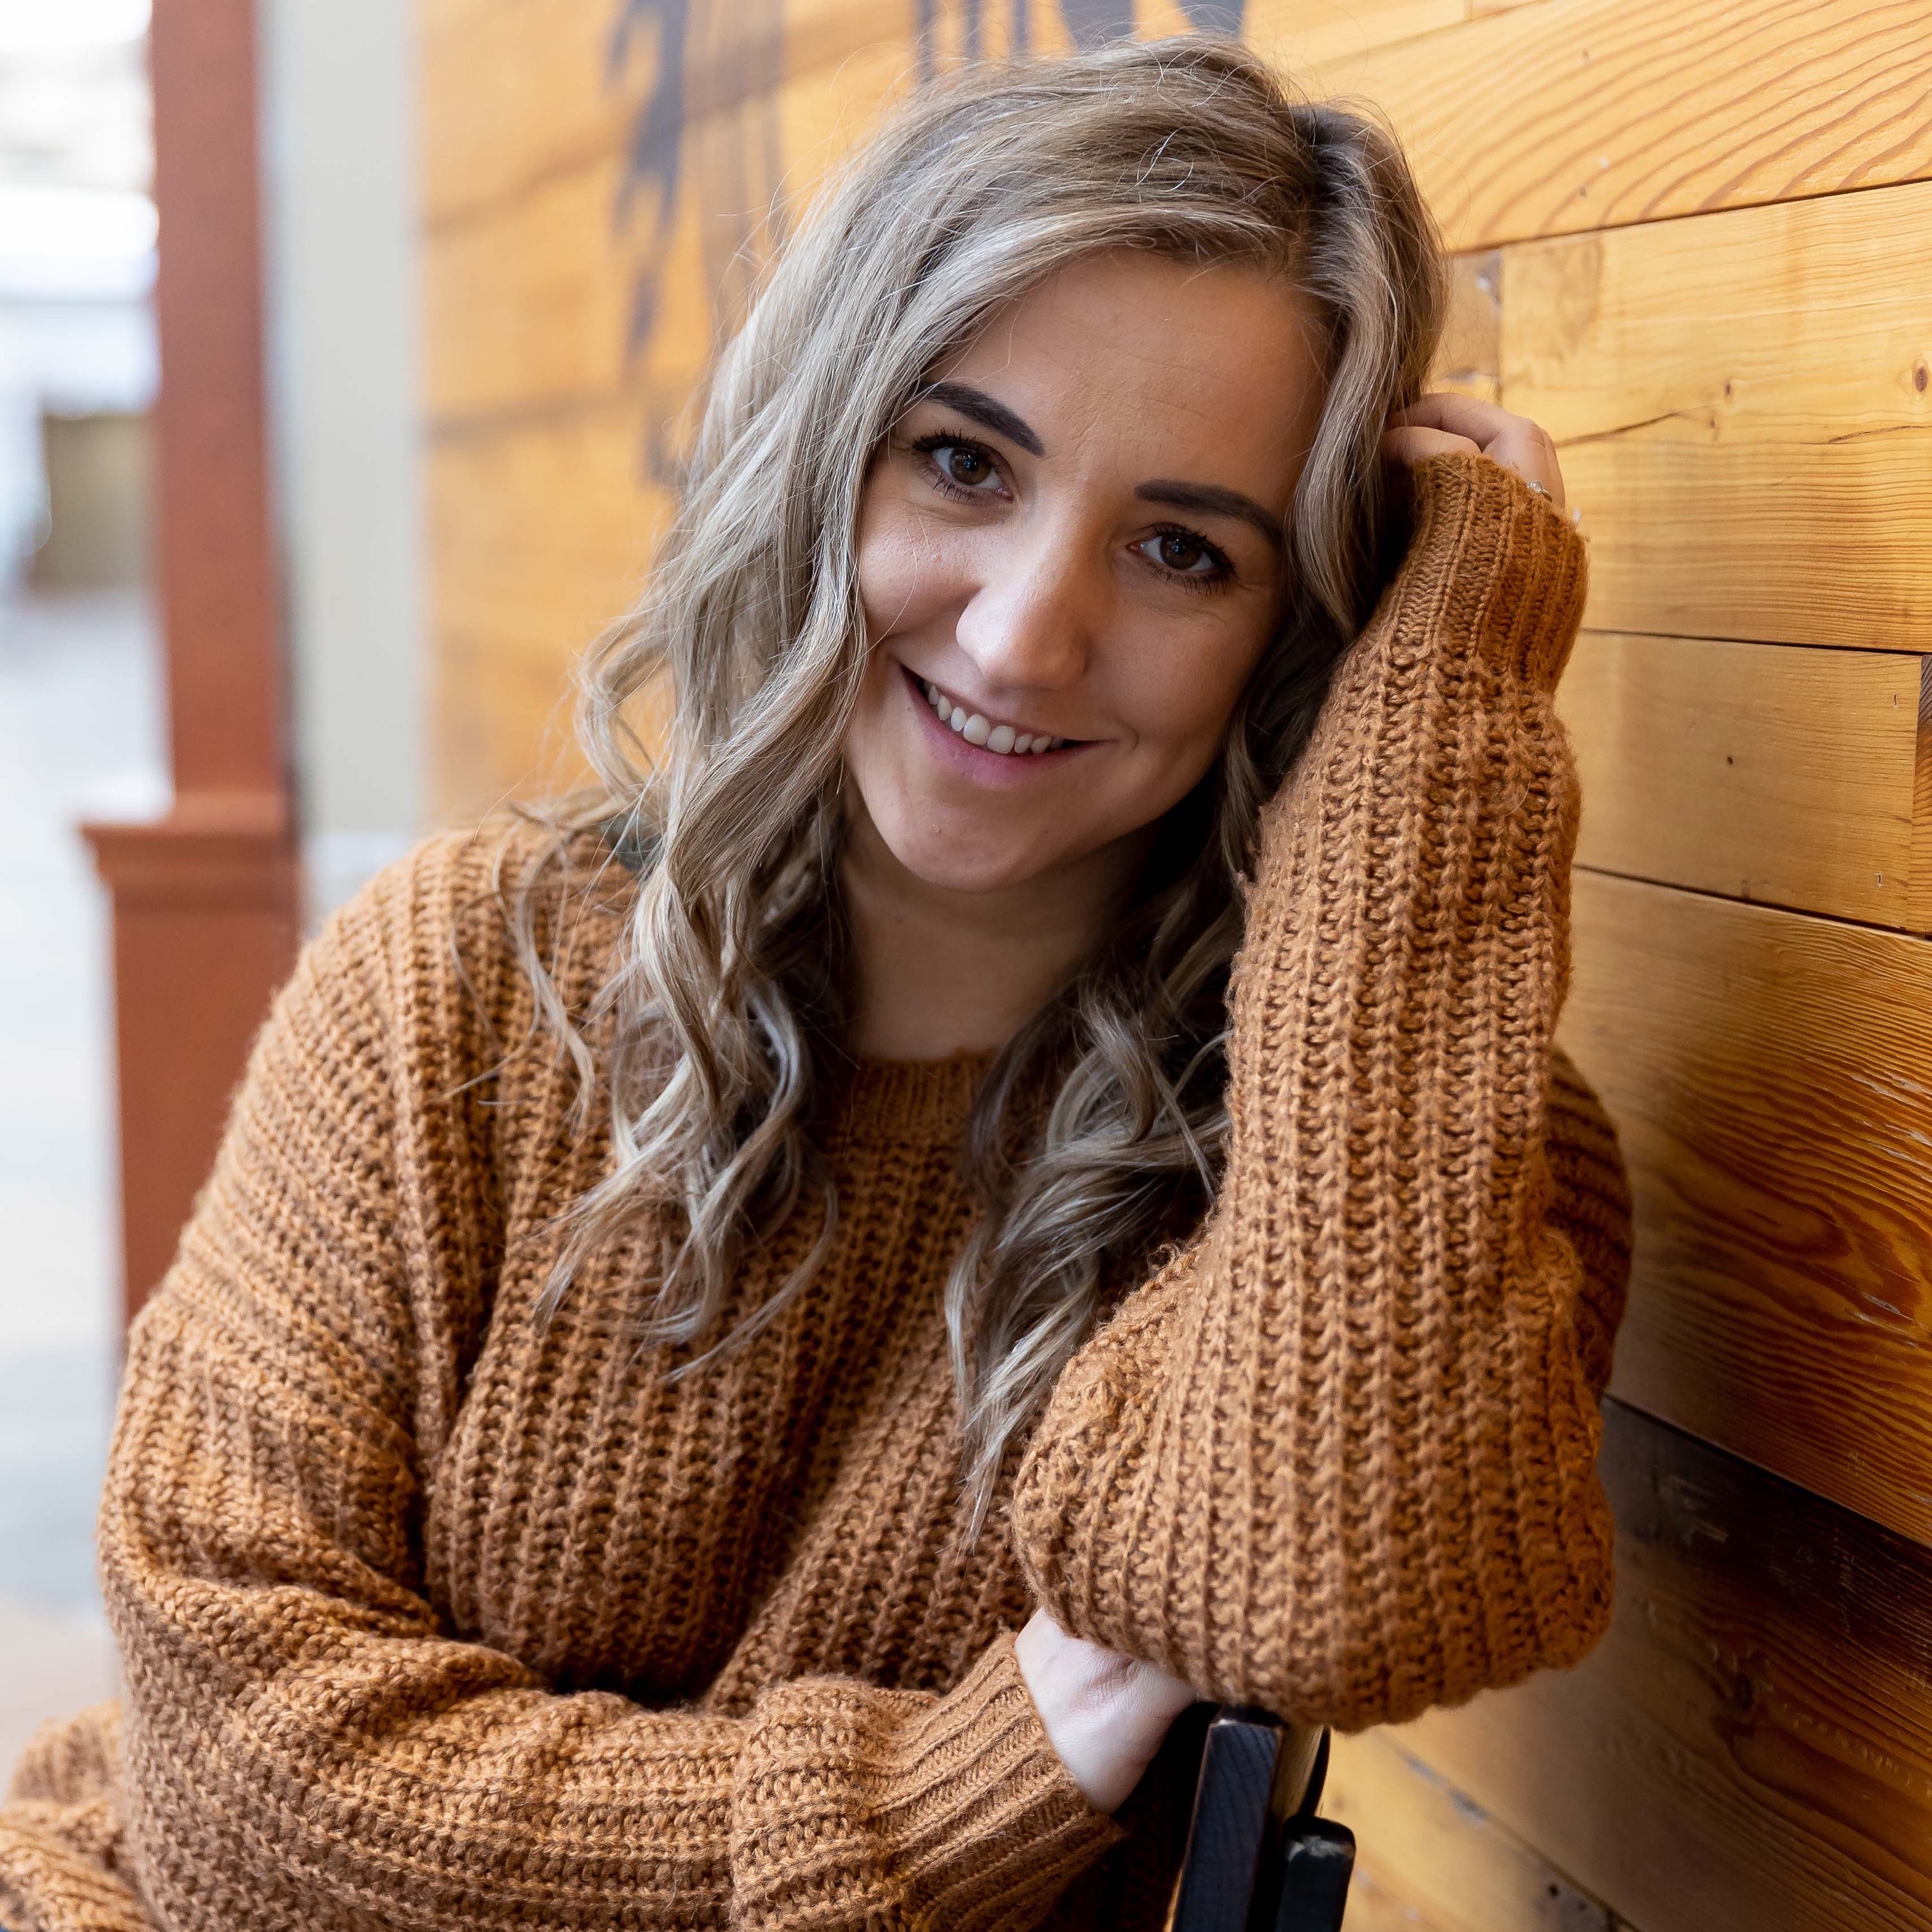
Blush of Summer Crochet Cardigan Pattern
- Lenka
- Jun 1, 2023
- 9 min read
Updated: Jun 9, 2024
Summer is around the corner even though it already feels like it. For me, crochet patterns for garments are still new and with each pattern I find a better way to do it. This crochet cardigan is made in one piece. Meaning, you do your front panels and the back panel all at once.

I know how crocheting of clothes can be intimidating but trust me when I say this crochet cardigan pattern is easy and very beginner friendly. You repeat only two rows and follow the numbers of stitches for your size. I also made an additional video tutorial where I explain everything you need to know.
If you'd like ad free and printable pattern you can find it on my Etsy or Ravelry.
If you enjoy my crochet content but you don't feel like to purchase my patterns it's absolutely ok.:) That's why my patterns are free on my blog so it can be available for everyone!
There's also another way though how to support my work with Buy Me a Coffee (my version is Buy Me Yarn, you know why:) ). It cost you even less than my actual patterns. You can check the link above or the button below for more details.
BIG THANKS for everyone who supports me by purchases, likes, shares, comments, tags or/and feedbacks! It means a lot to me.
I hope you enjoy this Blush of Summer Cardigan so don’t forget to share your project on Instagram! If you have your account you can tag me under @happyheartsy. I would love to see your finished Blush of Summer so I can share it with others.
This pattern and all images associated with this pattern cannot be sold or claimed as your own.
You are allowed to sell finished cardigan. Feel free to mention me for creating this pattern, it would make my day and I can share your finished project on my social media if you allow.
Please, if you need help with this pattern or you have any questions, don't hesitate to email me on lenka@happyheartsy.com. I'll be happy to help you:)
For this cardigan you need:
Yarn - Caron Cakes Blossom, Colour Passionfruit (or any worsted yarn)
1 skein = medium 4, 8oz/227g, 481yd/440m (for size M I used 2.2 skeins of this yarn)
Hook size - 6mm / J-10
Scissors, Yarn Needle, Stitch Markers (optional)
Gauge:
Please, make your swatch before doing this pattern to make sure the cardigan will fit you.
14sts x 7 rows = 4" x 4"
Numbers of skeins for each size approx. - 2 (2, 3, 3, 4, 4, 5, 5, 6)
The sizing guide follows size XS(S, M, L, XL, 2XL, 3XL, 4XL, 5XL). E.g. 86 (86, 88, 88, 90, 90, 92, 92, 94) means 86 for XS, 86 for Small, 88 for Medium, 88 for Large, 90 for XL, 90 for 2XL, 92 for 3XL, 92 for 4XL, 94 for 5XL
Final measurements for this cardigan for all sizes in inches:
Bust: 37 (41, 45, 49, 53, 57, 61, 65, 69)
Length: 26.5 (26.5, 27.5, 27.5, 28, 28 28.5, 28.5, 29, 29)
Arm depth: 7 (7.5, 8, 8.5, 9, 9.5, 10, 10.5, 11)
This video is an additional tutorial for this pattern where I explain everything you need to know.
Here is the time breakthrough of the video:
0:00 - Introduction
0:51 - How to crochet the main panel
26:40 - How to crochet the ribbing for the sides and neckline
36:30 - How to crochet the ribbing at the bottom of the cardigan
41:52 - How to crochet the sleeves with ribbing
51:25 - How to crochet the pockets
Abbreviations:
FCH - foundation chain
FDC - foundation double crochet
DC – double crochet
Ch – chain
Ch Sp – chain space
BLO - back loop only
Sk - skip
St - stitch
NOTES:
1) You crochet this cardigan lengthwise starting from your right front panel to the left front panel as a one piece. Please, see the scheme of this cardigan below.
2) You crochet the whole construction as a one piece.
3) If you start with FDC it counts as a first row
4) Ch 3 (after every DC row/odd number row) count as a first DC and 1 ch space for the next row.
5) Ch 2 (after every ch 1 space row/even number row) count as a first DC for the next row.
6) Ch1 space counts as a st.
7) Odd number of the rows is your right side, even number of the rows is your wrong side.

DIRECTIONS
Now you have two options how to start. It's either with foundation chain and first row separately or start with foundation double crochet. Feel free to watch my YouTube video where I explain how to start FDC.
MAIN PANEL
Ch 86 (86, 88, 88, 90, 90, 92, 92, 94)
ROW 1 - Into your 3ch DC, DC in every ch until the end of the row. Ch 3 (counts as a first DC and ch 1 sp for the next row). Turn. In total 85 (85, 87, 87, 89, 89, 91, 91, 93) sts. (now continue with ROW 2)
OR
FDC - 85 (85, 87, 87, 89, 89, 91, 91, 93). Ch 3 (counts as a first DC and ch 1 sp for the next row). Turn. (counts as a first row)
ROW 2 - Into your 2nd st (from your first DC) DC, *ch 1 (skip the next stitch), DC into the next stitch*, repeat from * to * until the end of the row. You should end your row with DC. Ch 2. Turn. In total 85 (85, 87, 87, 89, 89, 91, 91, 93) sts.
ROW 3 - DC in every st (and ch space) until the end of the row. Ch 3. Turn. In total 85 (85, 87, 87, 89, 89, 91, 91, 93) sts.
Repeat ROW 2 and 3 until ROW 9 (11, 13, 15, 17, 19, 21, 23, 25). Your last row is DC row.
ROW 10 (12, 14, 16, 18, 20, 22, 24, 26) - This is the ch 1 space row. This row will be split of sts and fch to make a space for your armhole. For example 61/25 means 61 sts (your last stitch is DC) then
continue with 25 FCH only. 61/25 (59/27, 59/29, 57/31, 57/33, 55/35, 55/37, 53/39, 53/41)


ROW 11 (13, 15, 17, 19, 21, 23, 25, 27) - Into your 3rd ch make DC, DC in every st (and ch space) until the end of the row. Ch 3. Turn. In total 85 (85, 87, 87, 89, 89, 91, 91, 93) sts.
Now you repeat the pattern of ch 1 space row and DC row until ROW 39 (43, 47, 51, 55, 57, 61, 65, 69)
ROW 40 (44, 48, 52, 56, 58, 62, 66, 70) - This is the ch 1 space row. You start to make your
second armhole exactly the same way as the first one. 61/25 (59/27, 59/29, 57/31, 57/33, 55/35, 55/37, 53/39, 53/41)
ROW 41 (45, 49, 53, 57, 59, 63, 67, 71) - Into your 3rd ch make DC, DC in every st (and ch space) until the end of the row. Ch 3. Turn. In total 85 (85, 87, 87, 89, 89, 91, 91, 93) sts.
Now you repeat the pattern of ch 1 space row and DC row until ROW 49 (55, 61, 67, 73, 77, 83, 89, 95). Your last row is in DC, in total 85 (85, 87, 87, 89, 89, 91, 91, 93) sts.

SEWING for all sizes
Now fold your cardigan with the sides as you would wear it with wrong side out. Align the rows so DC rows are on top of each other and ch 1 space rows as well. Now sew the top part together as you see
on the picture. ↓


RIBBING around the sides and neckline for all sizes

(this direction for the ribbing is the same for all ribbings of the cardigan)
Start to make the ribbing at the bottom of one side of the cardigan. You will crochet the ribbing all around the one side, neckline and the other side.
You can also continue with the beginning tail if you make an invisible knot to join the new yarn so this way you can avoid the weaving as much as possible. :)
Insert the hook into the first st and make 11 FCH.
ROW 1 - Insert the hook into your 3rd ch from the hook and make DC. Then DC in every ch (in total 10DC). Sl st to the side of the cardigan into the second st (you connected the row with the cardigan). Then 2 sl sts up of the side of the cardigan. Turn.


ROW 2 - Continue with DC in every stitch in BLO. Ch 2. Turn.
ROW 3 - Into the next st make DC, until the end of the row. Sl st to the side of the cardigan into the second st (you connected the row with the cardigan). Then 2 sl sts up of the side of the cardigan. Turn.

Now you repeat ROW 2 and ROW 3 all around until you get to the bottom of the other side of the cardigan.
NOTE: Once you get to the neckline you simply continue in every stitch. The necline ends with the sides of the DC rows and ch1 space rows. Each end of the row counts as a DC so once you join the ribbing to the sides, one end of the each row means 2 sl sts.
RIBBING for the bottom for all sizes
The ribbing pattern is exactly the same as the ribbing for the sides. Starting with ch11 and DC in BLO.
If you end your ribbing of the sides at the edge of the cardigan you can continue with ch11 and start to crochet the ribbing all around the bottom.

If you end your ribbing of the sides with sl st of your DC row you have to secure it and leave a tail. Then join your new yarn at the very beginning of the side and make 11ch and start to crochet the ribbing all around the bottom.

This picture shows how you start your ribbing for the bottom of the cardigan.

SLEEVES
NOTES:
1) Start at the bottom of your armhole.
2) Sleeves are working in the round.
3) The pattern is originally for the mid long sleeves to your elbow. If you'd like them shorter or longer just continue with the pattern (always end your sleeves with DC row)
ROW 1 - Join your yarn at the bottom of your armhole and make ch 2 (counts as a first DC), ch 1 (skip the next st), *into the next st DC, ch 1 (skip the next st)*. Repeat from * to *. Once you get to the first ch 2 (your first DC), sl st into the top of the second ch. In total 50 (54, 58, 62, 66, 70, 74, 78, 82) sts.
ROW 2 - Ch 2 (counts as a first DC), DC in every ch sp and DC st. Once you get to the fist DC, sl st into the top of the second ch. In total 50 (54, 58, 62, 66, 70, 74, 78, 82) sts.
Continue ROW 1 and ROW 2 for 8 (8, 10, 10, 12, 12, 14, 14, 16) rows or until your desired length of the sleeve. Your last row is in DC row only (don't forget that you will add to the length 2.5" for the ribbing).
RIBBING for the sleeves for all sizes
Once you finish your last DC of the sleeve, make a sl st to your first DC of the row.
Then make ch11 and start the ribbing the same way as the ribbing for the sides and the bottom of the cardigan. Once you are at the first row of the ribbing, roll it up and with your hook make sl sts to sew the ribbing together.

POCKETS for all sizes (optional)
NOTES:
1) Make this pattern 2x. 1 pocket for the each side.
2) It's the same pattern as the whole cardigan with repeating DC row with ch1 sp row.
Ch 22
ROW 1 - DC into the 3rd ch from the hook, DC in every ch until the end of the row. Ch 3 (counts as a first DC and ch 1 sp for the next row). Turn. Continue with ROW 2. In total 21 sts.
OR
ROW 1 - 21 FDC. Ch 3 (counts as a first DC and ch 1 sp for the next row). Turn. In total 21 sts.
ROW 2 - Into your 2nd st (from your first DC) DC, *ch 1 (skip the next stitch), DC into the next stitch*, repeat from * to * until the end of the row. Ch 2. Turn. In total 21 sts.
ROW 3 - DC in every st (and ch space) until the end of the row. Ch 3. Turn.
Repeat ROW 2 and ROW 3 until ROW 9 (your last row is in DC). Don't secure the pocket but
continue with ch 7 for the ribbing of the pocket. Continue the same way as the all ribbings for this cardigan. You get 6sts in total for the pocket ribbing.
Once you finish the pockets, place them on your cardigan on the same place of each side. Grab your yarn needle and whip st around the edges of the pockets.


Don't forget to weave in your tails and TA-DA, your Blush of Summer Cardigan is completed.
Let me know how it went. I am always happy for any feedback from you so I can improve my patterns and make it easy for the next projects.


I came across this pattern while looking for an easy summer cardigan that used worsted yarn and very little seaming. This was perfect. It was easy to follow. It took me about 3 days to complete. It turned out wonderful. I plan on using this pattern to make several cardigans for family and friends. Nothing like an enjoyable pattern to use for the holidays!