
How to Crochet the Catherine Wheel Stitch (Harlequin / Starburst Stitch Tutorial)
- Sep 26, 2025
- 6 min read
Updated: Jan 13
Hi there, it’s Lenka from Happy Heartsy 💛
If you’re looking for a stitch that’s both fun to crochet and stunning to look at, the Catherine Wheel Stitch is a perfect choice. This stitch creates a beautiful pattern of “wheels” or “bursts,” and you might also hear it called the Harlequin Stitch or Starburst Stitch. It’s one of those designs that instantly adds texture and colour play to your crochet projects.
In this tutorial, I’ll guide you step by step with photos, a written pattern, and a full video so you can follow along in the way that works best for you. Grab your yarn and hook, and let’s dive in together!

If you wish to support my work you can do so with Buy Me a Coffee (my version is Buy Me Yarn, you know why:) ).
It's a symbolic amount that supports me in maintaining my blog and producing more free content for you. Find out more by clicking the link or button.
BIG THANKS for everyone who supports me by purchases, likes, shares, comments, tags or/and feedbacks! It means a lot to me.
This post contains affiliate links for the yarns I used and truly love. It also displays ads. I may earn a small commission if you choose to make a purchase through these links or interact with the ads—at no extra cost to you. The revenue I earn through ads and affiliate links helps support my small business and allows me to continue sharing free crochet patterns and content with you. Thank you so much for your support—it truly means the world to me.
All patterns and images in this post are for personal use only. They may not be sold, copied, or claimed as your own. You’re more than welcome to comment, like, or share this post with others!
Before we get into the actual pattern, I also created the Ultimate Crochet Hack Sheet! It's 2 pages with basic crochet abbreviations and symbols, hook sizes in US and UK versions, all the yarn types (with recommended hooks and projects), etc. Feel free to click on the pic or a link to my shop where you can find more details.
Video Tutorial
Check out my YouTube video tutorial where I cover everything. It's a fantastic complement to any written pattern. You're welcome to leave feedback in the video comments.

Recommended Materials
In this tutorial, I use LionBrand Cotton24/7 cotton yarn. I find that the texture stands out more with cotton yarn, and its bright colours are beneficial during tutorials. For this yarn I use a 4mm/G-6 crochet hook.
However, if you're new to crocheting and just practicing, I highly recommend using any solid color acrylic yarn that works with a 5mm/H-8 hook size.


Direction for Catherine Wheel Stitch
Start with any multiple of 10 + 7 foundation chains (FCH).

ROW 1
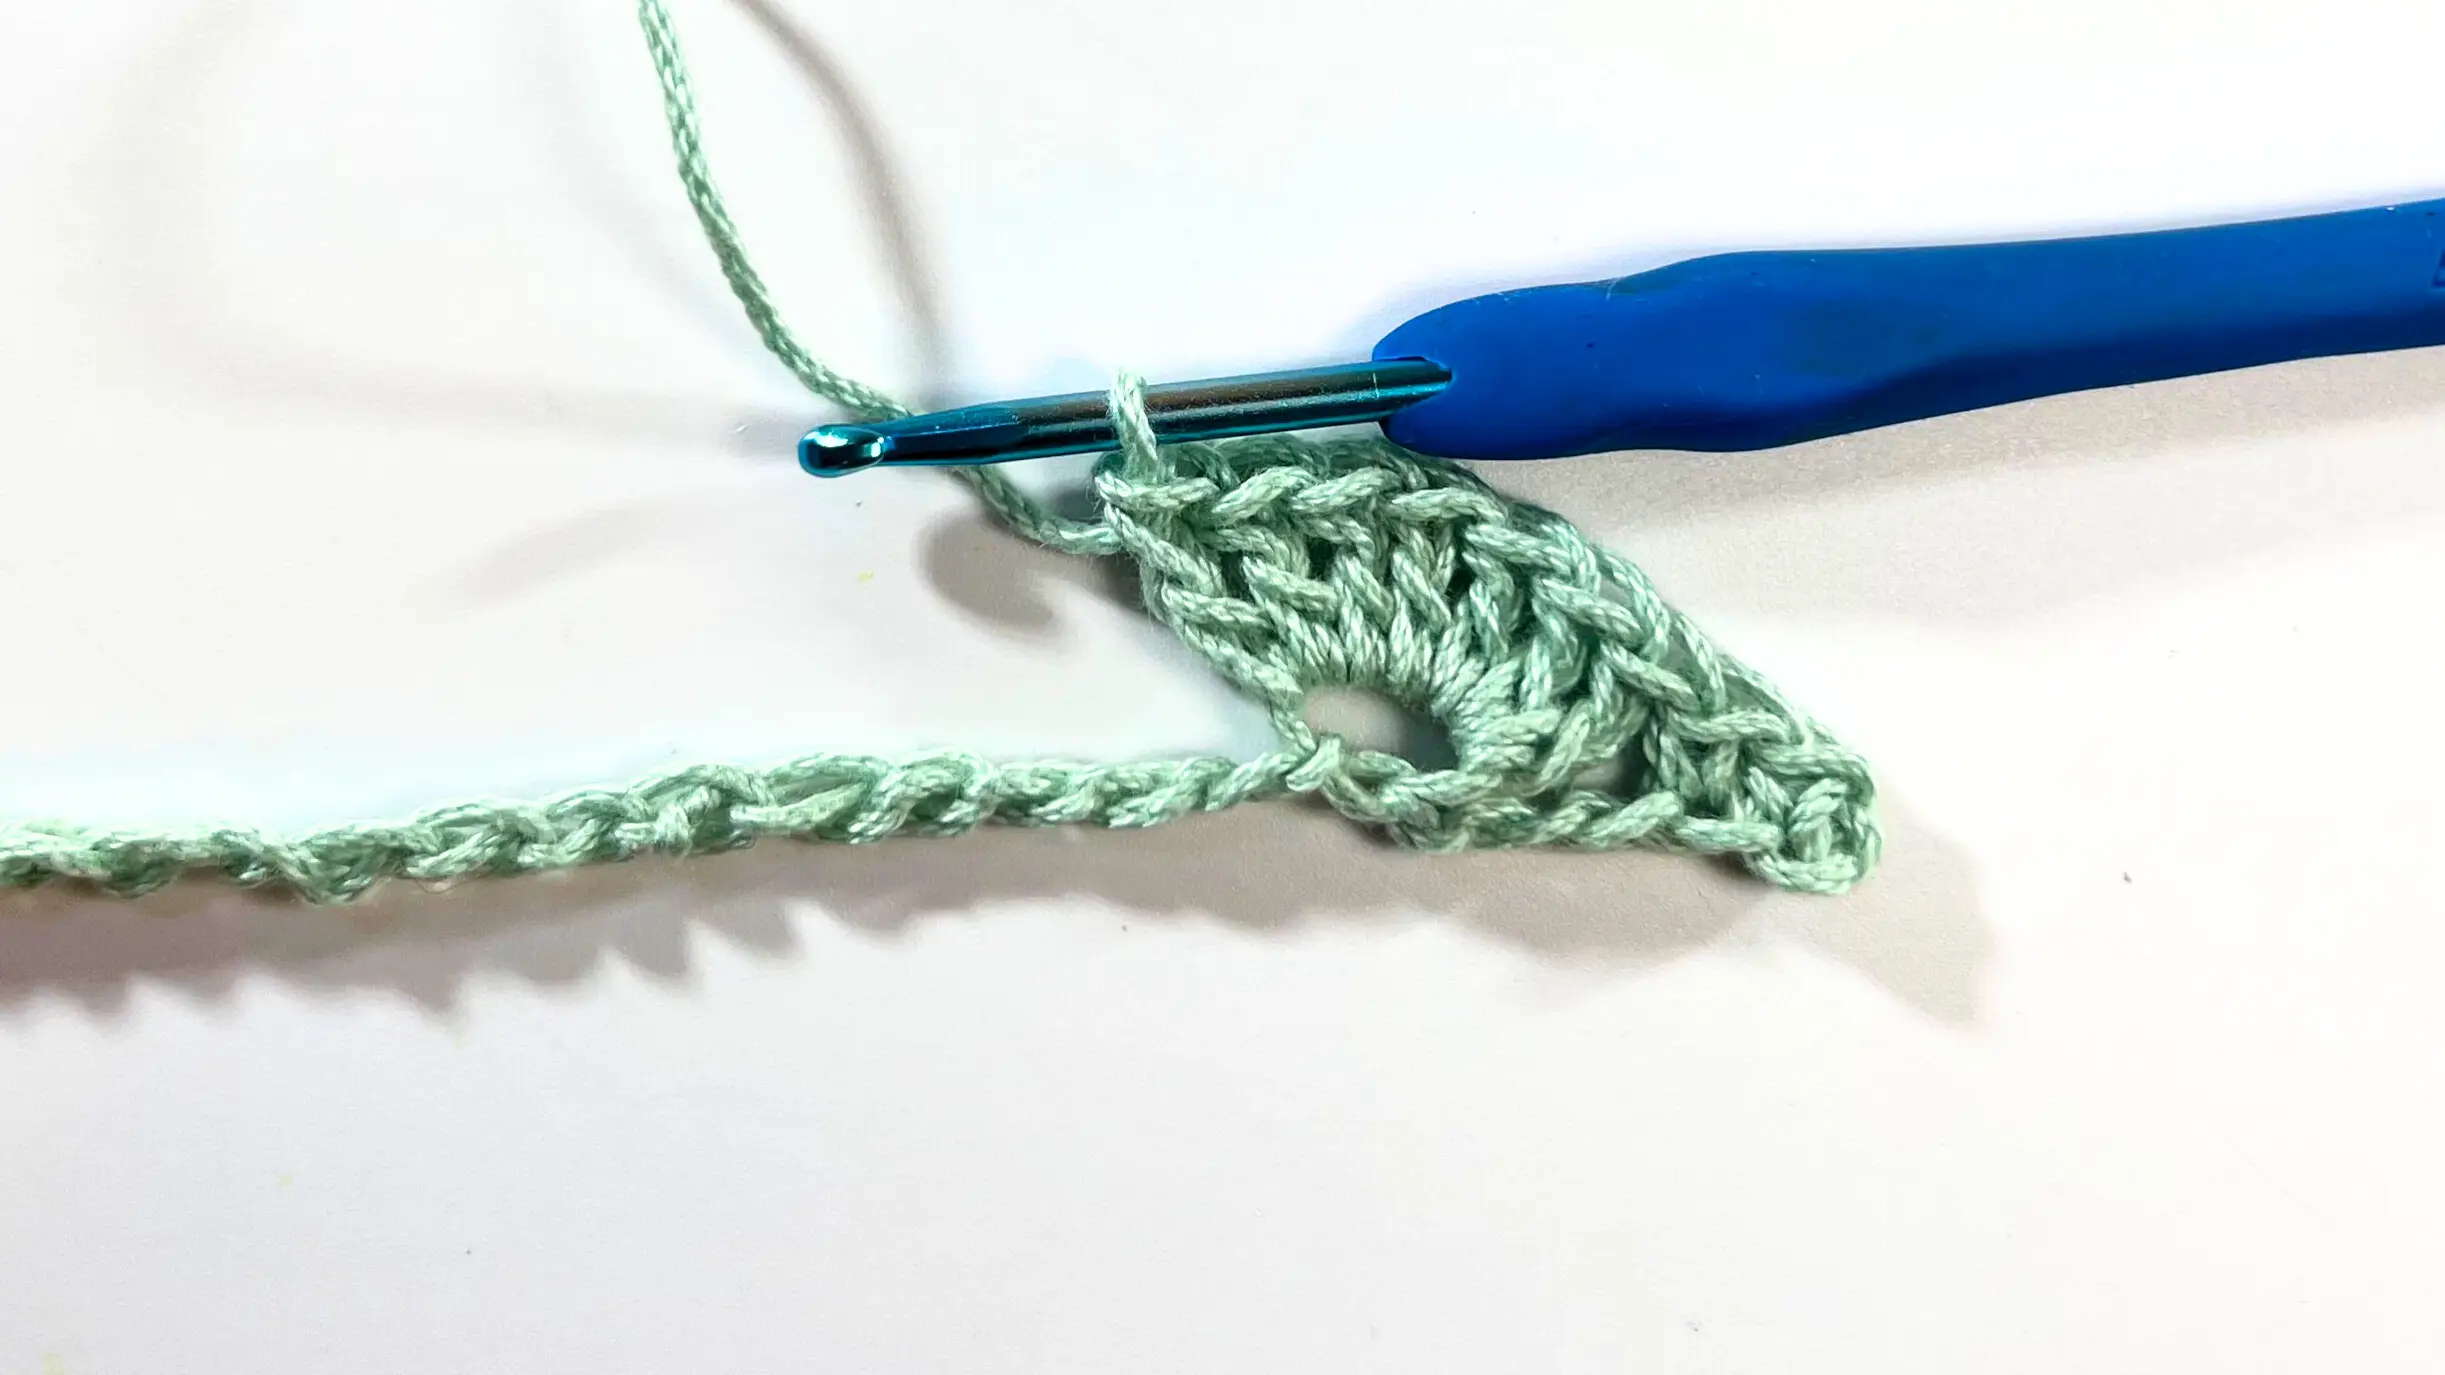
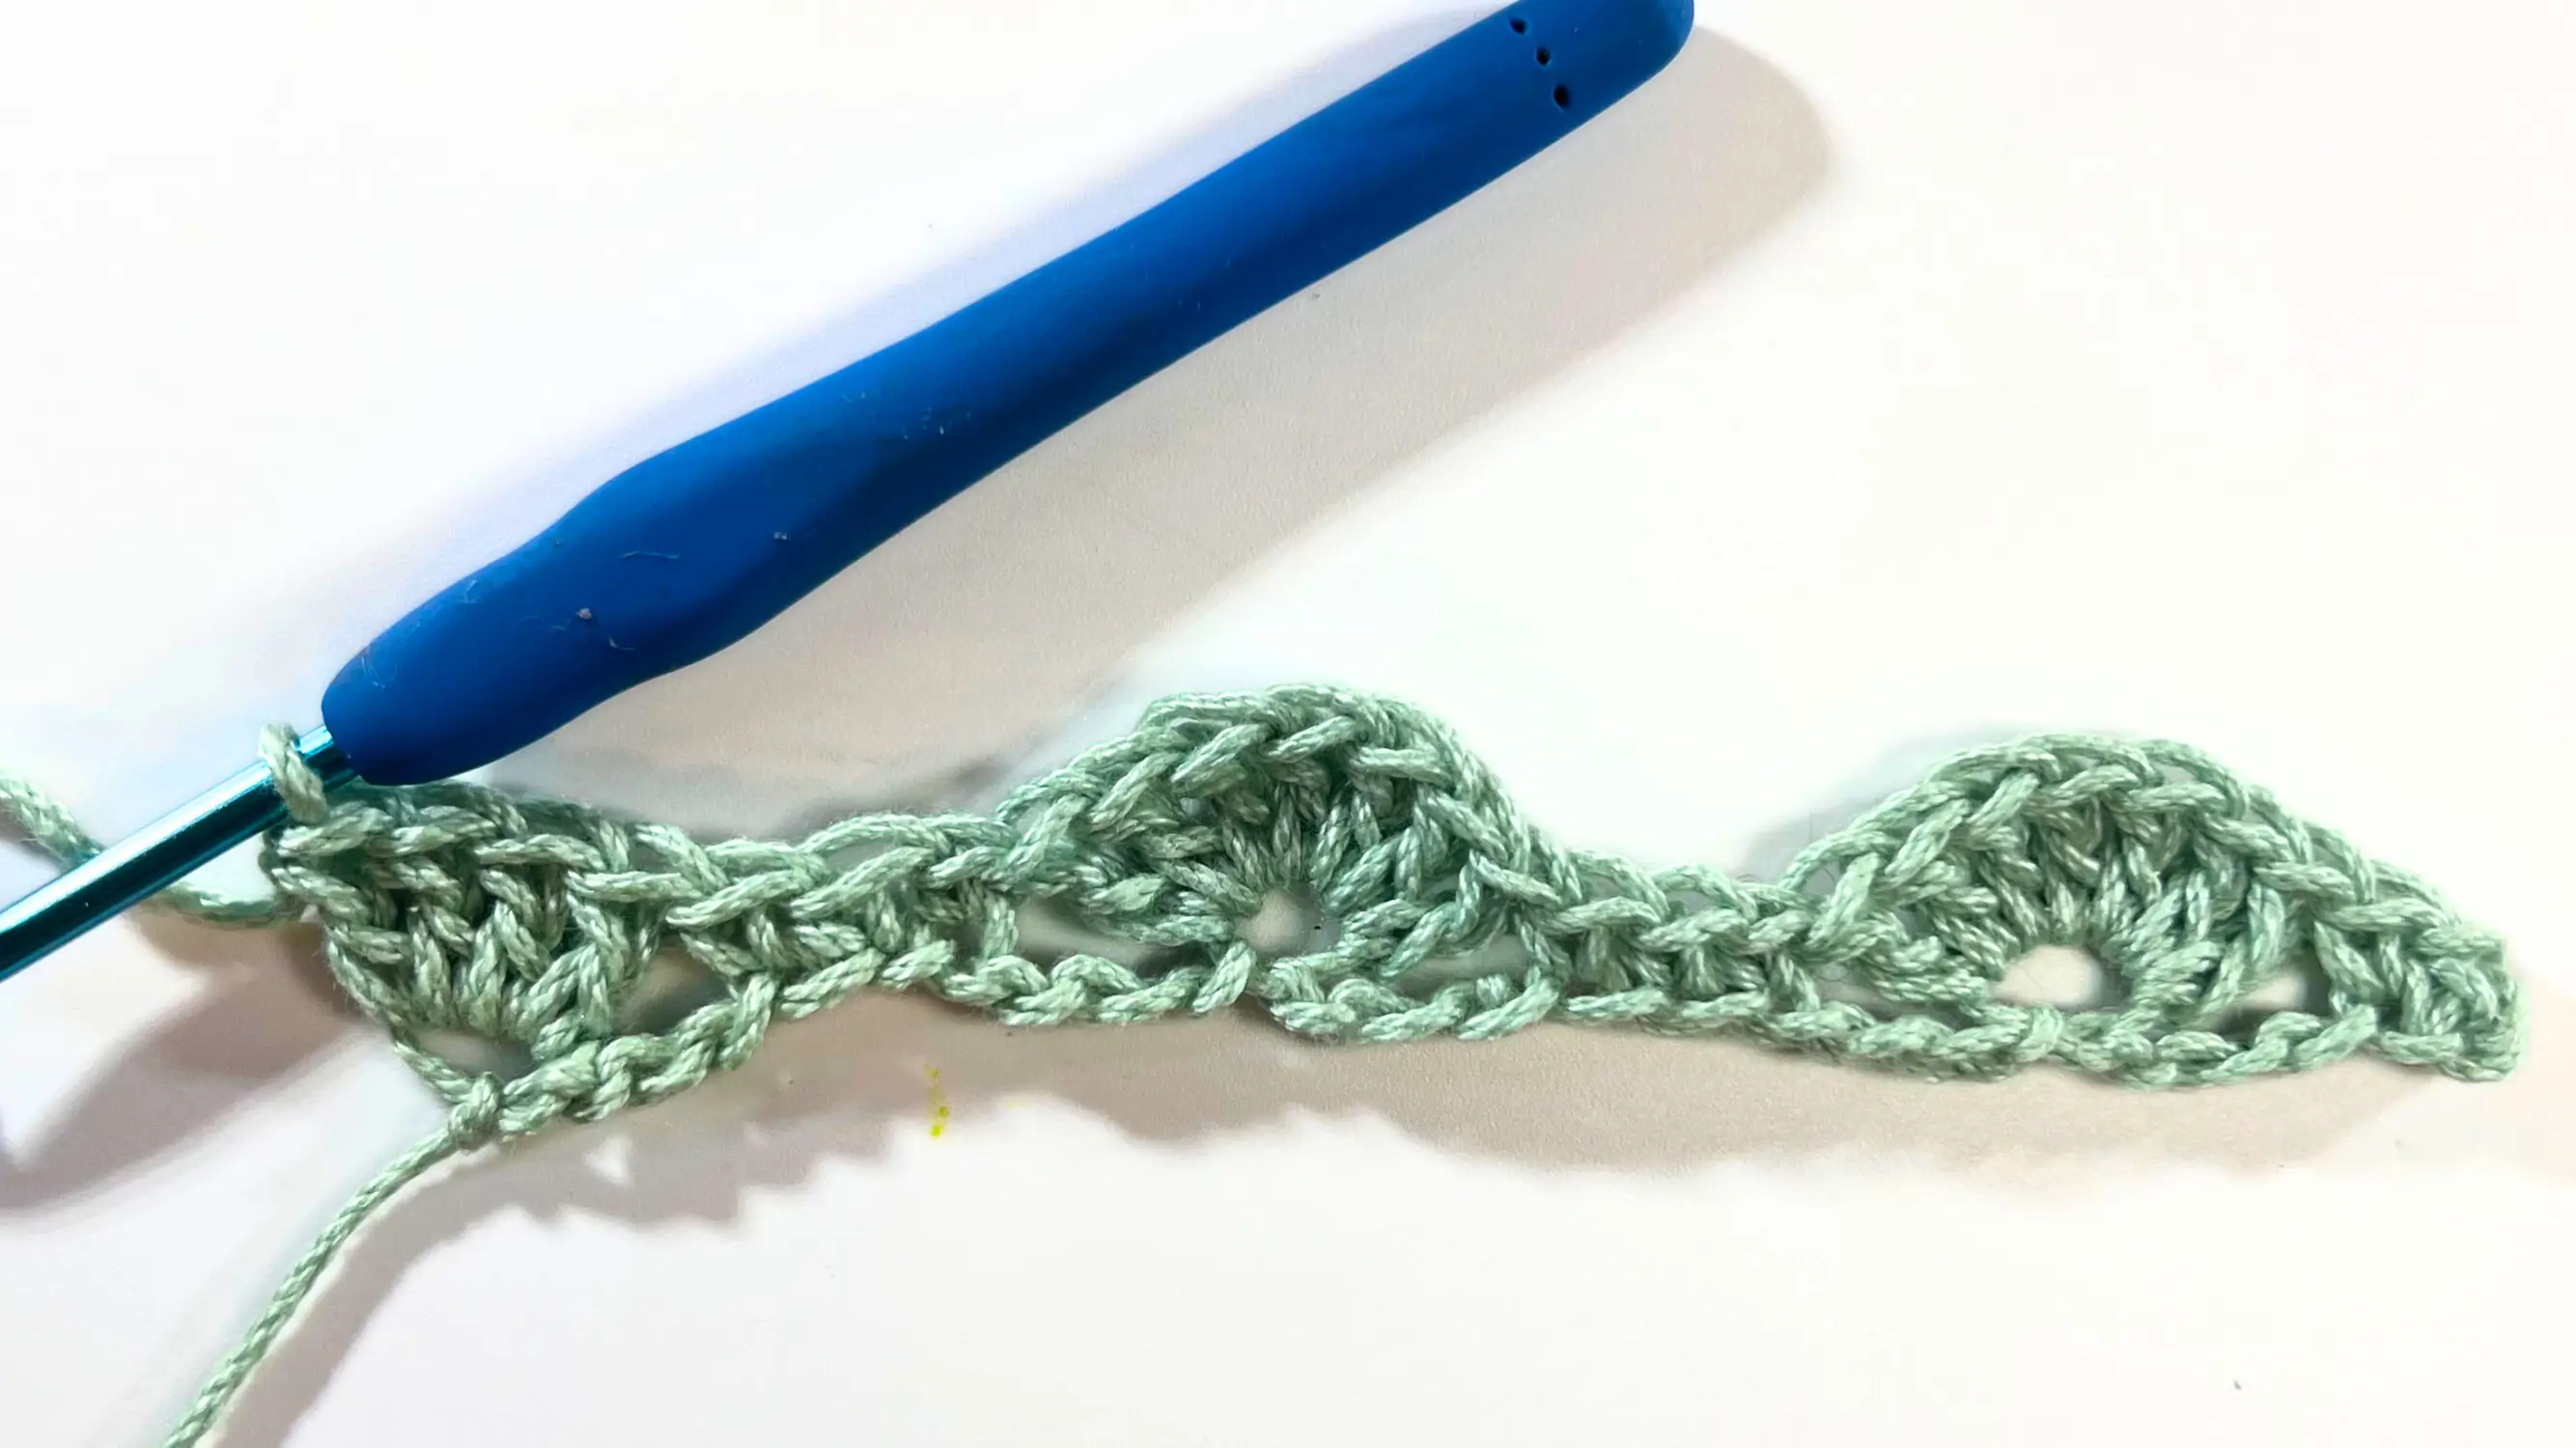
Into the 2nd chain, make 1 SC, then 1 SC into the next chain. Skip the following 3 chains, and into the 4th chain make 7 DC.


Skip 3 chains, then make 1 SC in each of the next 3 chains. Repeat the sequence skip 3 chains, 7 DC shell, skip 3 chains, 1 SC in each of the next 3 chains until you have 4 chains remaining. Skip 3 chains, and in the last chain work a 4 DC shell.


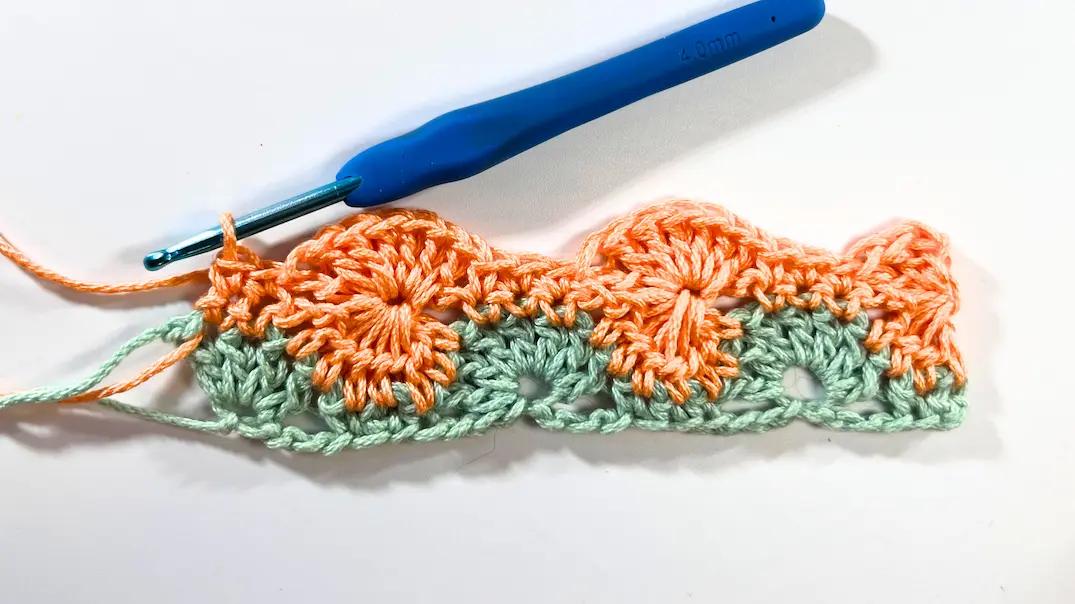
ROW 2
Now it’s time to change colours. You can cast off and turn your work, or, if you’re using only two colours, leave the first colour attached and pick it up again for the next switch.
Insert your hook into the first stitch, place the new colour over the hook, pull it through, and chain 1 to secure.
Next make 1SC into the first stitch and another 1SC into the following one.

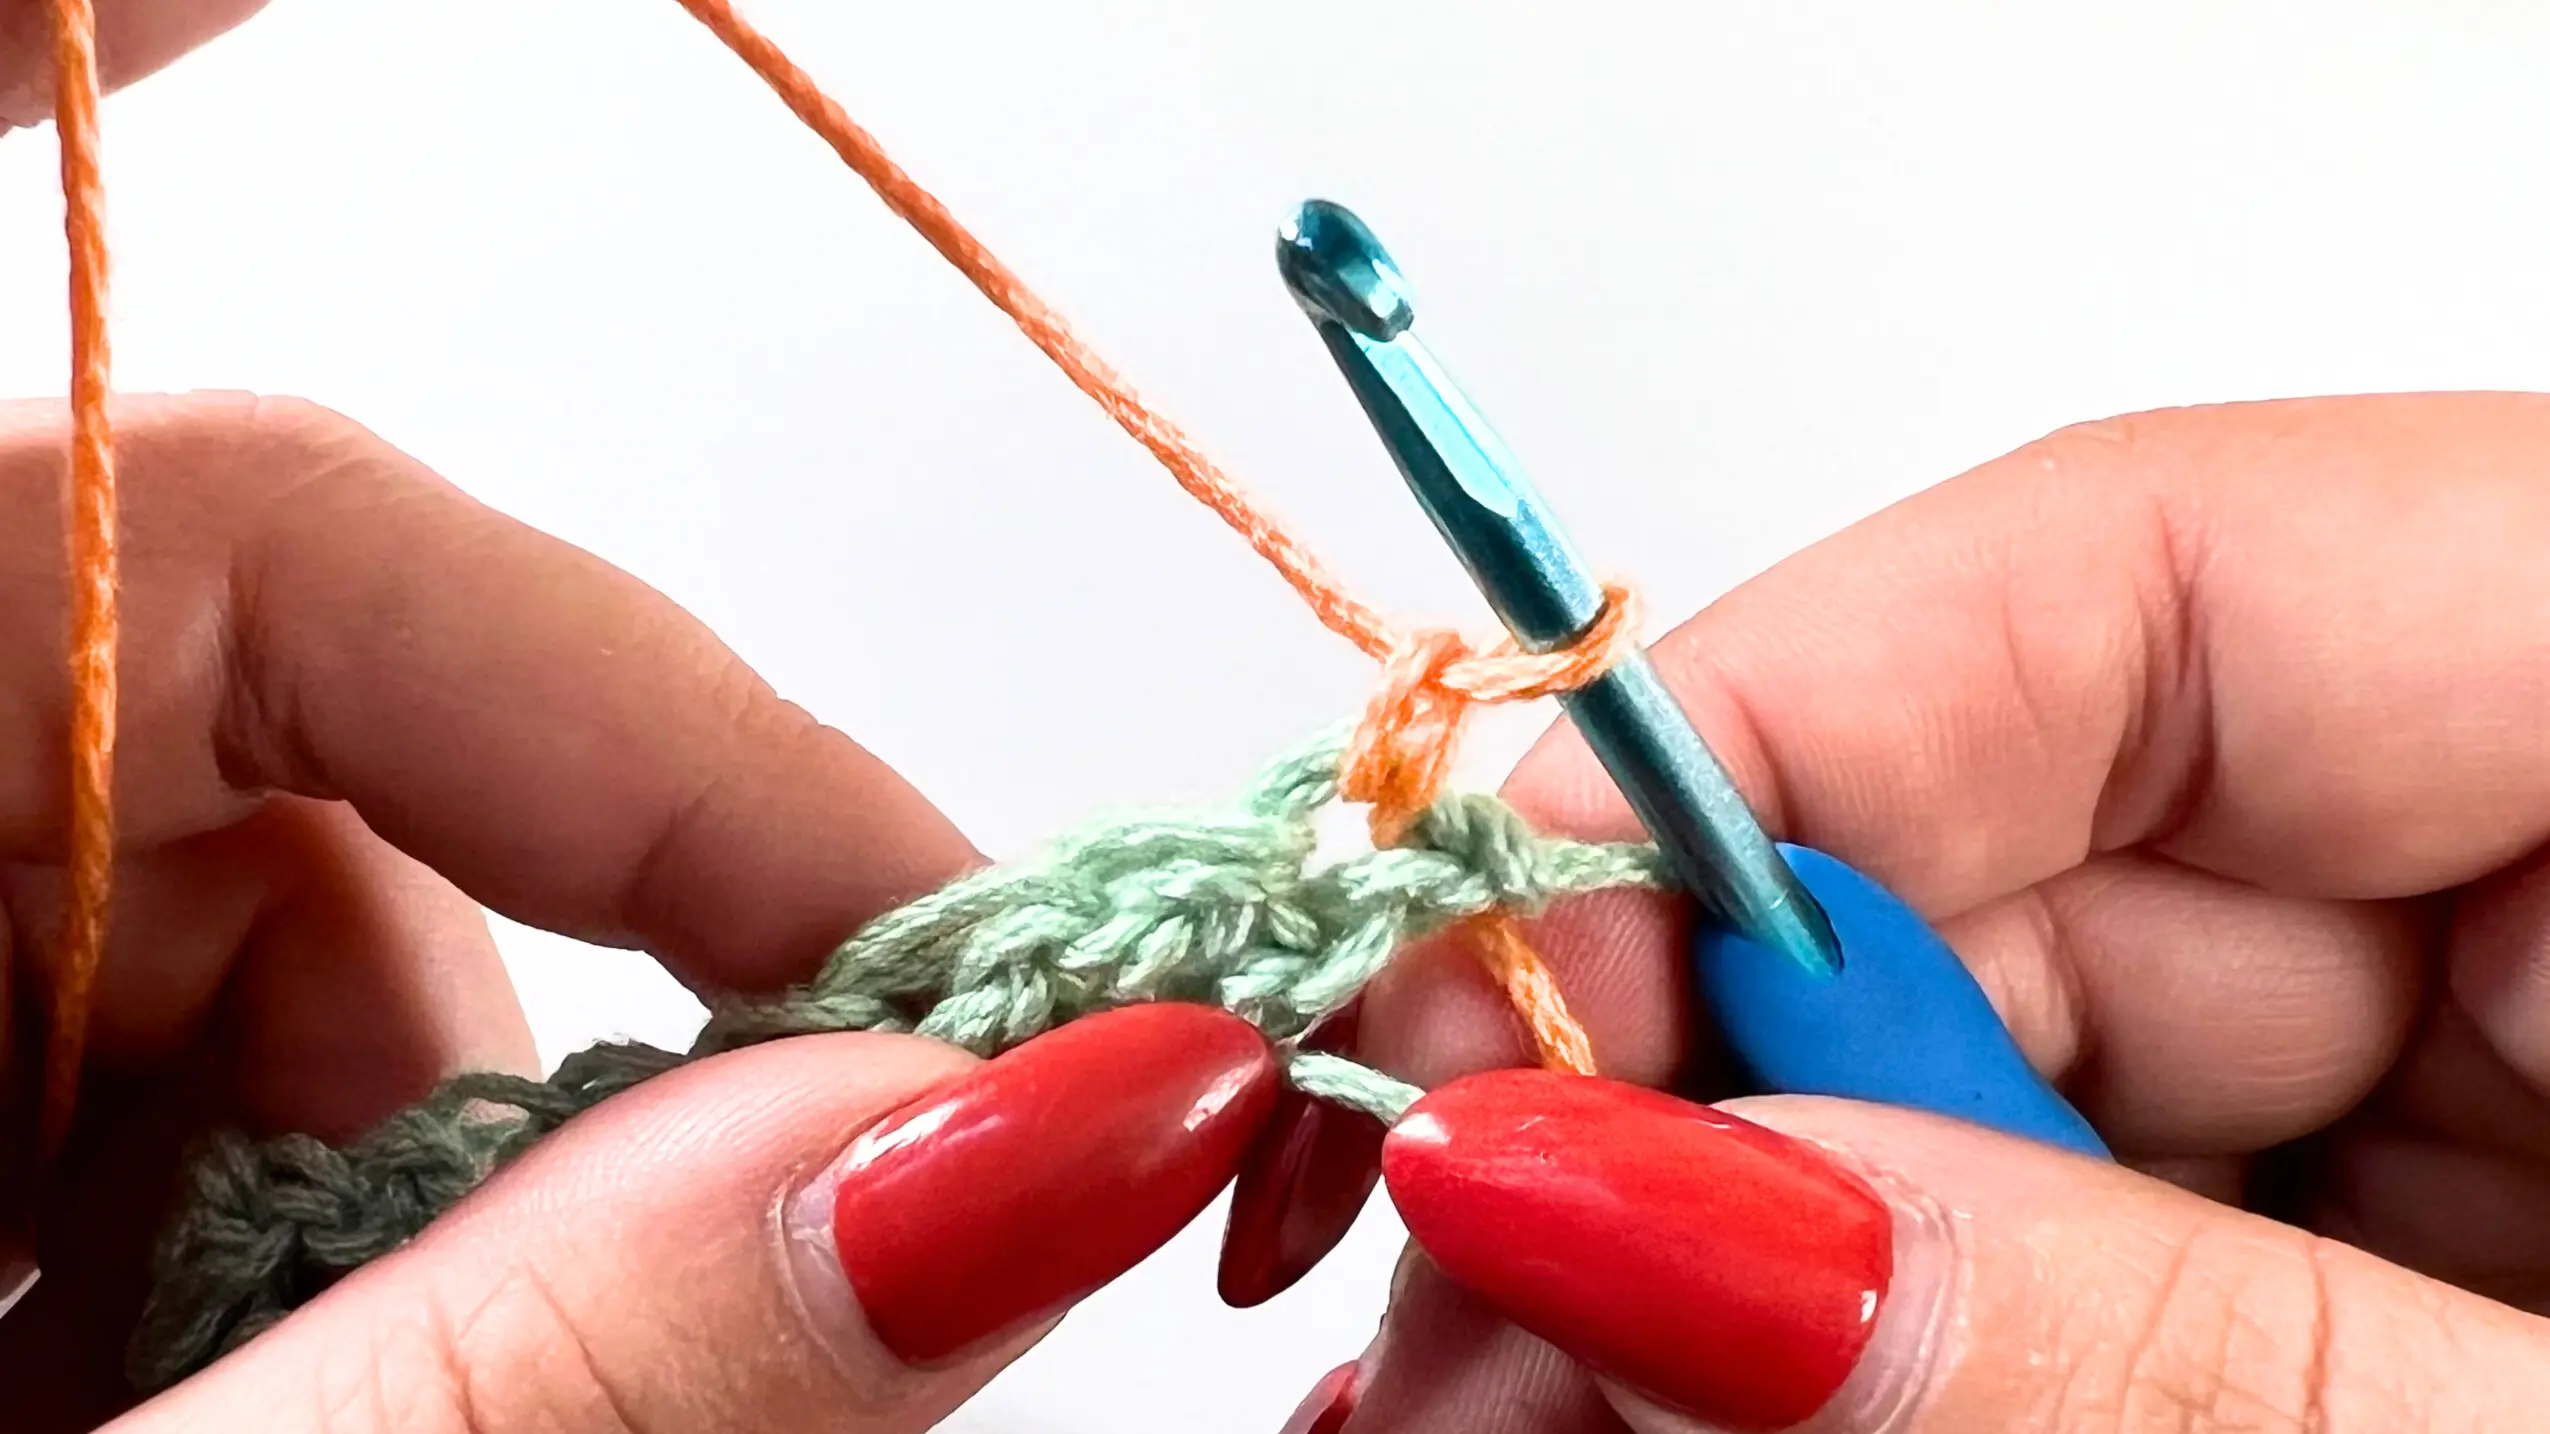

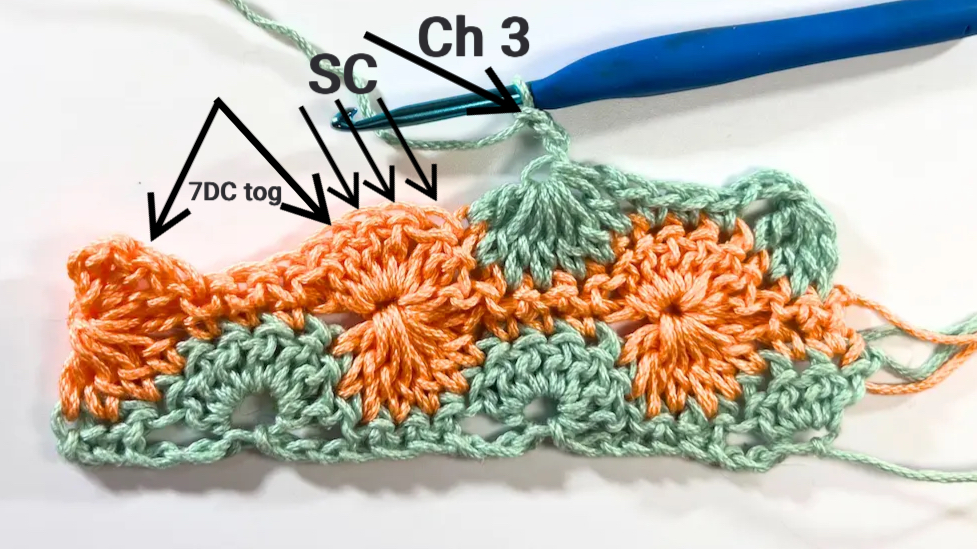
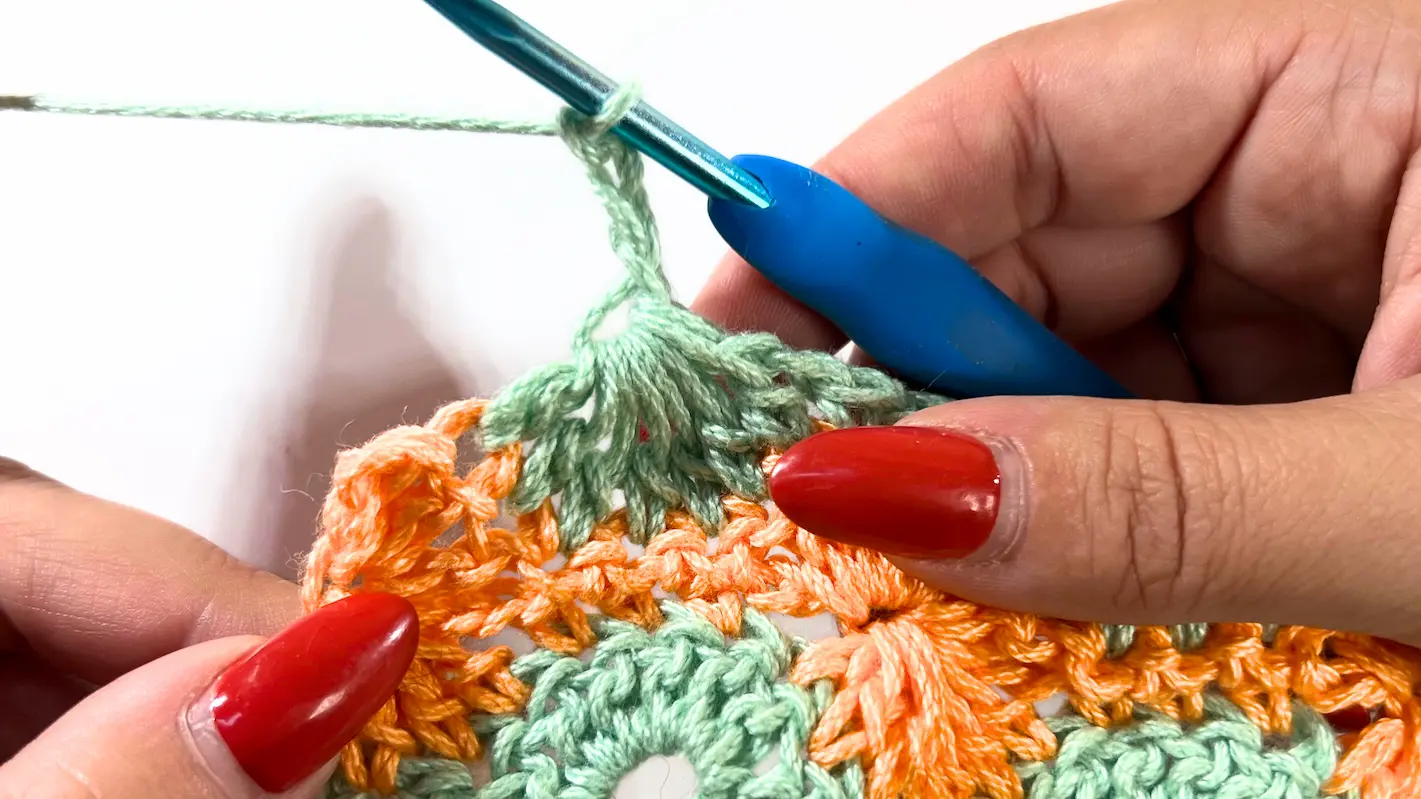
Chain 2, then work 7 DC together over the next 7 stitches.
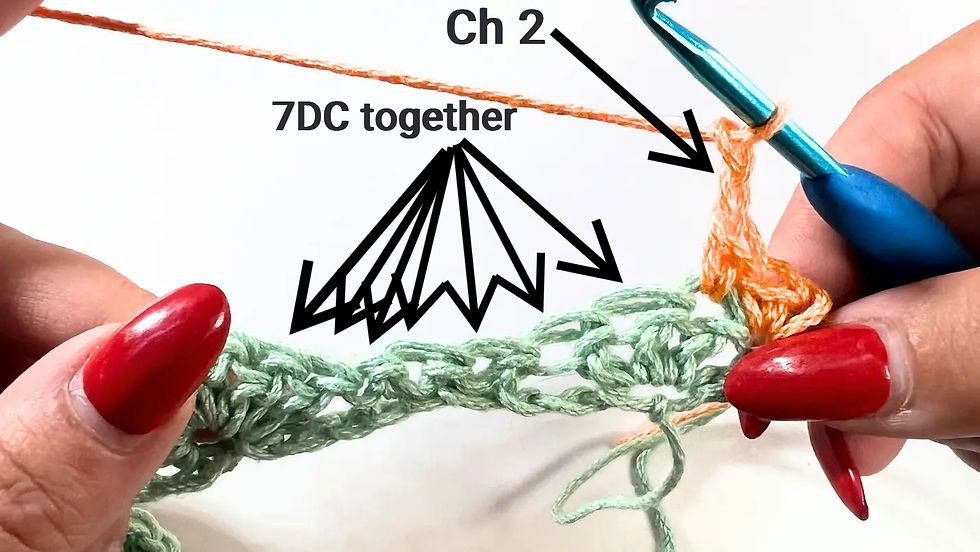
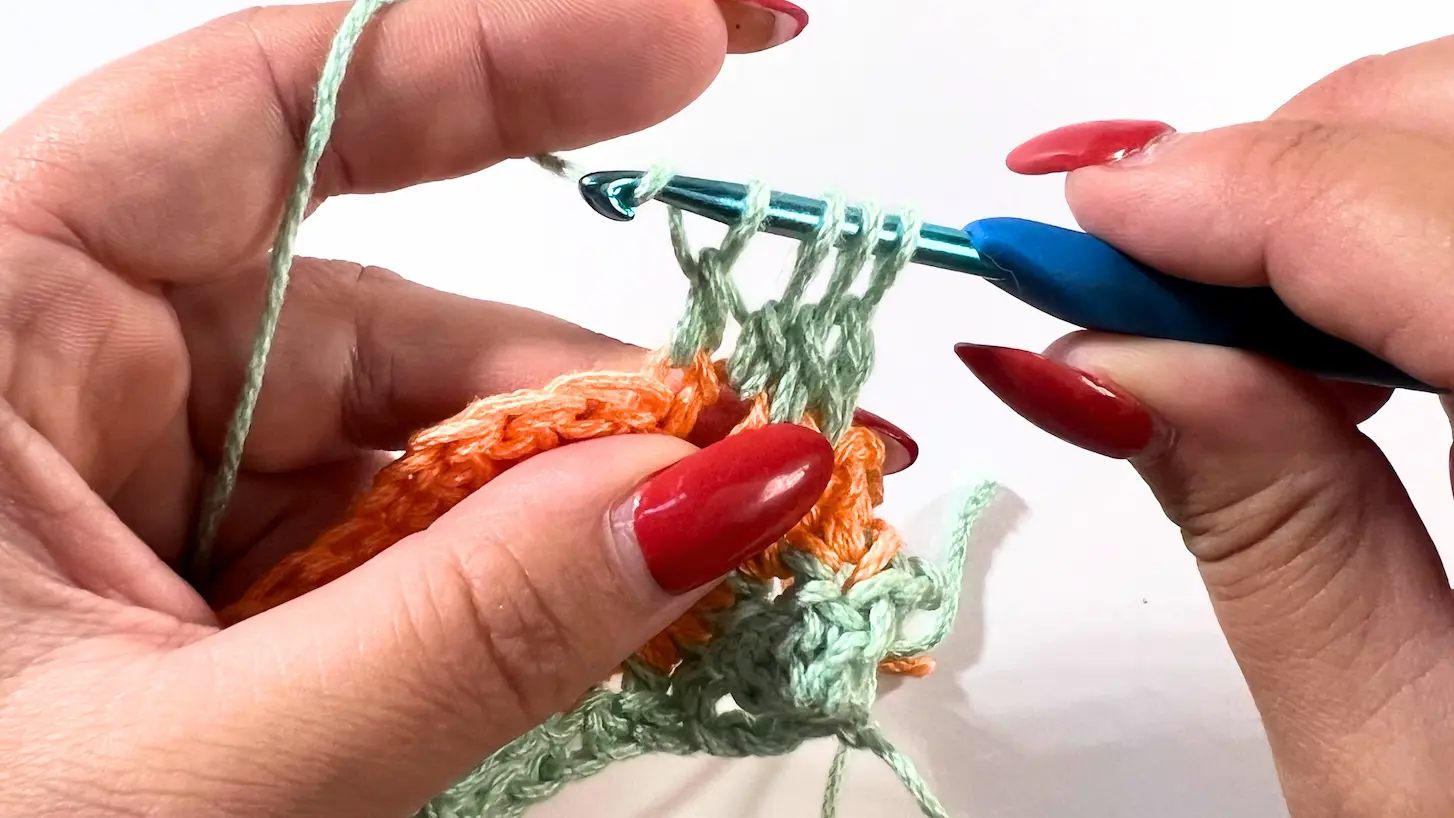
How to crochet 7DC together (or any other number of DC sts)
Yarn over (YO) and insert the hook into the next stitch. YO and pull up a loop (you will have 3 loops on your hook). YO again and pull through the first 2 loops (leaving 2 loops on your hook). This completes the first step of your first partial double crochet.


Repeat this process in each of the next 6 stitches: YO, insert the hook into the next stitch, YO and pull up a loop, YO and pull through 2 loops only. Each time you repeat, you’ll add one more loop to your hook.
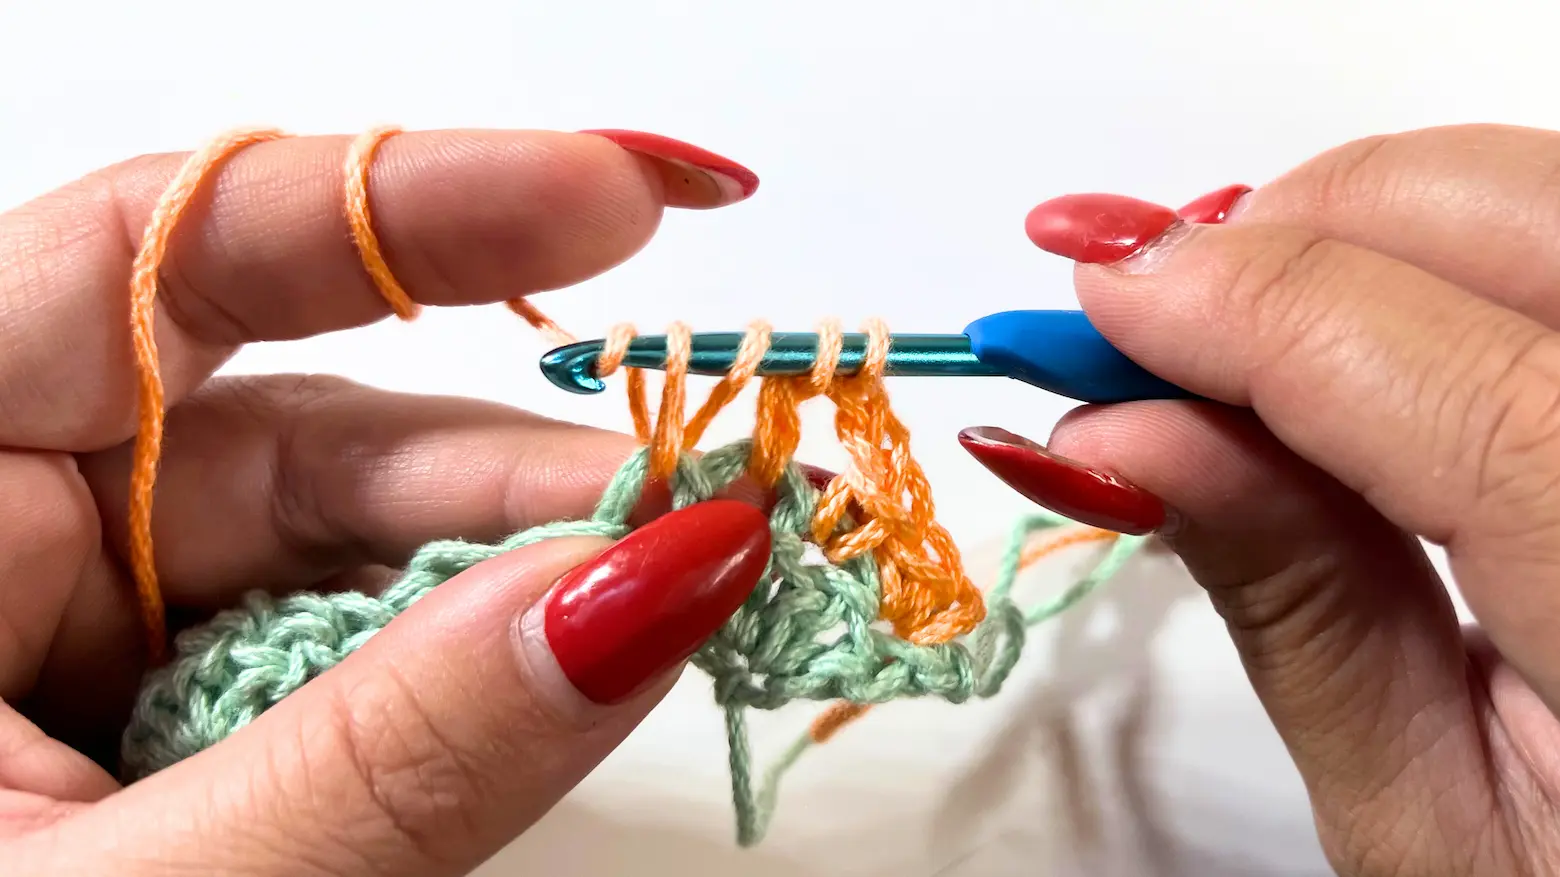

Once you finish working the 7 DC together, you should have 8 loops on your hook. Yarn over and pull through all 8 loops to complete the 7 DC together cluster.

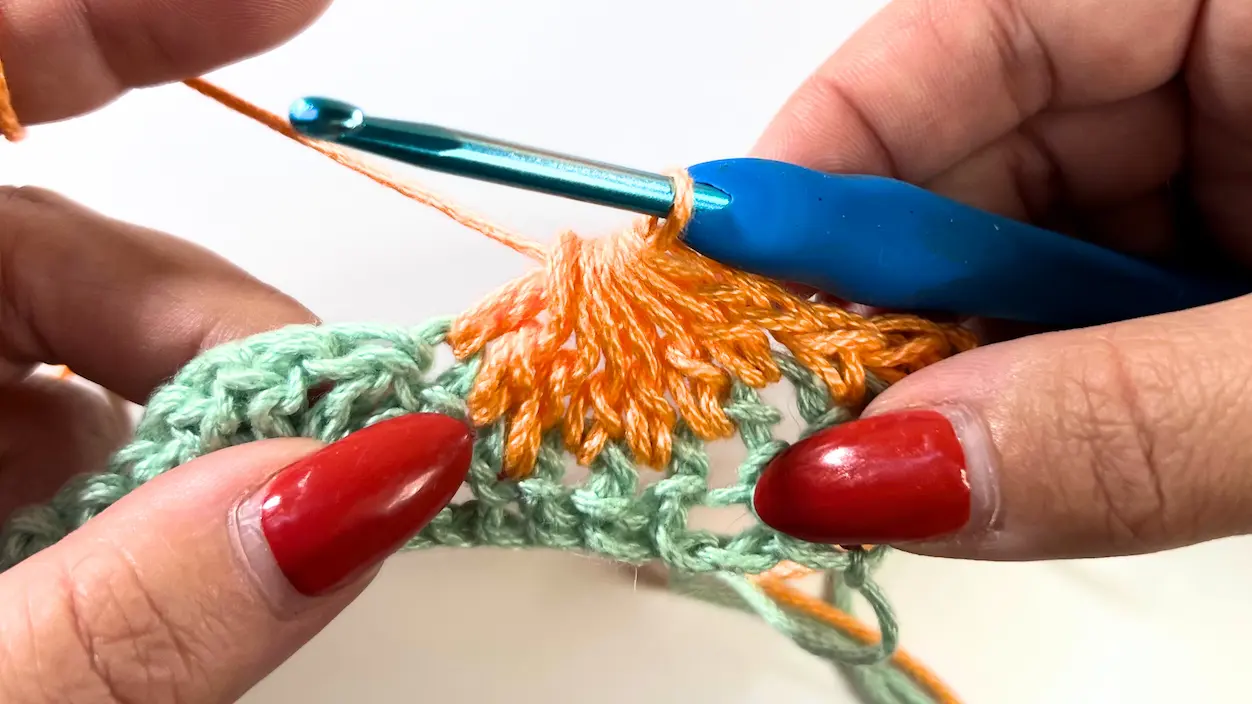
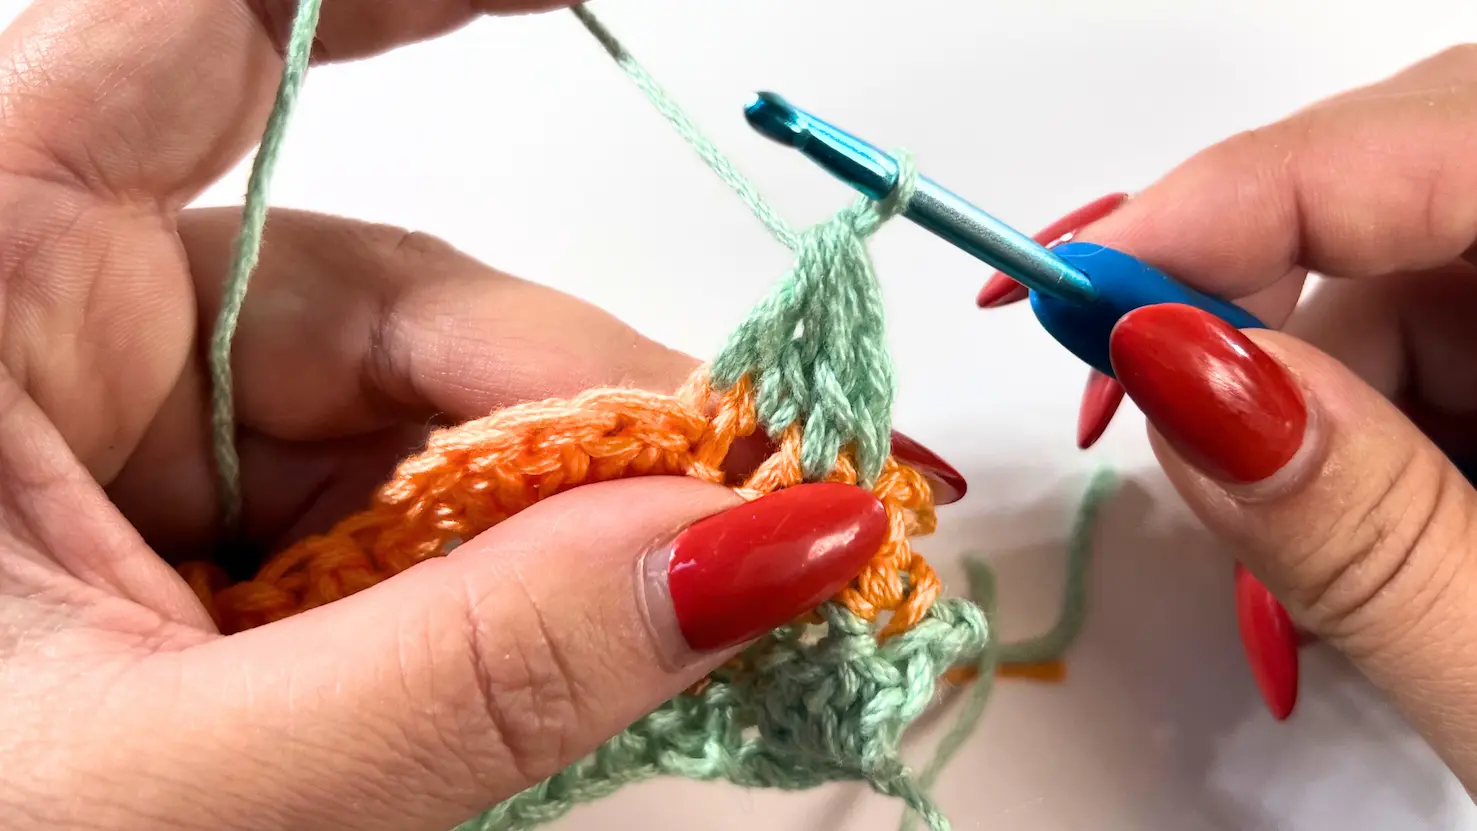
Chain 3, then repeat the sequence: 1 SC into each of the next 3 stitches, chain 2, 7 DC together, chain 3, 1 SC into each of the next 3 stitches, ch 2 until you have 4 stitches left. In those last 4 stitches, work 4 DC together (the same way as the 7 DC together, but with a total of 5 loops on your hook to close the cluster).


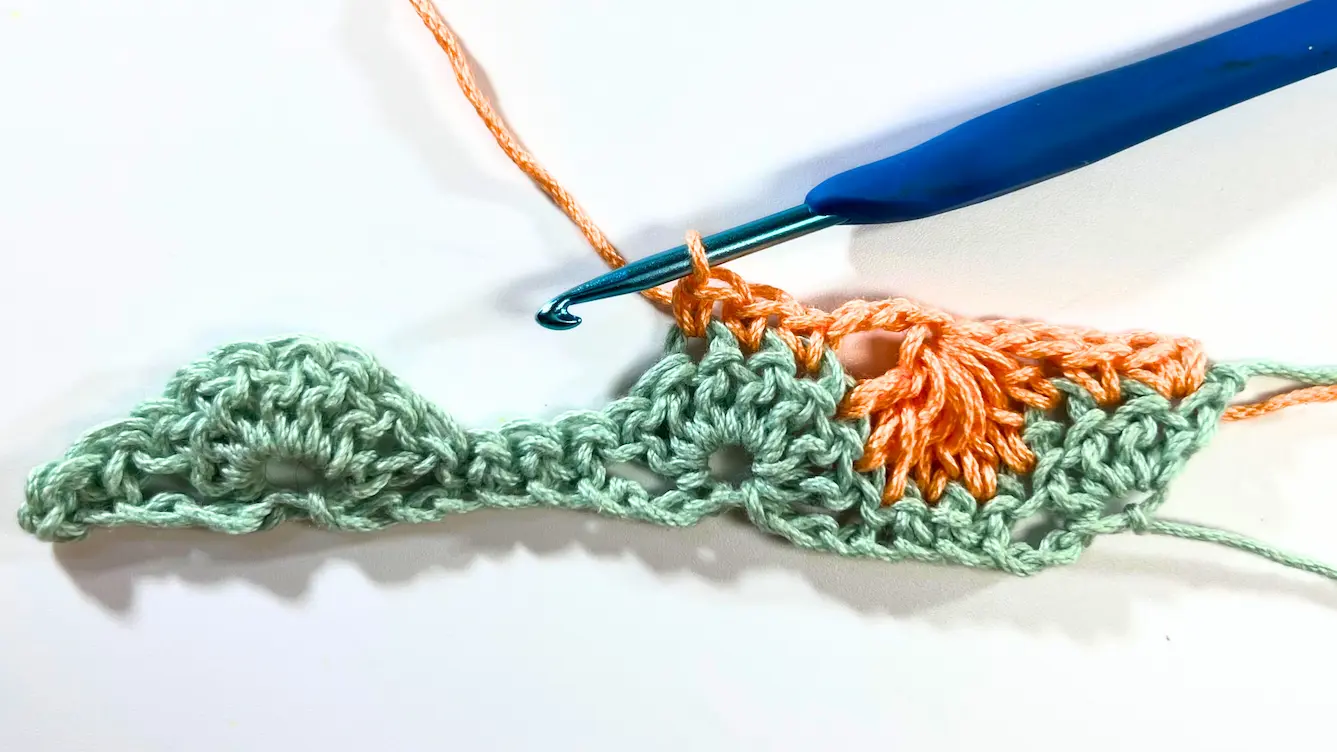


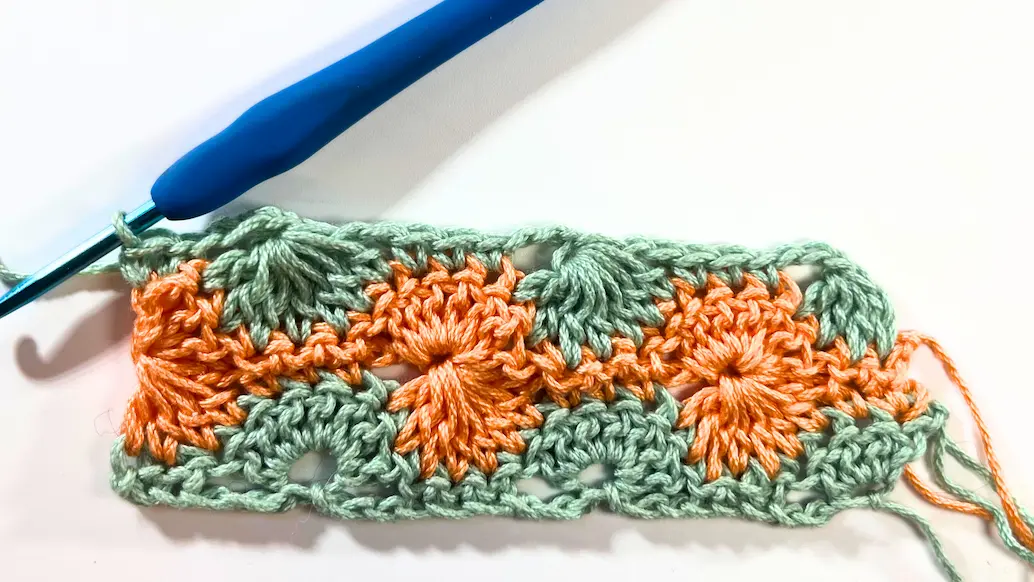
ROW 3
Keep the same colour and start the row with ch 2 that counts as the first DC for the row. Then make another 3 DCs into the loop (not the stitch) as the arrow indicates in the picture. Then skip the next 3 sts and make 1 SC into each of the next 3 stitches (these are the SCs from the previous row).


Then skip the next 2 chains and into the 3rd loop make 7 DC. After that, repeat the sequence: skip the next 3 stitches and make 1 SC into each of the 3 SCs from the previous row, then work 7 DC into the next loop. Continue this sequence across until the end, finishing with 1 SC into each of the last 2 stitches.


ROW 4
Now switch to your new colour. Chain 2 (this counts as your first partial double crochet). Then, over the next three stitches, work 3 double crochets together. You should have 4 loops on your hook—yarn over and pull through all 4 loops to complete the cluster.


After completing the first 4DC cluster at the beginning of the row, repeat the sequence as follows: Ch 3, then make 1 SC into each of the next 3 stitches from the previous row. Ch 2, and over the next 7 stitches work 7DC together.
Once you finish your last 7DC together, chain 3. You should now have 2 stitches left—make 1 SC into each of those last 2 stitches to complete the row.

ROW 5
Keep the same colour and chain 1. Work 1 single crochet (SC) into each of the next 2 stitches. Skip the 2 chains and into the 3rd loop make 7 double crochets (7DC). Skip the next 3 chains and work 1 SC into each of the SCs from the previous row. Keep repeating this sequence (7DC into the loop, sk 3 chains, 3 SCs over the SCs, skip 2 chs) across the row. At the end of the row, finish with 4DC into the last stitch.


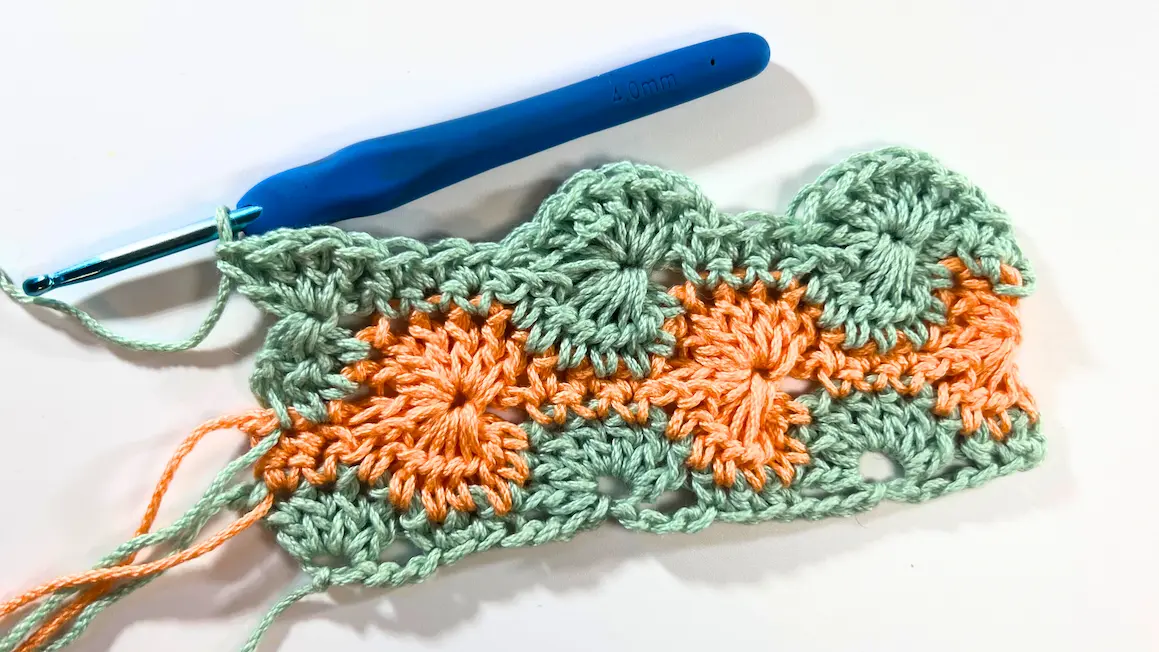
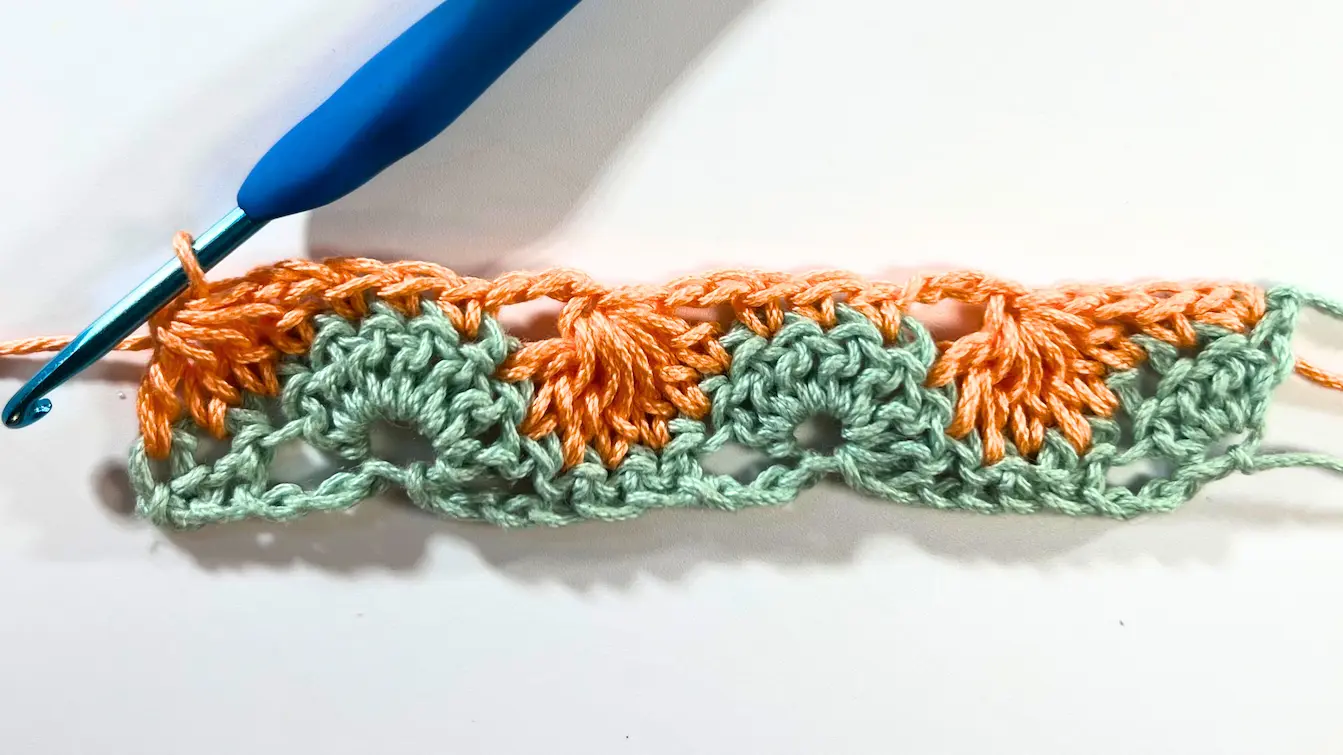
ROW 6 - until desired length
Continue the pattern by repeating Rows 2, 3, 4, and 5 until the project reaches the desired length.
Ta-daa! ✨ Your Catherine Wheel Stitch sample is ready, and I hope you had as much fun learning it as I had sharing it with you. This stitch is such a joy to make, and I can’t wait to see how you’ll use it in your own projects.
If you enjoyed this tutorial, please consider liking, sharing, or leaving a comment — it truly means the world and helps me keep creating free crochet resources for you. 💕
And don’t forget, I’d love to see your work! Tag me on Instagram @happyheartsy so I can cheer you on and celebrate your crochet journey with you.
Happy stitching,
Lenka


Comments