
Free Crochet Wall Organizer Pattern | Easy 3 Pocket Hanging Storage
- Sep 12, 2025
- 7 min read
Lately, I’ve been in full-on nesting mode getting ready for baby, and one thing I realized is how much I need little spots to tuck things away. That’s how this 3 Pocket Wall Organizer came to life—it’s perfect for holding baby essentials, but honestly, it works just as well in any space. Whether you need extra storage in your craft room, a place for mail by the entryway, or just want to add a handmade touch to your home, this project is simple, practical, and fun to make.
If you'd like to support my work and get a printable, ad-free version of this pattern, please visit my shop or Ravelry.
If you like my crochet content but aren't interested in buying my patterns, that's perfectly fine. :) I offer my patterns for free on my blog so everyone can access them!
Additionally, there's an alternative way to support my work through Buy Me a Coffee (in my case, it's Buy Me Yarn, and you know the reason:) ). It's even cheaper than my current patterns. For more information, you can click the link above or the button below.
HUGE THANKS to everyone who supports me through purchases, likes, shares, comments, tags, or feedback! It truly means a lot to me.

This post contains affiliate links for the yarns I used and love and it also displays ads. I make a small commission if you purchase through these links or through the Ads which in no way affects the cost to you. The revenue I receive from Ads, and affiliate links, help me to support my small business which allows me to share my free crochet patterns/content with you. Thank you for your understanding and your support! It means a lot to me.
This pattern and all images associated with this pattern cannot be sold or claimed as your own.
You are allowed to sell finished project. Feel free to mention me for creating this pattern, it would make my day and I can share your finished blanket on my social media if you allow.
Don’t forget to share your project on Instagram! If you have your account you can tag me under
@happyheartsy. I would love to see your finished Heartfelt Threads Cardigan so I can share it with others.
Before we get into the actual pattern I also created the Ultimate Crochet Hack Sheet! It's 2 pages with basic
crochet abbreviations and symbols, hook sizes in US and UK version, all the yarn types (with recommended hooks and projects) etc. Feel free to click on the pic or a link to my shop where you can find more details.

What you need for this 3 Pocket Wall Organizer:
Materials:
Yarn used approx. 300g / 510m
Hook - 4mm/US G-6
Scissors, Yarn Needle, Stitch Markers
3x Wooden Dowels - 15"
Measurements:
The sizing guide follows size S, (M, L) means 31 for S (41 for M, 51 for L)
S - Small Pouch - 8" x 6.5"
M - Medium Pouch - 10" x 7.5"
L - Large Pouch - 13" x 9.5"
All together - laying flat 25" x 15" (wooden dowel)
Gauge:
4" x 4" = 16sts x 18rows
Abbreviations:
Ch - Chain
FCH - Foundation Chain
YO - Yarn Over
YU - Yarn Under
St - Stitch
SC - Single Crochet
Sl St - Slip Stitch
DC - Double Crochet
Ch Sp - Chain Space


DIRECTIONS for 3 Pockets Wall Organizer
YouTube - 3:44 - Starting the Crochet Pocket
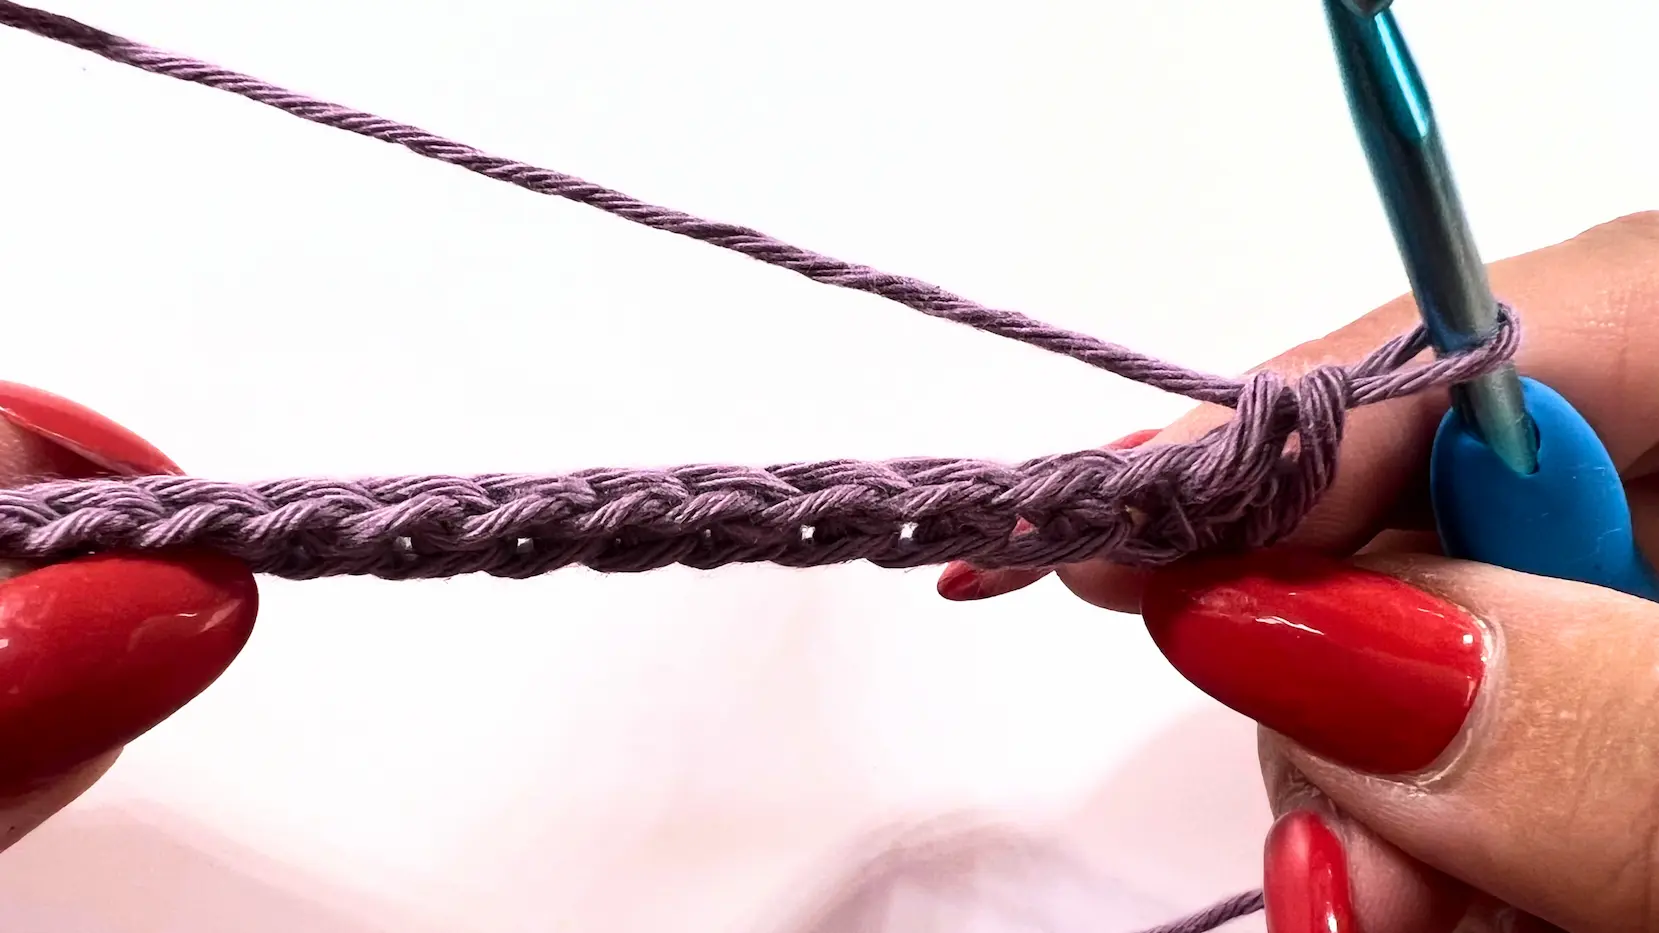
Start with 31 (41, 51) FCH
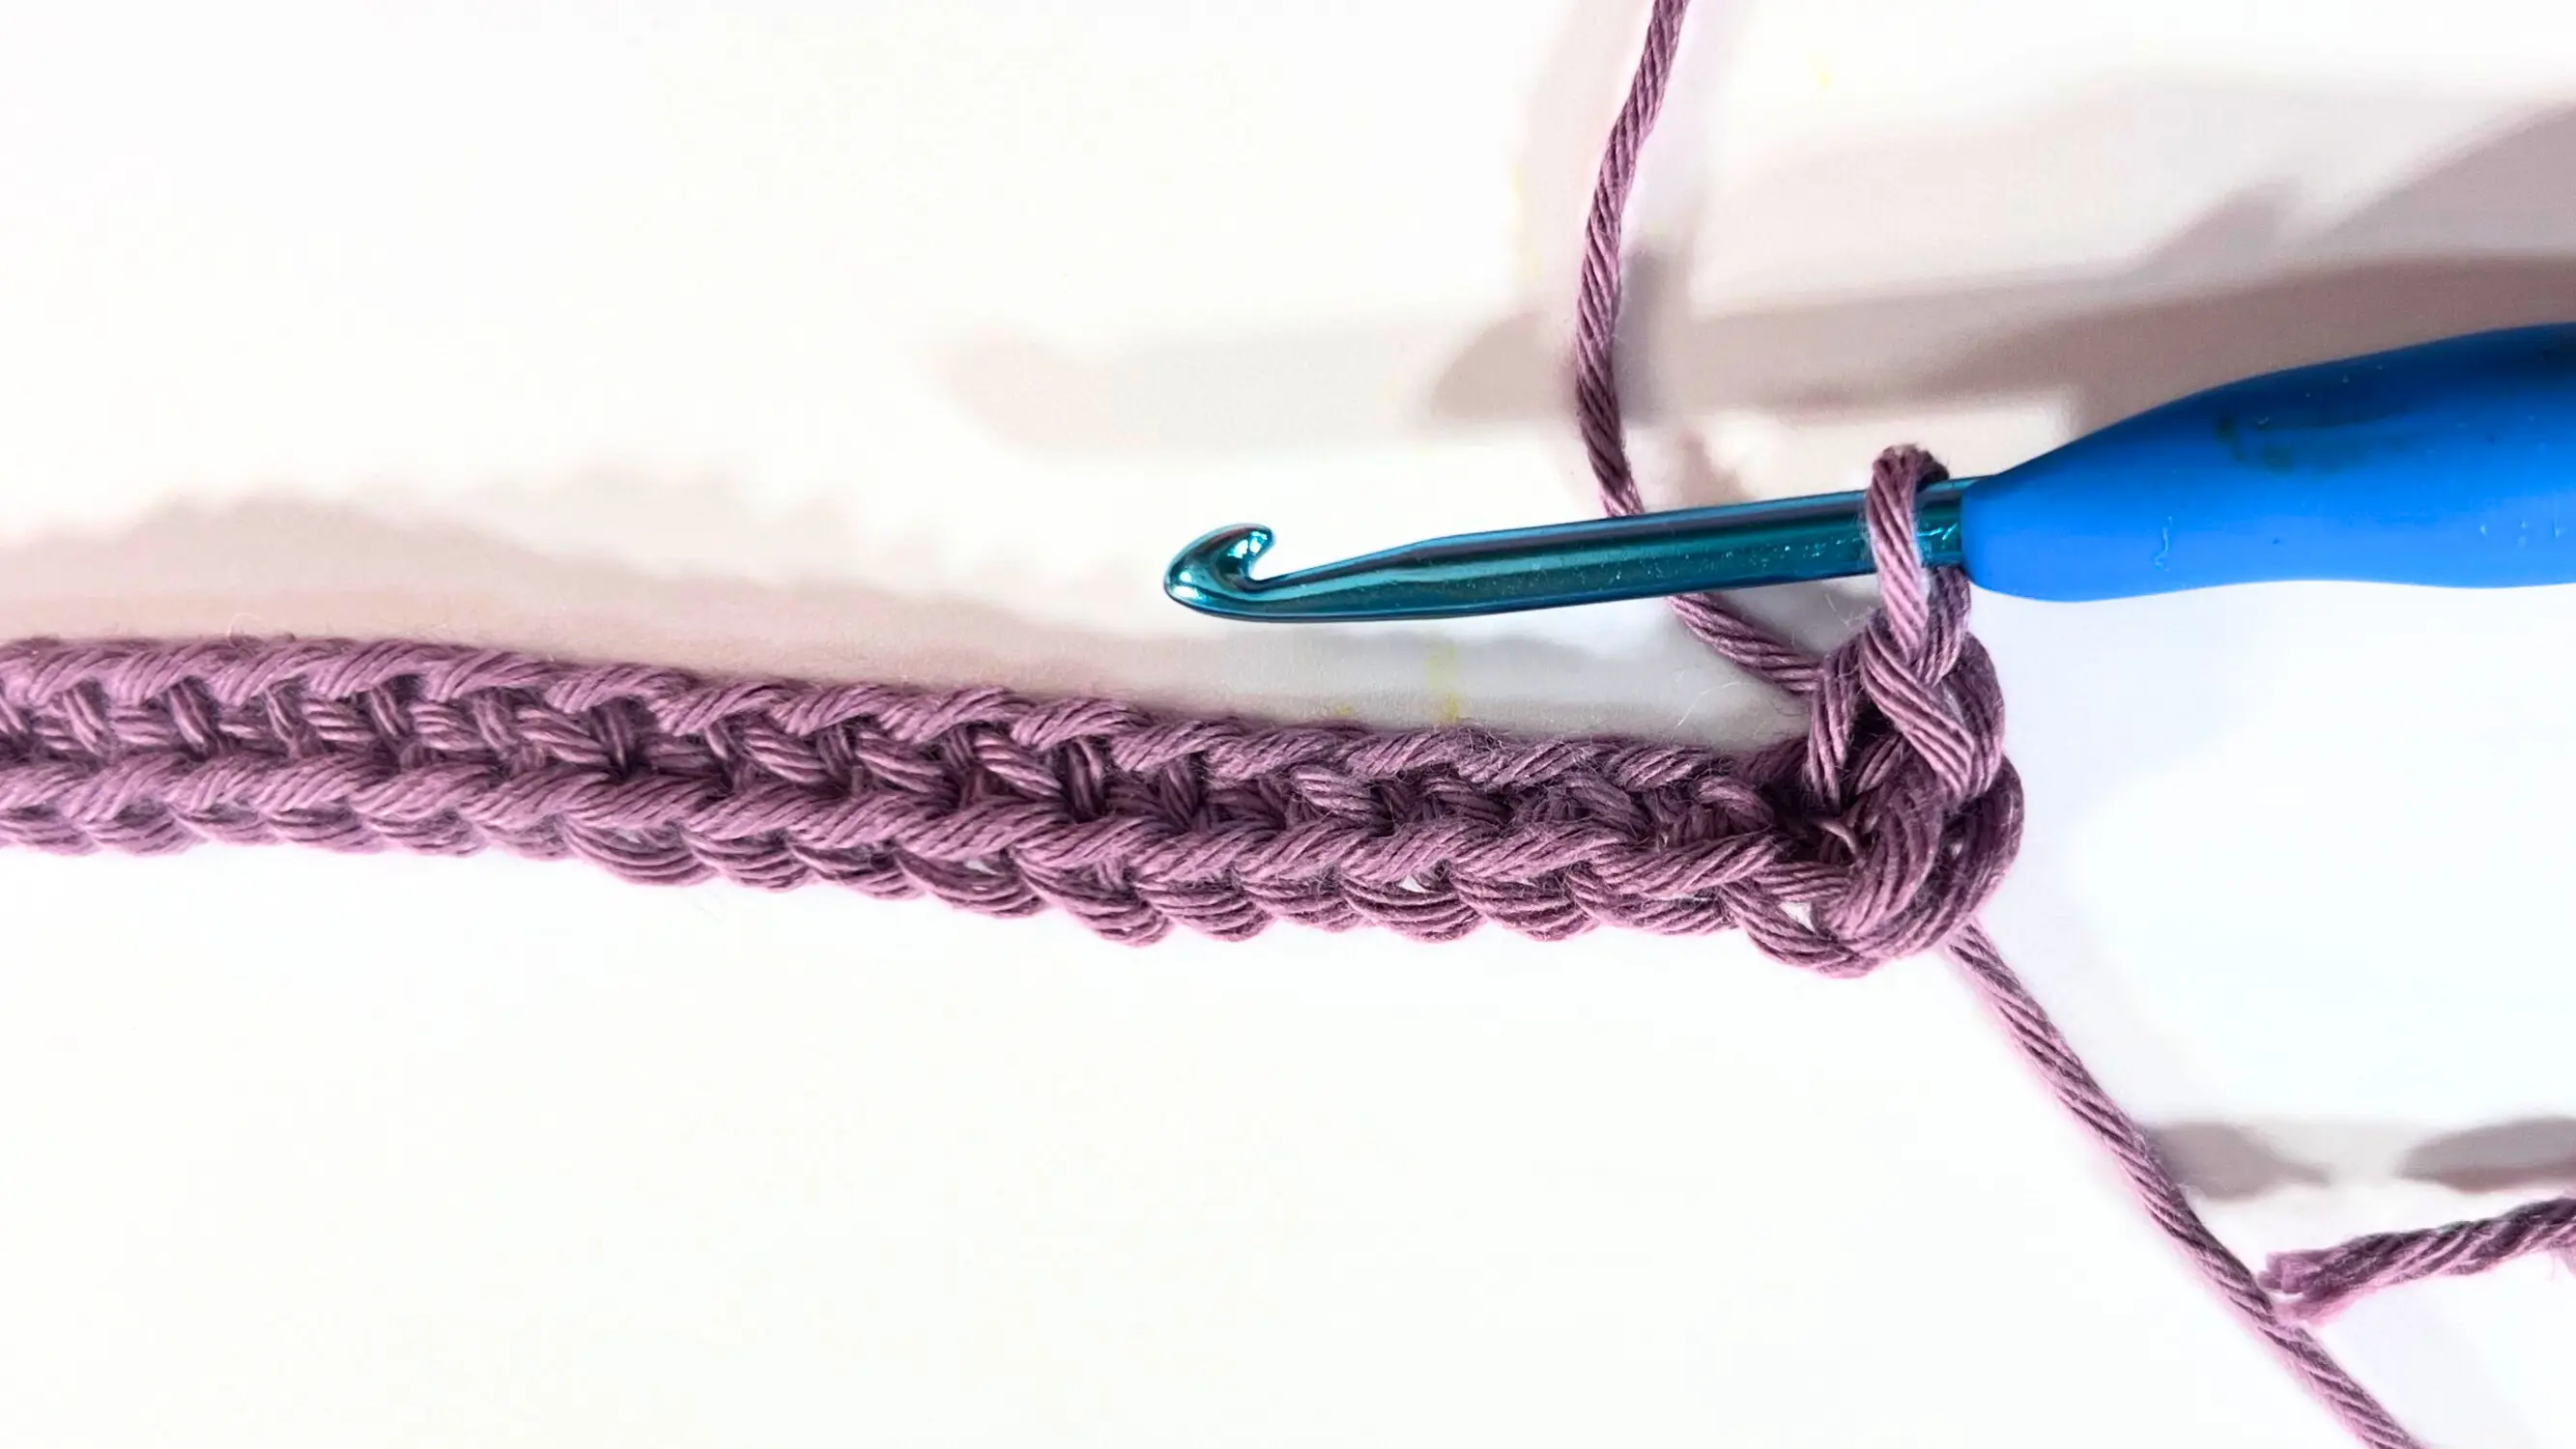
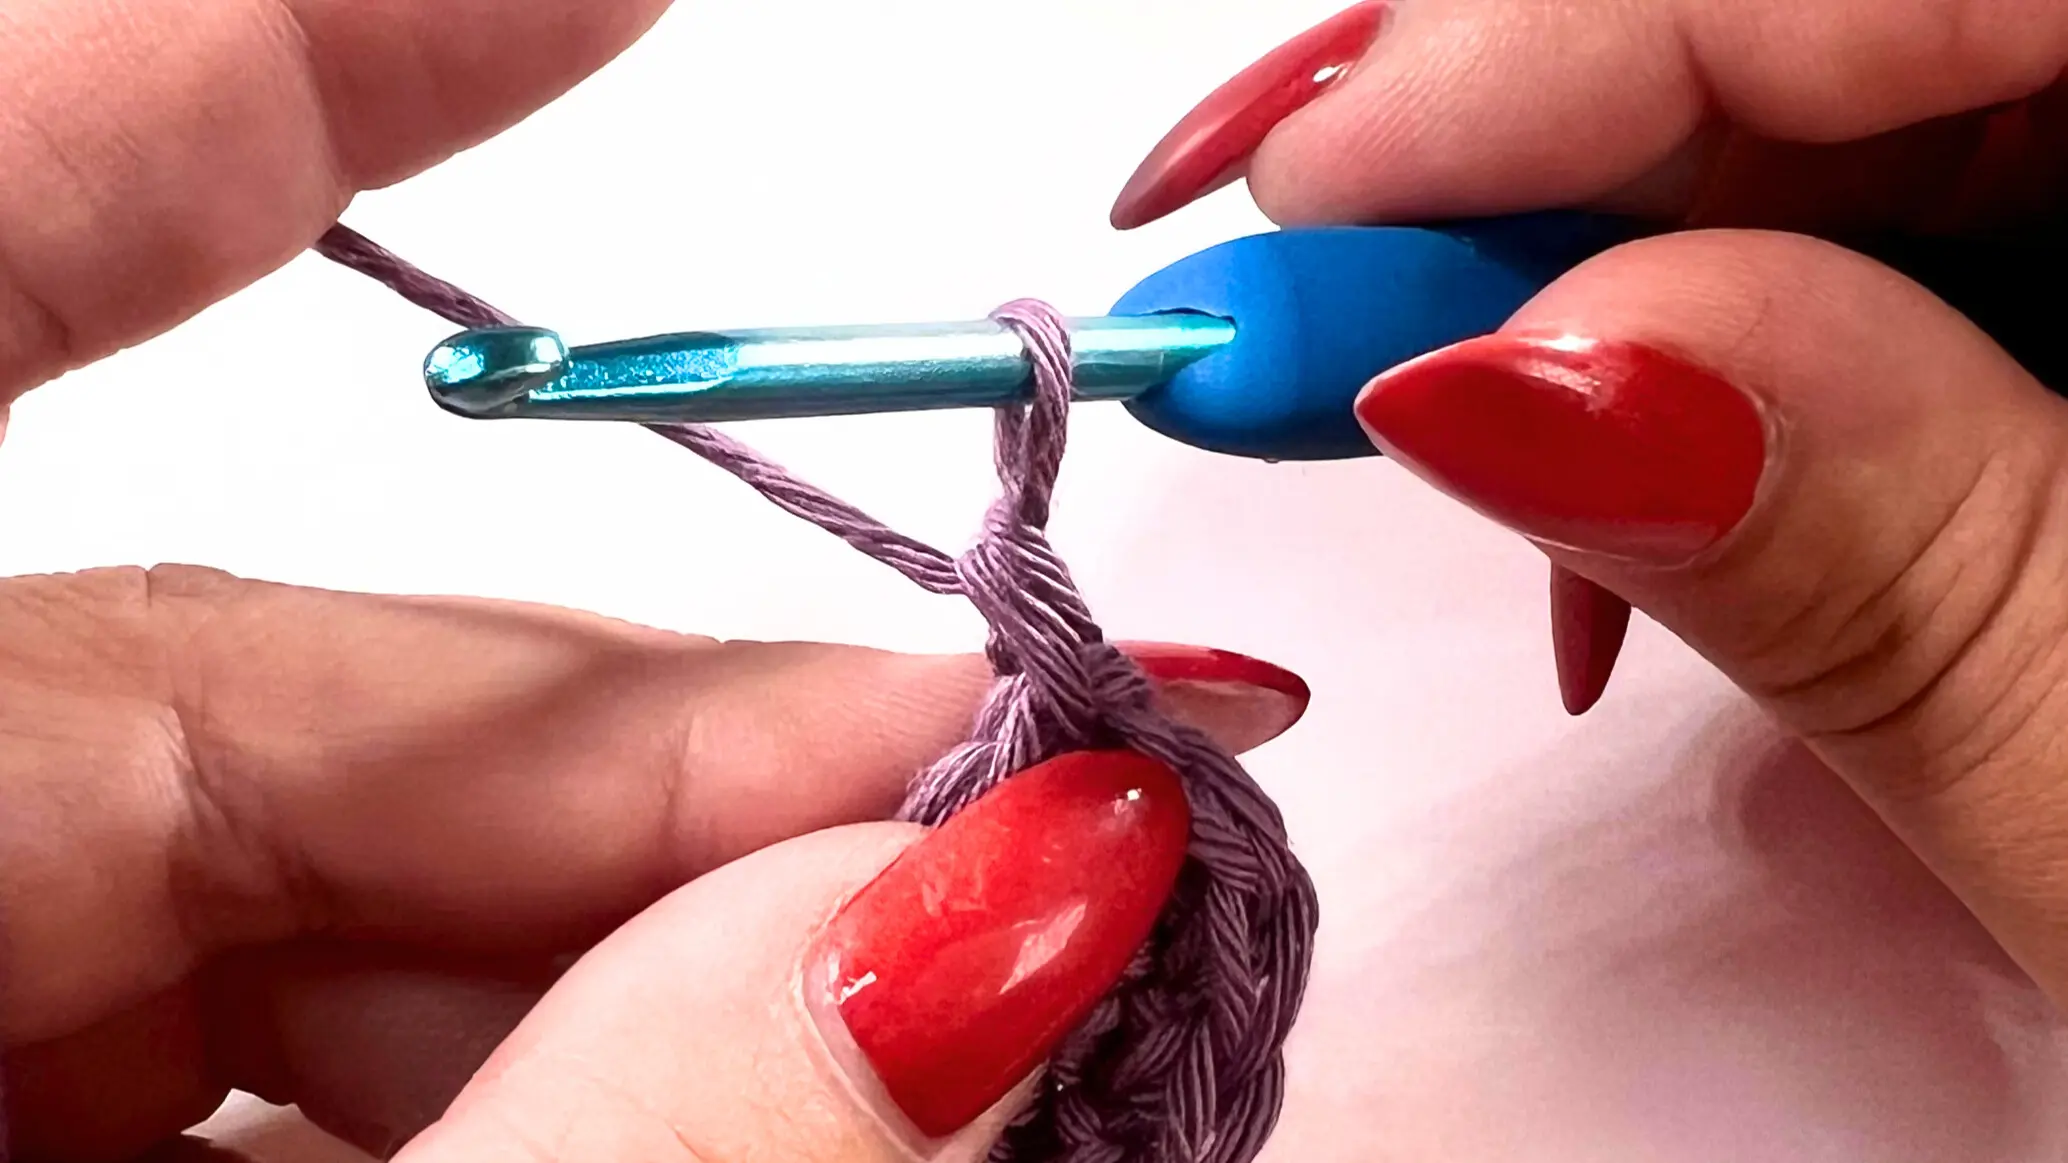
ROUND 1 - Make your first SC into the 2nd chain from the hook (also insert a stitch marker into this chain - not completed stitch).

Then continue with SC across until the end of the row. In the last chain, make 3 SC. This will let you start working SC around the foundation chain (FCH).

Now make SC into each chain along the bottom of the FCH.
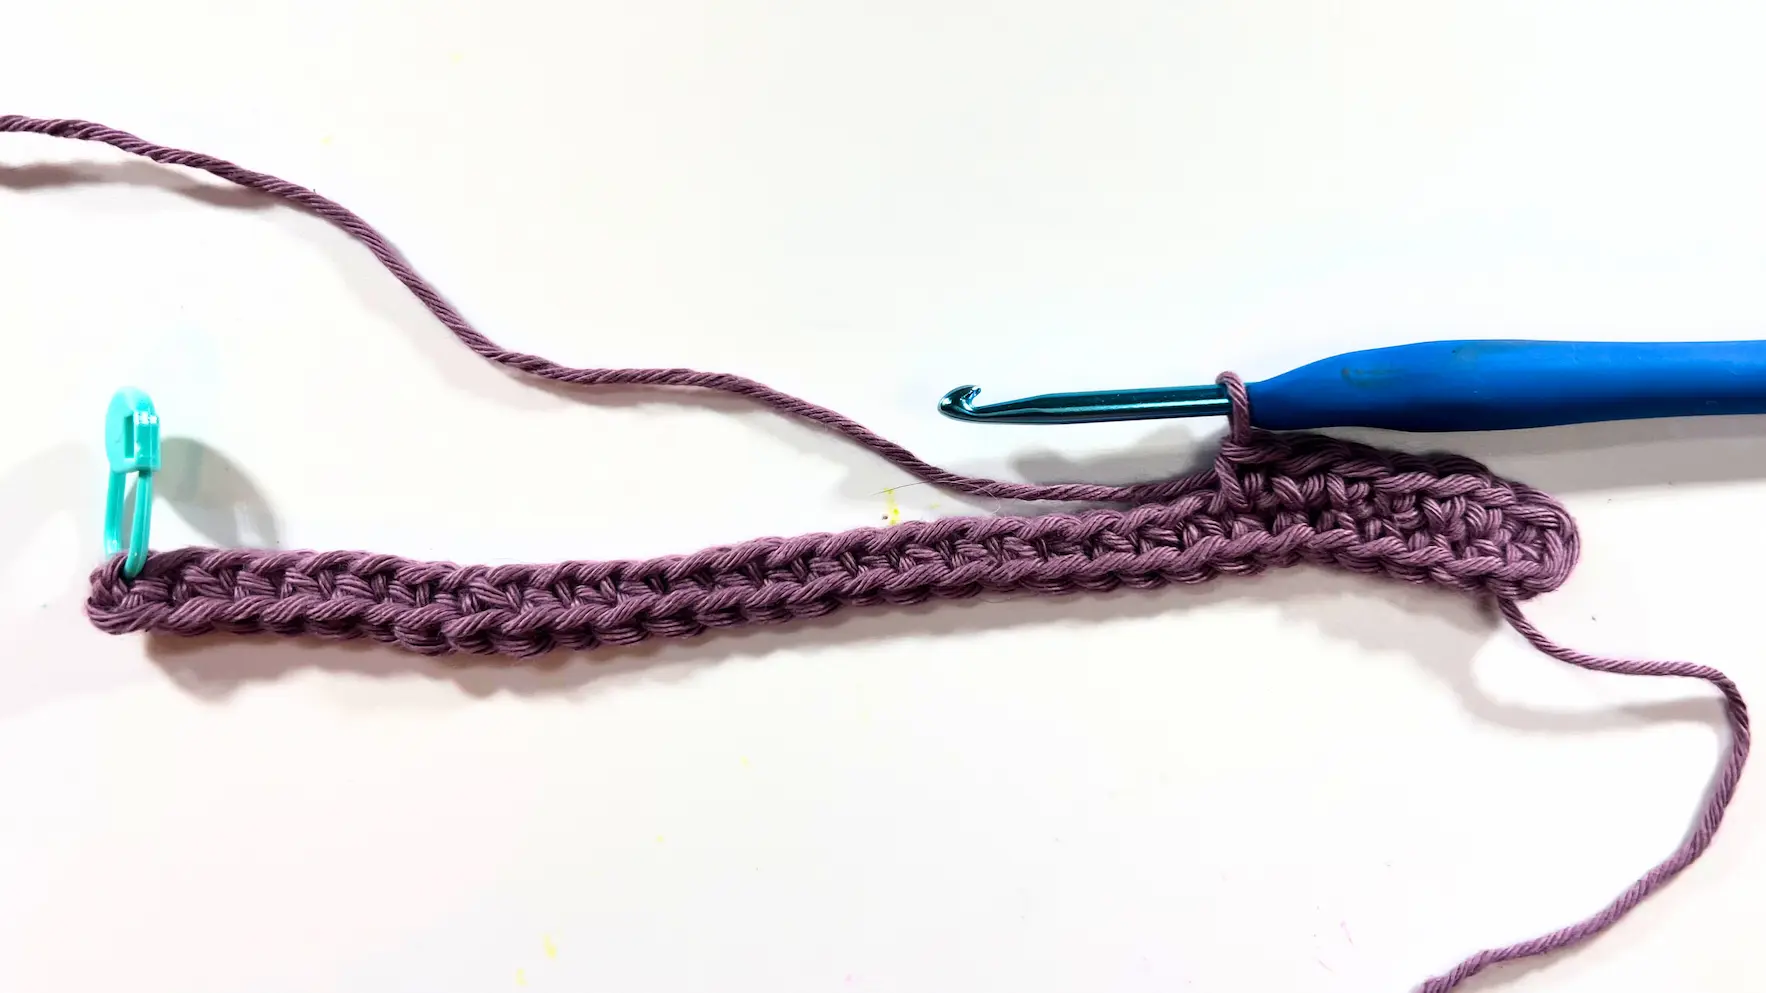
Once you reach the last chain (where your stitch marker is inserted), make 2 SC. You should now have 3 SC in that chain in total.

At the end of Round 1, you should have a total of 62 (72, 82) sts. Your stitch count will remain the same throughout the pattern unless noted
How to Make an Invisible Join
YouTube - 11:37 - How to Crochet an Invisible Join
Since this pattern is worked in the round, I highly recommend using a stitch marker to mark the first stitch of each round. To make your join look seamless, I’ll show you how I do an invisible join—it looks cleaner than a regular slip stitch.
Of course, this step is optional and you can join however you prefer. A regular slip stitch will leave a visible seam, but for this organizer you can easily hide that side against the wall.
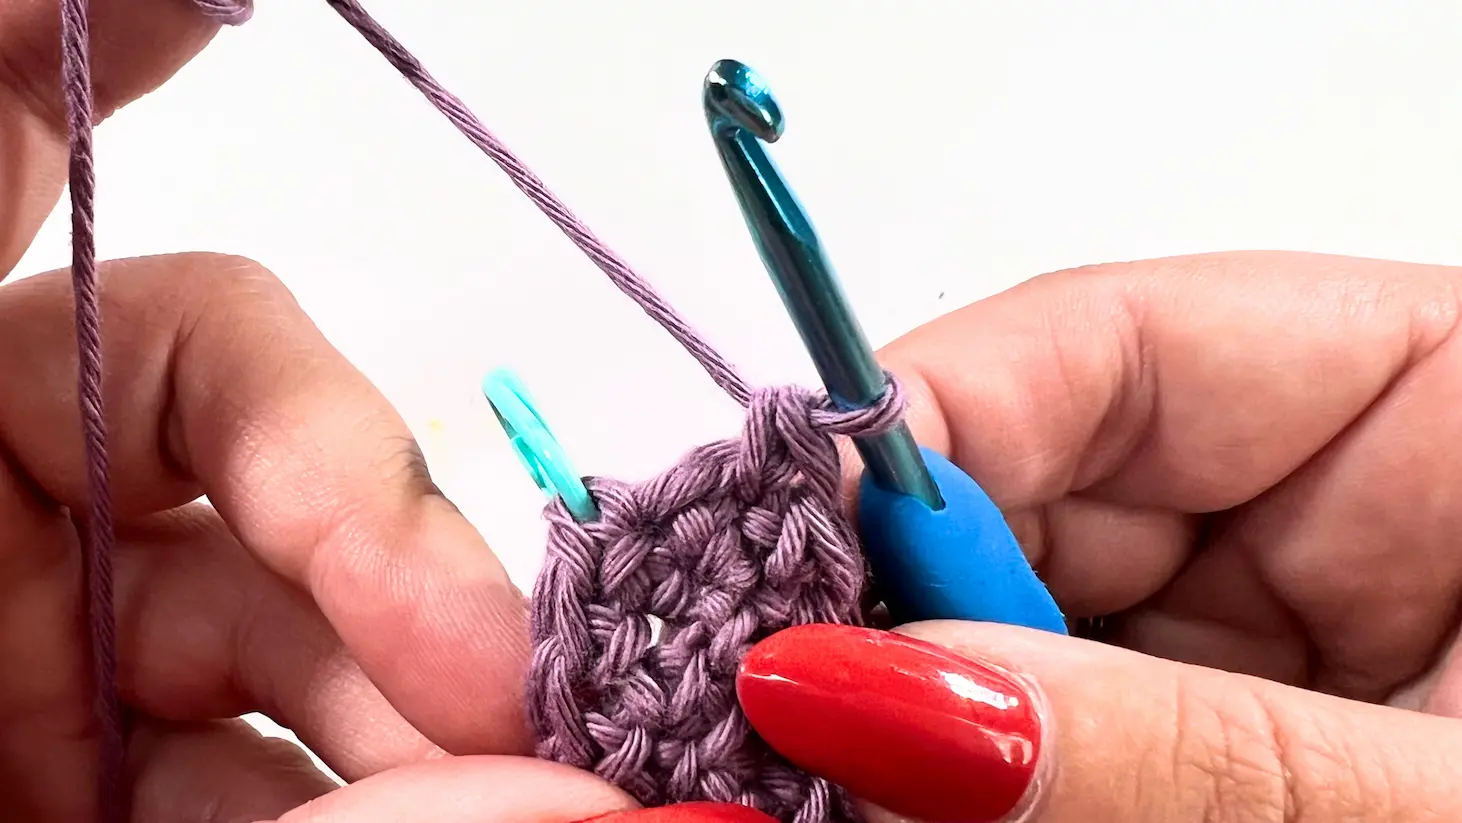
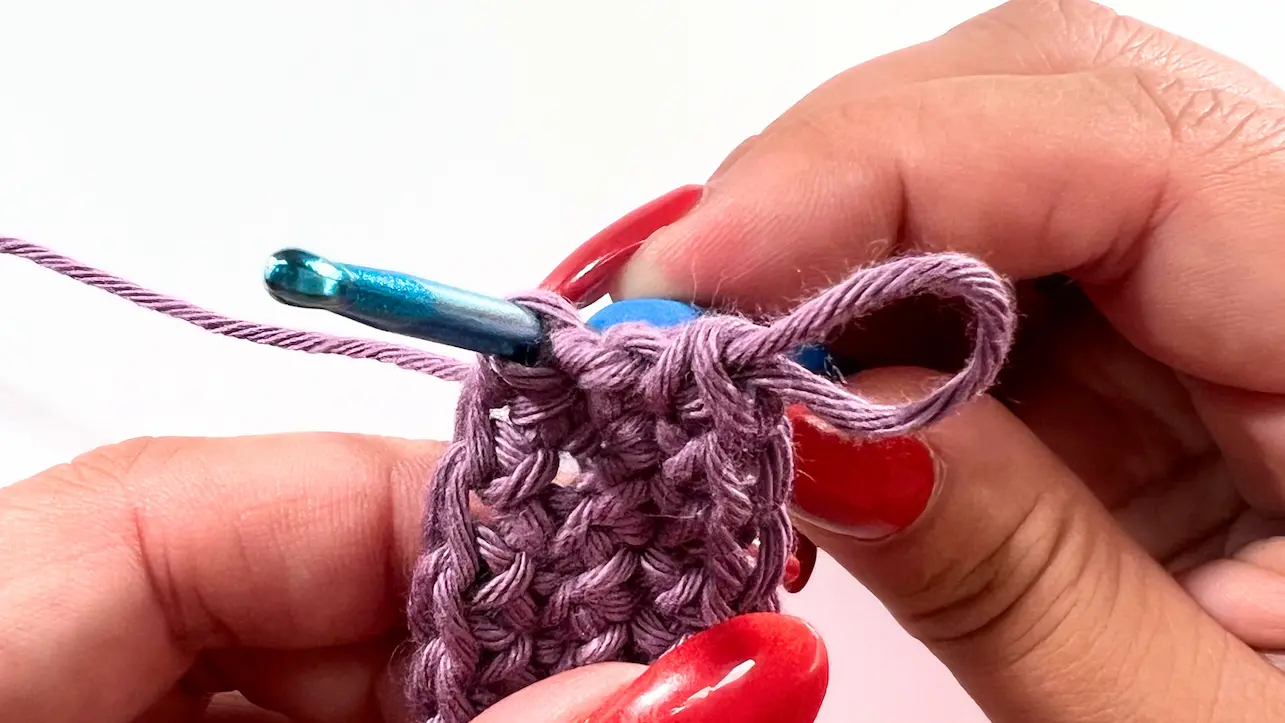
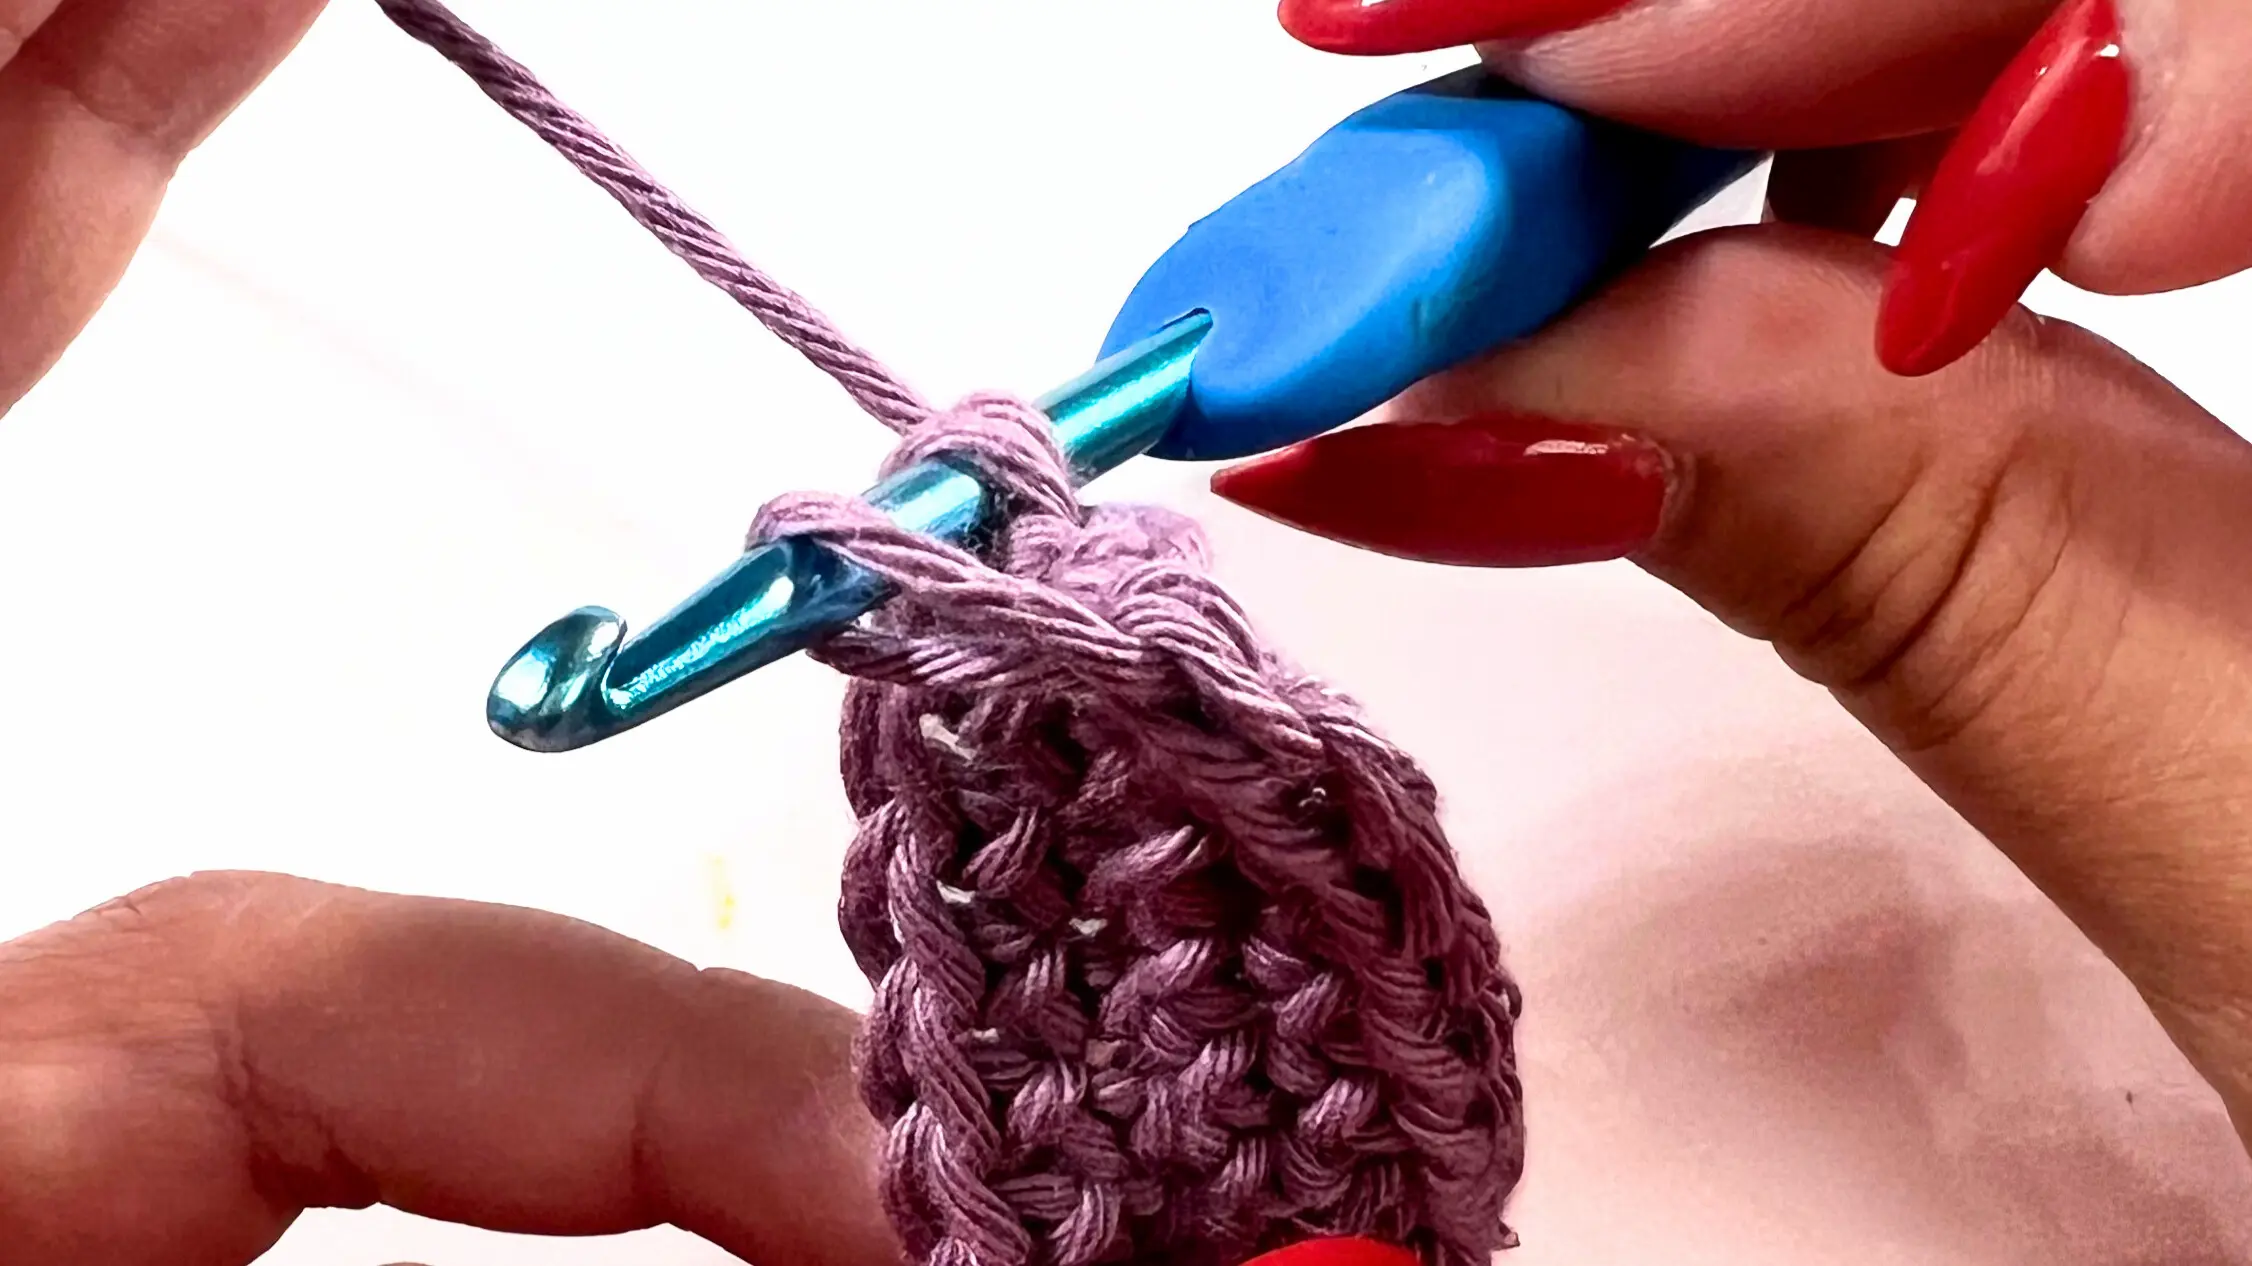
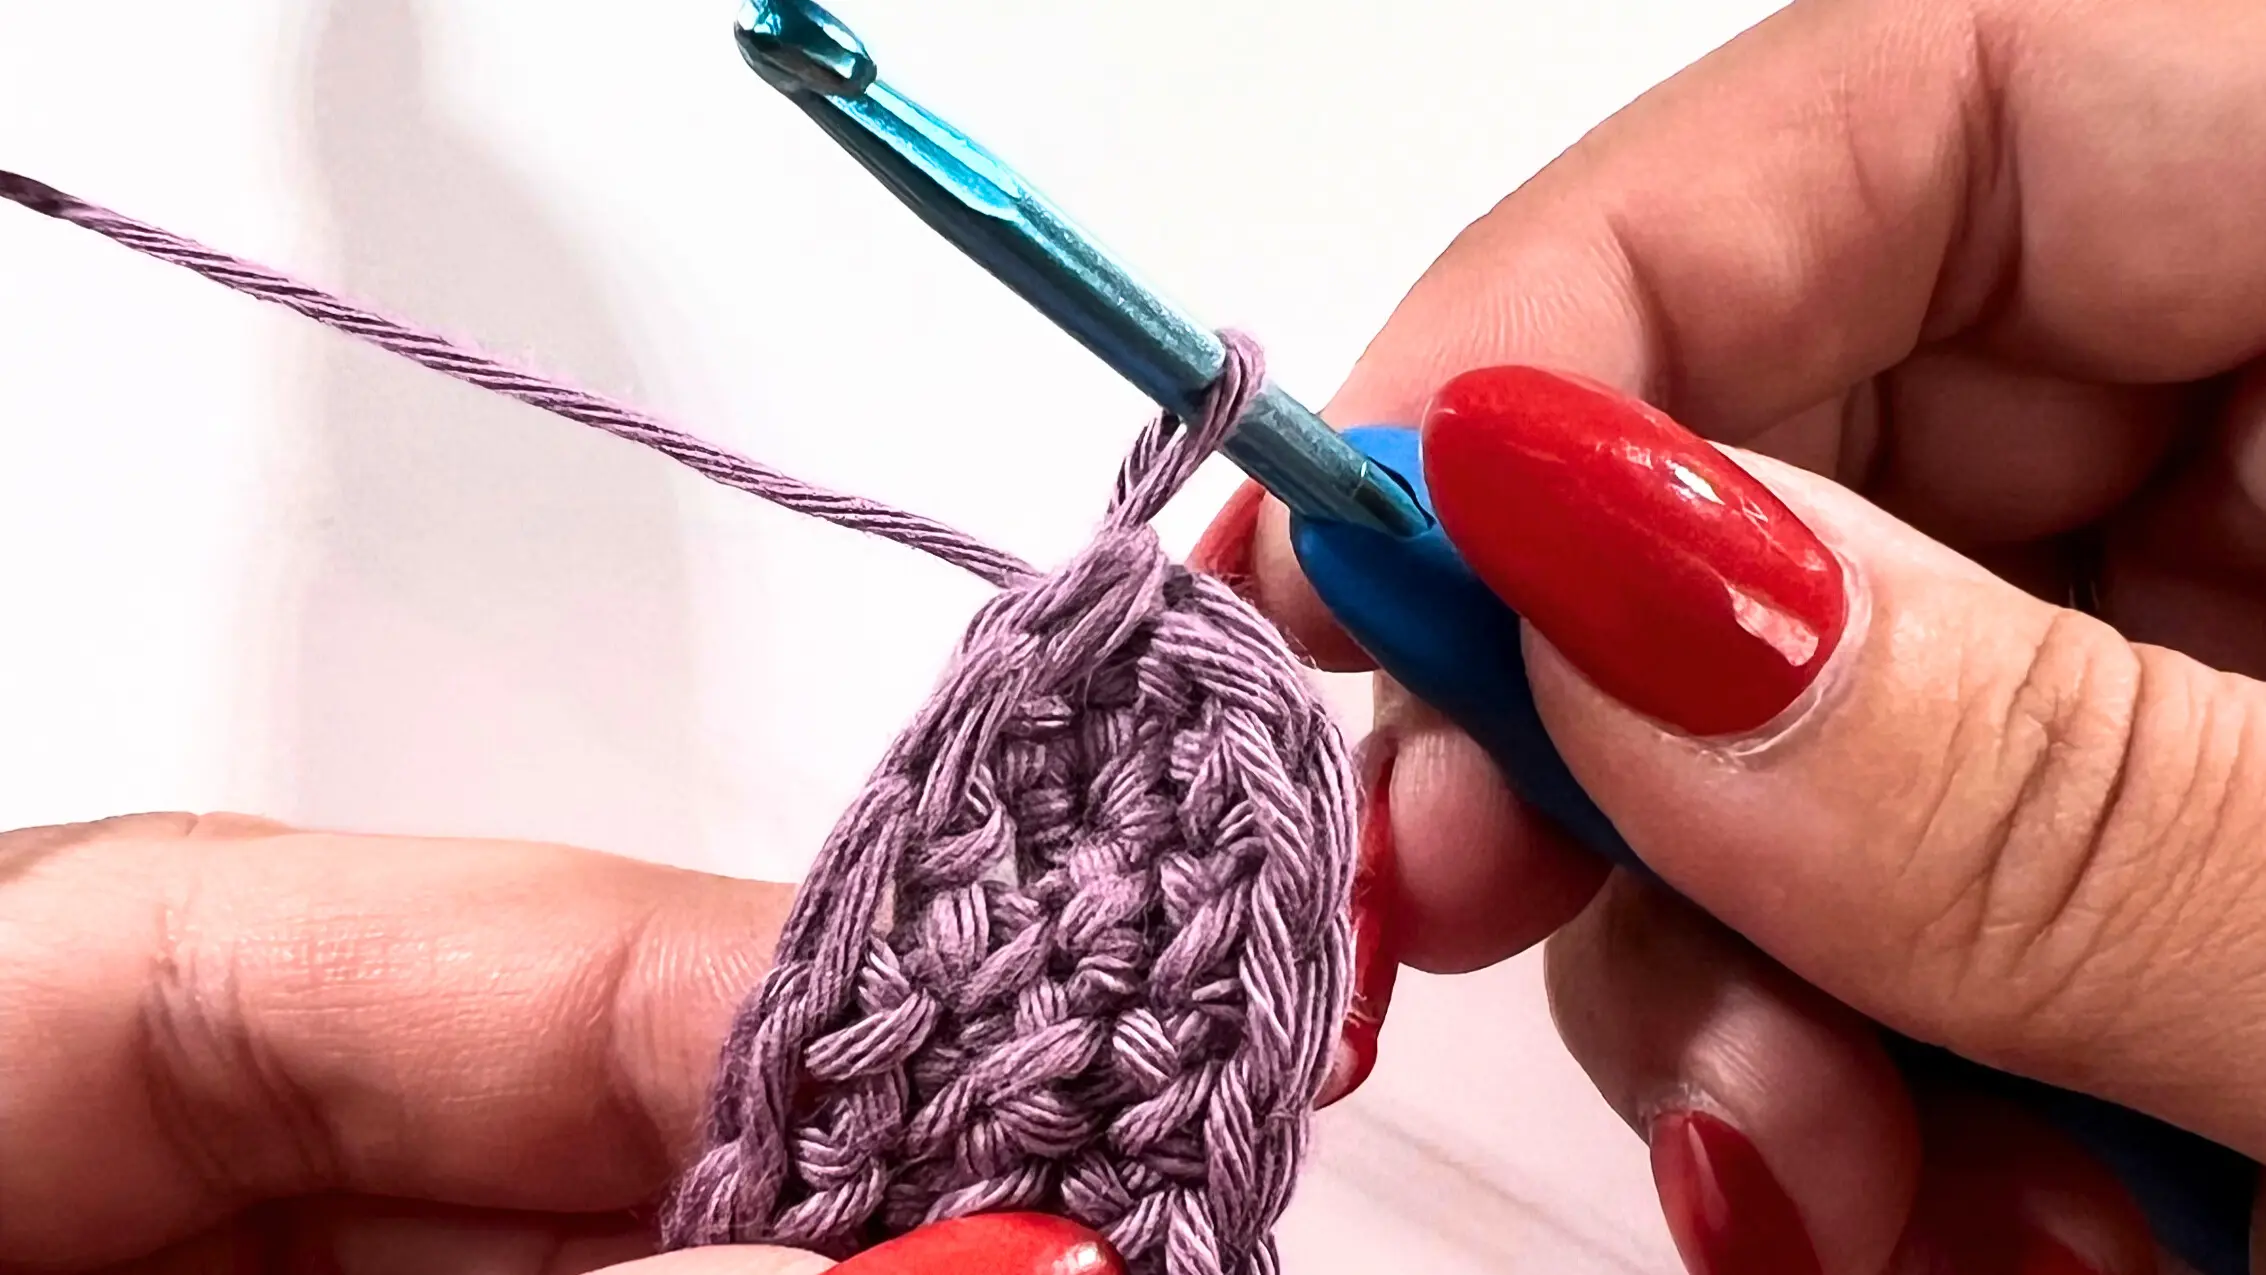
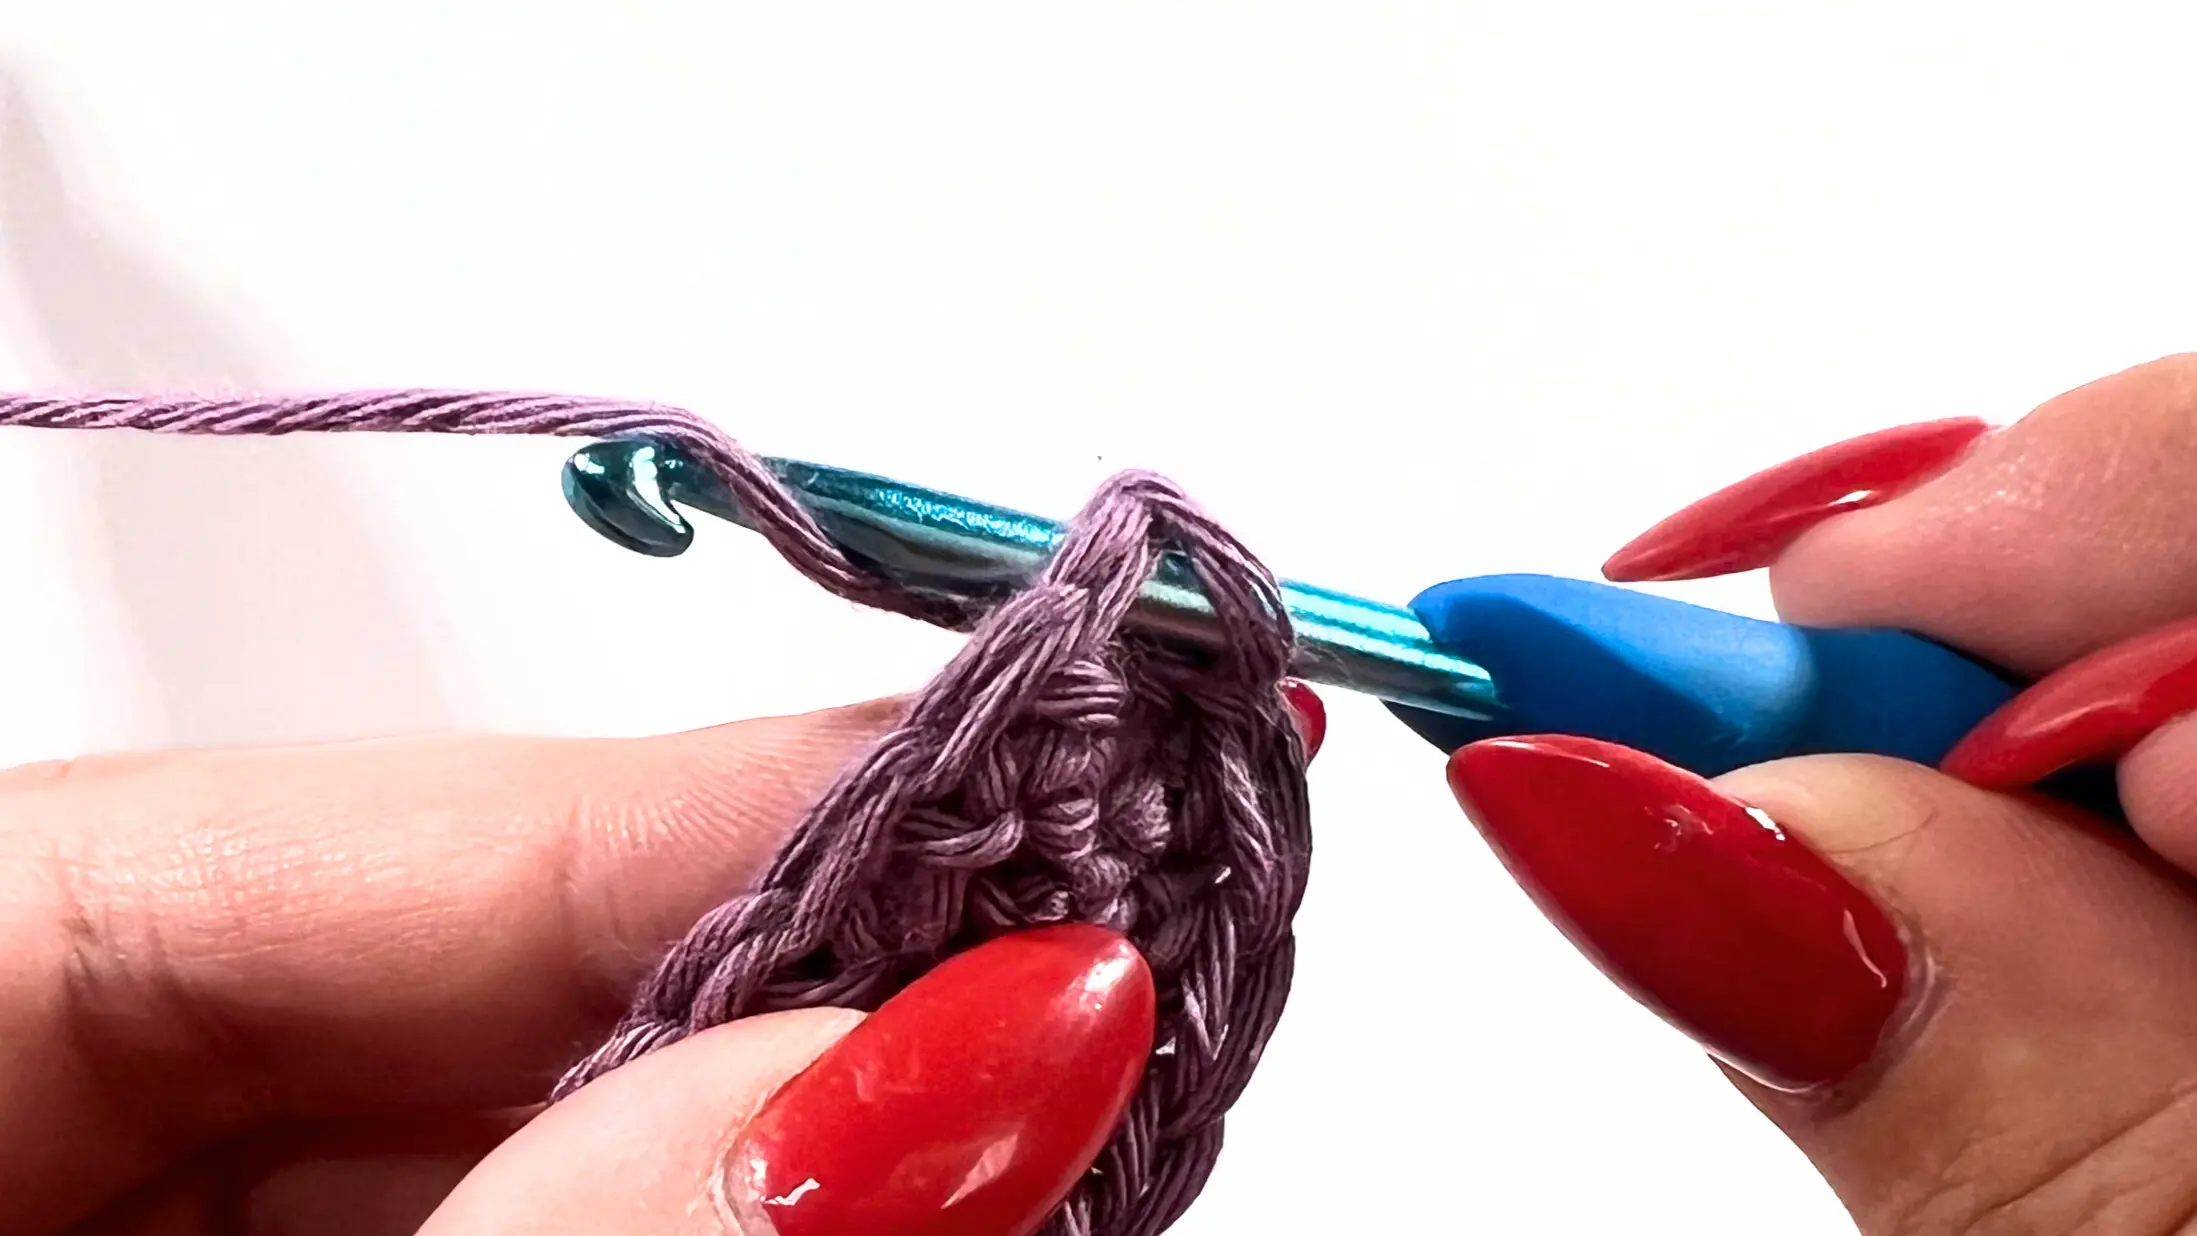
Once you reach your first SC of the round, don’t get confused by the extra loop that might appear after the slip stitch. When you tighten it, the loop may loosen a little. Make sure to recount your stitches from time to time.
Take your hook off the loop (be careful not to lose it) and insert the hook from the back into the first stitch. Then place the loop back on your hook and pull it through. Tighten it, insert the hook into the same stitch, and continue with your SC (yarn under – see the difference between yarn over and yarn under below these steps for invisible join). Put your stitch marker back and continue with the next round.
Yarn Over vs. Yarn Under
Yarn Over (YO) - Wrap the yarn over the hook from back to front before pulling through. This is the most common method and creates a slightly looser stitch with a traditional look.

Yarn Under (YU) - Bring the yarn under the hook from front to back before pulling through. This method makes your stitches tighter and gives them a different twist, often looking neater and more compact.

For this organizer, I prefer using yarn under, as it creates a cleaner look for the invisible join.
ROUND 2 - ROUND 12 (16, 20) - Continue with SC with yarn under
ROUND 13 (17, 21) - After joining the round, start with ch 3 (the first 2 chains count as your first DC, and the 3rd chain is your ch-1 space). Skip the next stitch and make 1 DC into the following stitch. Repeat the sequence: DC, ch 1, skip the next stitch, DC all the way around. End with ch 1, then join into the 2nd chain of the starting ch-3. YouTube - 19:35 - Double Crochet with Chain Spaces
ROUND 14 (18, 22) - ROUND 19 (25, 31) - Continue with SC with yarn under
ROUND 20 (26, 32) - Repeat Round 13 (17, 21)
ROUND 21 (27, 33) - ROUND 23 (30, 37) - Continue with SC with yarn under
ROUND 24 (31, 38) - Repeat Round 13 (17, 21)
How to Attach the Wooden Dowels
YouTube - 29:14 - How to Attach Wooden Dowels
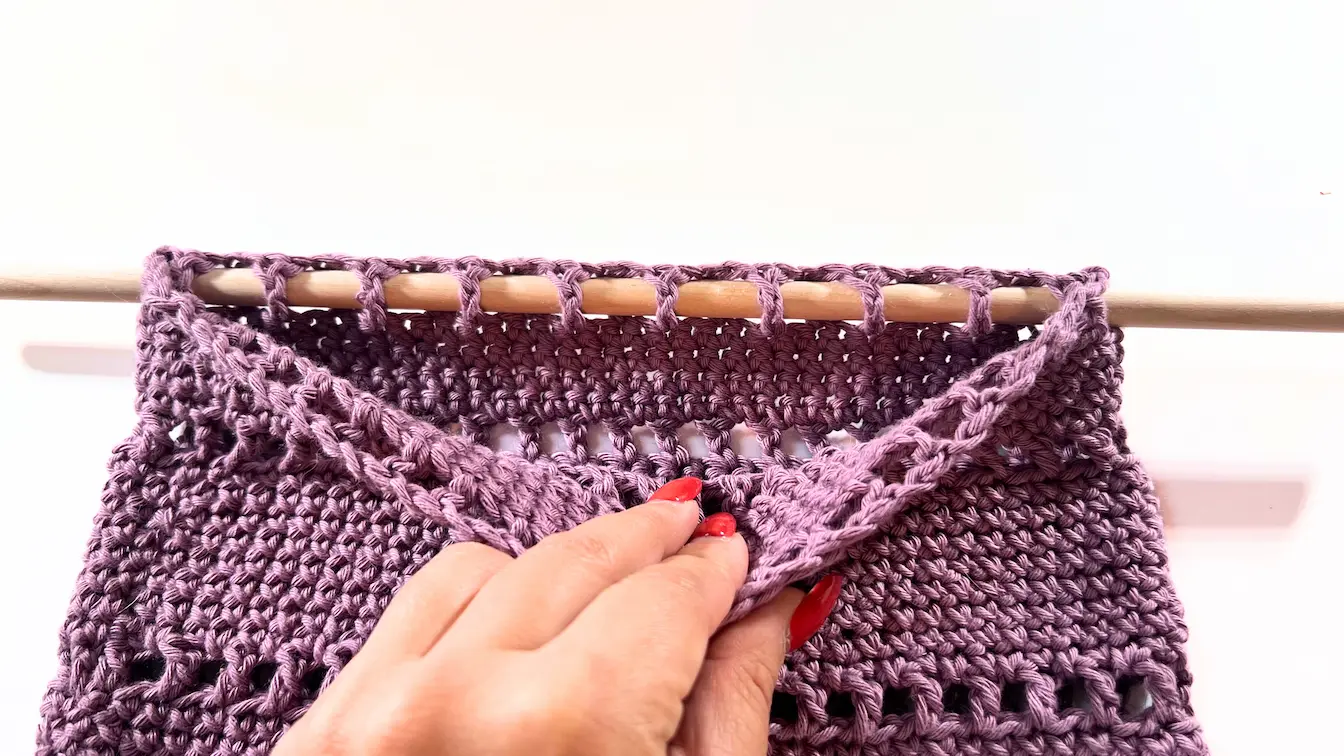
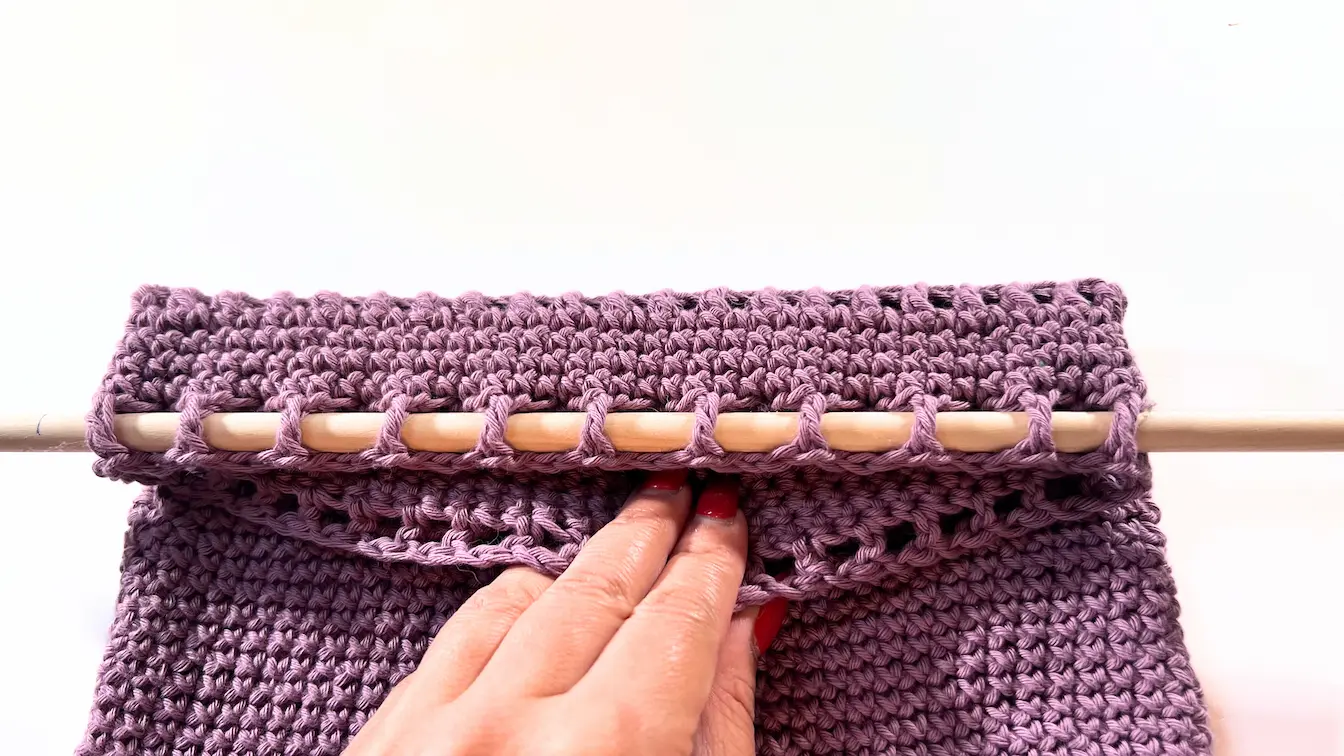
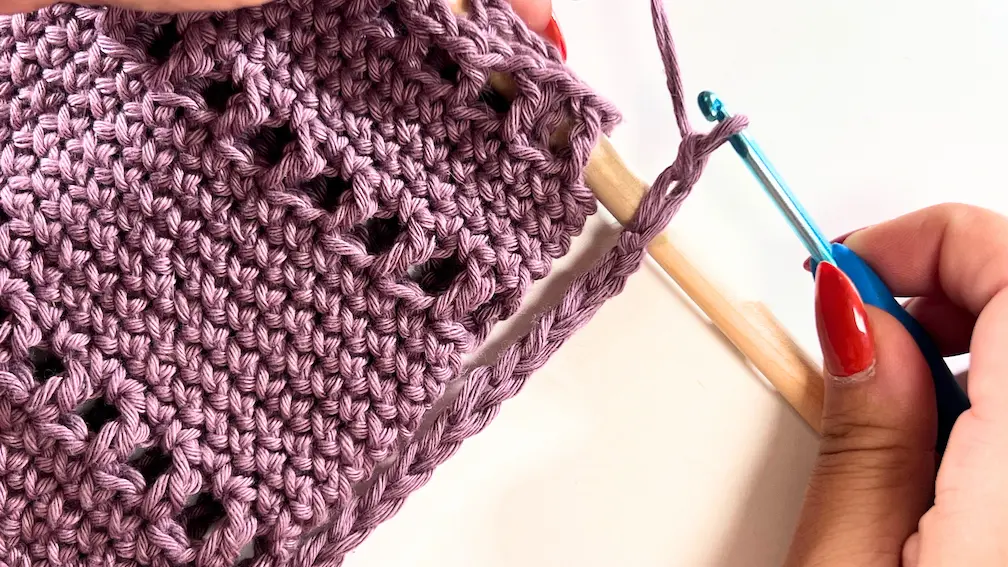
We’re almost at the finish line with this organizer! Now it’s time to attach the wooden dowels, which is very simple thanks to the last row of DC and chain spaces.
Simply grab your wooden dowel and weave it through the chain spaces on the back side only of each pouch, as shown in the pictures below. Easy, right? 🙂
How to Join the Pouches
YouTube - 31:38 - Join 3 Pockets Together
For joining, I used a double strand of yarn with the same hook size. Since I worked with cotton yarn (optional, but recommended), it’s less stretchy—and using it double-stranded makes it even sturdier. Keep in mind that the pouches will hold items inside, so you don’t want the join to stretch too much.
The order of the pouches from top to bottom goes from the smallest pouch to the largest.
Once you have them arranged with the desired space between each, grab your hook and yarn, and let’s start a simple foundation chain.
Make your own notes for the number of chains you work between the pouches. I haven’t provided specific counts, since this can vary depending on your preference and how much space you’d like.
For reference, I made 25 FCH between the large and medium pouches, 20 FCH between the medium and small, and 35 FCH for the top.

Make a slip knot and wrap the yarn around the wooden dowel so the slip knot sits in front and the yarn is behind. YO and pull through to secure it—that’s how you attach the yarn. Now simply make FCH until you reach the next wooden dowel.

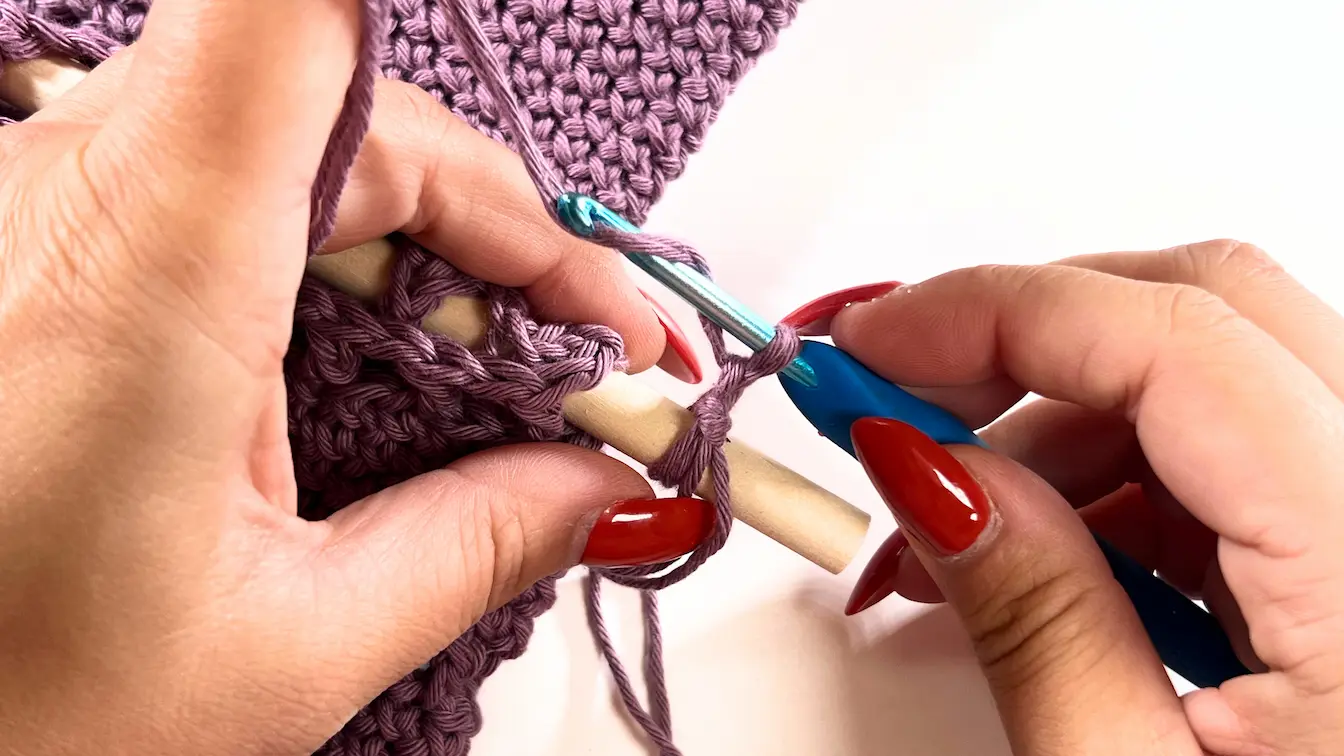
Once you reach the second dowel, wrap the yarn behind the stick again, YO and pull through. Continue working FCH from there.

When you reach the last dowel, make enough FCH to hang the organizer on the wall. After that, continue working FCH down from the top dowel to the middle one, and then from the middle to the bottom. Be sure to make the same number of FCH on this side as you did on the other side, so everything stays even.

Ta-daa! Your 3 Pocket Crochet Wall Organizer is now complete and ready to hang. I’d love to see how yours turned out—don’t forget to tag me on Instagram @happyheartsy so I can share your beautiful makes!
Every like, comment, and share means the world and helps me keep creating free patterns for you. If you enjoyed this project, let me know in the comments below—I love hearing from you!
Happy Crocheting,
Lenka


