
Free Crochet Baby Washcloth Pattern | Lemon Peel Stitch C2C Tutorial with Border
- Oct 3, 2025
- 7 min read
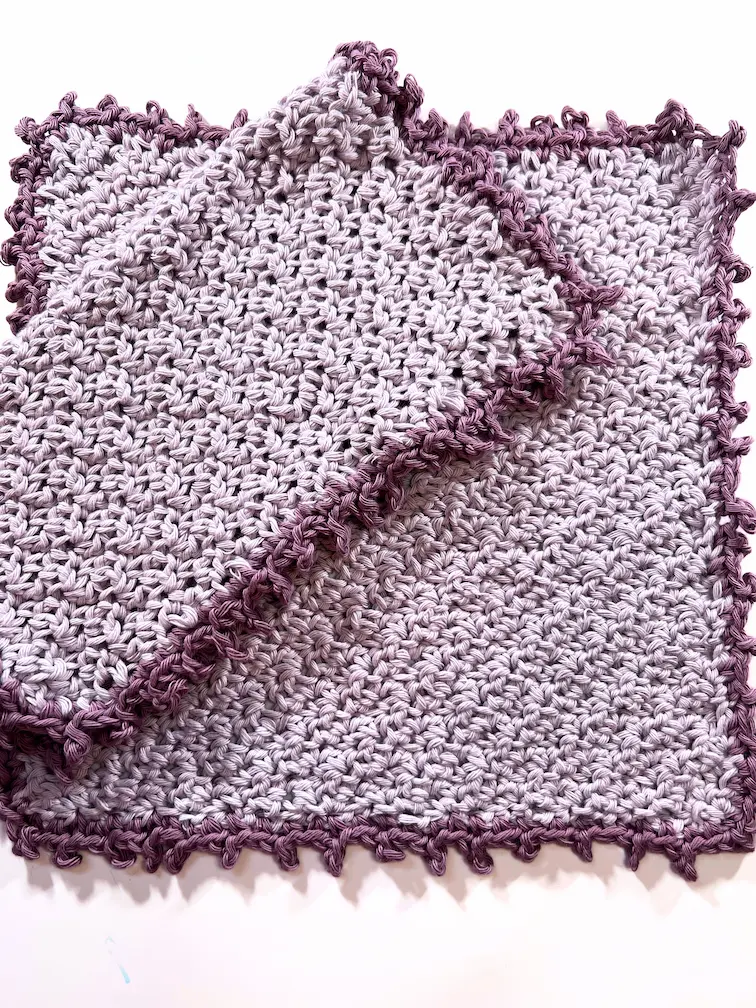
There’s something so sweet about making a handmade washcloth for a little one. This Free Crochet Baby Washcloth Pattern is worked in the Lemon Peel Stitch C2C (corner-to-corner) and finished with a beautiful Peacock Border. The texture is soft yet durable—perfect for bath time or gifting as part of a baby bundle.
If you’d like to see the regular Lemon Peel Stitch worked in rows, I have a separate tutorial for that right here.
Grab your yarn and hook, and let’s make this adorable baby washcloth together!
If you'd like to support my work and get a printable, ad-free version of this pattern, please visit my shop or Ravelry.
If you like my crochet content but aren't interested in buying my patterns, that's perfectly fine. :) I offer my patterns for free on my blog so everyone can access them!
Additionally, there's an alternative way to support my work through Buy Me a Coffee (in my case, it's Buy Me Yarn, and you know the reason:) ). It's even cheaper than my current patterns. For more information, you can click the link above or the button below.
HUGE THANKS to everyone who supports me through purchases, likes, shares, comments, tags, or feedback! It truly means a lot to me.

This post contains affiliate links for the yarns I used and love and it also displays ads. I make a small commission if you purchase through these links or through the Ads which in no way affects the cost to you. The revenue I receive from Ads, and affiliate links, help me to support my small business which allows me to share my free crochet patterns/content with you. Thank you for your understanding and your support! It means a lot to me.
This pattern and all images associated with this pattern cannot be sold or claimed as your own.
You are allowed to sell finished project. Feel free to mention me for creating this pattern, it would make my day and I can share your finished blanket on my social media if you allow.
Don’t forget to share your project on Instagram! If you have your account you can tag me under
@happyheartsy. I would love to see your finished Heartfelt Threads Cardigan so I can share it with others.
Before we get into the actual pattern I also created the Ultimate Crochet Hack Sheet! It's 2 pages with basic
crochet abbreviations and symbols, hook sizes in US and UK version, all the yarn types (with recommended hooks and projects) etc. Feel free to click on the pic or a link to my shop where you can find more details.

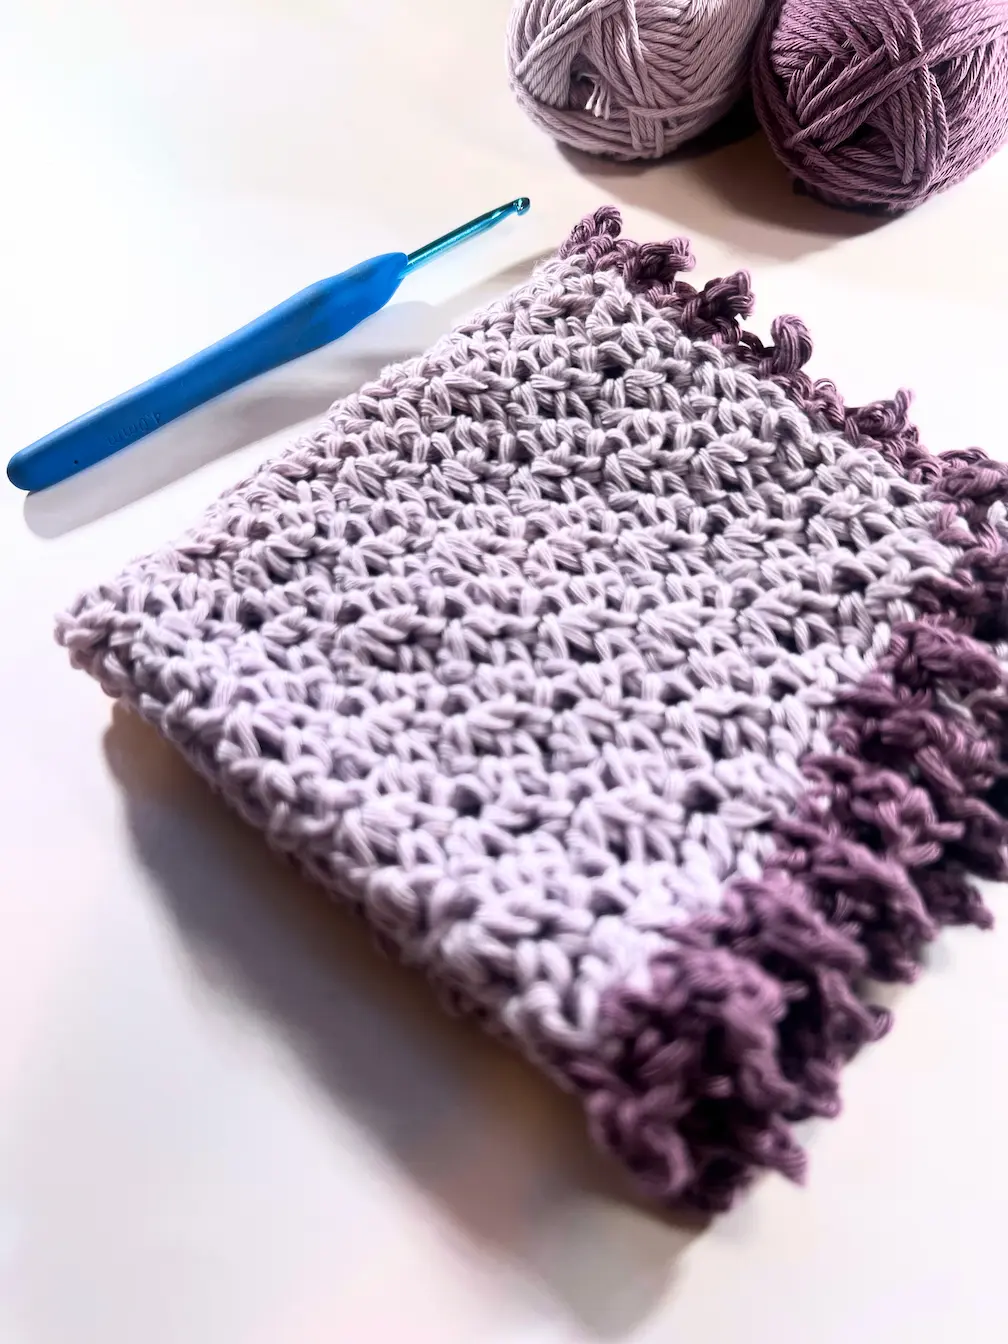
What you need for this baby washcloth:
Materials:
Yarn used approx. 50g / 85m for one washcloth if making 10"
Hook - 4mm/US G-6
Scissors, Yarn Needle, Stitch Markers
Measurements:
Since it’s C2C method it’s up to you how big you’d like to make this washcloth.
Gauge:
No need the gauge for this pattern
Notes:
This washcloth is worked in the Lemon Peel Stitch using the C2C (corner-to-corner) method.
The chain 2 at the end of each row always counts as the first DC for the next one.
Increases are always made in the first and last stitch of the row (each increase row adds 2 stitches).
At the beginning of each decreasing row, chain 1 acts as a partial DC for the DC2tog. In other words, the ch 1 counts as the first stitch, and you make a DC into the second stitch to decrease.
At the end of each decreasing row, you always work a DC2tog. Each decrease row reduces the stitch count by 2.
Abbreviations:
Ch - Chain
FCH - Foundation Chain
YO - Yarn Over
St - Stitch
SC - Single Crochet
DC - Double Crochet
DC2tog - 2 Double Crochet Together
SC3tog - 3 Single Crochet Together
Sl St - Slip Stitch


DIRECTIONS
C2C Lemon Peel Stitch Increase
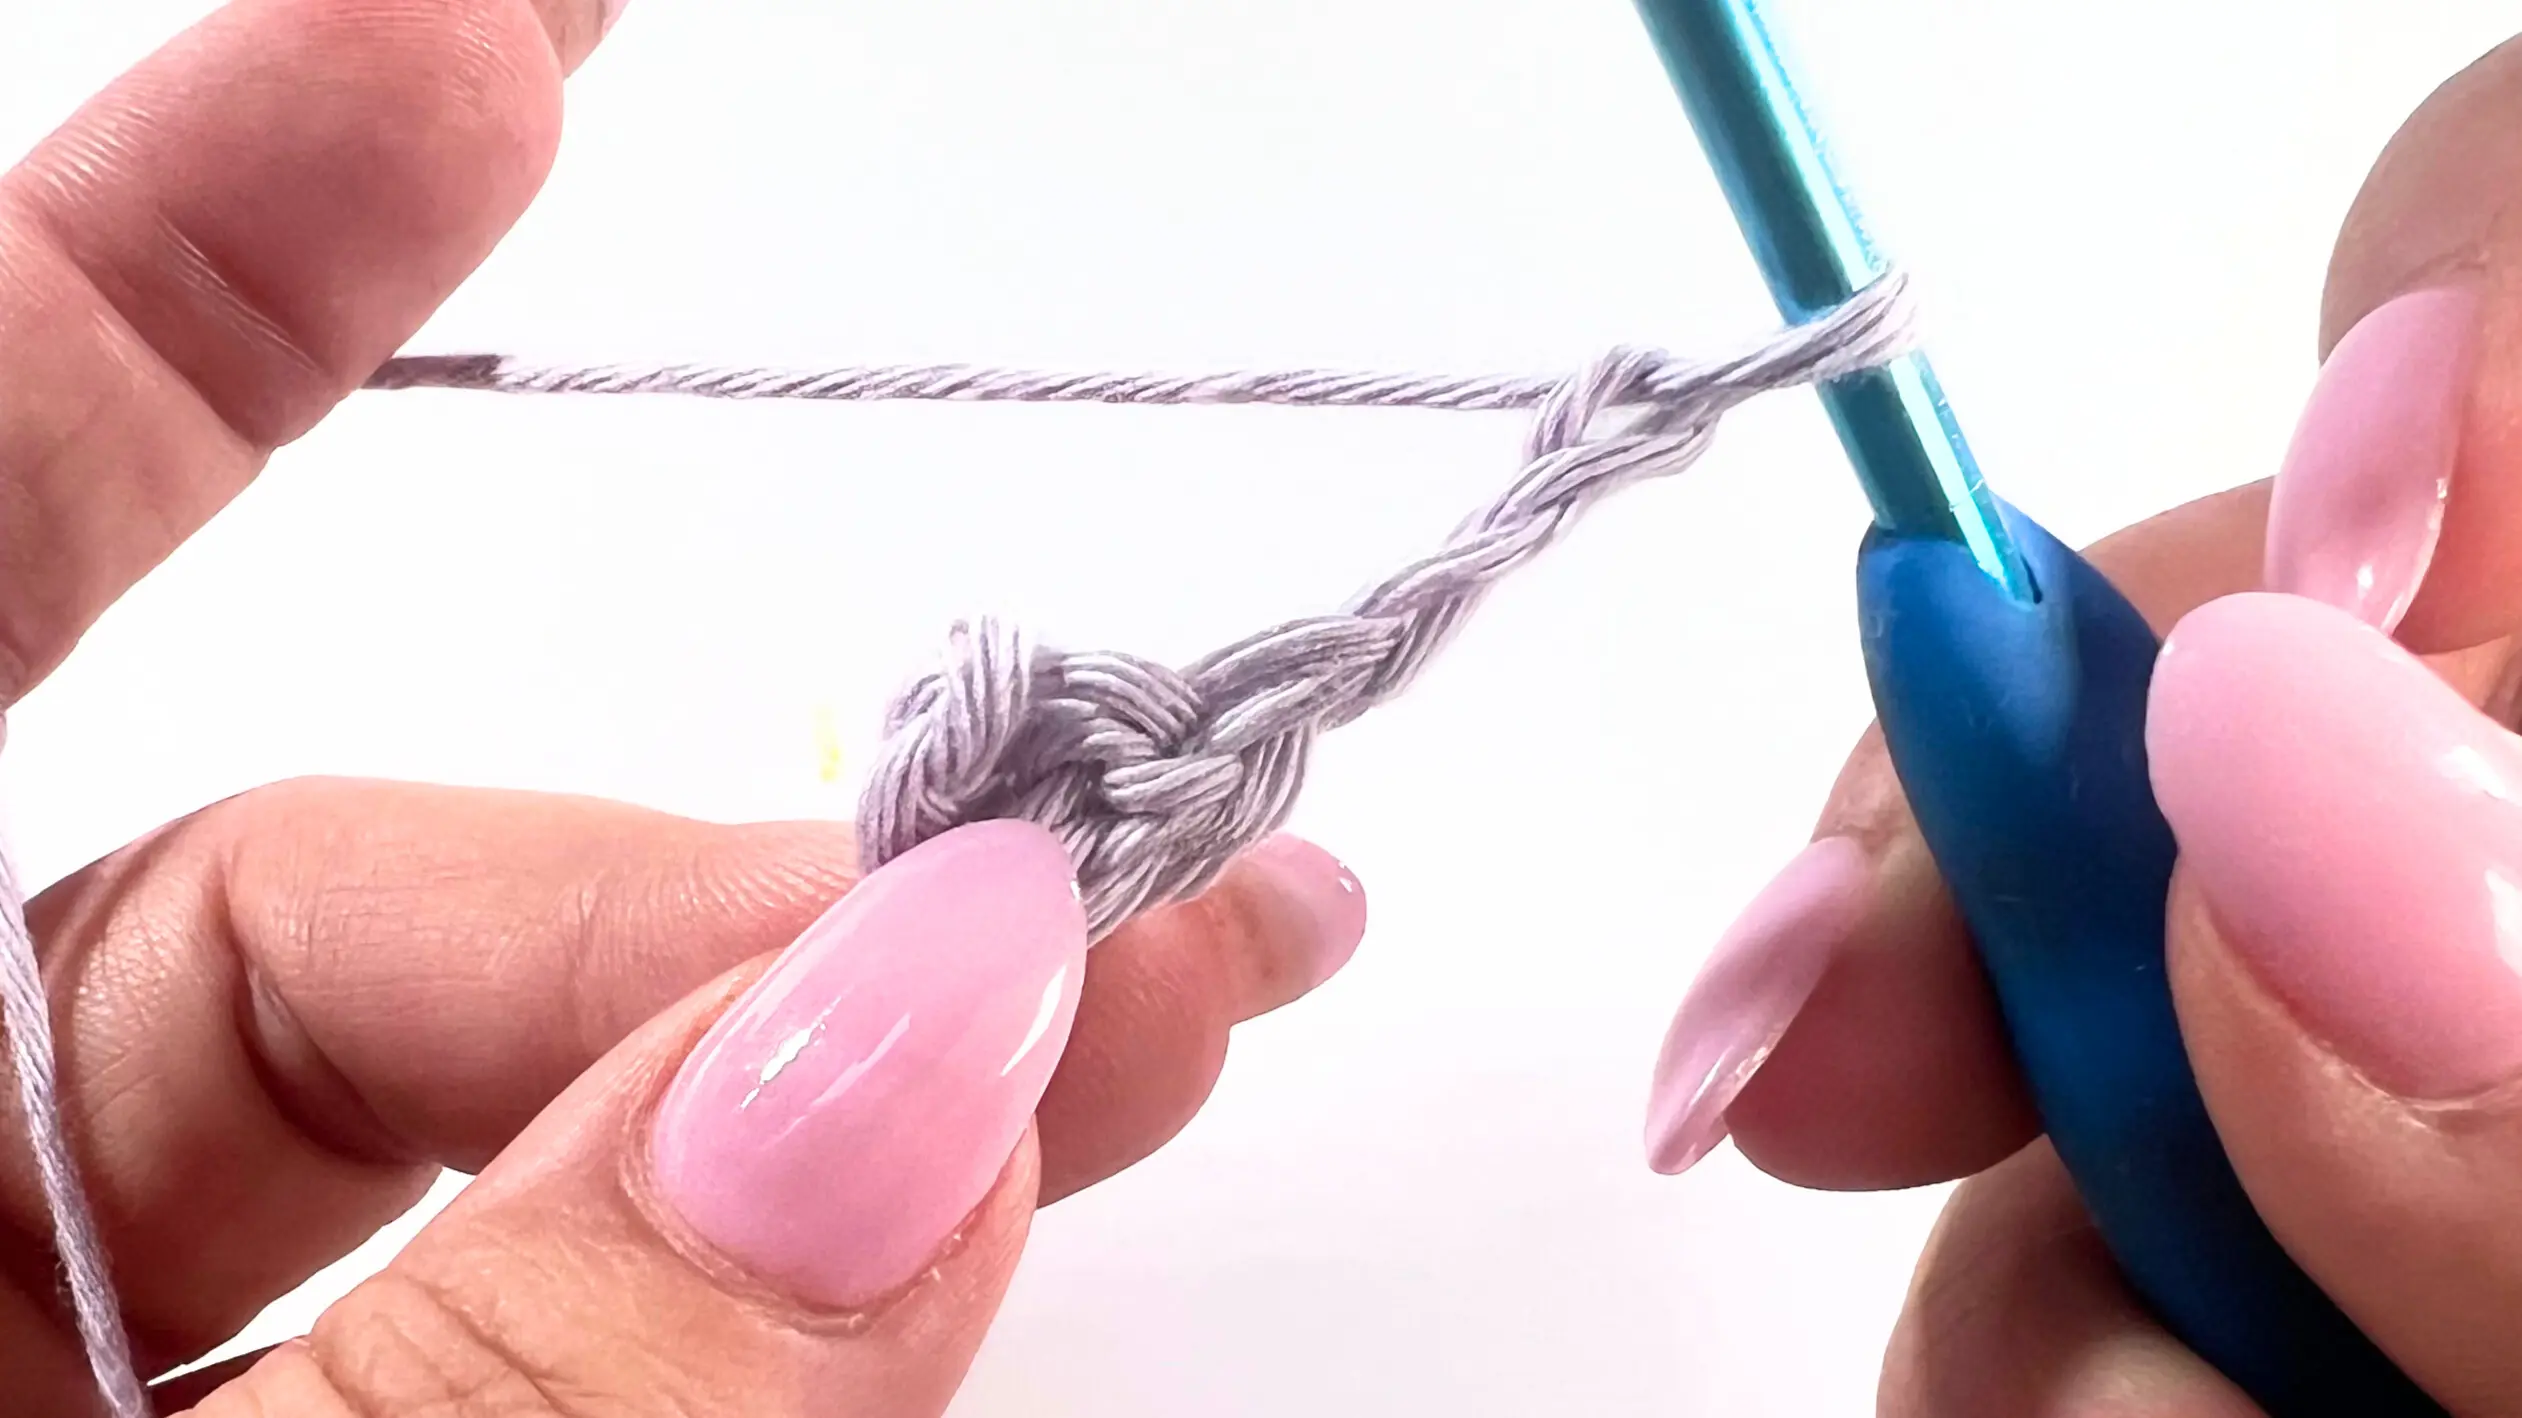
Start with ch 3.

ROW 1 - Into the first chain, make 1 SC and 1 DC. (The 2 skipped chains at the beginning count as the first DC.
Tip: It’s optional but recommended to place a stitch marker into the top of the second chain so you don’t miss the last stitch in the next row.)
Then, chain 2 and turn. (This chain 2 counts as your first DC.) In total 3 sts.

Into the first stitch, make 1 SC. (This is your increase—remember that the first and last stitches always have 2 stitches in them.) The first stitch is ch 2 (counts as DC) + SC. The last stitch is SC + DC. Each row will always start and end with a DC.
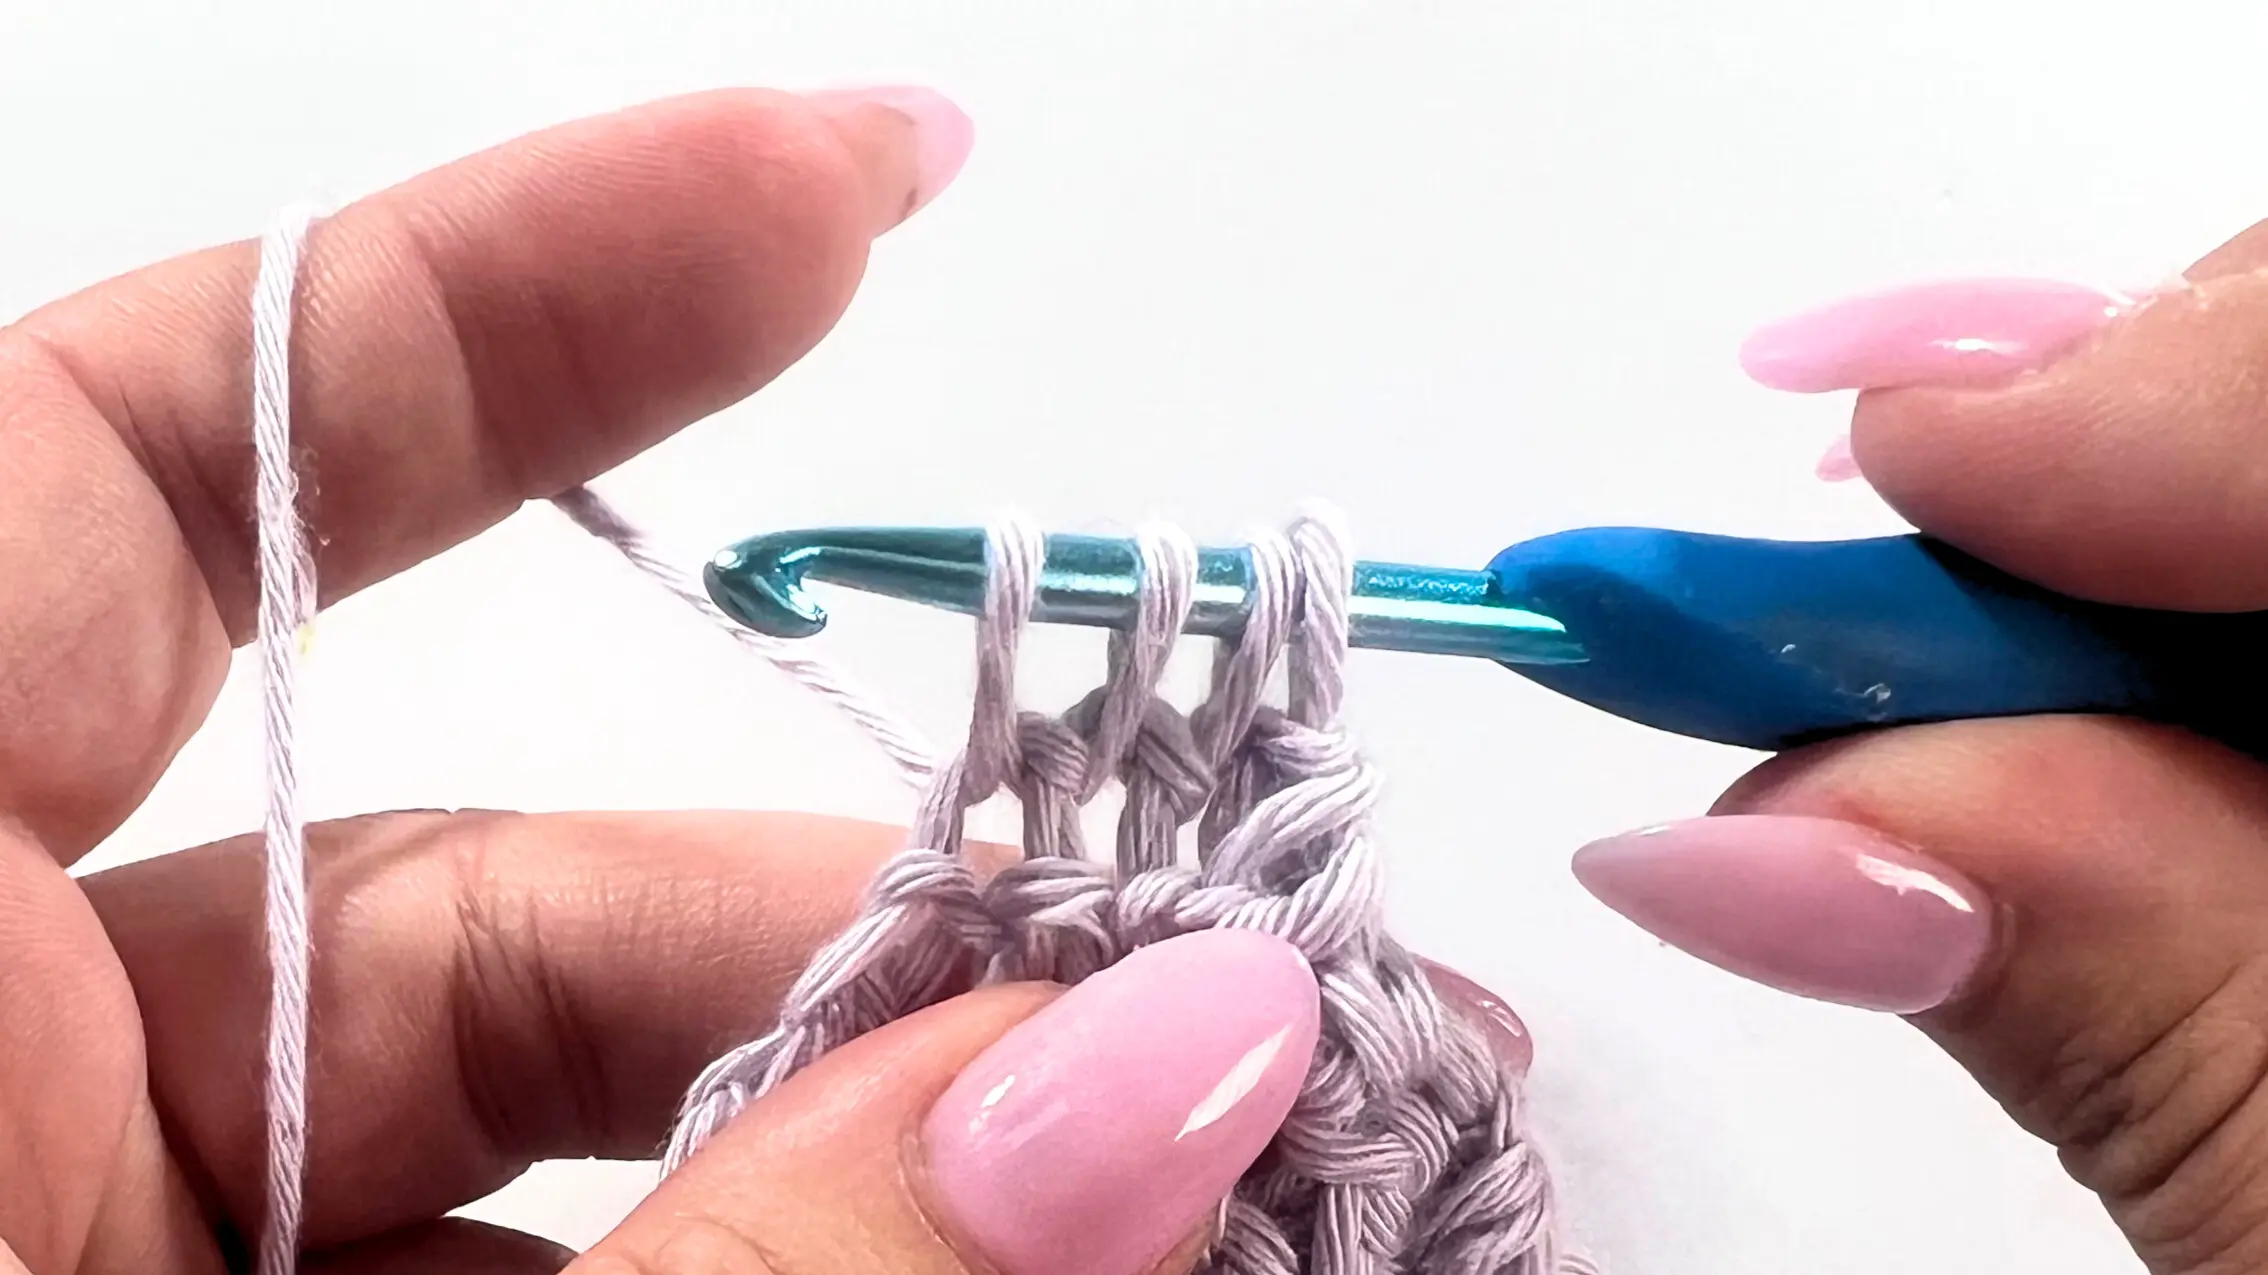
After the increase, alternate DC and SC across the row until you reach the last stitch. In the last stitch, make 1 SC and 1 DC. Chain 2 and turn. (You should now have a total of 5 stitches.)


ROW 3 - until desired length - Repeat Row 2 with increases.
Make 1 SC into the first stitch, then 1 DC. SC, DC—repeat from to across the row until the last stitch, where you will make SC + DC.
Tip: The Lemon Peel Stitch is all about alternating DC and SC. A great way to check if you’re on track is to make sure you’re always working the opposite stitch from the row below!

C2C Lemon Peel Stitch Decrease
Once you reach your desired washcloth length, it’s time to start decreasing.
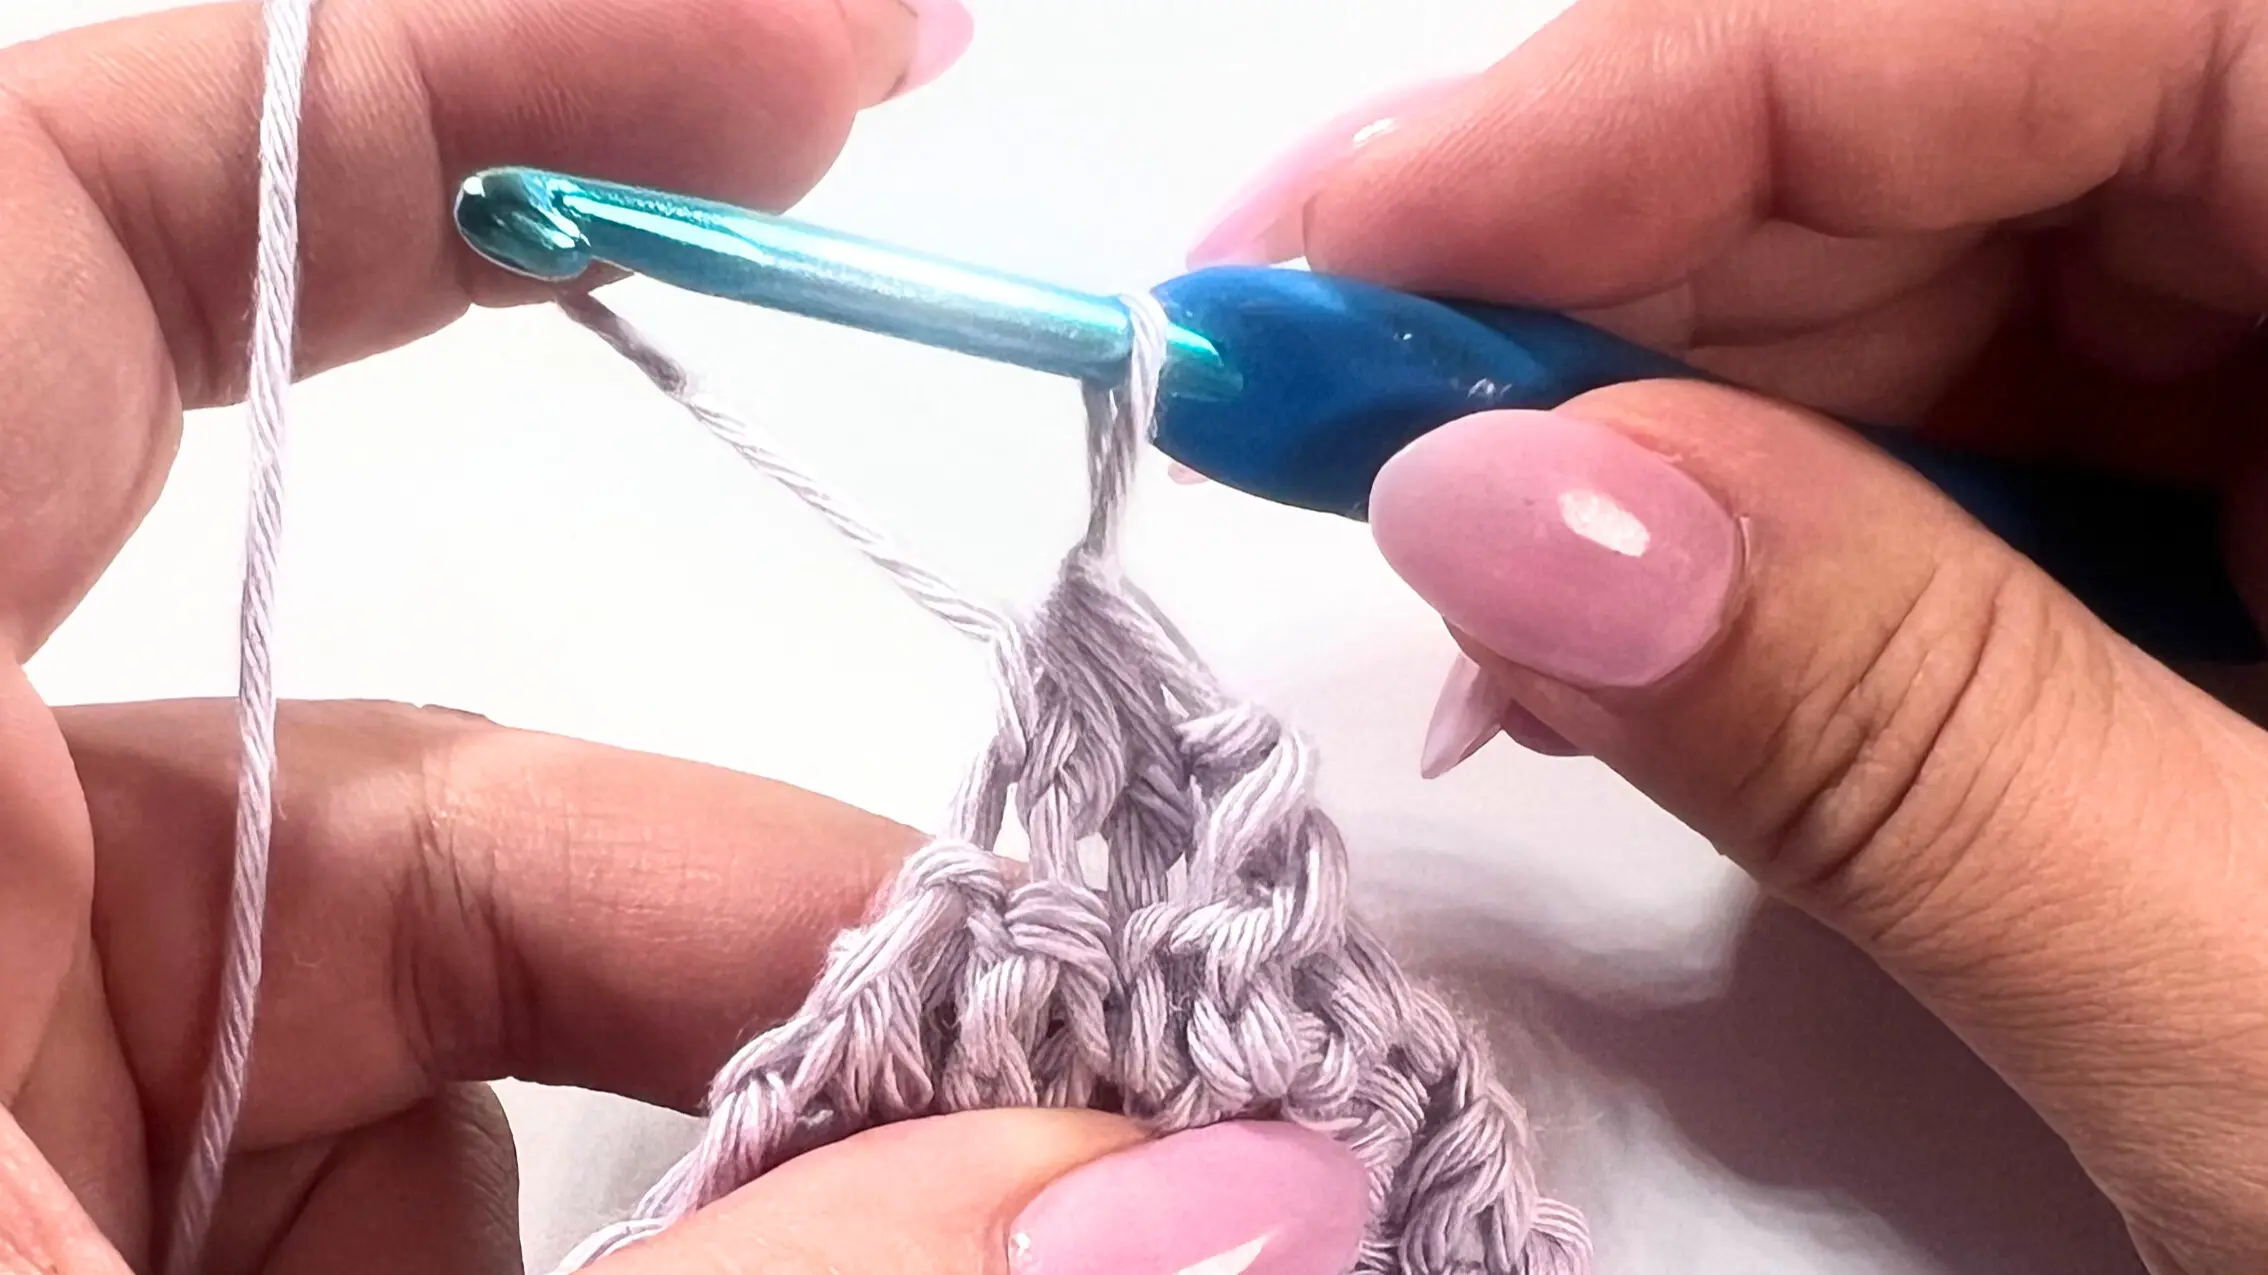
At the end of your last increase row, chain 1 and turn. This chain 1 counts as the first stitch (technically a partial DC). Into the 2nd stitch, make 1 DC. This creates a variation of a DC2tog. The DC you just made will also count as the last stitch for the next row, so it’s helpful to place a stitch marker there to avoid missing it later.
Then, alternate SC and DC across the row until only 2 stitches remain. Work a DC2tog into those last 2 stitches to decrease.
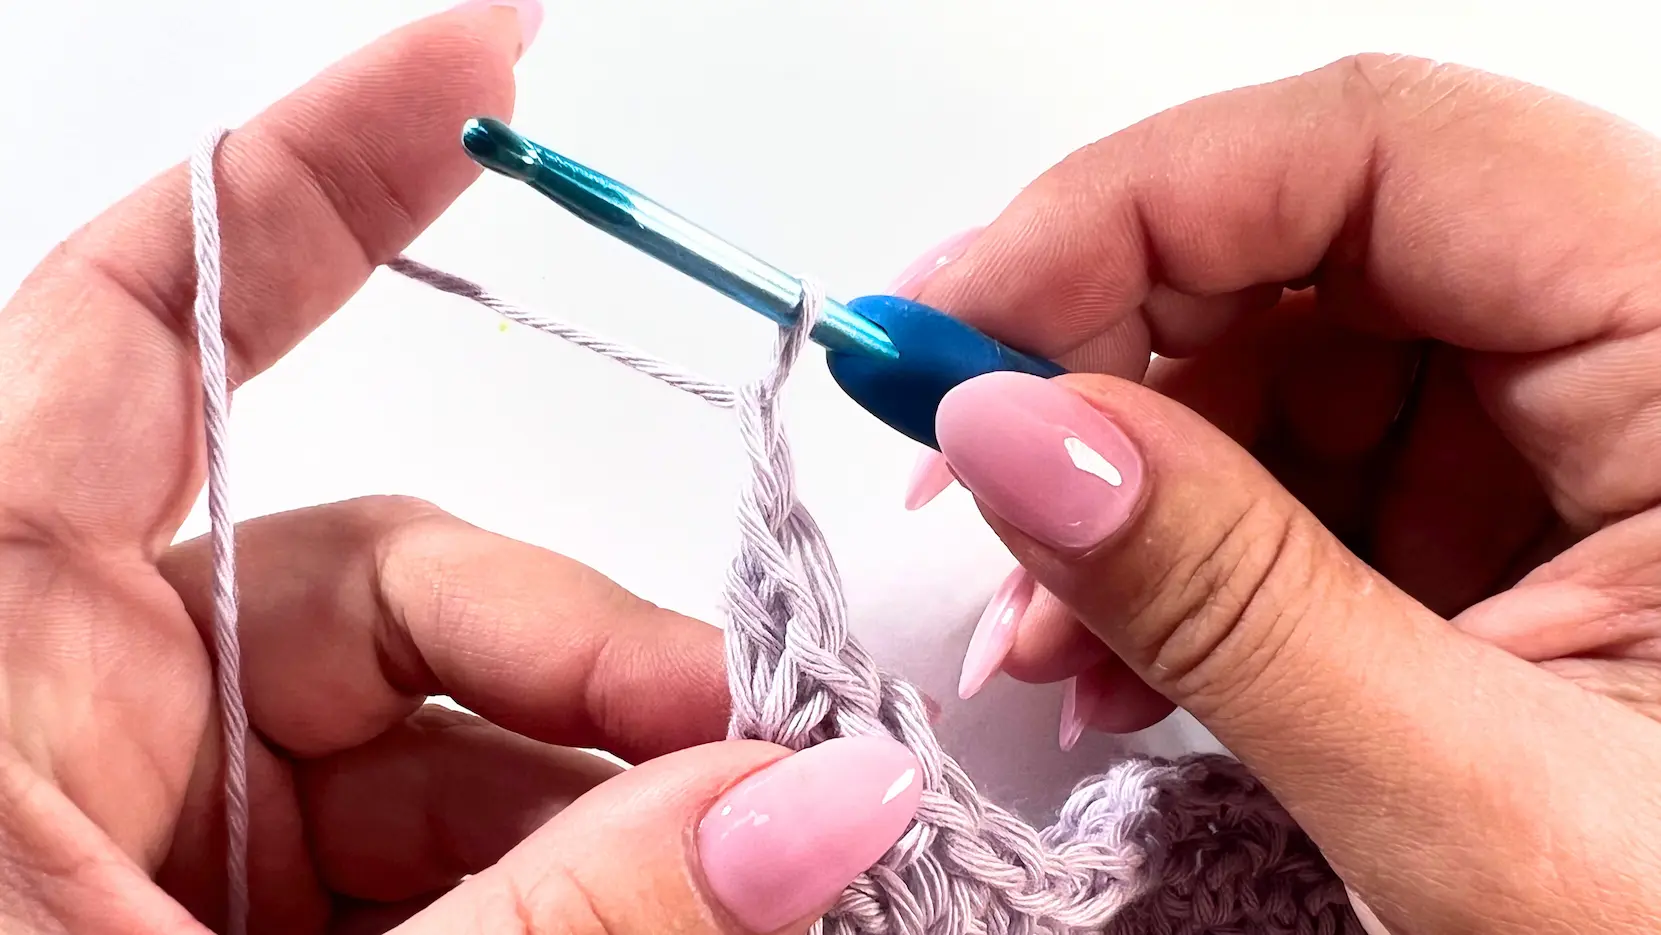


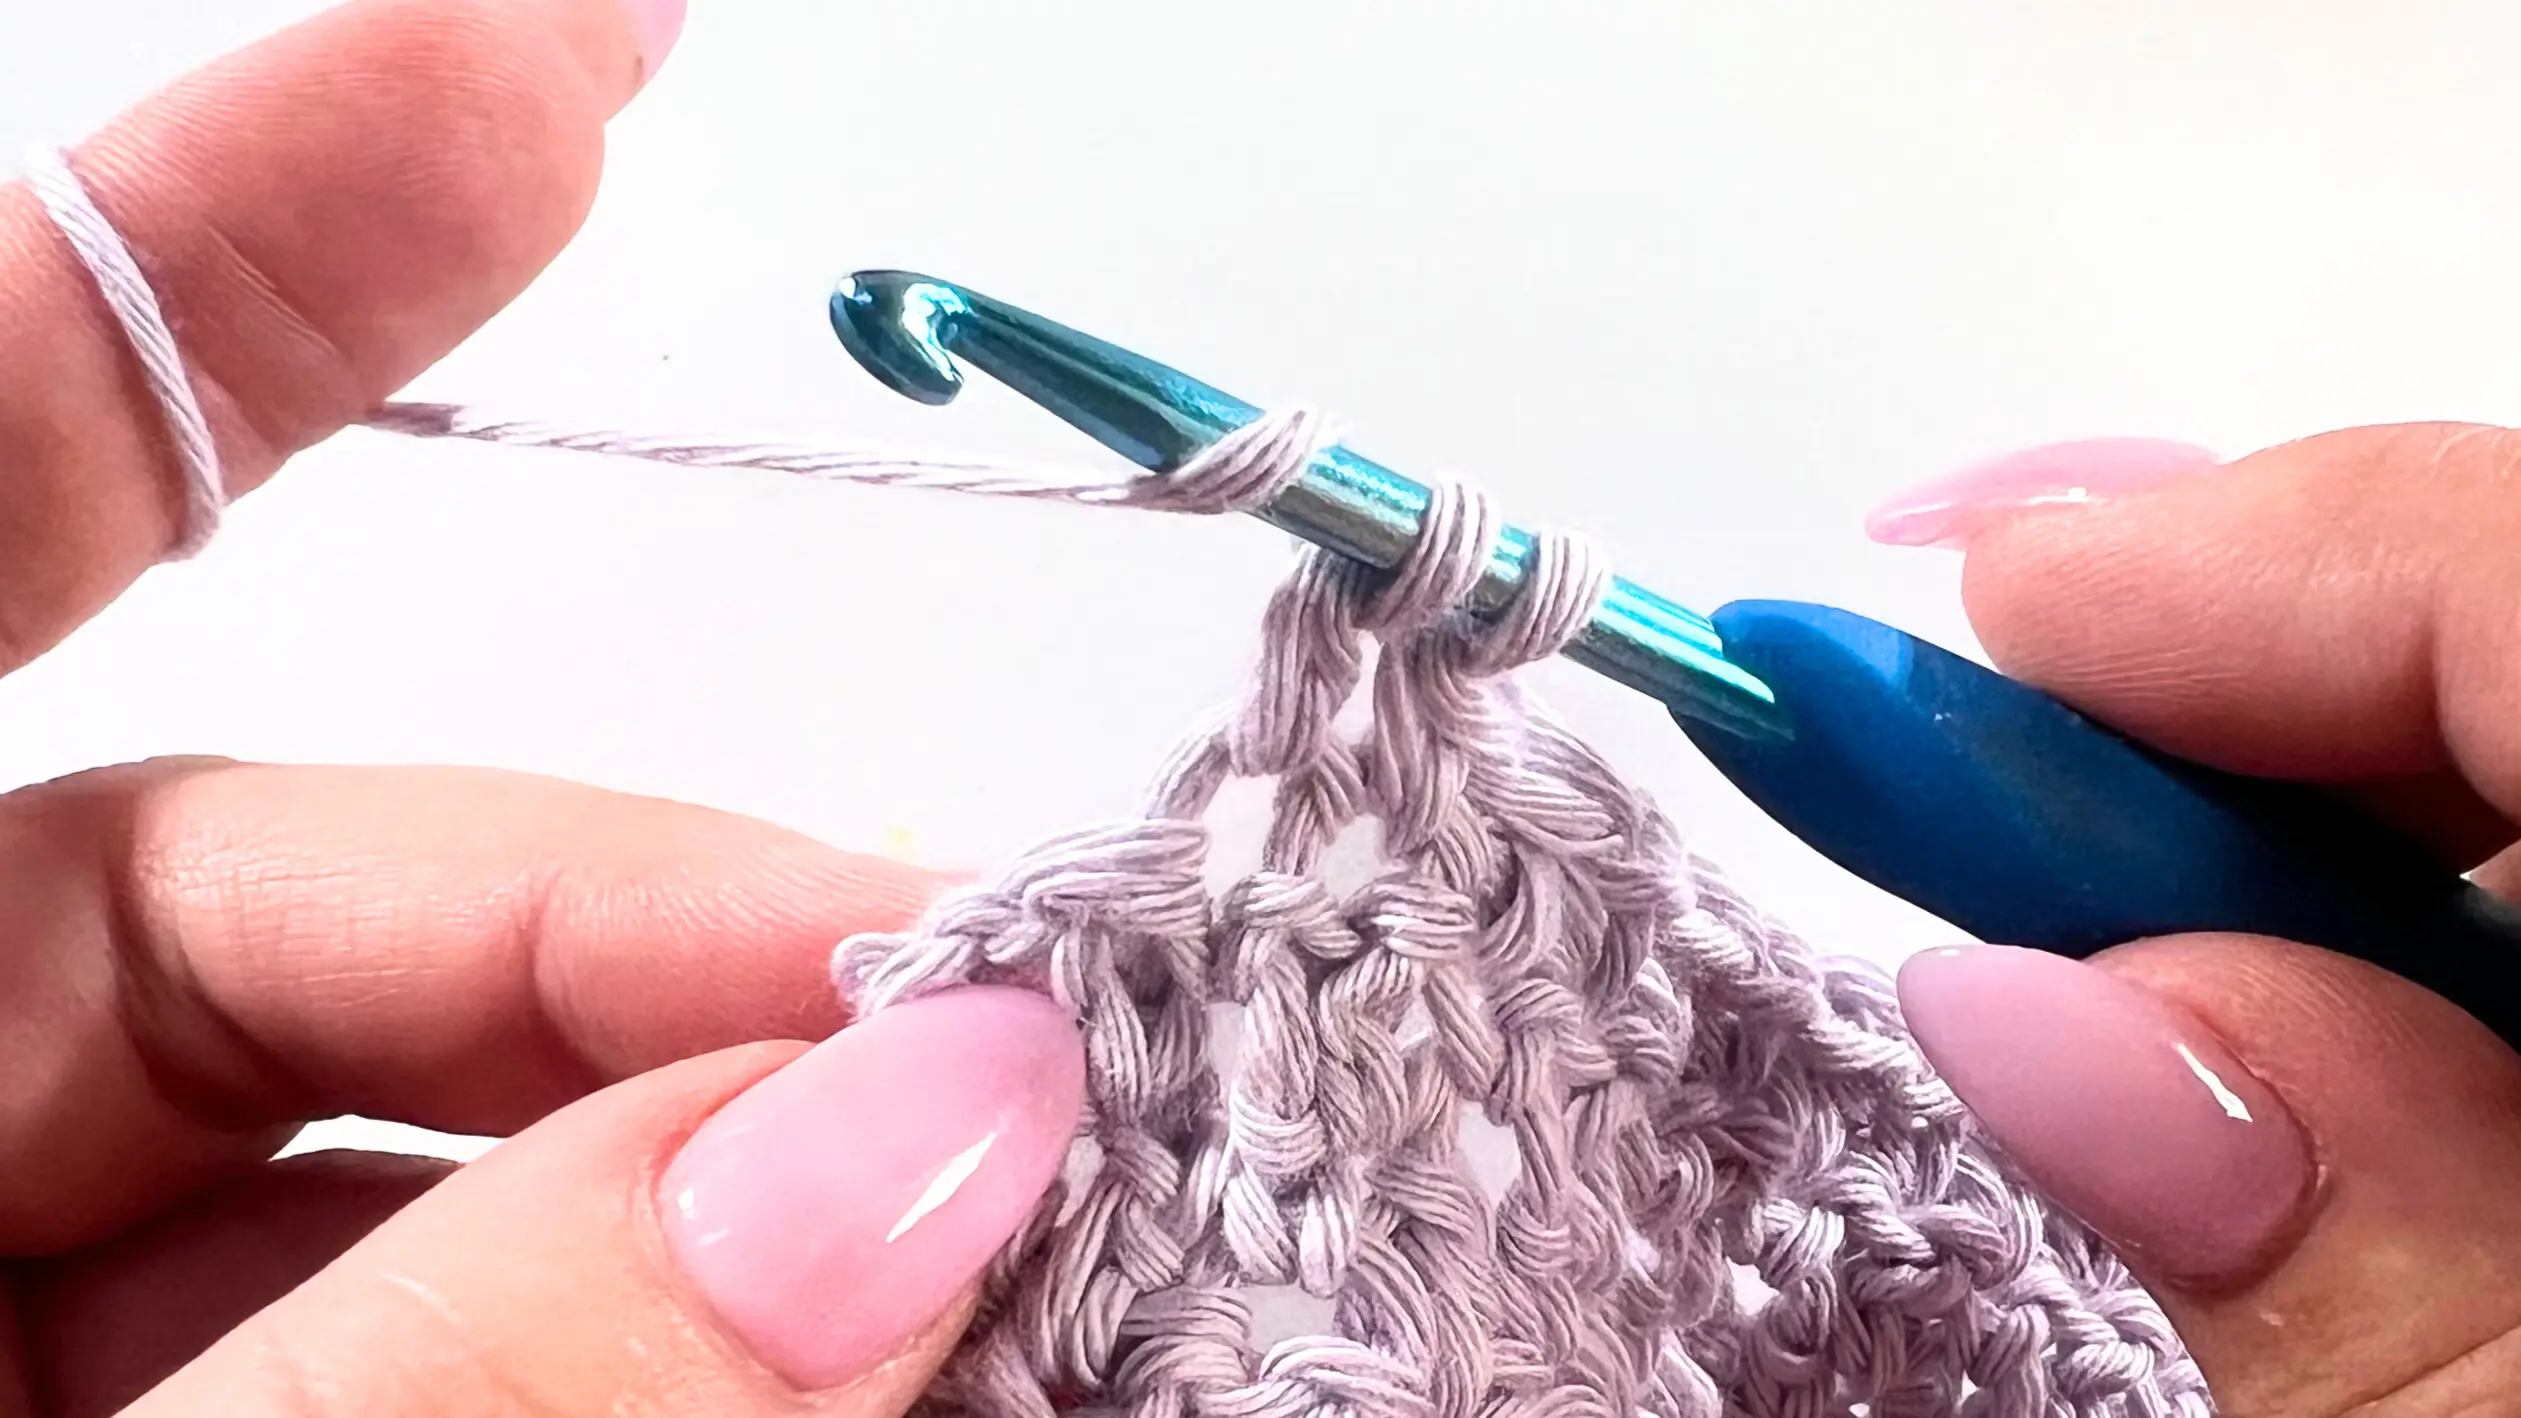
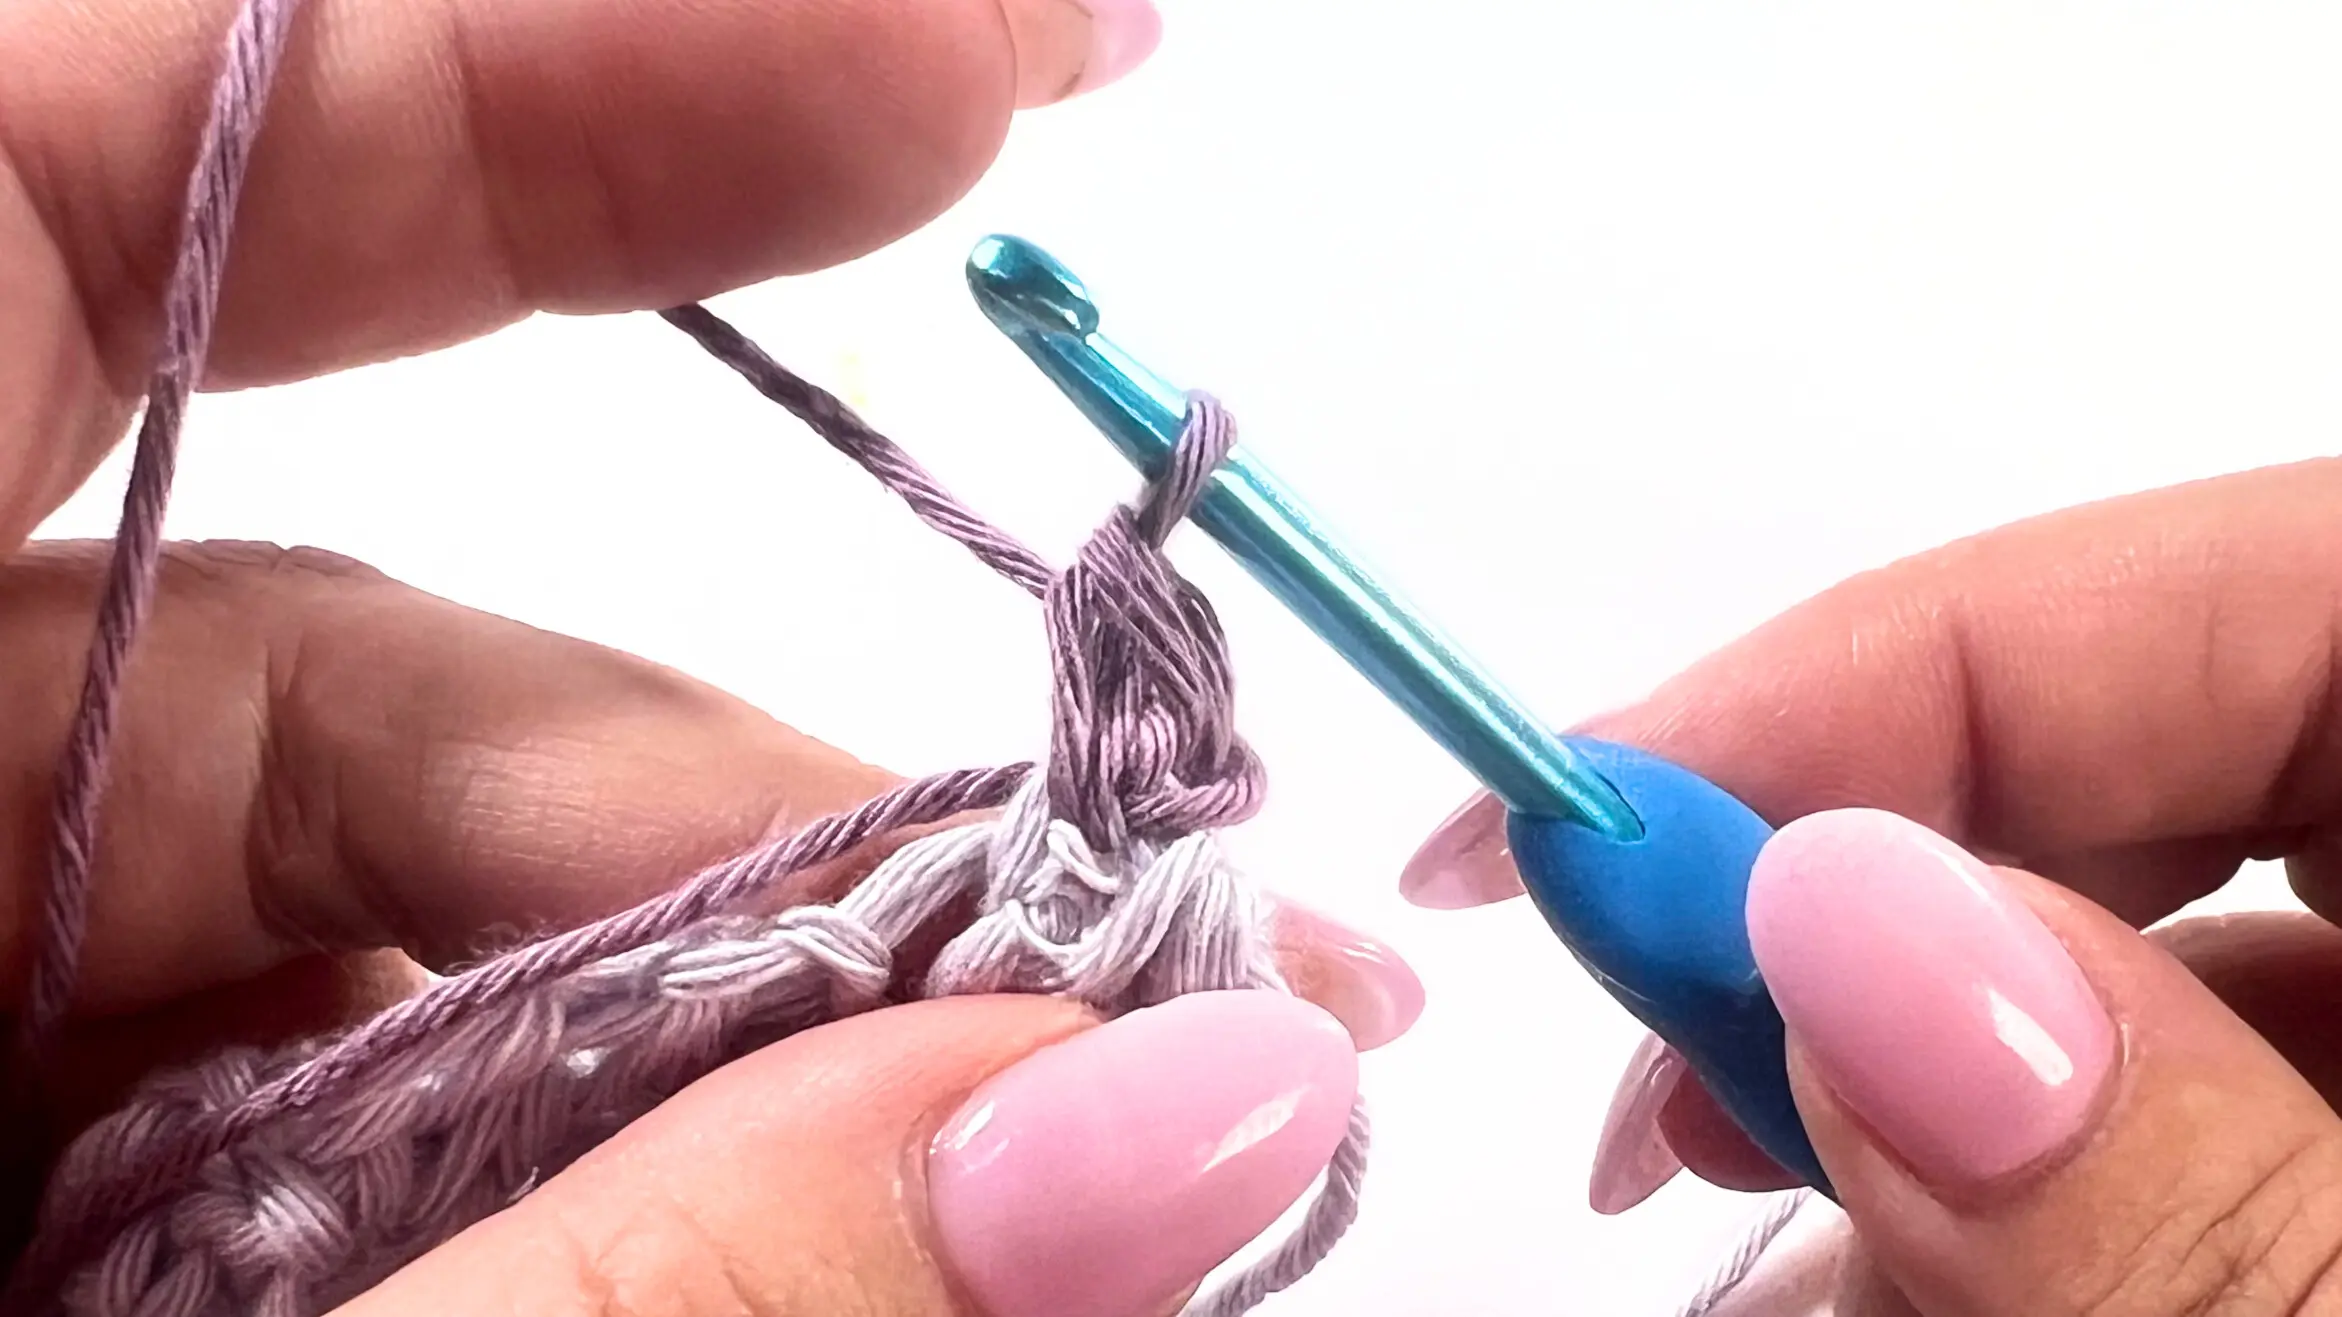
How to DC2tog (Double Crochet Two Together)
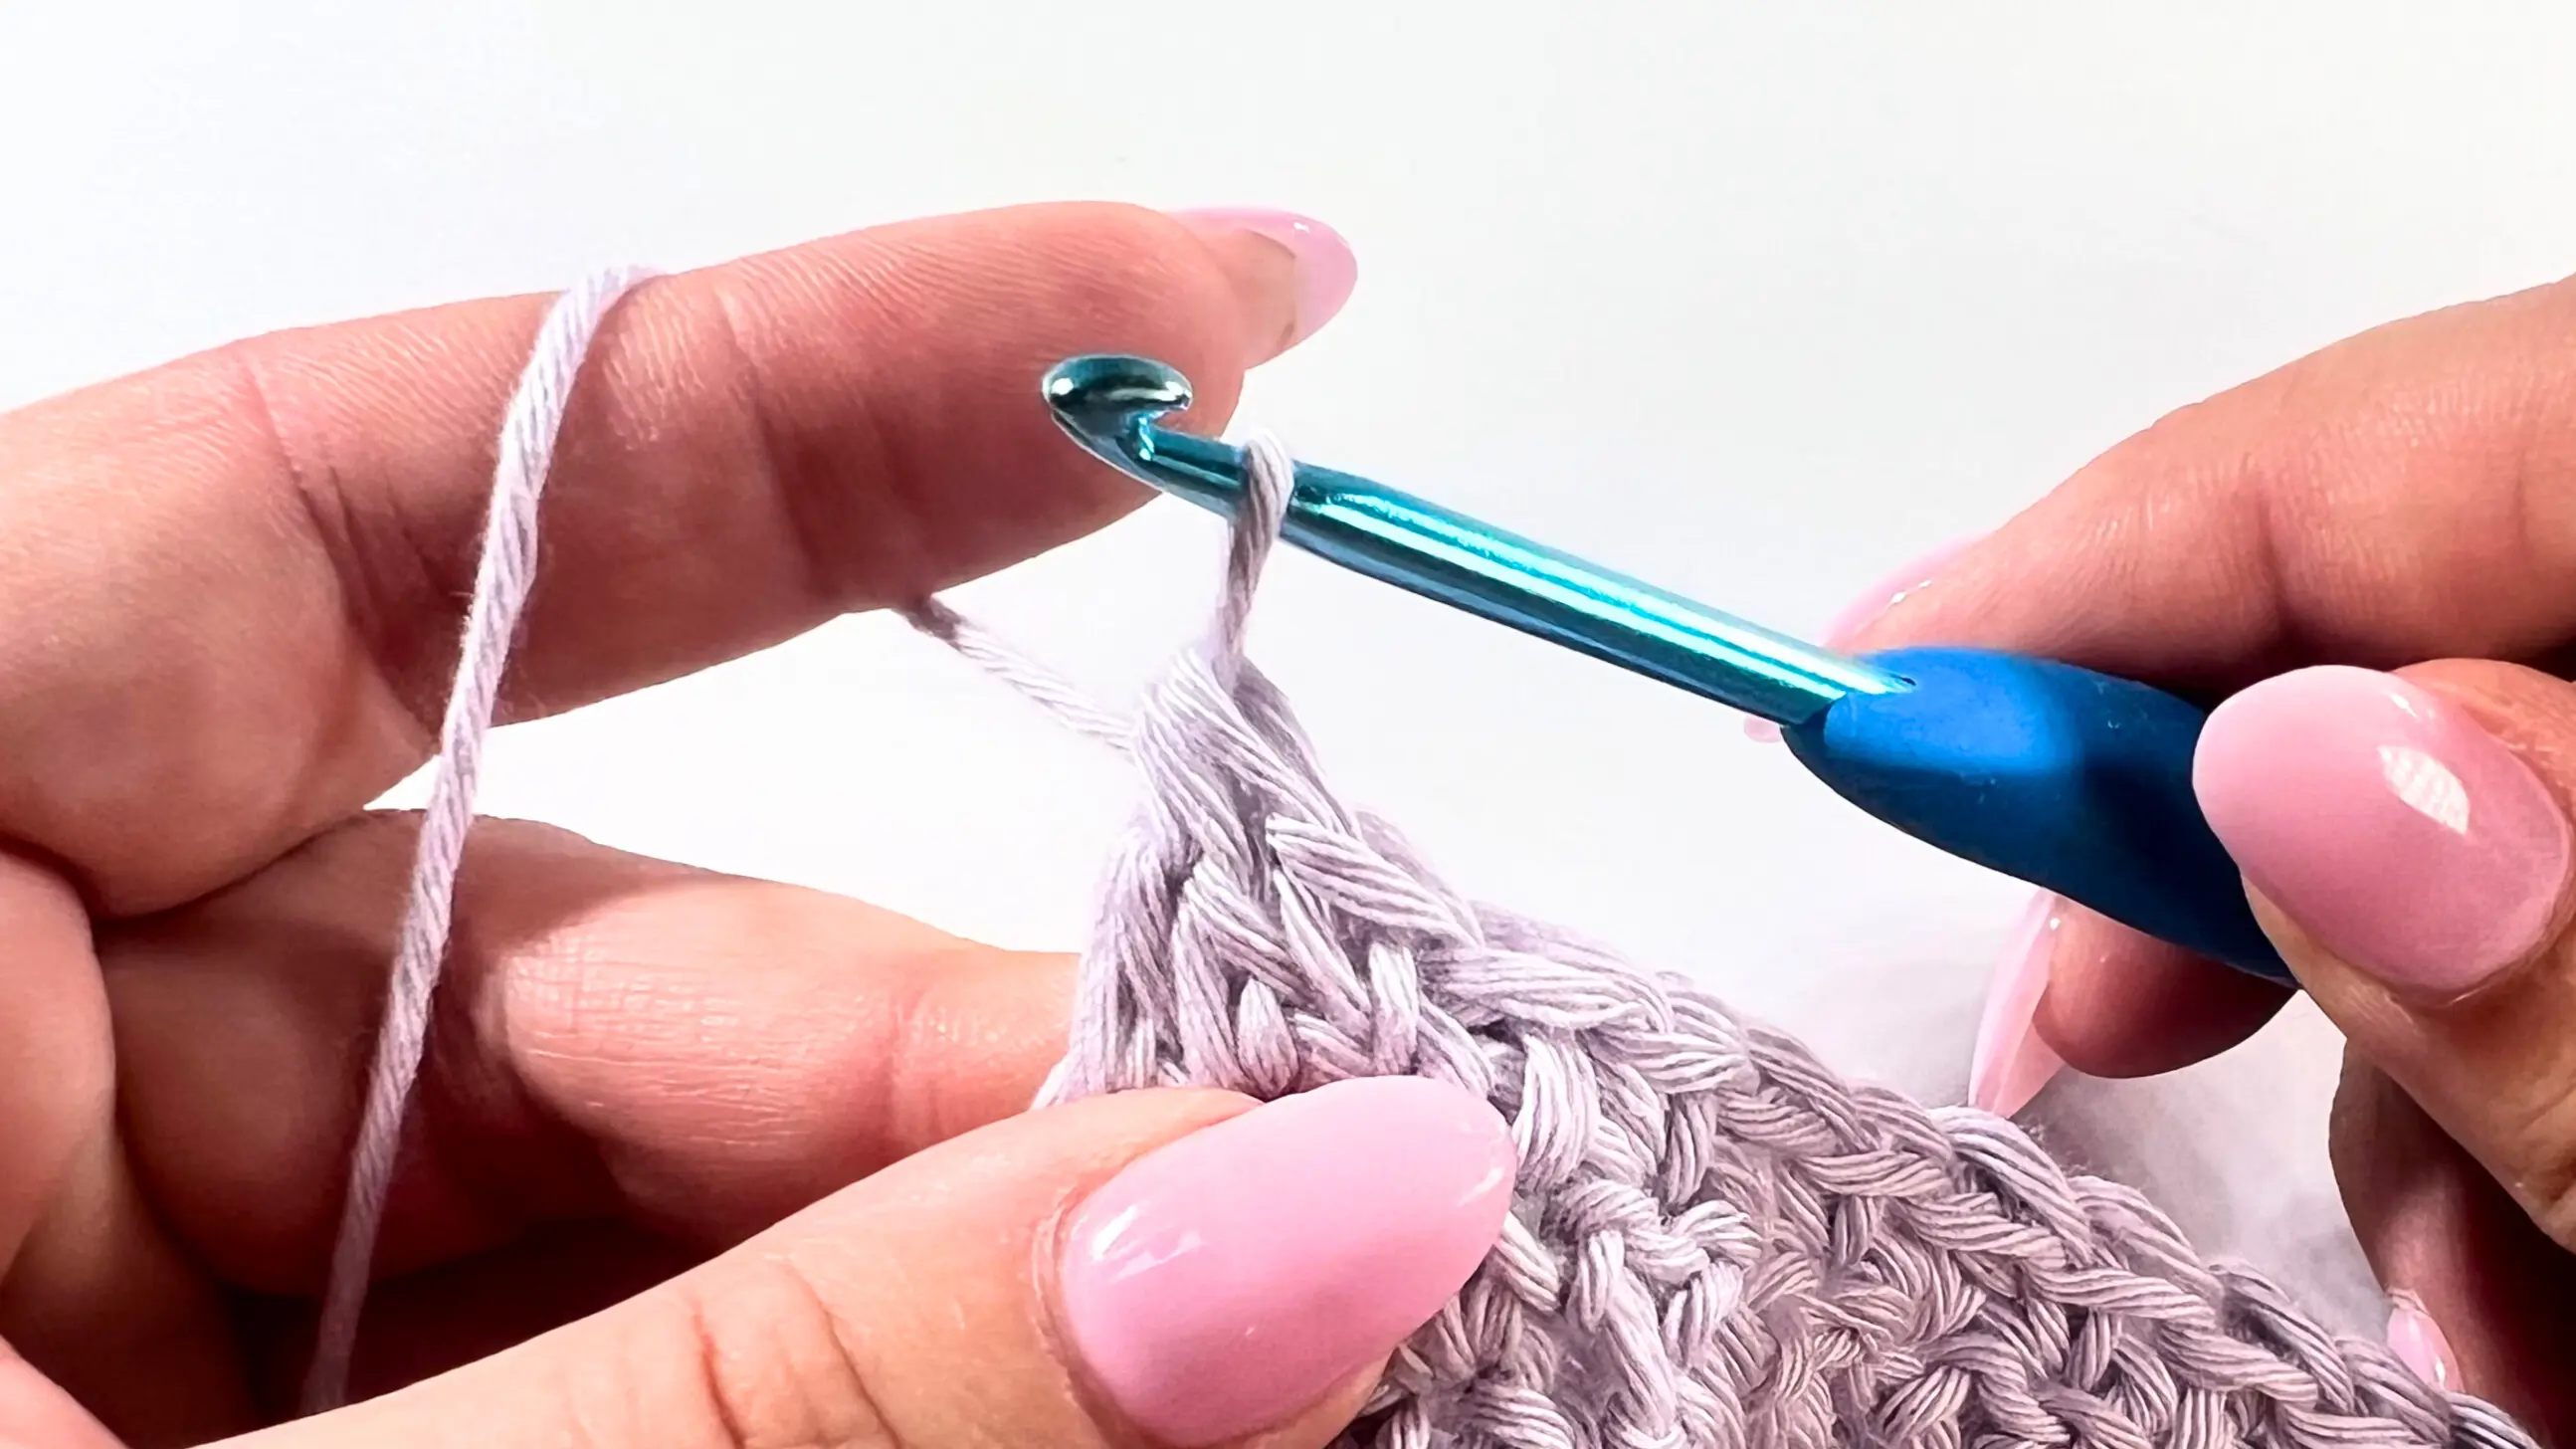
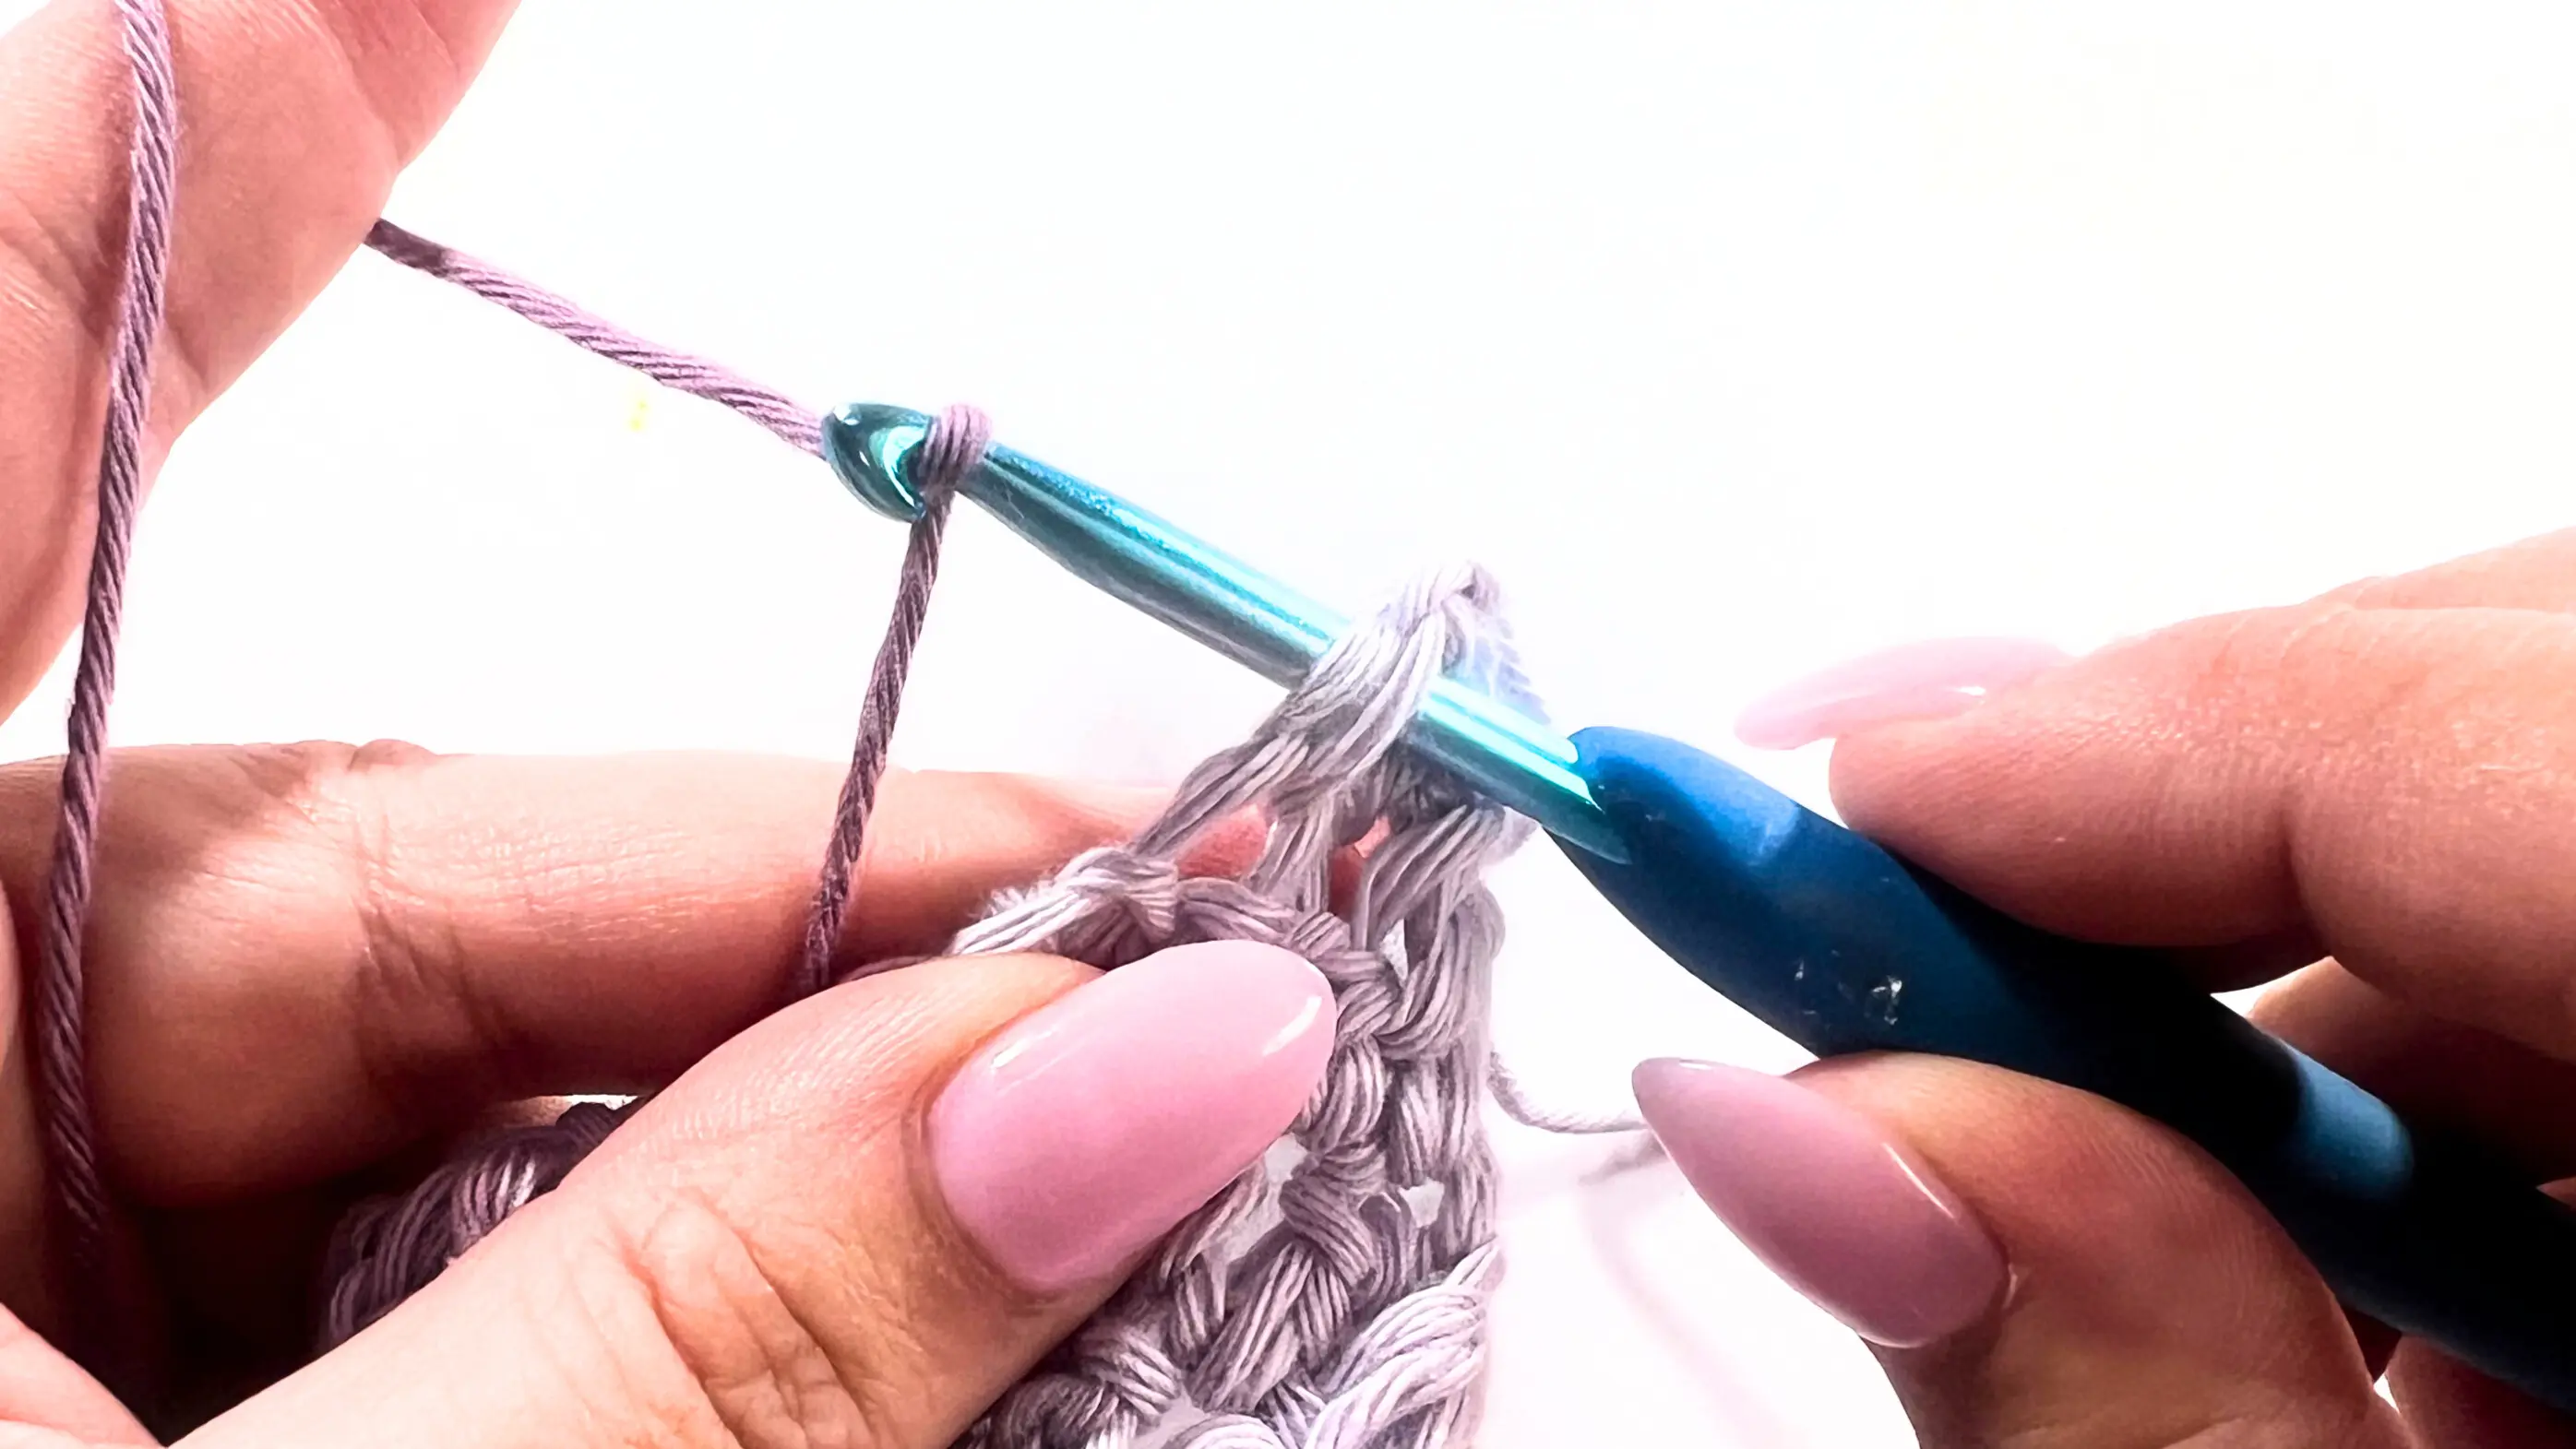
When you reach the last two stitches of the row, yarn over and insert your hook into the next stitch. Yarn over again and pull up a loop—you’ll have three loops on your hook.

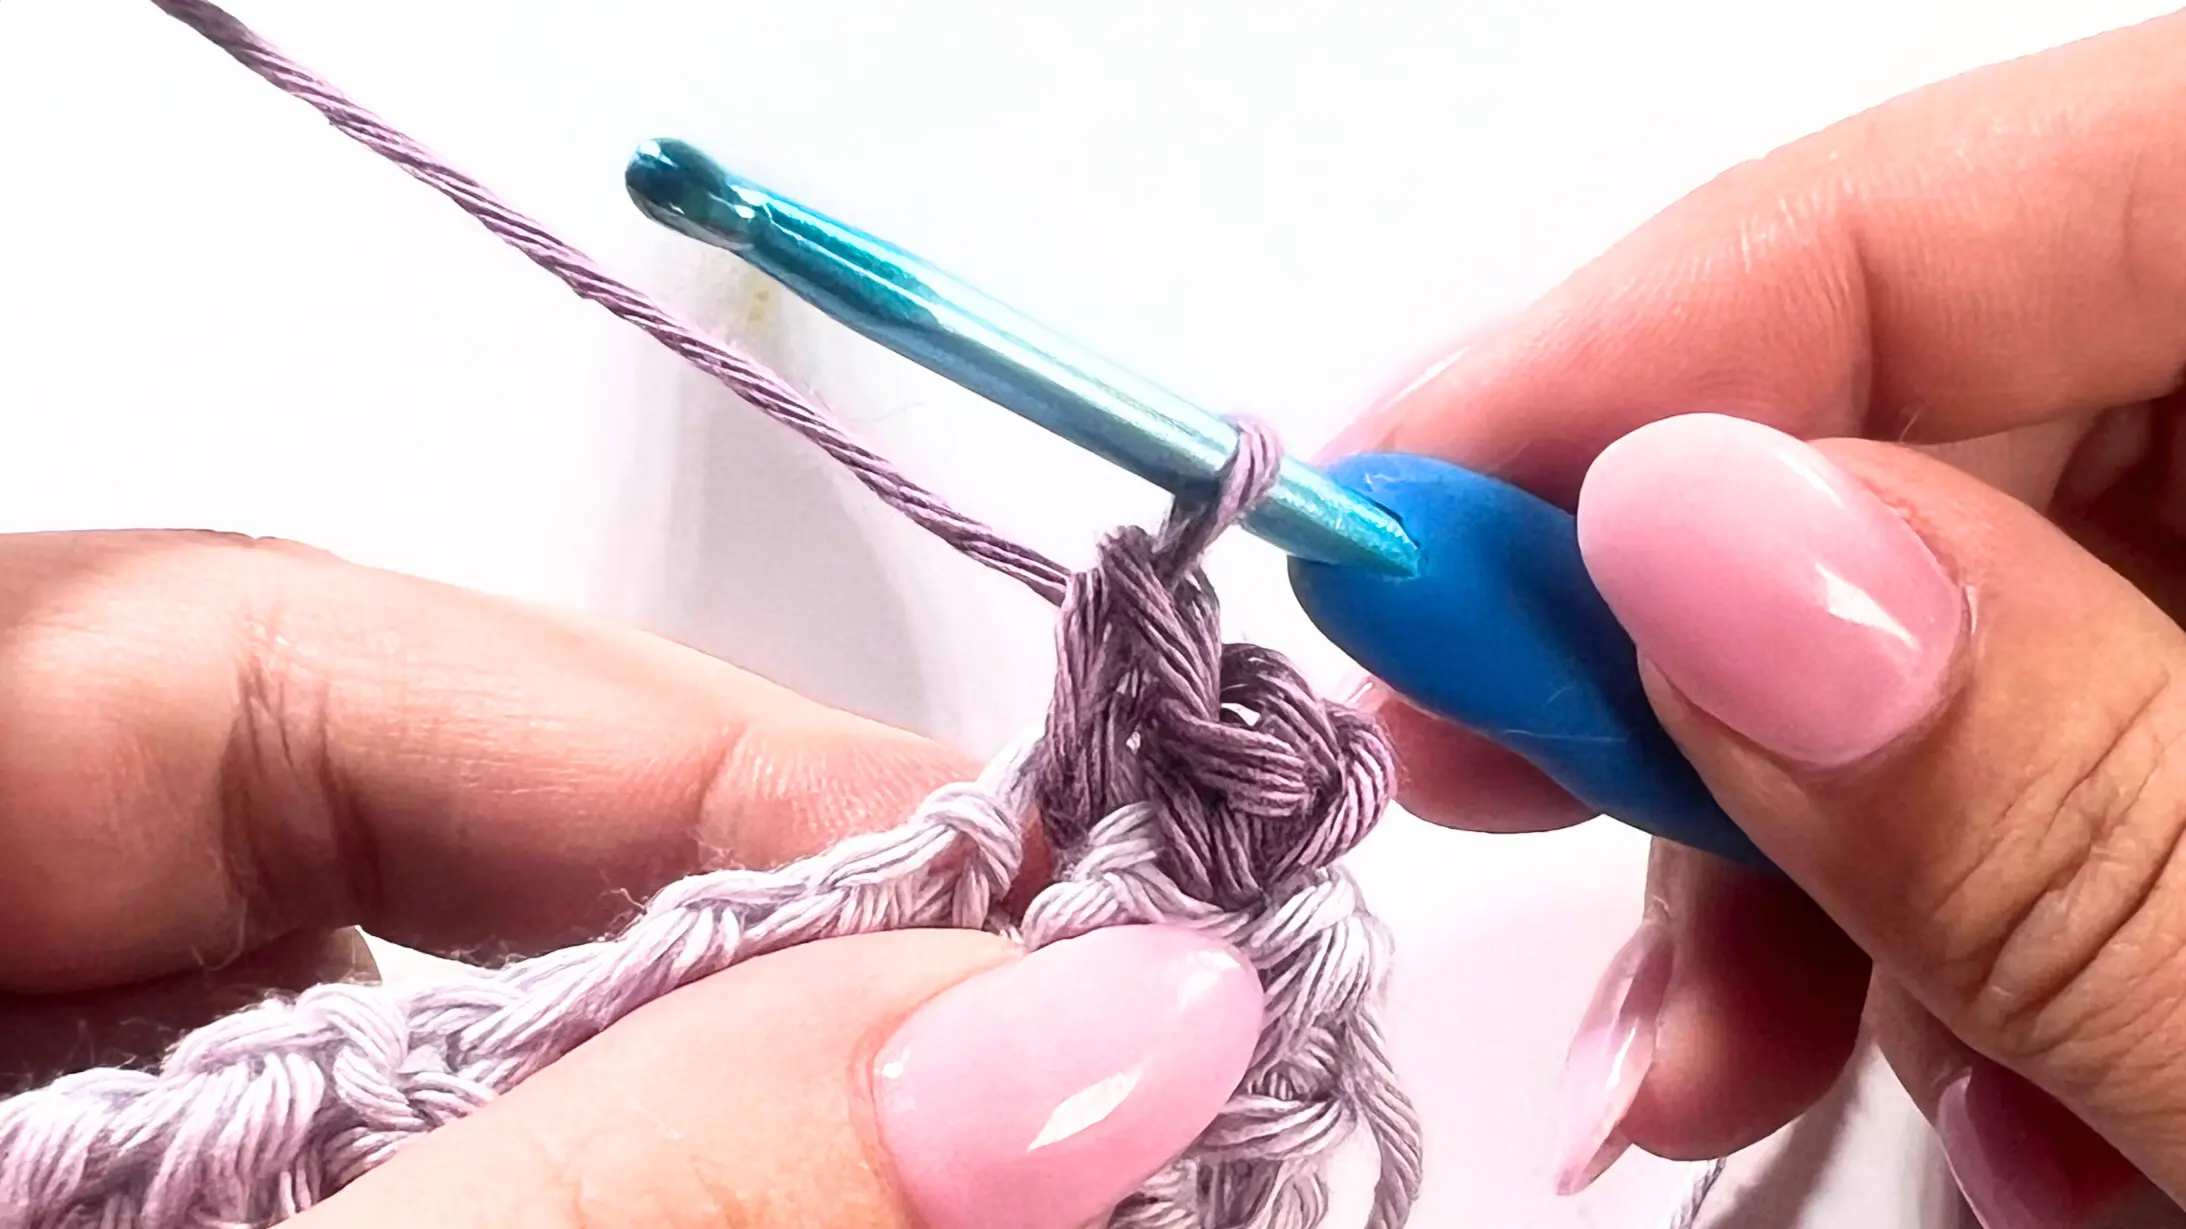
Yarn over and pull through the first two loops. Then yarn over and insert your hook into the last stitch, yarn over and pull up a loop—you’ll now have four loops on your hook.

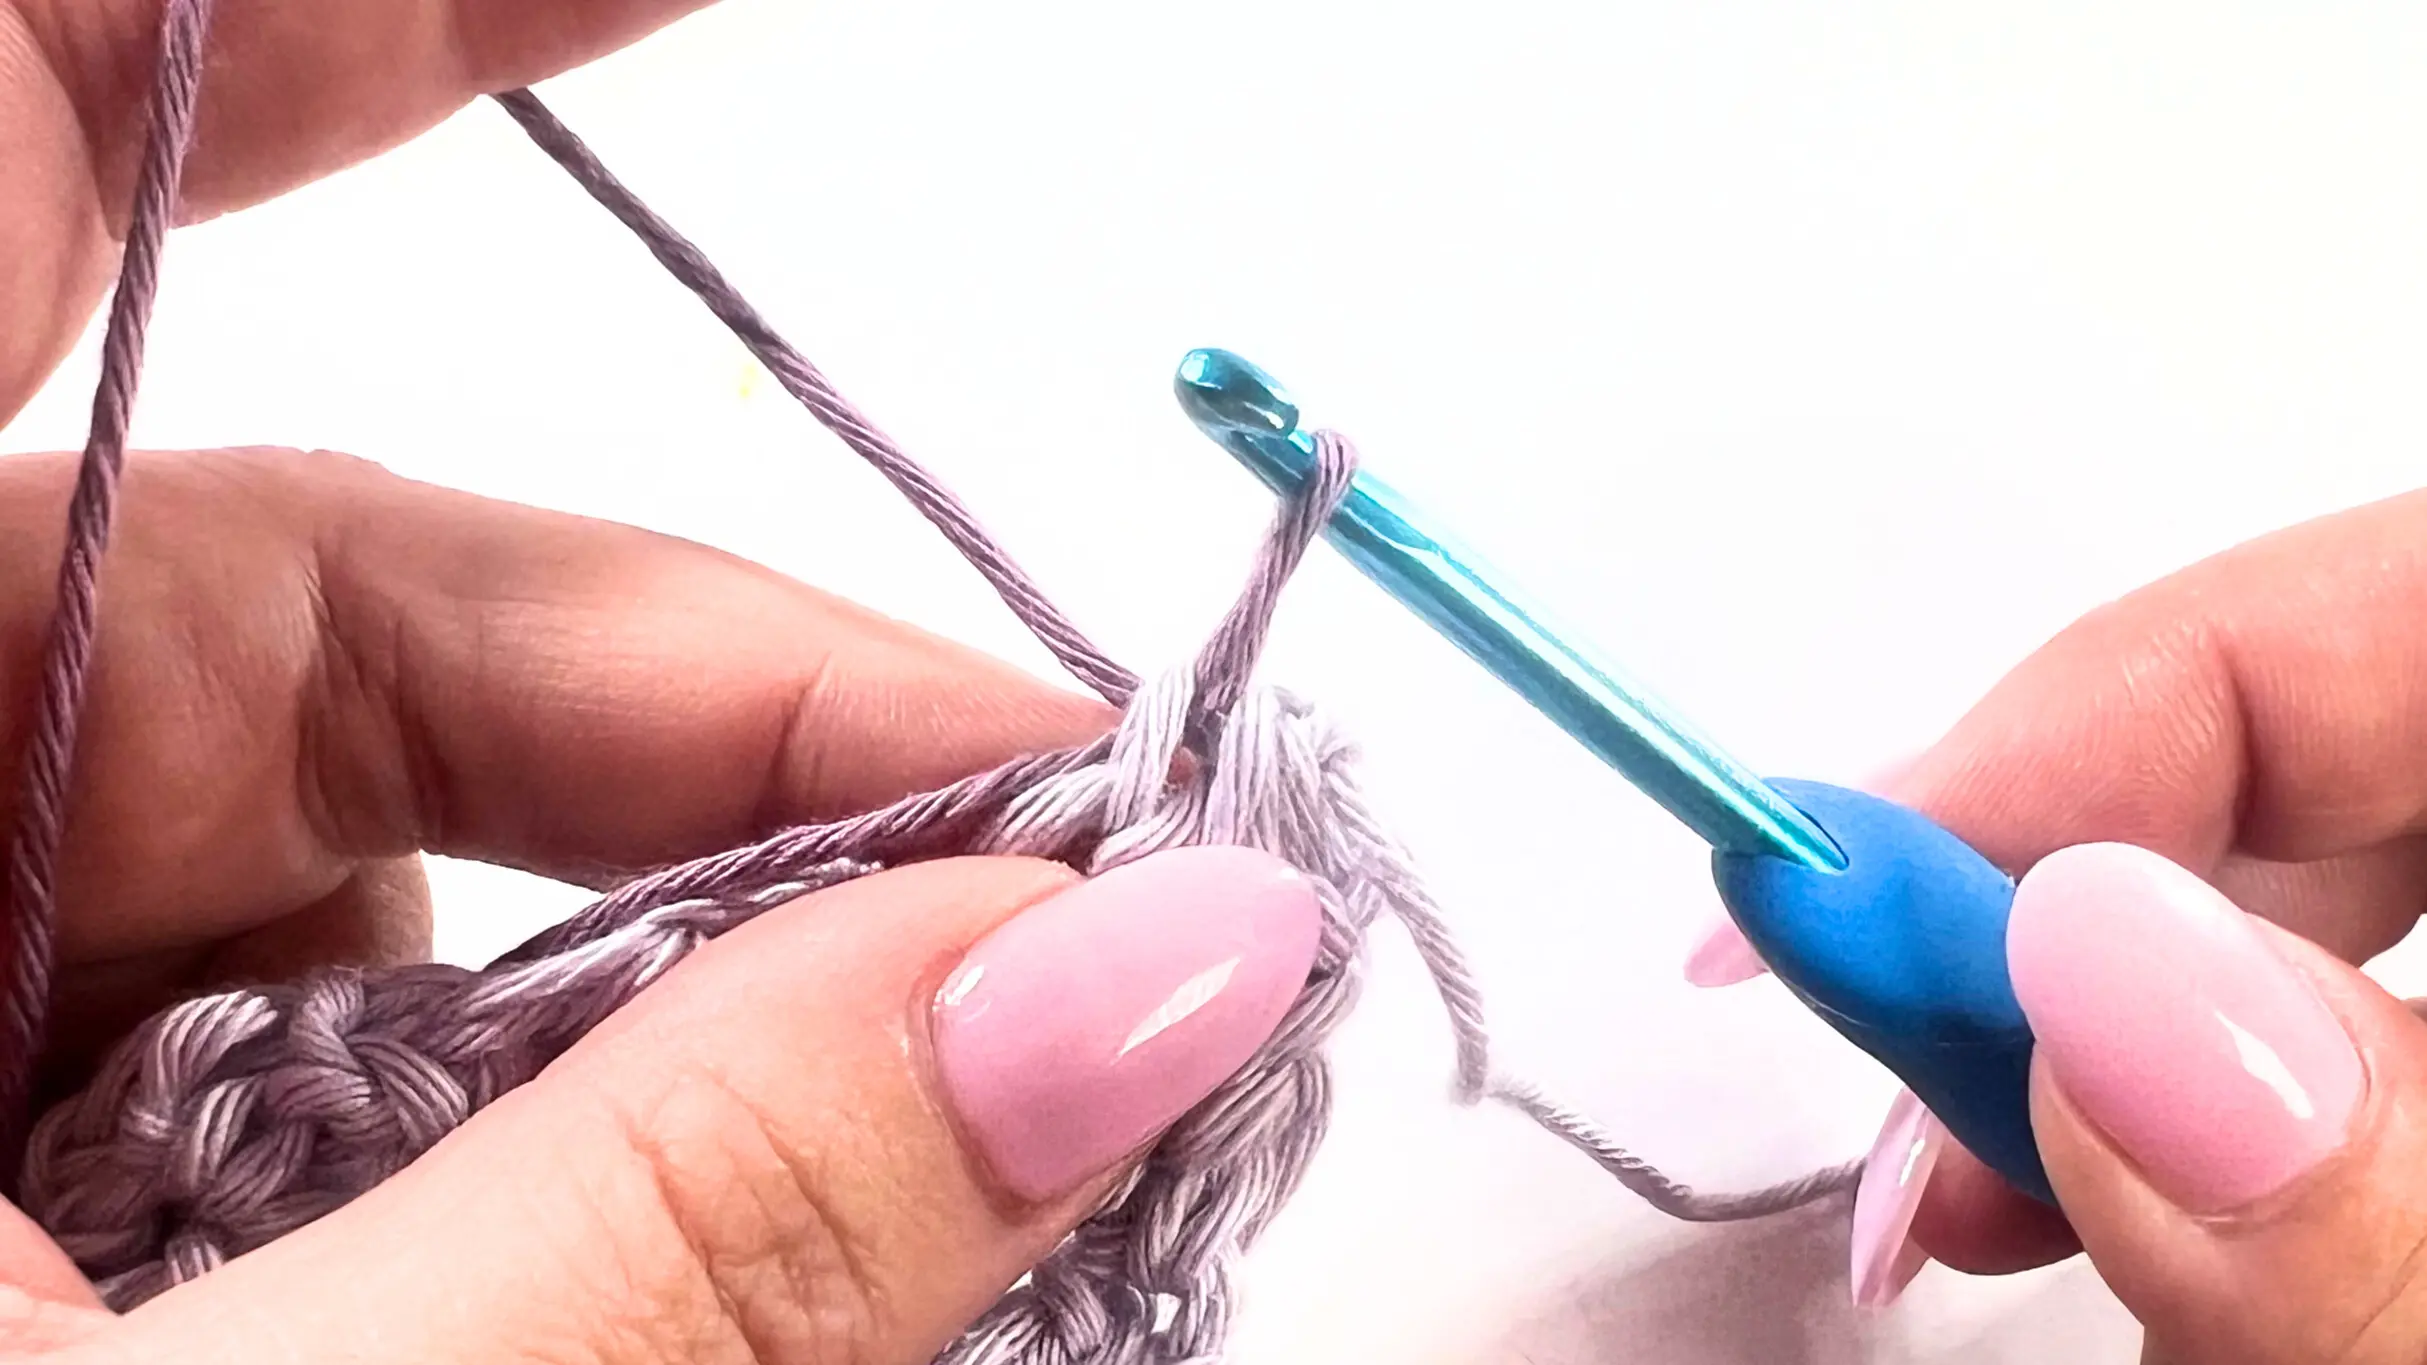
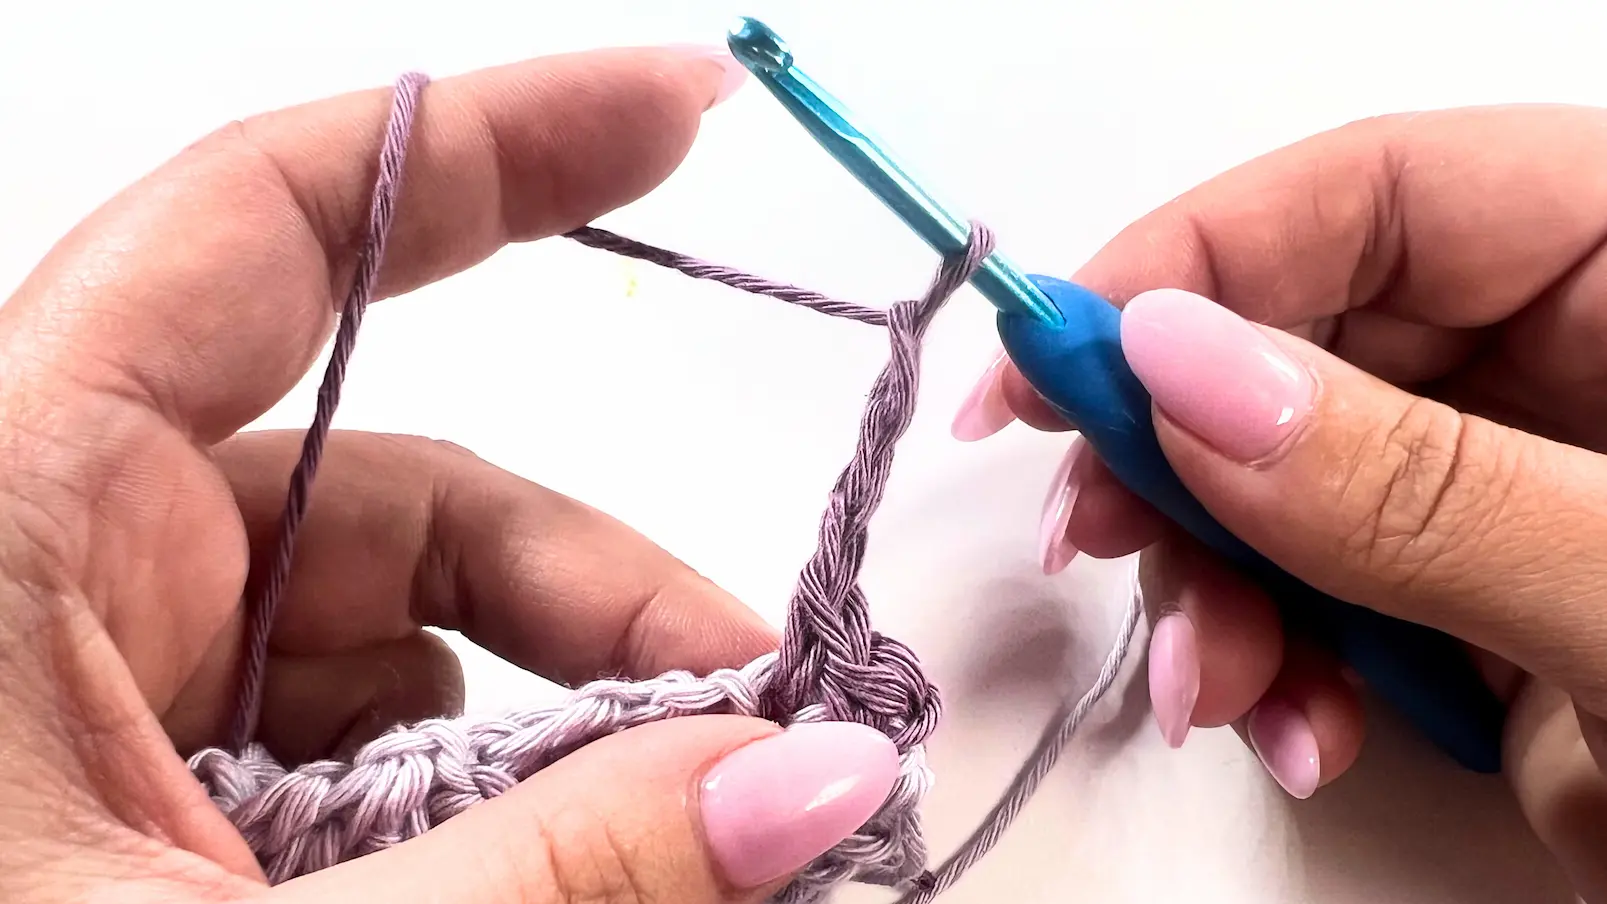
Yarn over and pull through the first two loops, then yarn over once more and pull through all three remaining loops. This completes your decrease (DC2tog), which you’ll always work at the end of a decreasing row.

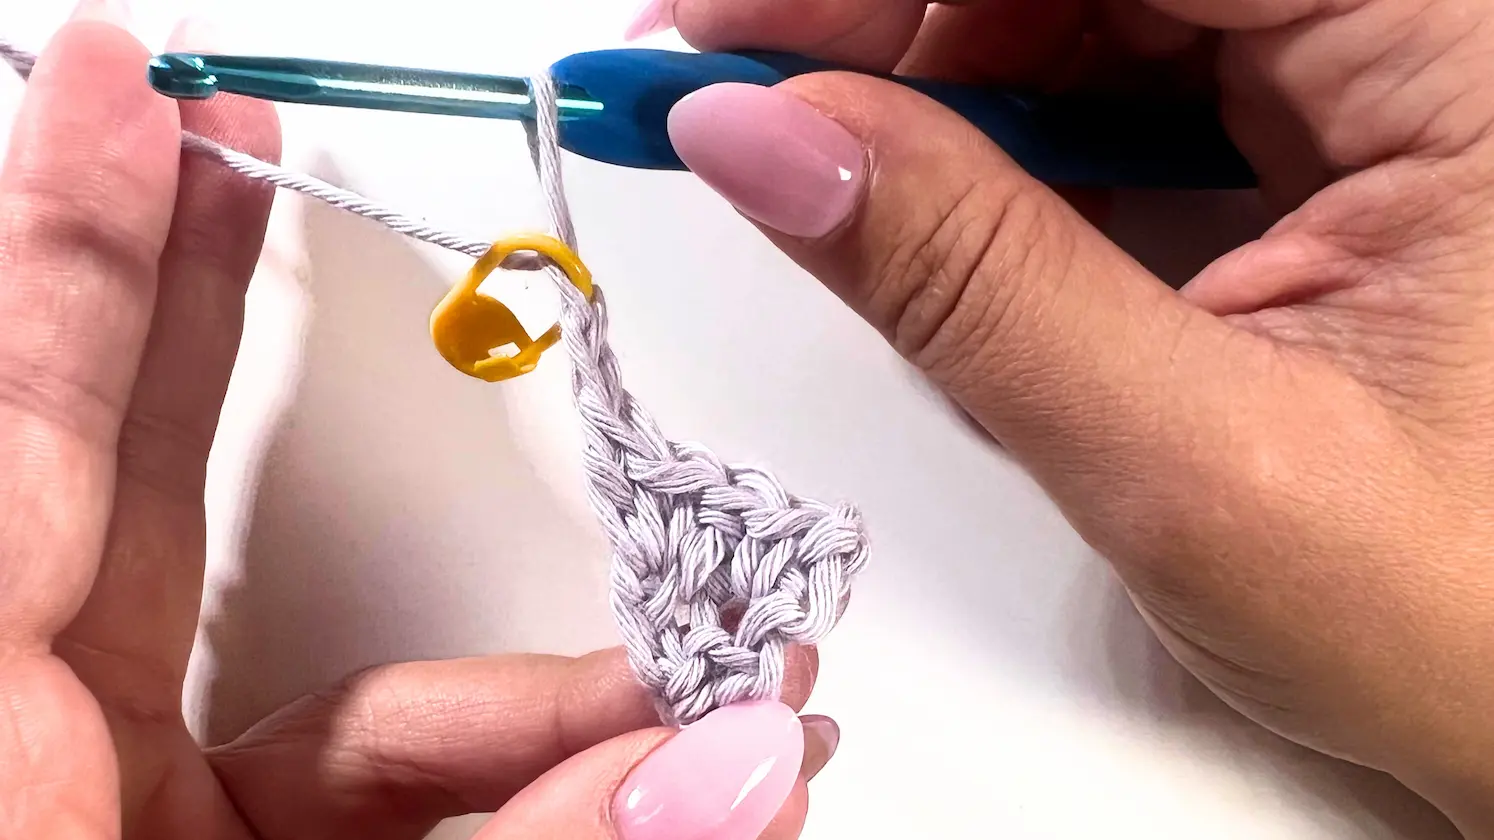
Then, chain 1 and turn your work to begin the next decreasing row. Continue decreasing on each side until you are left with just 3 stitches.

Finishing the Lemon Peel Stitch C2C
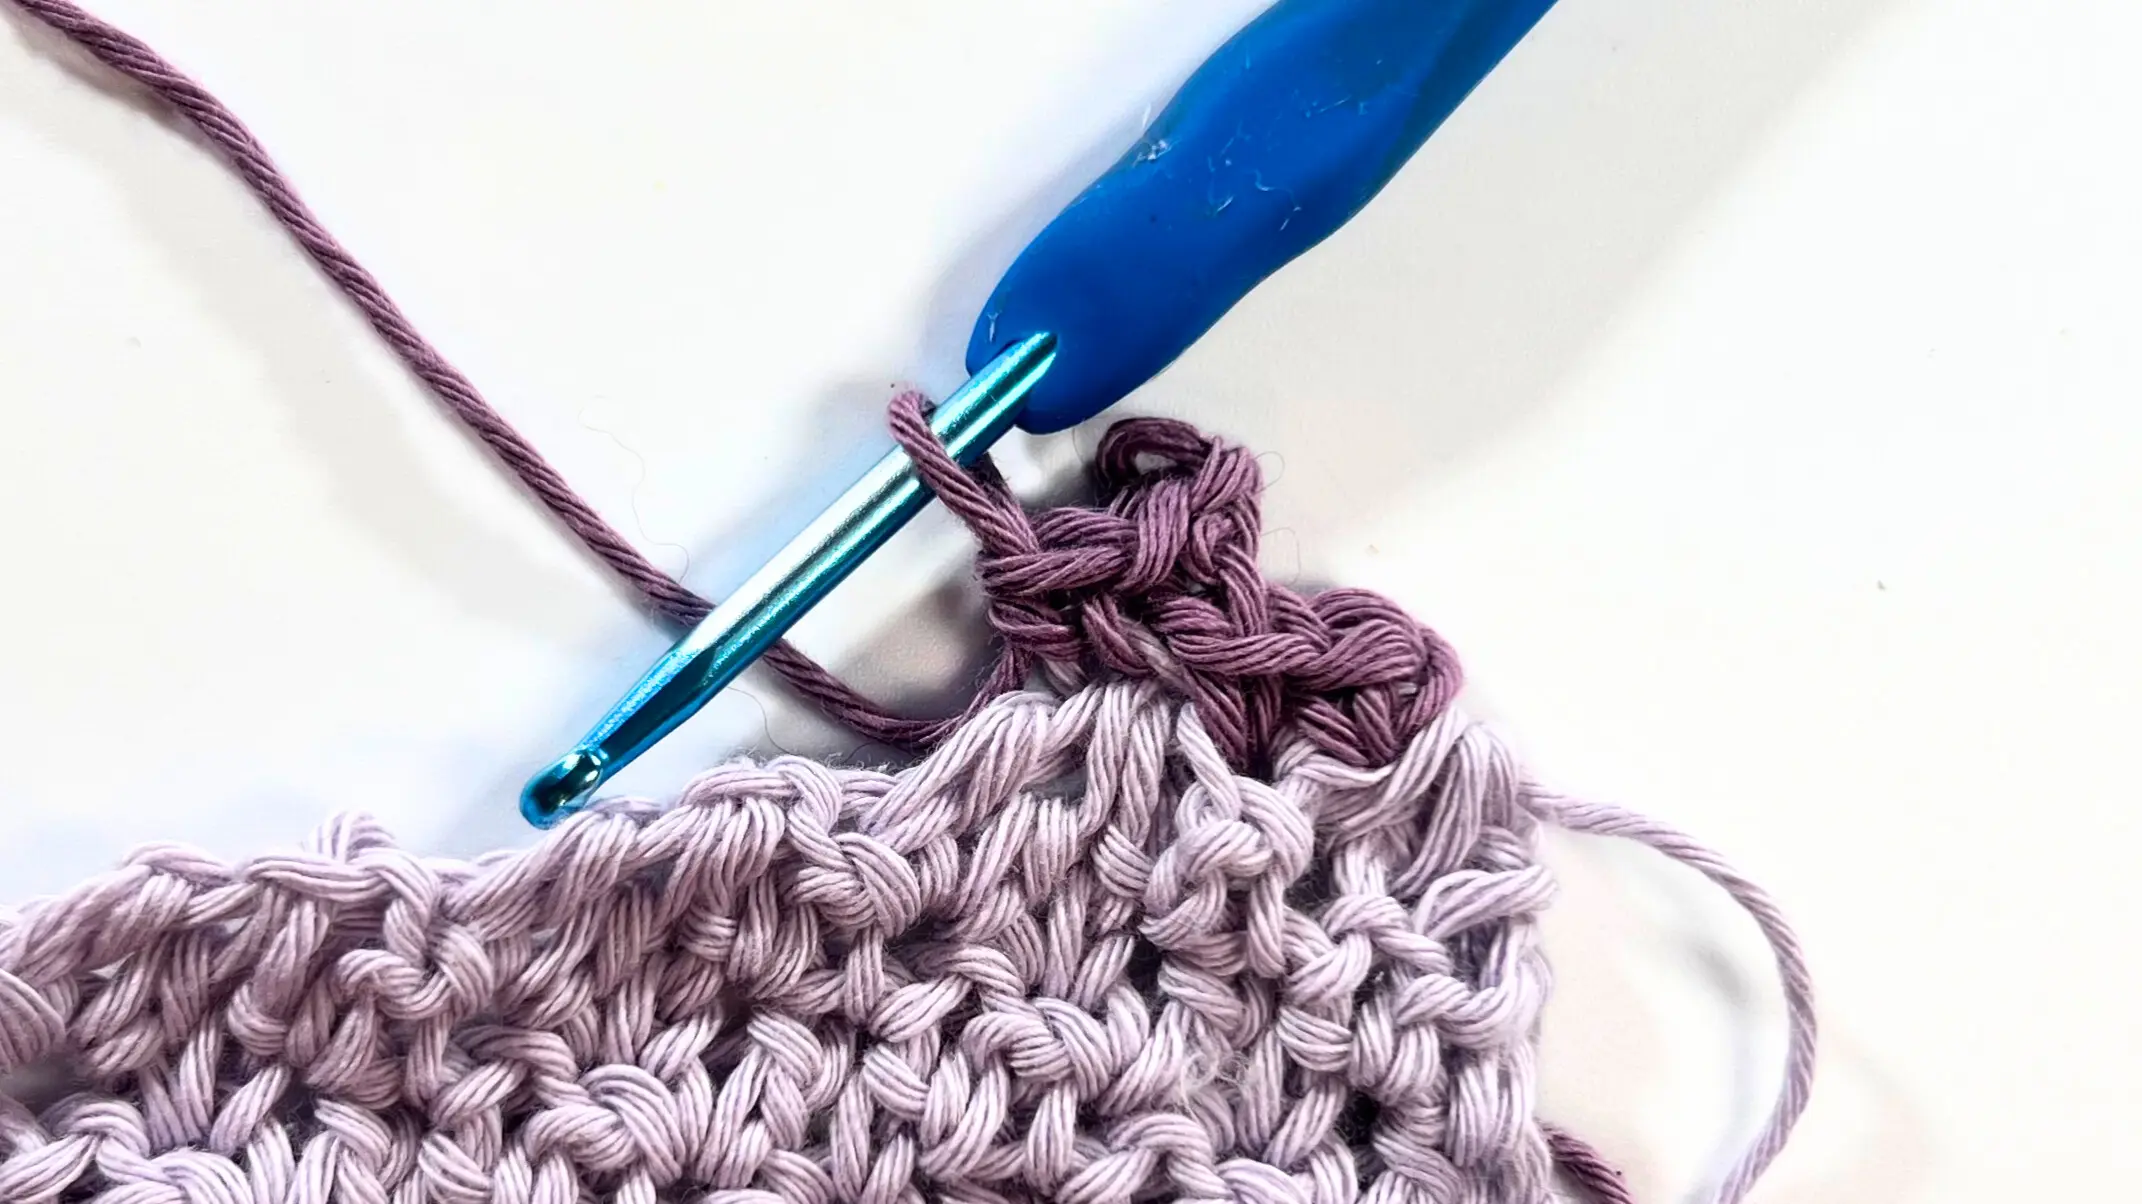
When you reach the last 3 stitches, work an SC3tog (single crochet three together) over them. This brings the corners neatly to a point and finishes off your Lemon Peel Stitch C2C washcloth.
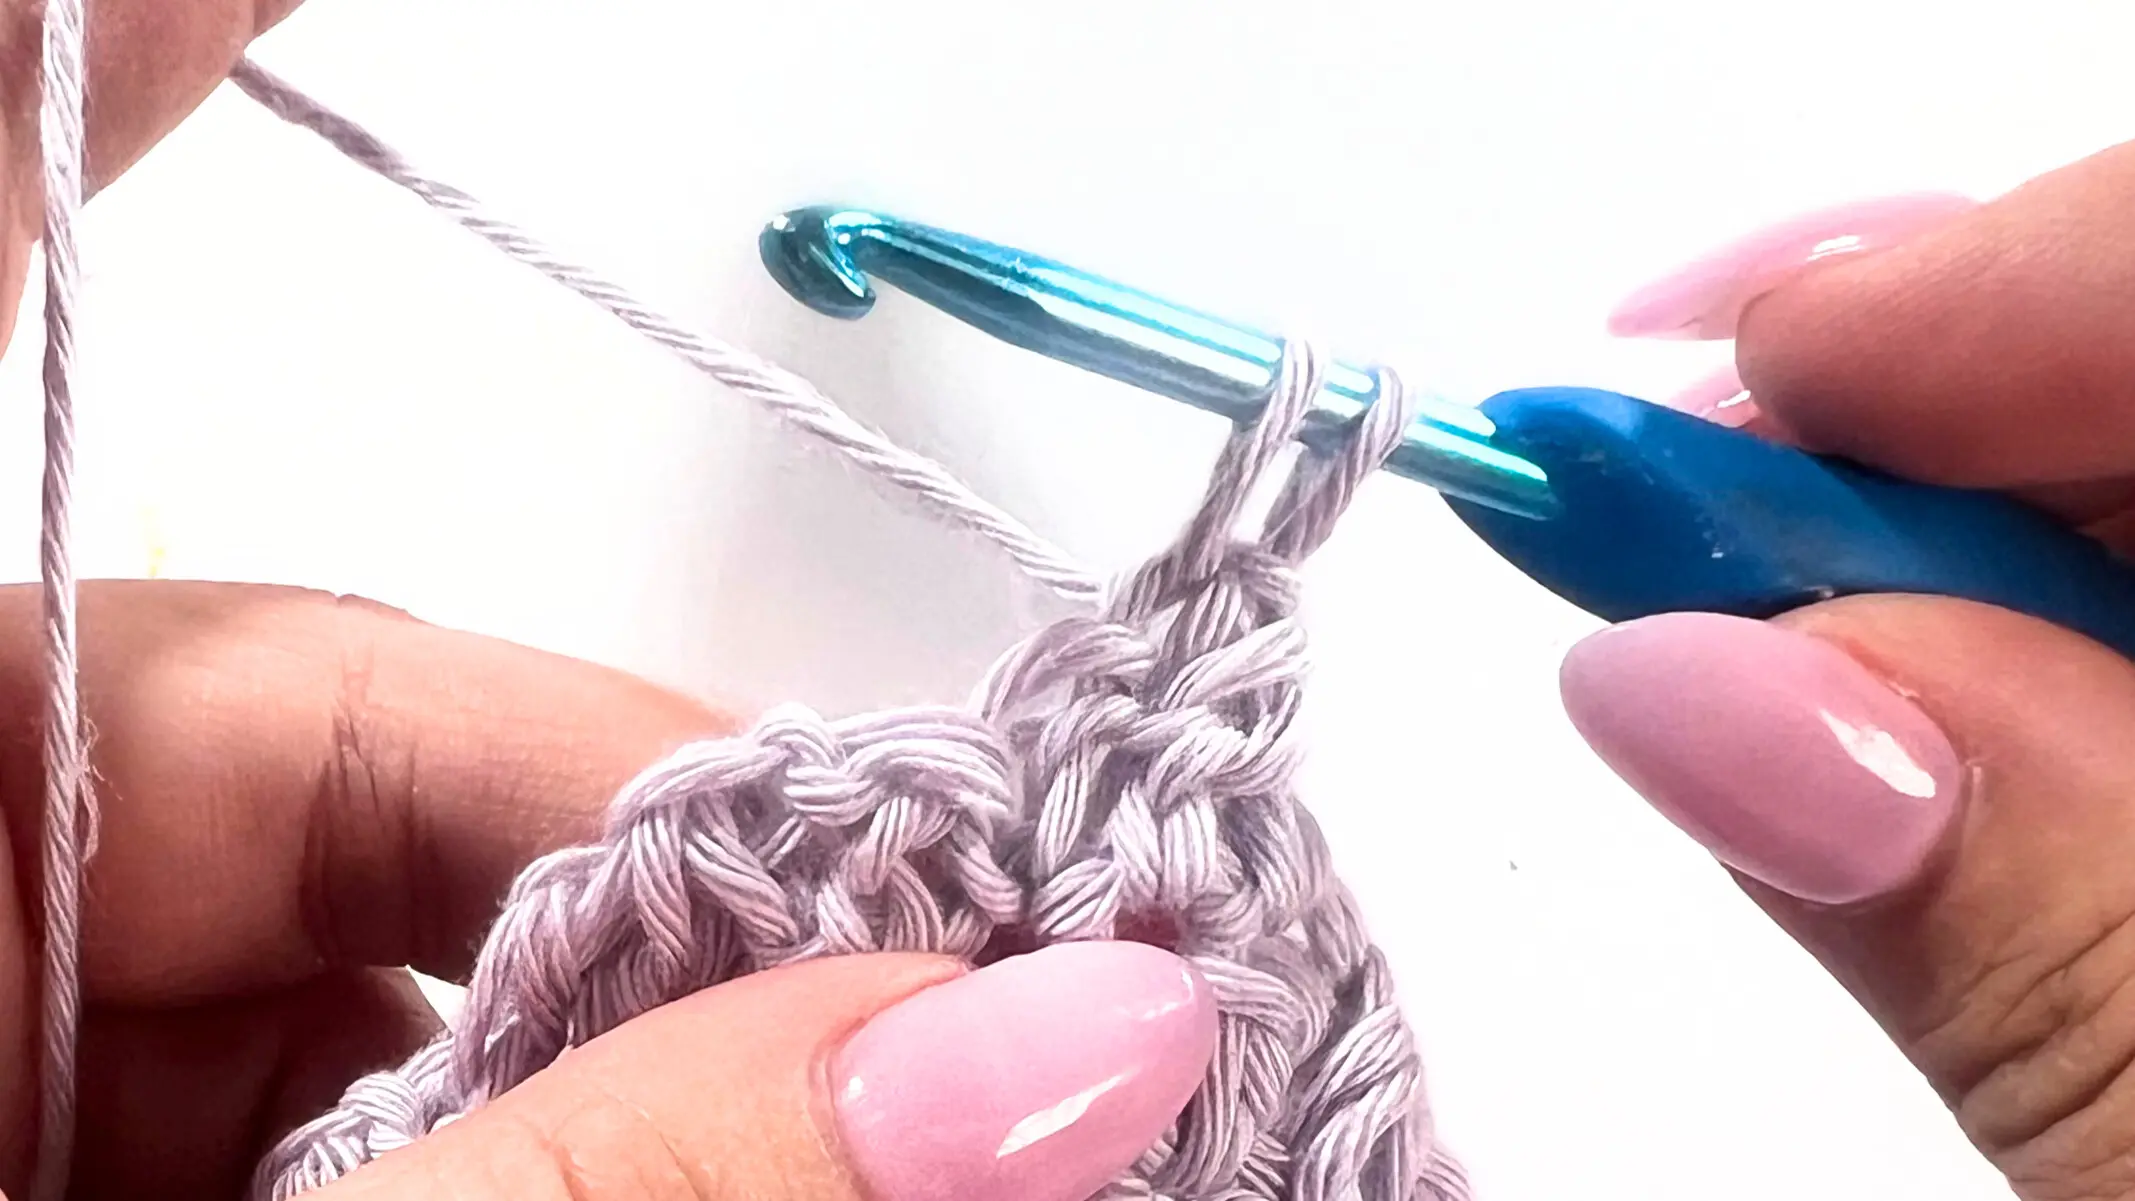
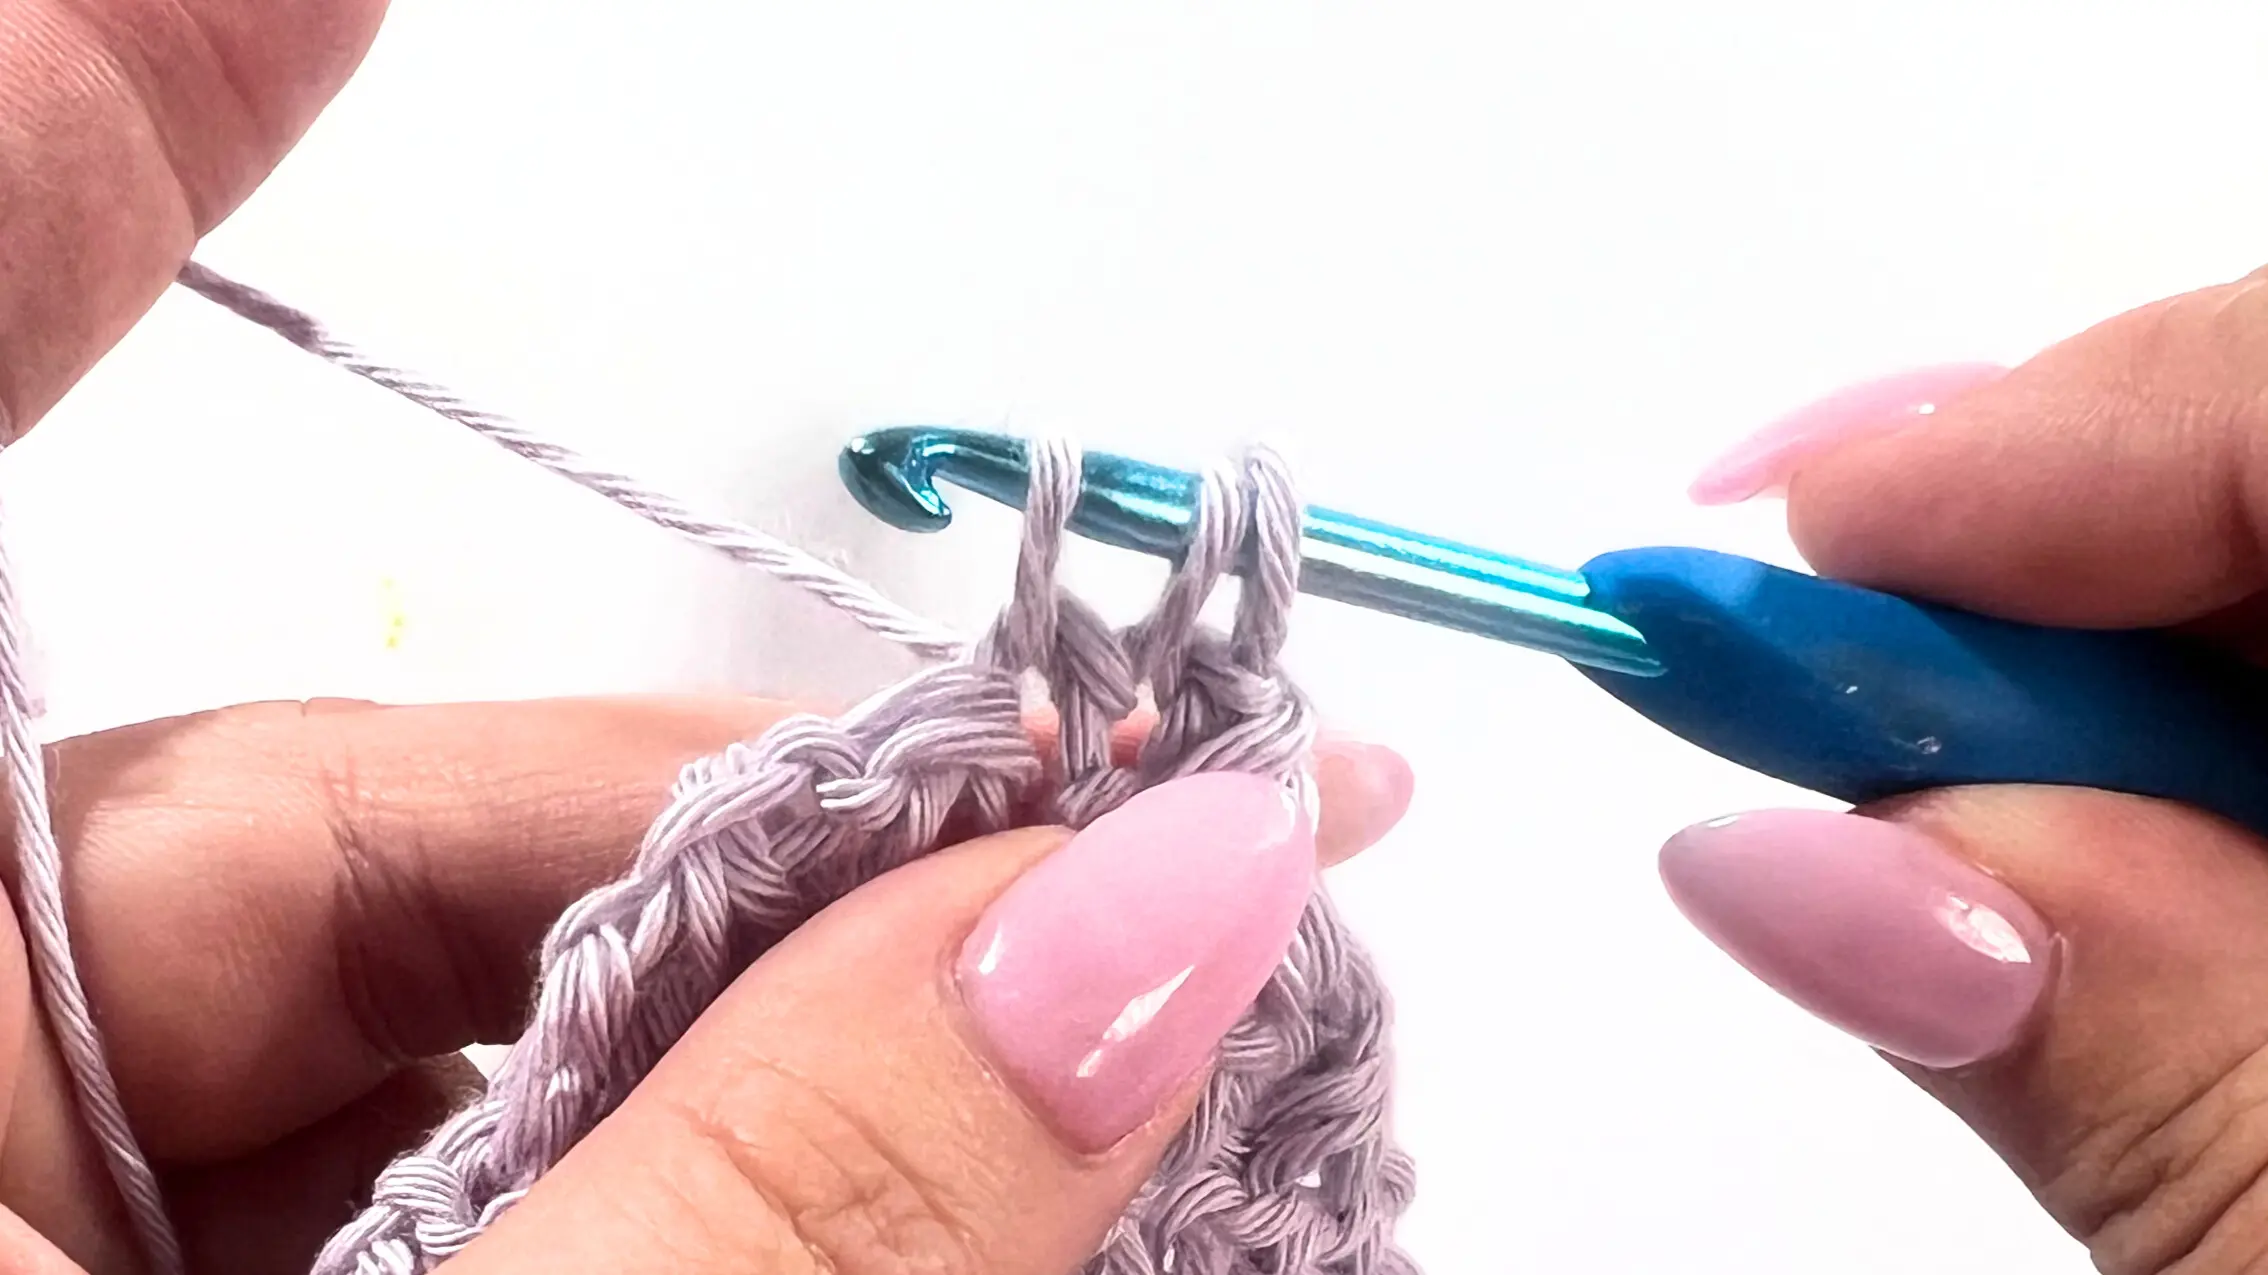
How to SC3tog (Single Crochet 3 Together)
Yarn over, insert your hook into the first stitch, and pull up a loop—there are now 2 loops on your hook. Yarn over again, insert your hook into the next stitch, and pull up another loop—3 loops on your hook. Repeat once more into the last stitch, so you now have 4 loops on your hook. Yarn over one last time and pull through all 4 loops. This completes your SC3tog, which neatly finishes the corner of your washcloth.
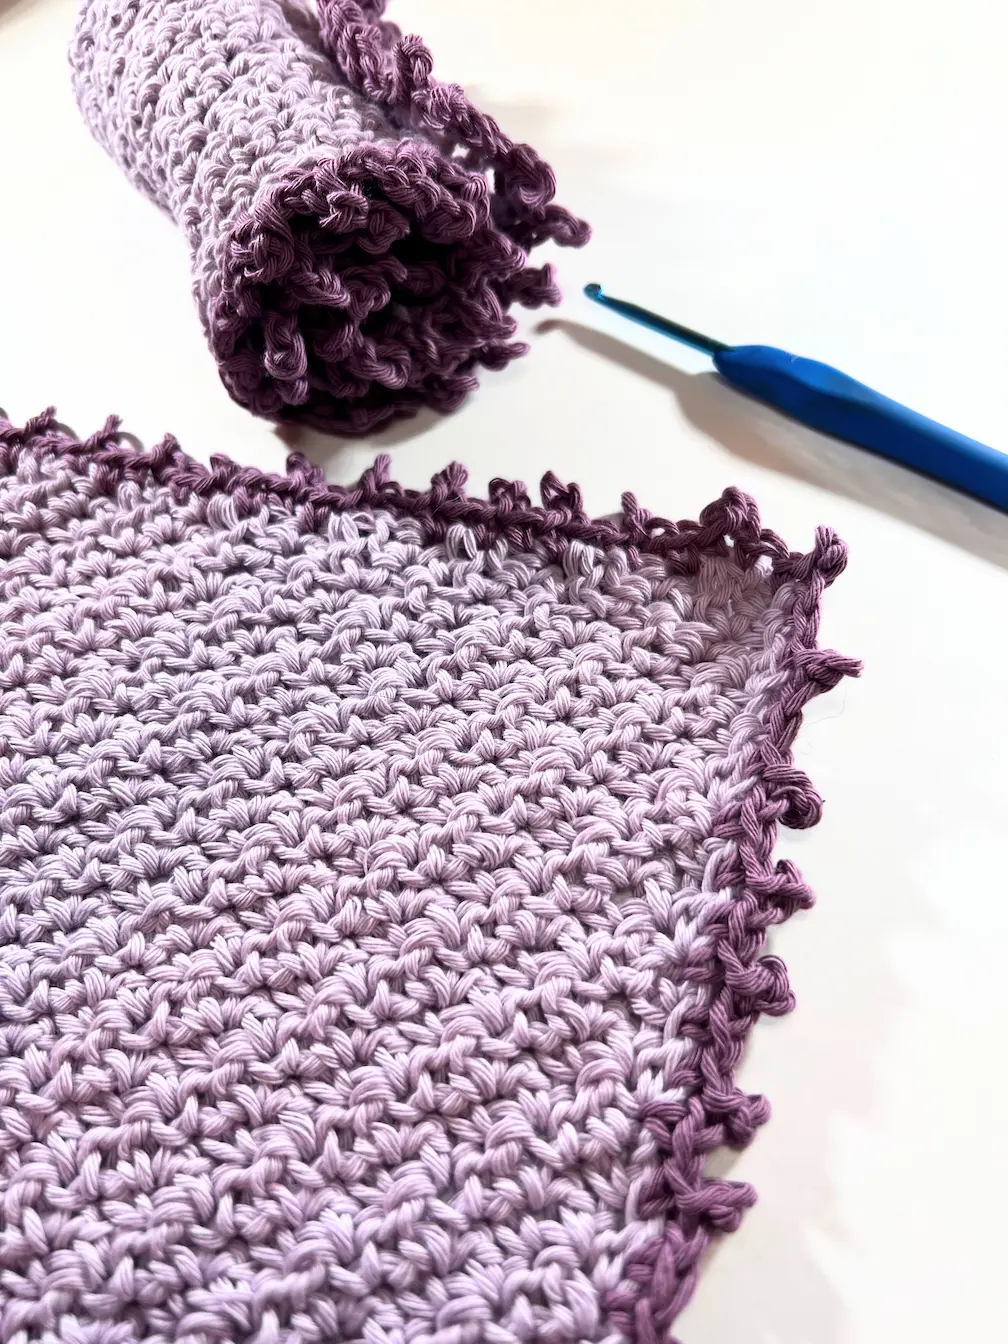
Cast off and weave in the tail. Now it’s time to add the border!
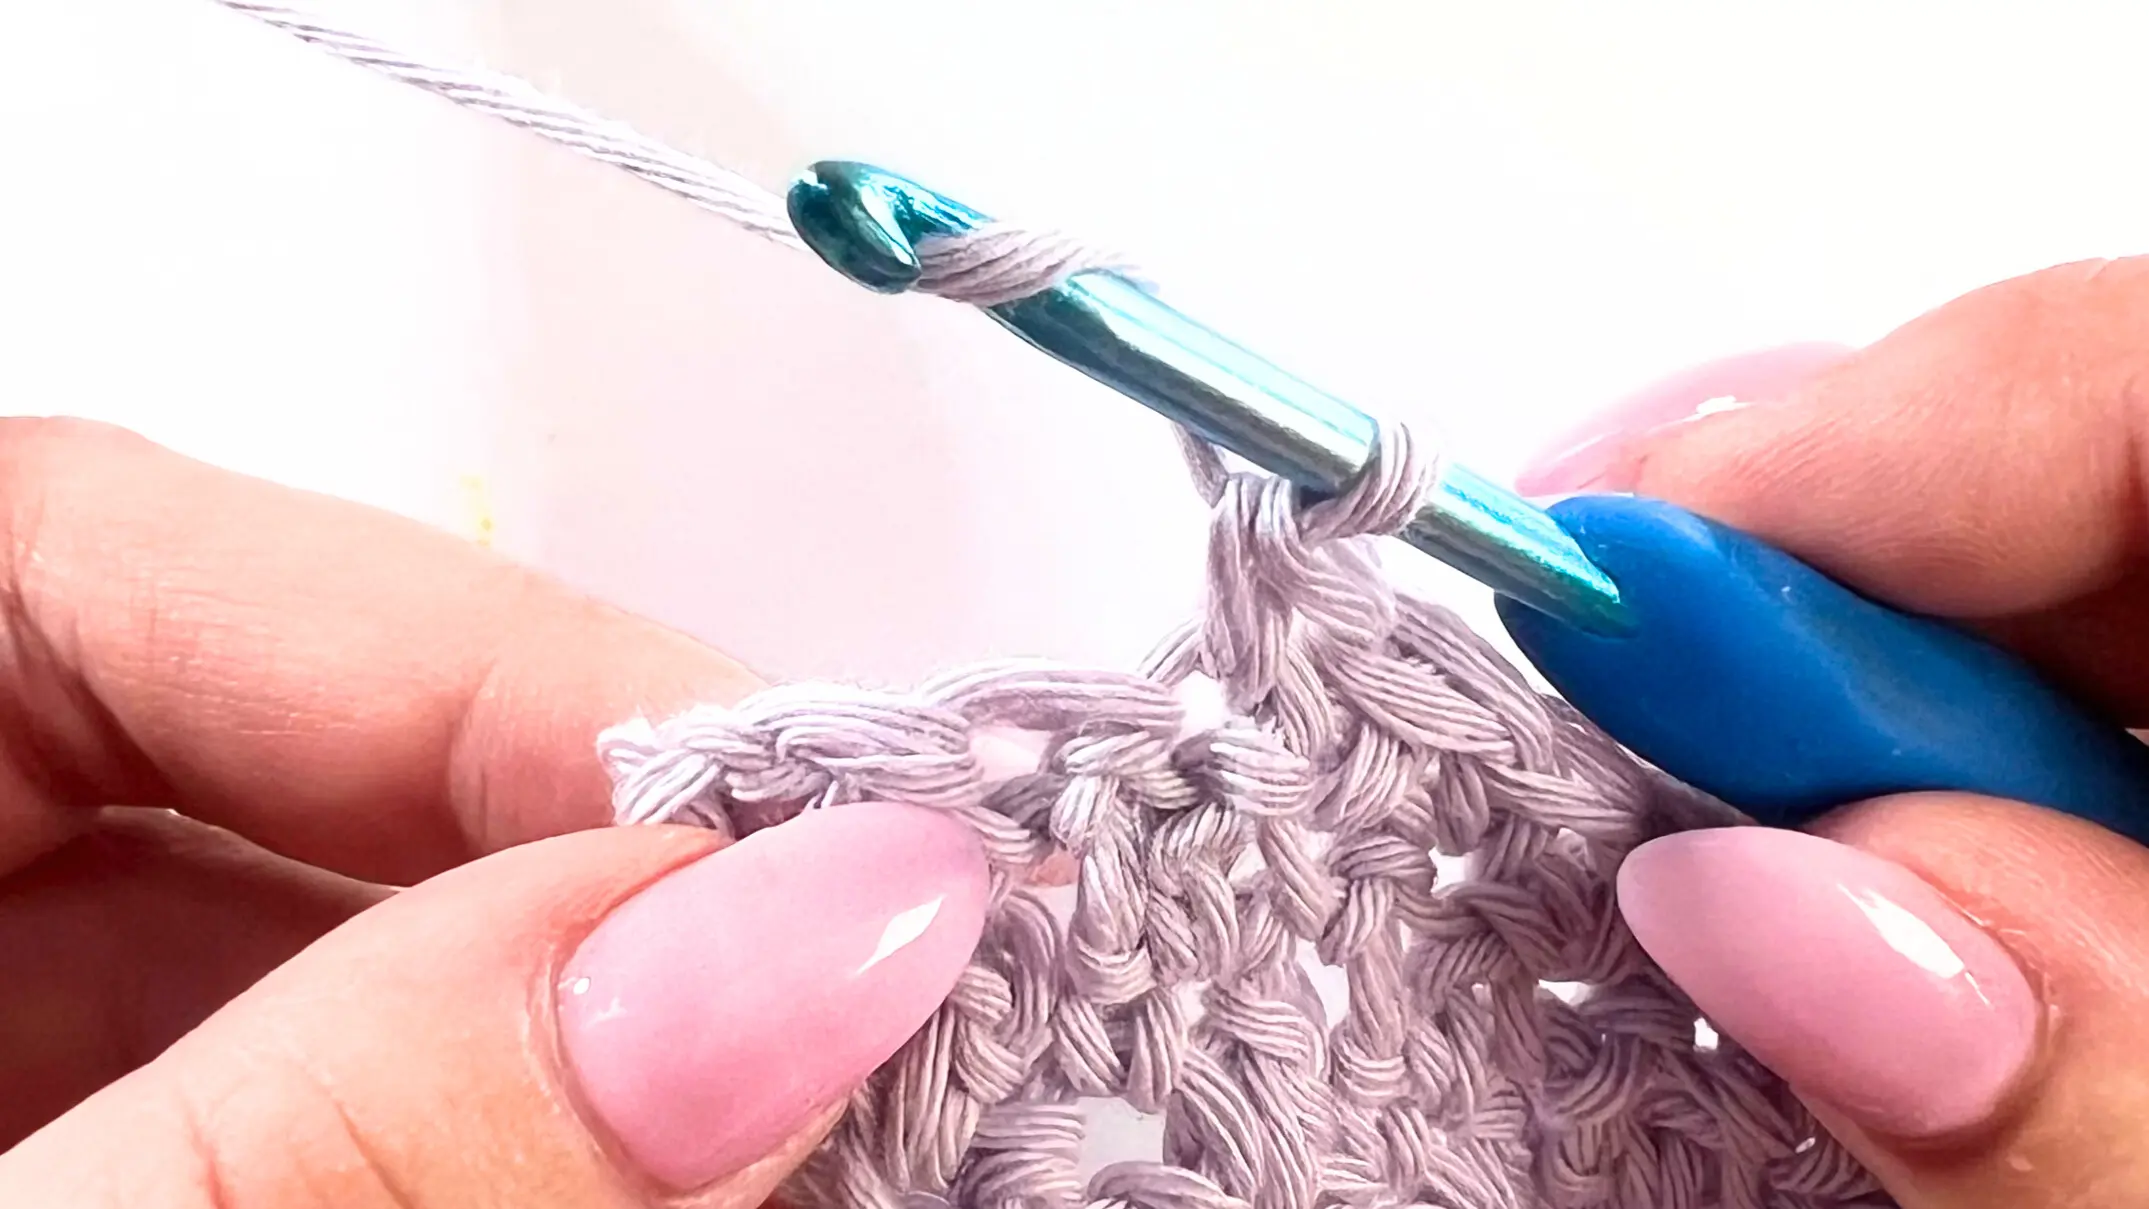
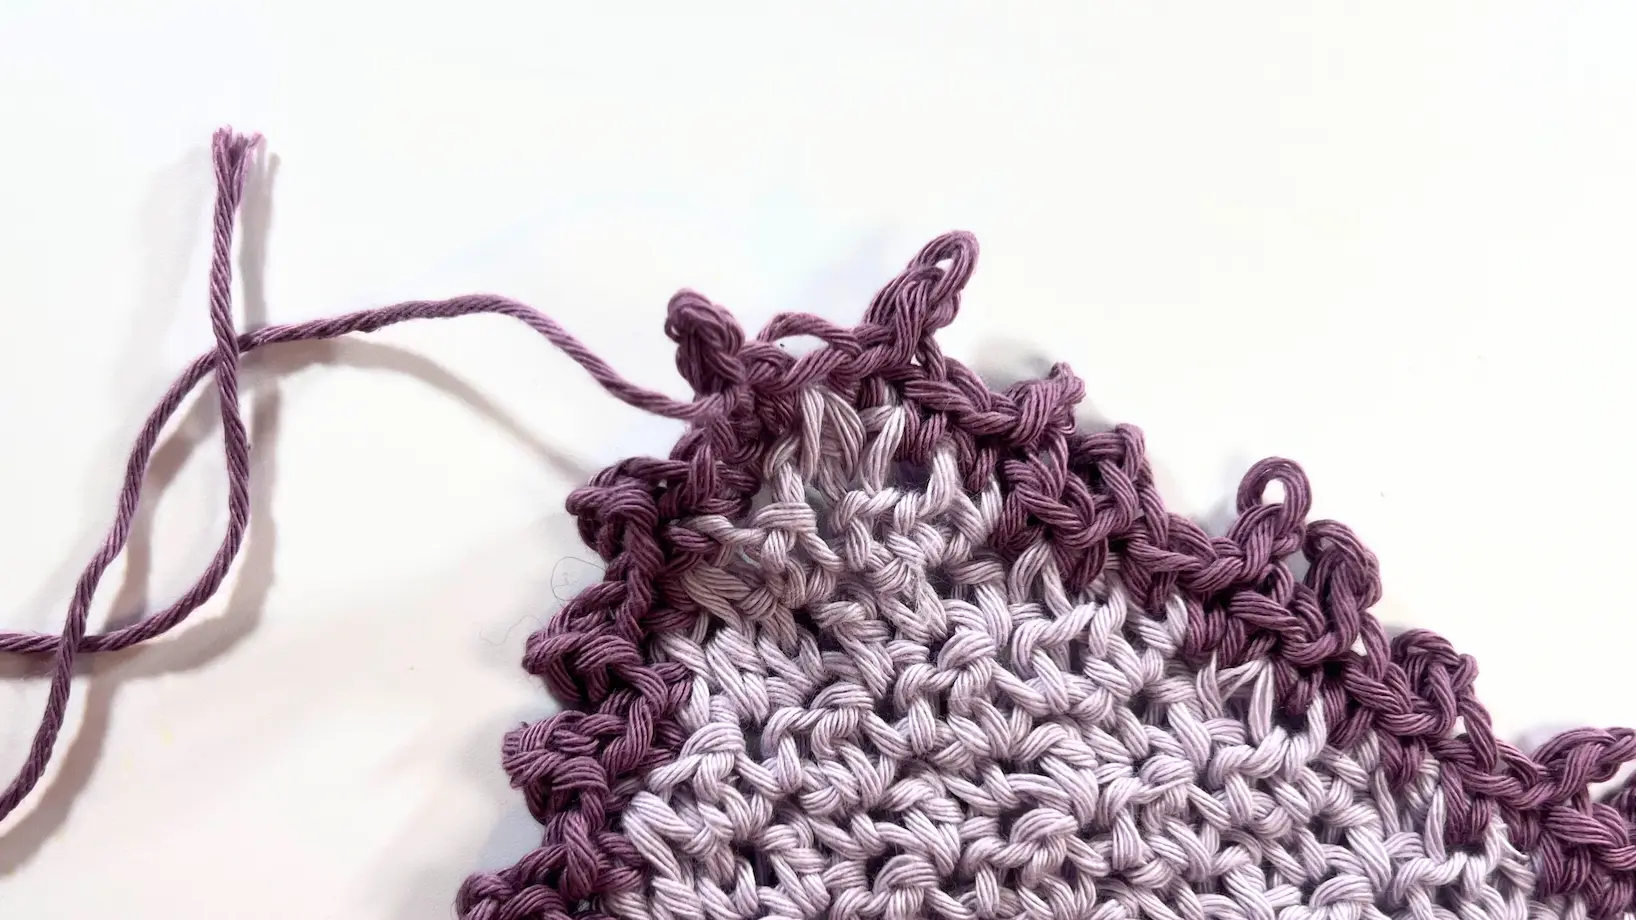
Picot Border
Grab your next colour of yarn. (If you’d like to keep the same colour, you can continue directly after finishing the washcloth.)
Note: Because of the C2C technique, you won’t see regular stitches along the edges of the washcloth—only the ends of rows. For the border, simply insert your hook evenly and intuitively around the entire piece, placing your stitches close to each other so the edge looks neat and consistent.
Insert your hook into the first stitch, place your new colour over the hook, and pull it through to join.
Chain 1, then make your first SC into the same stitch.

Make 1 SC into the next stitch, then chain 3.
Then make a slip stitch into the first chain of the ch-3, and work 1 SC into the next stitch. That completes your first Picot Border scallop. Continue by repeating SC, ch 3, slip stitch into the first chain, SC all the way around the washcloth. When you reach the beginning, join with a slip stitch and fasten off. Weave in the tails—and your washcloth is finished!


Ta-da! Your washcloth is done! ✨
I’d love to see how yours turned out—don’t forget to tag me @HappyHeartsy so I can cheer you on. 💜
If you enjoyed this tutorial, give it a like, leave a comment, and share it with a fellow crochet friend. Your support helps me bring more free crochet patterns and tutorials your way!
Happy Crocheting,
Lenka


Comments